


A Spray Paint Pick-Me-Up!
7 Materials
With lots of projects in motion, do you ever feel like you just aren’t accomplishing anything? Sounds like a perfect Spray Paint Pick-Me-Up moment!
With the Aging Forest walls in our office (stay tuned for this project), the Master bedroom folding door & two furniture pieces, nothing is coming of my list. I need something to finish and fast!
Check out my blog for more projects & ideas! nluvstudio.com/nluv-memos-blog-jaime-pirozzi/
A little spray paint can do wonders! Check out the paint aisle and see all the different textures, colors and sheens available now in a can!
Don't Forget the Small Stuff!
When renovating a space, there’s always those little things that go back into the room but don’t necessarily belong anymore. I like to put light fixtures and electrical face-plates in this category. While you can always buy new ones or even make your own, with so many simultaneous projects, why not just spruce up what you already have? I took my own advice & decided to do a little ‘fast-refinish’ to complete these finishing touches and cross something off my list!
Our rooms were full of all different colors from wood to metal and even plastic... nothing matched our new design so it was time for a quick makeover!
Spray 'em!
I know what you’re thinking… “How can you spray paint something when you’re supposed to be a faux finish artist?” Let’s be honest here. Not everything needs to be revolutionized with stone or plaster to make it awesome.
If you do want other finish ideas, check out the Finish Gallery nluvstudio.com/the-gallery-finishes-designs-furniture-and-more/the-finish-gallery/
Simple accessories can receive a quick once-over and look amazing. Not every project needs to take a lot of time to be worthy of your design. Light fixtures and outlet covers are the perfect pieces for a little effort and some spray paint. While I’m not completing a complex treatment on these, I still follow a strict process for prep. Regardless of your final look, NEVER skip the prep!
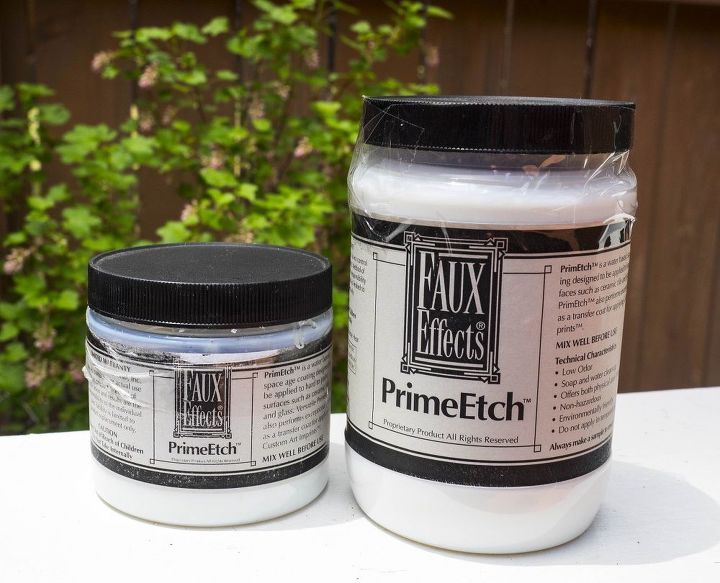
Worried about adhesion? A little PremEtch will do the trick. Clean and a little sanding first and then a coat of PrimEtch... most anything will stick after this step!
It all starts with prep
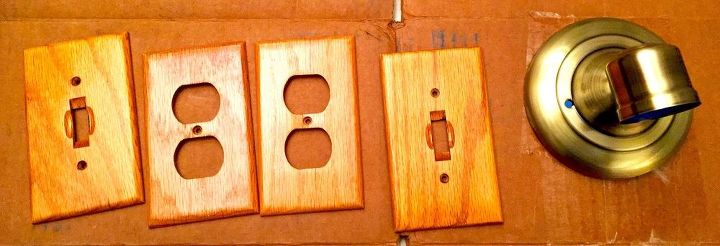
I decided to spray paint two light fixtures and all the outlet covers. They are all different surfaces with some metal, others plastic and even a few wood pieces. Don’t think for a second they don’t ALL need prep before spraying. What is most important is to ensure the surfaces will allow maximum adhesion of the spray paint so you don’t have any chipping later on. These are going to get touched a lot, so the better the prep – the better you’re chances of no knicks! I have more steps for prepping than even the painting part, but they are easy so NO skipping them.
Clean all surfaces so there is no grime or grease present. I always try soap & water first, but if that doesn’t work, you can try something stronger like mineral spirits or denatured alcohol.
- After drying, a little sandpaper can help create some ‘tooth’ on the surface especially if there is some sort of shiny top coat. I scuff the wood, metal and plastic pieces all the same.
- Since I am always worried about adhesion (and I don’t want to be ‘so careful’ with these when they’re installed), I apply a single coat of PrimEtch™ to everything just to be safe. PrimEtch™ is a great water-based coating designed for hard to paint surfaces like ceramic tile and glass. You can really paint it on anything you are unsure about to give you that extra grit needed when re-finishing. Don’t get impatient… always follow dry time recommendations.
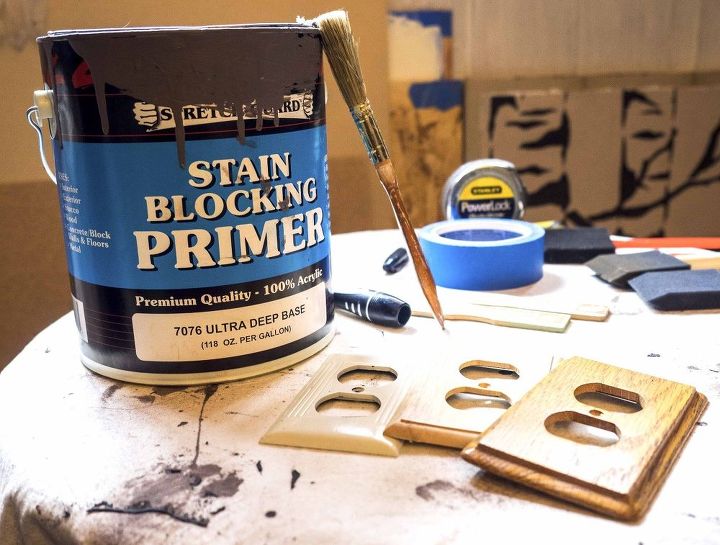
A coat of dark primer helps to even everything out and ensure the final result is smooth and consistent.
Let's get painting
- Since the spray paint color I chose is a dark-brown speckled stone finish, I painted all the items with a dark brown primer first so I can better control the consistency of the outcome. With some pieces starting out white, others metal and some wood, I want everything on the same color spectrum before spraying. One coat of primer will do wonders for that final spray coat. Consider adding this step to your project. You’ll appreciate it.
- After the primer is dry, it’s time to spray! I never spray paint in my studio so I picked a nice sunny day to set up outside. Since everything is primed a darker color, I only need two coats for full, even coverage. I used Rust-oleum® Multicolor textured spray as I love the feel and depth it creates.
- Once everything is dry, you’re done! If you want a more shiny look or just an additional protective layer, I’ve used a Minwax Polycrylic Satin finish over spray paint in other projects. If you remember, I did this for the carpet transitions and it really added a nice finished look. It’s up to you!
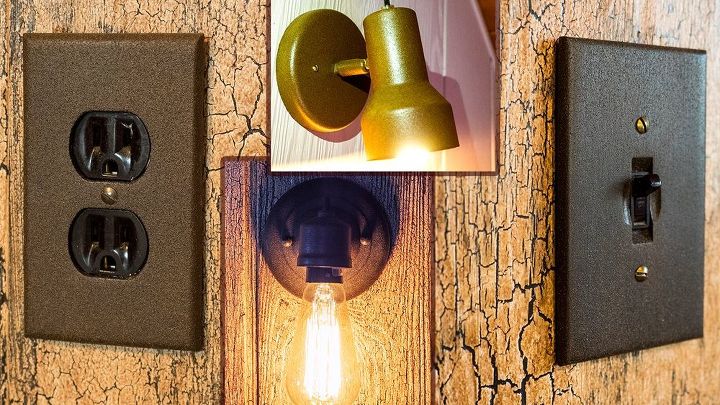
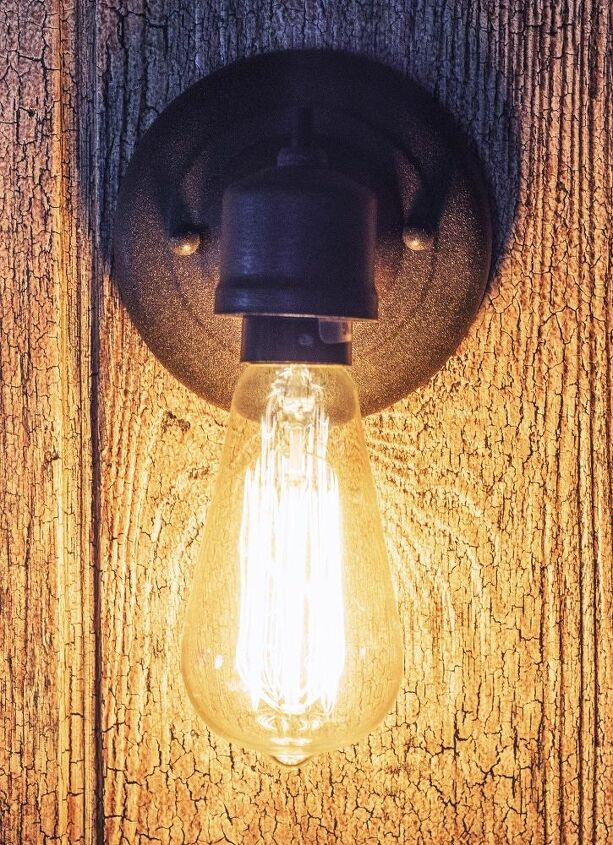
What started out as an outdated, upright light fixture with an old floral globe has now been turned upside down (literally) with an Edison bulb and a brown flecked color base plate. A perfect compliment to the wall!
Install & enjoy!
There’s only one thing left to do… install and enjoy! What started out as dated, ugly room accessories now compliment the spaces with that finishing touch. I may someday switch them out for something else, but for now, reusing what we already had is just what our design needed for the next step in our renovation progress.
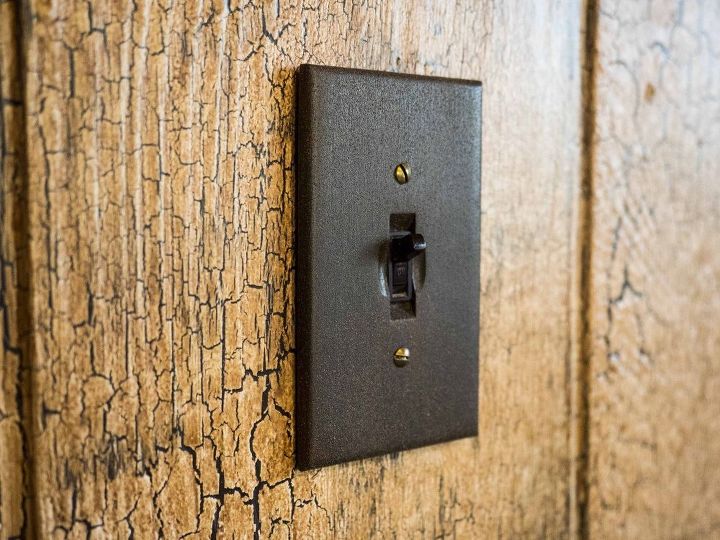
A simple light switch went from white plastic to rich textured brown in just a few steps.
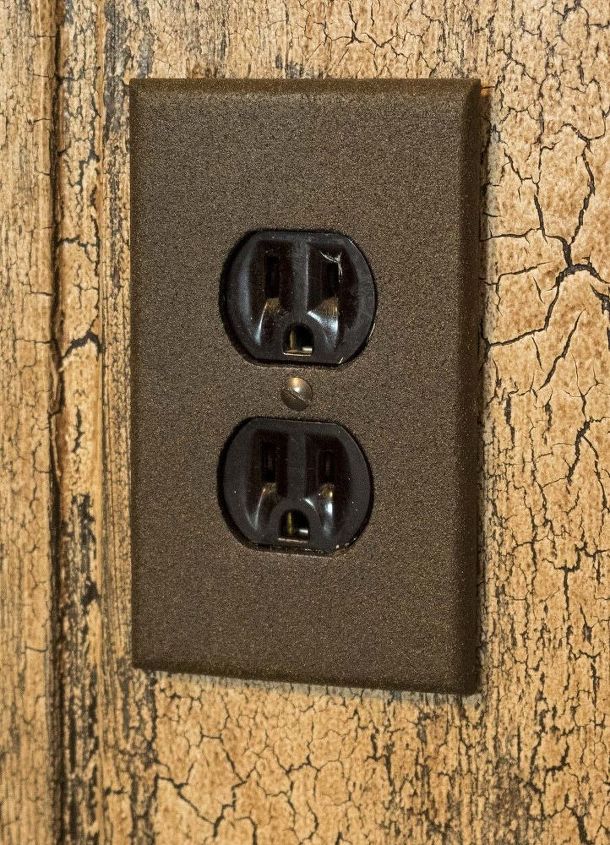
With the sockets already being a dark brown, this color paint for the face plate is the perfect match! Who knew they didn't start out this way together. It was meant to be.

Want more details about this and other DIY projects? Check out my blog post!


Frequently asked questions
Have a question about this project?
I would like to paint my white vinyl picket fence a different color...a blueish color, is it possible?