Kitchen Sink Inspiration – 13 Ways to Restyle Your Sink
A sink is the heart of any kitchen, which is why a few tweaks can breathe new life into your home. In this selection of kitchen sink projects, you’ll find a wealth of hints and tips to help restore, restyle, and revamp your units. What’s more, thanks to the creative minds here at Hometalk, you’ll be able to take these ideas and apply them to your own kitchen to create something truly unique, practical, and aesthetically pleasing.
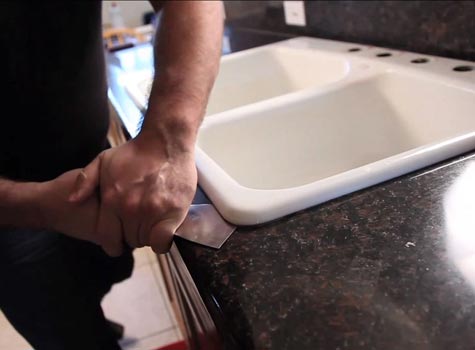
1. How to Install Kitchen Sinks
The standard method for cutting in a new sink is to use the paper template supplied. However, if your unit doesn’t come with one, Mary has a simple trick. Flip your sink upside down and trace around it. From there, mark ¼" in from the border and draw a line from this point around. Finally, use a circular saw to cut around the inner line. Simple! Get tutorial here
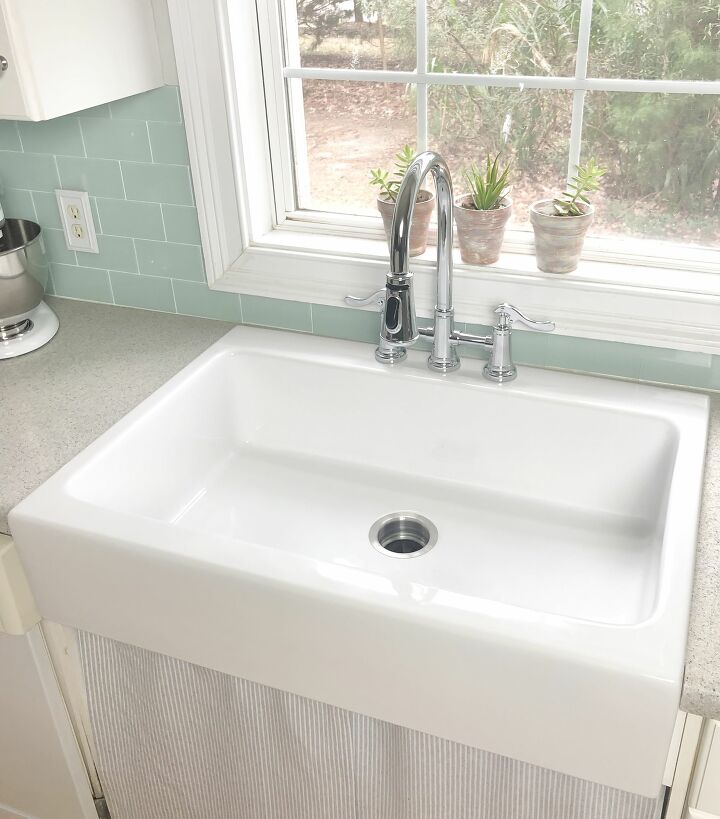
2. Drop-In Farmhouse Kitchen Sink
A farmhouse kitchen sink can transform a worktop. As you can see from this project, even an old worktop can be given a touch of style with a new kitchen sink. The beauty of a drop-in unit is that you can use the exiting holes left from your old sink. The top tip here is to dry install before sealing the unit with caulk. Get tutorial here
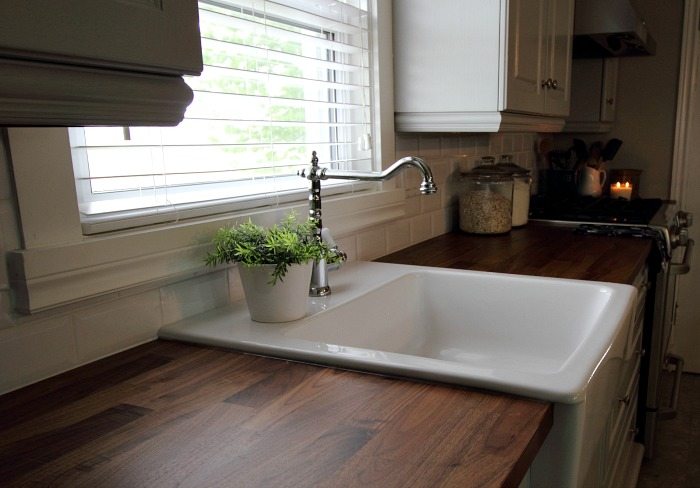
3. Kitchen Sink Essential Cleaning Tips
A brand-new farmhouse kitchen sink looks great. However, if you don’t treat it right, it won’t stay that way for long. These sinks hold and show stains much more readily than stainless-steel alternatives. Therefore, to keep yours looking this fresh, our Hometalker suggests cleaning it regularly with warm water, dish soap, and baking soda. Get tutorial here
4. Don’t Forget the Putty
For this revamp, Holly made sure she got every step of the process right. In practice, that meant having an extra pair of hands to help and using putty. Once the sink is set in place, smear plumber’s putty on the drain before screwing into the pipes. This creates an essential watertight seal that will stop leaks from ruining your kitchen. Get tutorial here
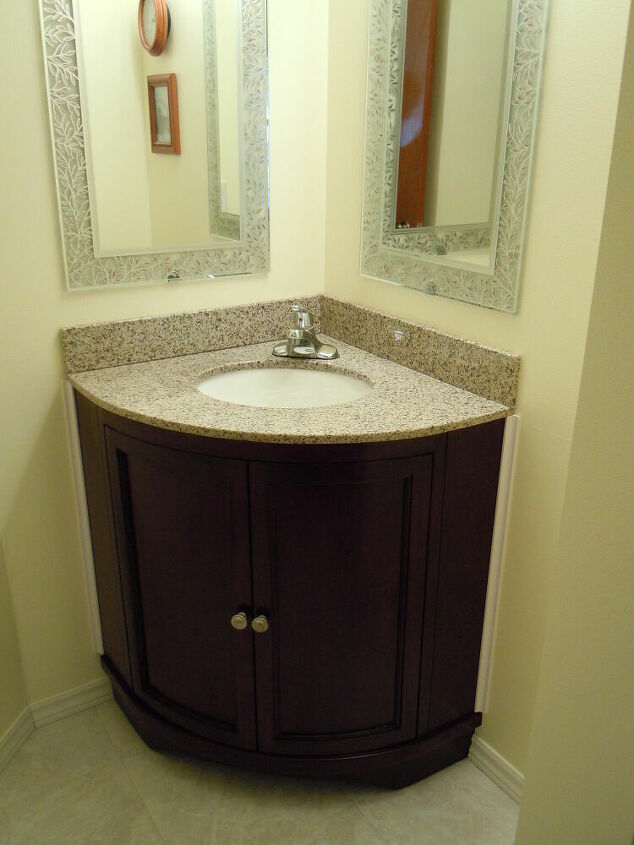
5. Corner Kitchen Sink Restyle
Replacing an old laminate worktop is easy and less expensive than you might think. As you can see, Craftdrawer Crafts used granite to good effect in this project. Because corner sinks are relatively small, you won’t need to spend big to recreate this look. We love it because the mirrors complement the surface and add a sense of space. Get tutorial here
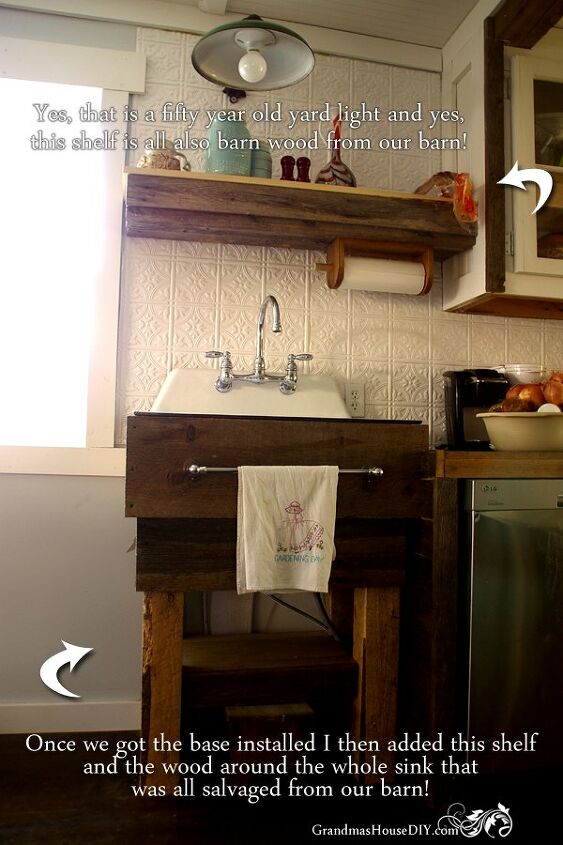
6. Standalone Kitchen Sink Cabinet
Separating your sink from the main units creates a unique look that works well in any farmhouse-style kitchen. To build a standalone base, take four 4X4 legs and cut to the right height. Across these, screw two 2X4 beams. Finally, add two shorter 2X4 beams width-ways for added support. Finally, varnish and drop in your sink. Get tutorial here
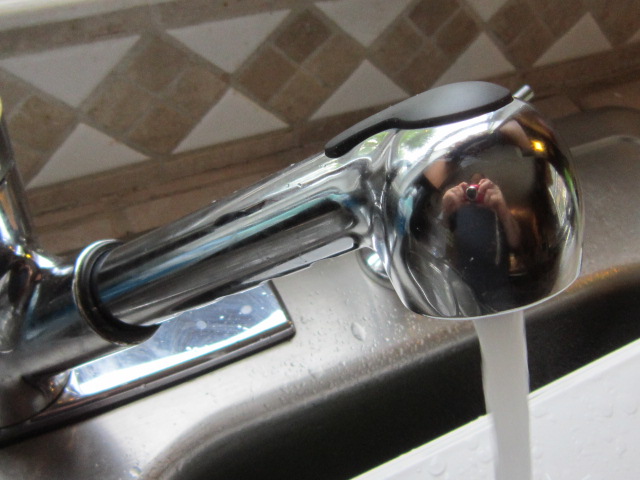
7. Kitchen Sink Faucet Fix
If your faucet head is cracked, you don’t need to replace the whole unit. Like Hometalker D Stepp, you can replace the head using a universal fitting. They used a Kingston Brass faucet. However, as long as yours has a universal fitting, you can attach it to the hose using a wrench and some Teflon plumbers' tape to seal the inside. Get tutorial here
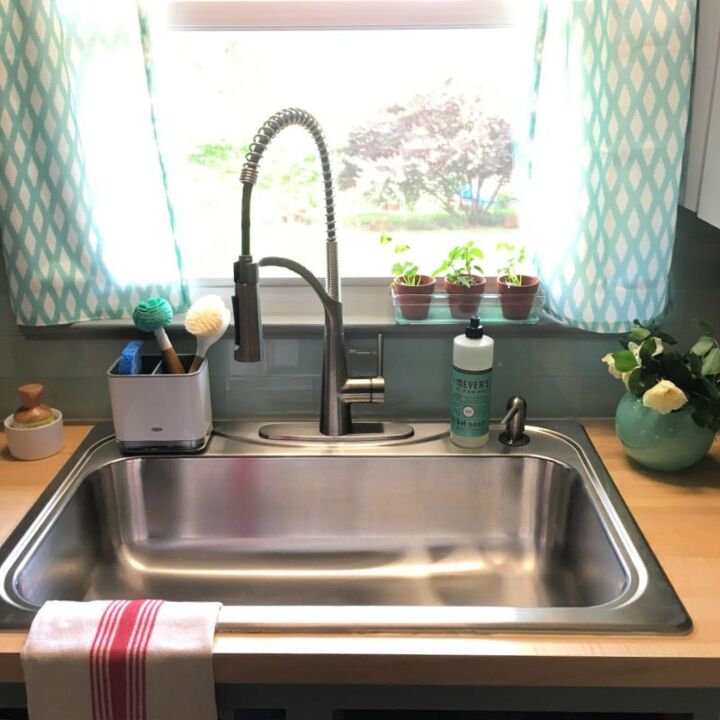
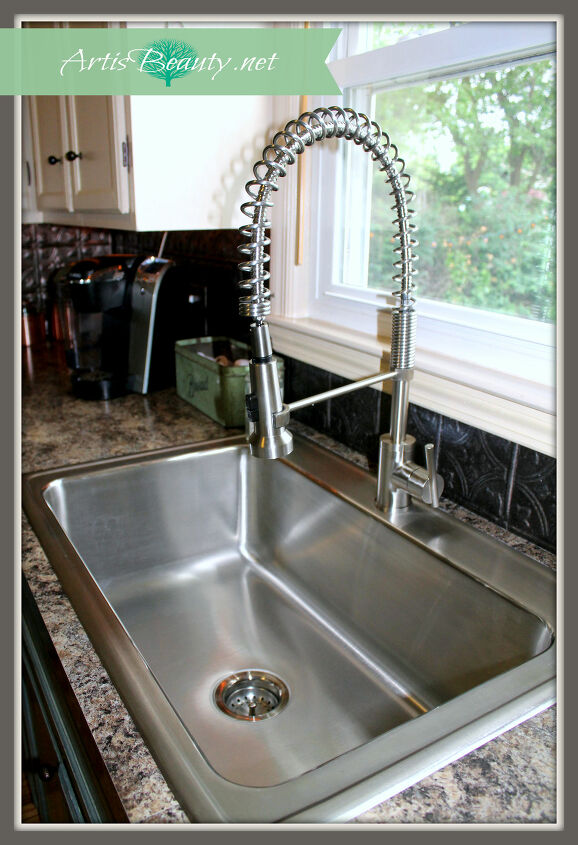
8. Bold Stainless-Steel Kitchen Sink
A stainless-steel kitchen sink can transform a room. What we love about this project from Art is Beauty is the faucet. When you use stainless-steel, you’re essentially making a statement, so why stop at the sink? Take inspiration from this unit by finding a bold faucet that not only matches the sink but stands proud on its own! Get tutorial here
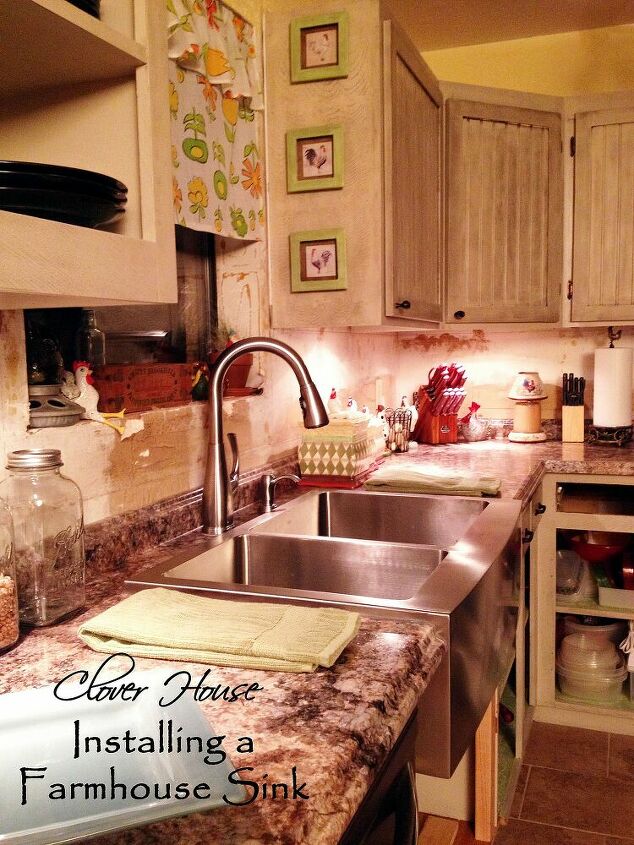
9. Building a Base - Installing a Farmhouse Sink
Farmhouse kitchen sinks are heavy. To recreate this chrome farmhouse look, you need to build a solid base. Before dropping in her unit, DeeDee added tripod supports to either side of her cabinet. A top tip here is to use thick wood as crossbeams. This not only adds strength but gives you enough surface area to rest the sink on. Get tutorial here
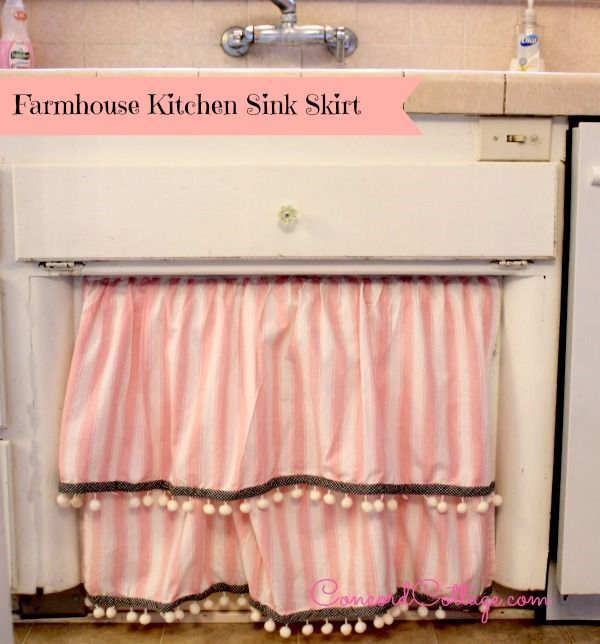
10. How to Dress Your Farmhouse Sink
The rustic look requires a combination of materials. Most of us know to use ceramic and wood. However, as this project shows, cloth is important too. In creating this look, ConcordCottage used a baby crib’s bed skirt. To copy this project, cut the skirt in half and sew one half on top of the other. Finally, use double-sided sticky tape to hold it in place. Simple! Get tutorial here
11. From Stair Posts to Kitchen Sink Cabinet
If you want to give your kitchen units a unique, rustic look, try adding stair posts. The ornate designs of these posts make for some truly innovative sink surrounds. If you take a look at this project from Courtney, you can see how she replaced the old legs with crisp white stair posts for a classy kitchen sink feature. Get tutorial here
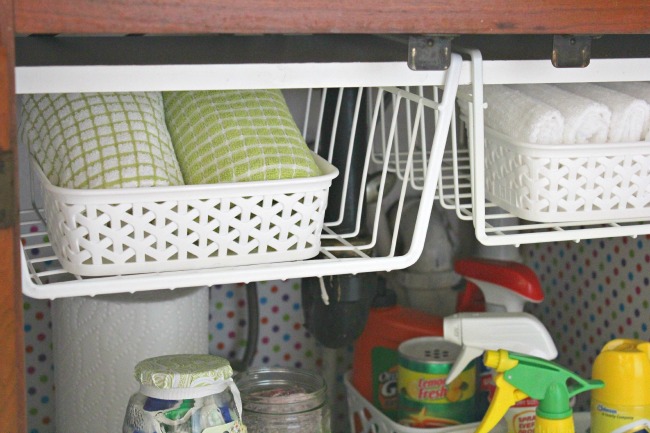
12. Makeover Under the Kitchen Sink
It’s great when your sink looks pretty from above, but what about under the surface? Here, you can see how strips of wallpaper, wire drawers, and a tray topped with mason jars can make a huge difference. The beauty of this project is that it not only looks fantastic, but it tidies up what’s often a messy area. Get tutorial here
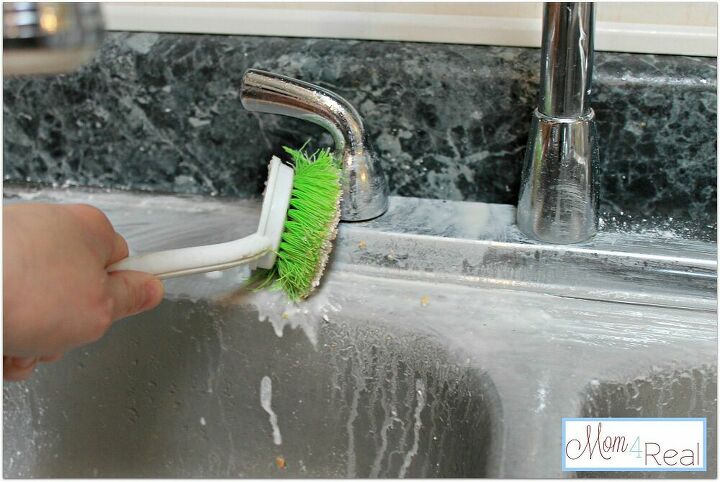
13. Spotless Stainless-Steel Kitchen Sink
A shiny stainless-steel sink can quickly lose its luster if you don’t clean it. Naturally, you need to keep on top of watermarks. However, as Mom4Real notes, you also need the right tools. Her tip is to use baking soda and a bristle brush. Sprinkle on the baking soda, allow it to sit, and scrub with warm water for sparkling results every time. Get tutorial here