Take Picture Frames Off Your Walls For These 15 Brilliant Ideas
Are you tired of the same old picture frames adorning your walls? Do you crave a touch of creativity and uniqueness in your home decor? It's time to break free from the conventional and explore a world of brilliant ideas beyond traditional picture frames.
Here, we present 15 DIY home decor ideas using old picture frames. Discover how to transform everyday objects and repurpose neglected items with these fun and simple projects. So, dust off those forgotten frames, and let's unleash your creativity!
DIY home decor using recycled materials
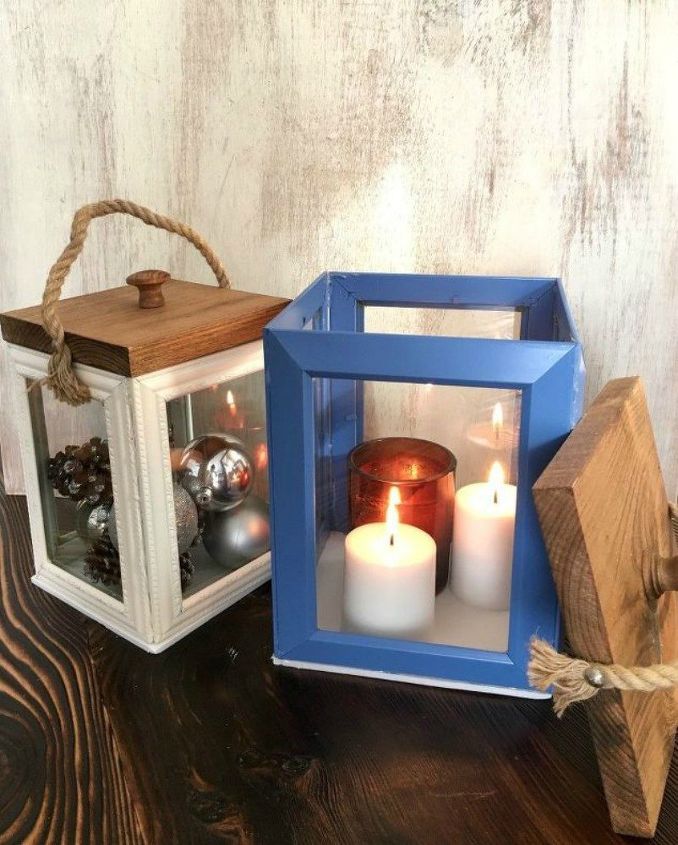
1. DIY picture frame lanterns
This project by Rob & Courtney M involves repurposing inexpensive Dollar Tree frames into lanterns that can be used for home decor throughout the year. The frames are spray-painted, and the glass is secured using hot glue.
Foam board bottoms are cut and glued onto the frames, and optional lids can be made using common board and rope handles. The lids are purely for aesthetics. The finished lanterns are versatile and can be used for any occasion. Get tutorial here
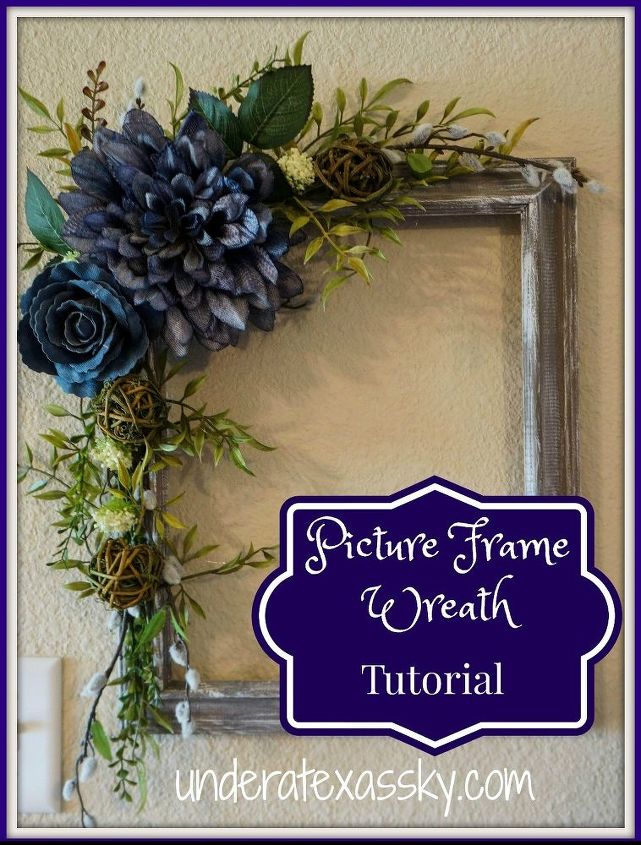
2. DIY picture frame wreath
Who said wreaths have to be circular? This tutorial by Under a Texas Sky shares two projects: painting a raw frame using a dry brush technique and creating a wreath using the painted frame.
The frame is initially painted with a base coat and then dry brushed with a lighter color. The wreath is assembled by layering greenery, filler, and flowers using hot glue. The finished wreath has a rustic touch with denim flowers. Get tutorial here
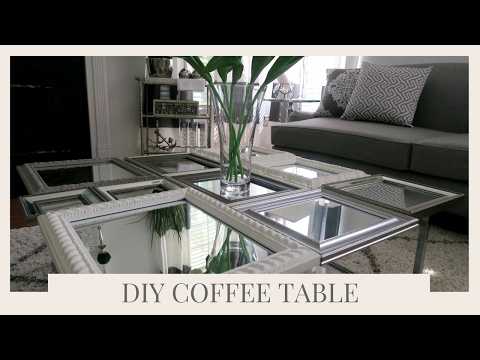
3. DIY picture frame coffee table
This DIY project by Nikki Boyd shows you how to a coffee table out of old picture frames.
First, you need frames that fit your design style; you'll be using straight-sided frames of different sizes. The base can be an existing coffee table. For glass tables, plywood or MDF should be added and screwed down.
The frames are configured by arranging them on the table and taking a picture of the desired arrangement. Mirror pieces are then cut to fit each frame, and foam board can be added for durability. The result is so unique! Get tutorial here
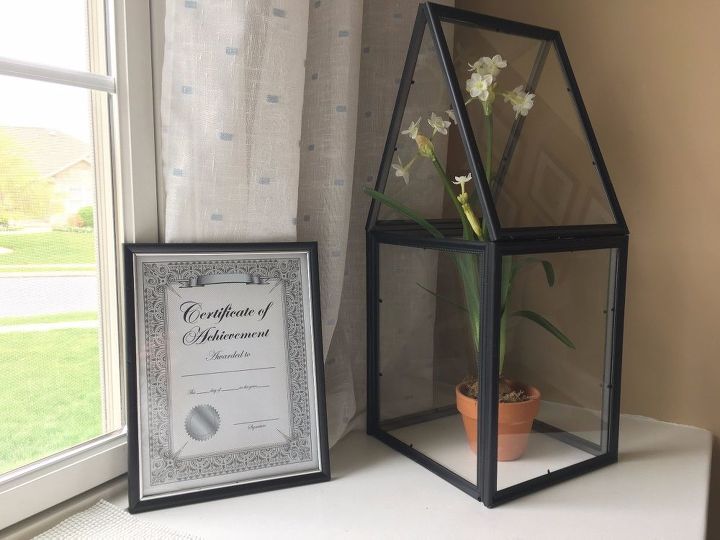
4. DIY picture frame terrarium
Terrariums are on trend but can be expensive. However, by using old picture frames, you can create your own terrarium for a fraction of the cost.
The process involves removing the back, glass, and "picture" from the frames, gluing the glass back into the frame, and assembling the frames using E6000 glue to create the bottom and roof.
These terrariums can be used indoors or outdoors. You can paint the frame to suit your style or use different frame sizes depending on your preference. Get tutorial here
5. DIY mini jewelry organizer
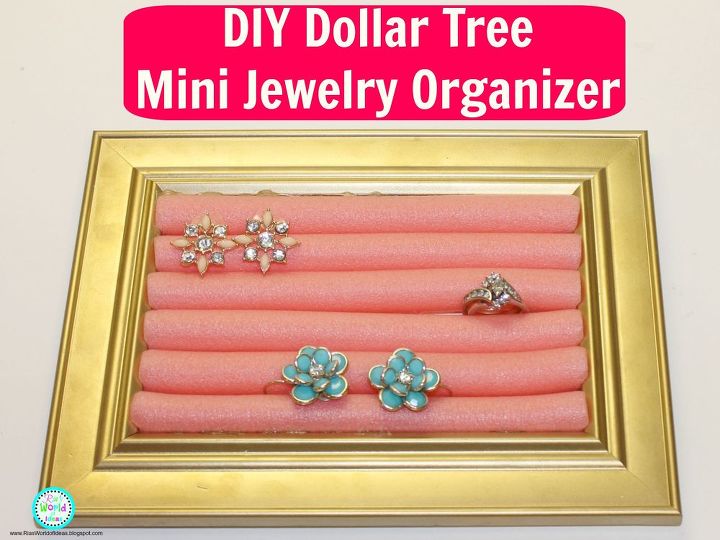
This simple DIY project by Maria Daniels-Marquez demonstrates how to create a mini jewelry organizer using a 4x6 picture frame and a 6-pack of pink hair rollers.
The picture frame can be spray-painted gold for a glam look. The metal from inside the hair rollers is removed, and the rollers are then glued onto the back of the frame using E6000 adhesive. The final result is a functional and adorable jewelry organizer that can store rings or stud earrings. Get tutorial here
6. DIY coffee table tray
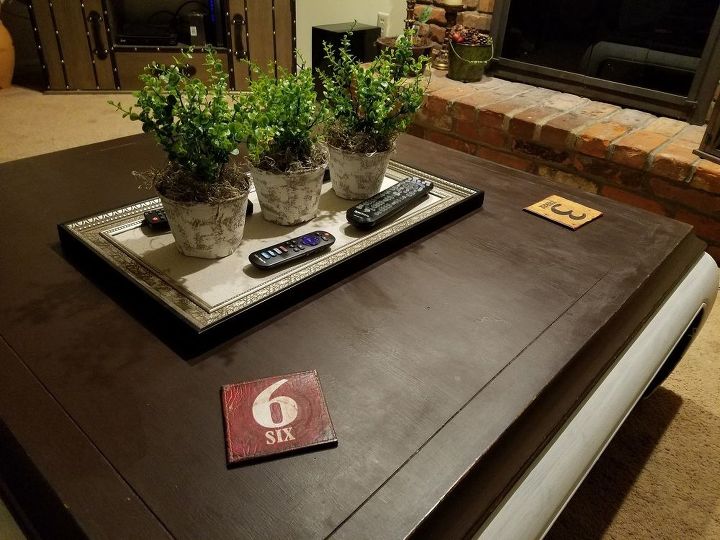
Next is a tutorial on creating a decorative tray for a coffee table that also serves as a remote control organizer. The primary materials used include a picture frame, discount fabric, image transfers, cardboard seedling pots, white acrylic paint, scrap paper, faux plants, and moss filler.
The glass is removed from the picture frame, and the fabric is wrapped around the cardboard backing and secured with a glue gun. Image transfers are applied to the fabric, and the pots are painted with a distressed look.
After filling the pots with scrap paper and adding plants and moss, the pots are placed on the tray, providing a stylish solution for remote-control storage. Get tutorial here
7. DIY accent wall
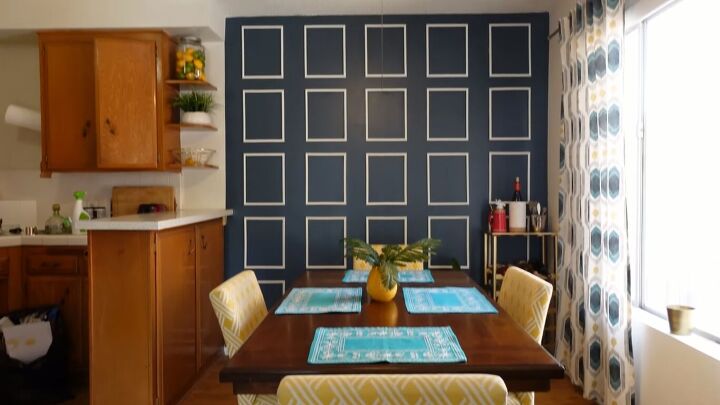
In this episode of LaughCryDIY, Katy transforms a dining room by creating a renter-friendly accent wall and adding DIY wall frame molding. She spray-paints Dollar Store frames white and gold, custom-color-matches the accent wall paint, and applies contact paper to the ceiling fan blades.
The DIY wall molding is created by measuring and marking the grid pattern on the wall, hammering nails to hang the frames, and using command strips for stability. The final result is an impressive dining room accent wall achieved on a budget of just $70. Get tutorial here
8. DIY door molding
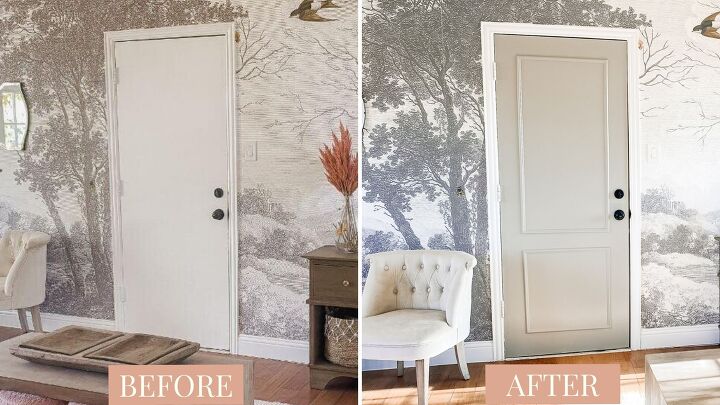
Next, Shelby shares how she transformed a plain flat panel door into a beautiful statement piece for under $20. She used picture frame molding to upgrade the door, finishing with caulking, wood putty, and painting.
The result was a door that matched the aesthetics of the room and made a significant impact on the overall look. This quick and simple project demonstrates that even the most ordinary doors have the potential for improvement and can become visually appealing. Get tutorial here
9. DIY lamp post
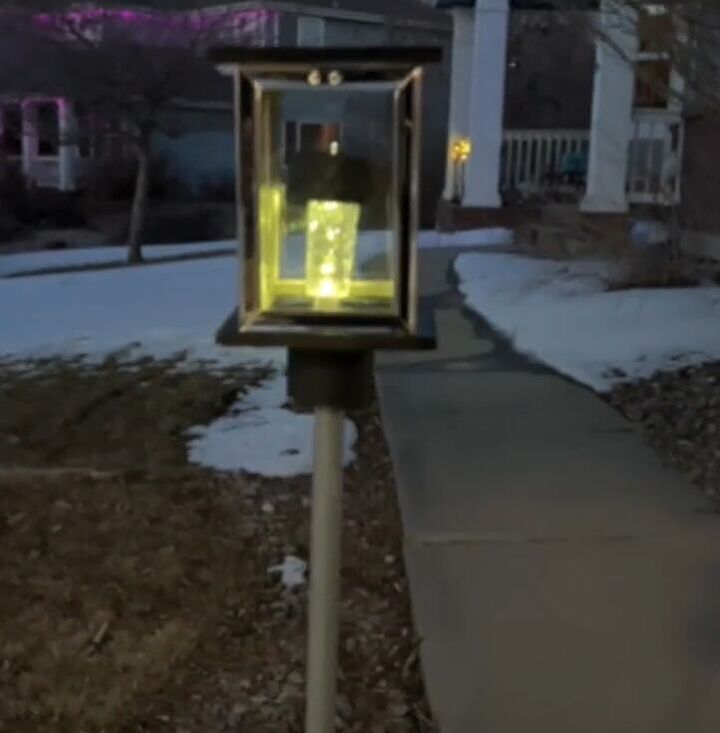
Create a unique and charming DIY lamp post for your front walkway with this step-by-step tutorial by Chas. You'll need four picture frames without backs, which will be assembled into a square shape using glue.
Paint the wooden base and cover it with black outdoor paint, then seal them with outdoor Mod Podge. Attach a solar light to the top of the frame cube using glue, and place it on a pool noodle stand secured to a broom handle inserted into an upside-down planter.
This creative project adds a classic touch to your home and illuminates the entrance to your house. Get tutorial here
10. DIY farmhouse window
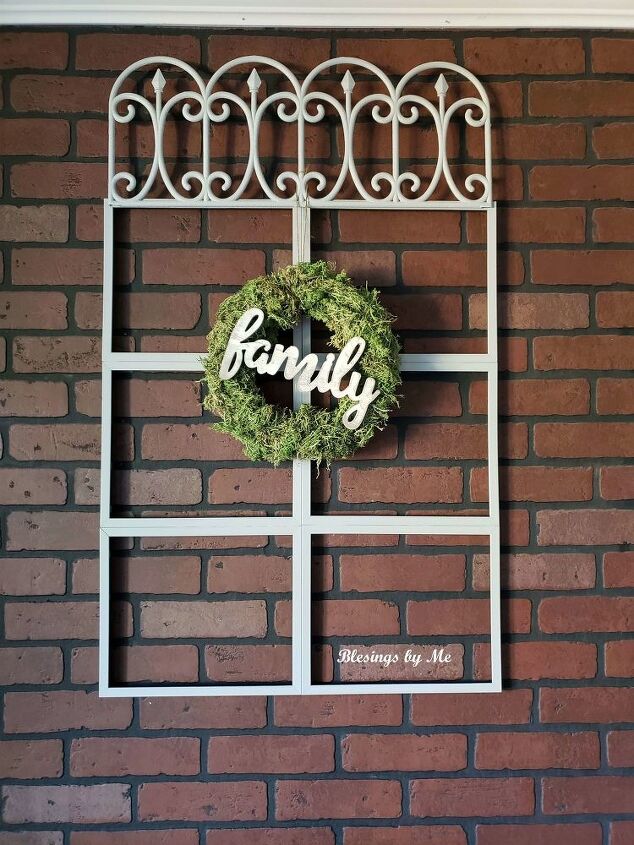
Create a cute farmhouse window using picture frames and these instructions from Michelle. Gather 6 picture frames, garden edging, spray paint, and glue. Spray paint the frames and edging, then glue the frames together and attach the edging to the front.
Hang the window and add a wreath for decoration. It's a budget-friendly DIY project that adds farmhouse charm to your home. Get tutorial here
11. DIY family tree mural
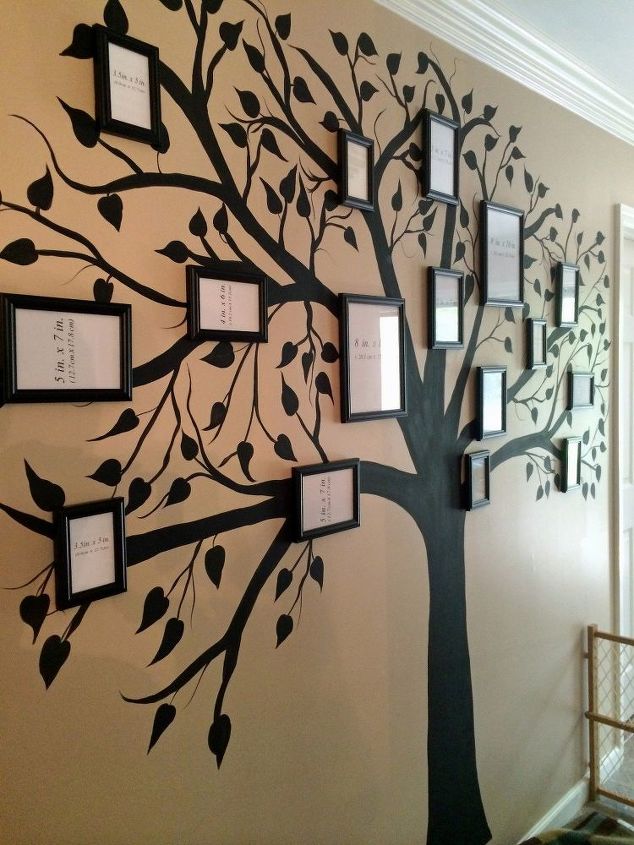
To create a family photo wall with a personal touch, Arts Be Crafty sketched a family tree on the wall using chalk. Using black acrylic paint and a flat brush, they filled in the tree and added wiggly branches and heart-shaped leaves.
After taking breaks to assess and add more details, photo frames were strategically placed on the tree. The project involved around 4 hours of work and was considered fairly easy, but the effect is amazing! Get tutorial here
12. DIY gold frame gallery wall
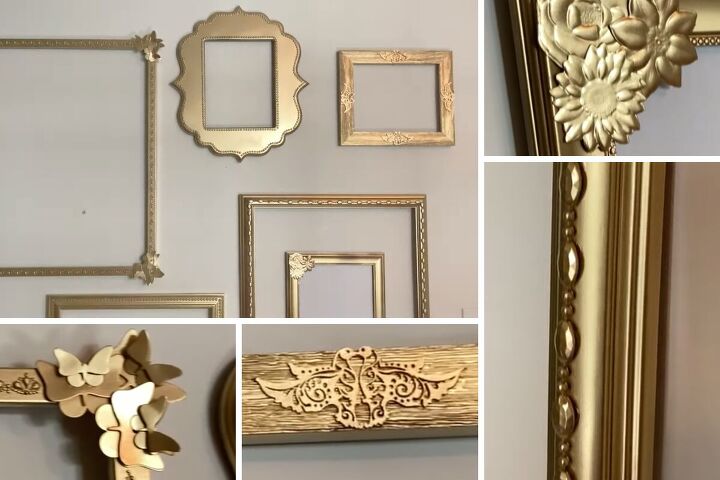
In this project, Katy creates a glamorous gold frame gallery wall using thrifted frames and affordable supplies from the dollar store.
She embellished the frames with various decorations such as garlands, butterfly stickers, crown stickers, metal flowers, wood-cut birds, rhinestones, and larger rhinestone stickers.
After cleaning the frames and removing any glue strands, she spray-painted the frames gold. The DIY craft is so cheap and easy, but the final result looks stylish and high-end. Get tutorial here
13. DIY candle lantern
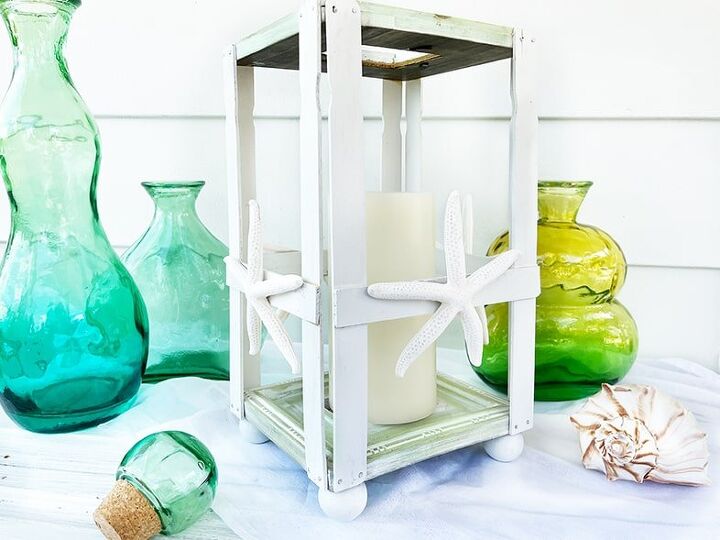
Create a beautiful DIY lantern using two wooden picture frames and paint sticks. Paint or stain the paint sticks, wood knob feet, and picture frame as desired.
Nail the paint sticks to the sides of the frame, glue the feet to the base, and cut additional paint sticks for the sides. Attach the side sticks with wood glue and let them dry. Finally, add decorative elements with hot glue and use a flameless battery-operated candle for safety.
The finished lantern can be used to brighten up a space or as a table decoration for events. Get tutorial here
14. DIY jewelry station
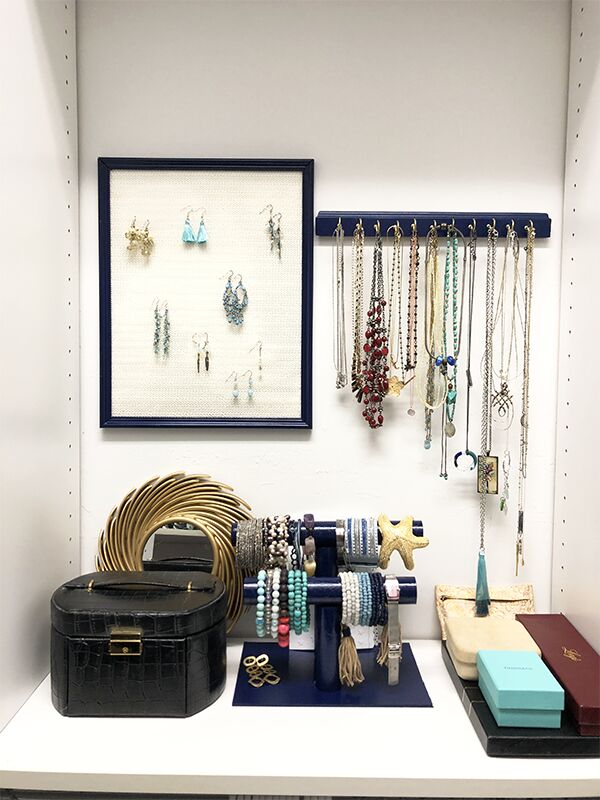
Another twist on jewelry organization, this time it's a hanging jewelry station. For earrings, The House house paints a black frame navy blue, adds shelf liner, and attaches it to the back of the frame. For necklaces, she spray-paints a piece of wood and adds gold hooks.
Lastly, she uses dowels and scrap wood to create a bracelet holder, gluing them together and painting it navy blue. The final outcome is an organized and inexpensive jewelry storage solution for a closet. Get tutorial here
15. DIY frame TV
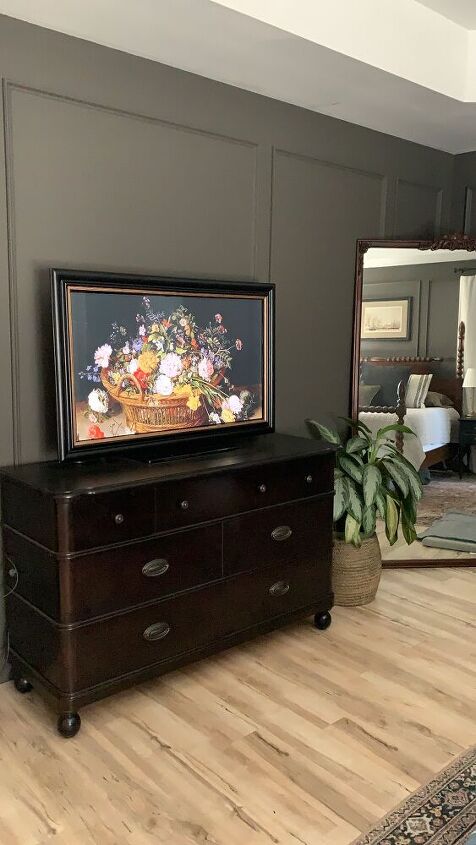
Have you heard of the Samsung Frame TV? It's a TV that can look like a piece of art in your home. To achieve a similar look for less, Lauren embarked on a DIY project.
She selected molding that matched her home's aesthetic, cut it to size using a miter saw, and used wood glue and staples to assemble the frame. The frame and bracket were painted with satin black spray paint, and a gold touch was added using Rub N Buff. The final result is s a TV that resembles a piece of art.
The TV can display artwork using apps or by playing art videos on platforms like YouTube. Overall, the frame enhances the TV's appearance and serves as a decorative addition to the decor. Get tutorial here
