Lanterns Made From Frames

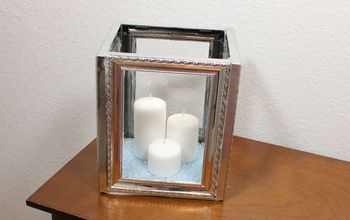
Here's a project that is inexpensive, yet looks nice and can be used for any season, or just to have as part of your home decor. What's even better is that you're turning something as mundane as Dollar Tree frames into useful lanterns! Candle lovers, this one is for you! :)
We want to help you DIY, so some of the materials in this post are linked to sellers. Just so you know, Hometalk may collect a small share of sales from the links on this page.
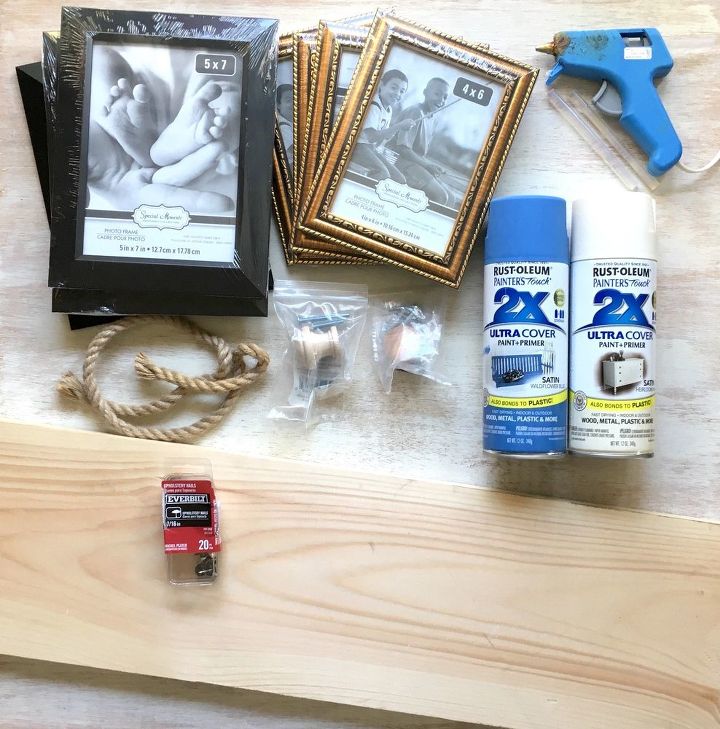
SUPPLIES:
- Frames with removable backs (4 for each lantern)
- Spray paint (I used satin Wildflower blue and satin Heirloom white.)
- Glue gun & sticks
- Foam board
OPTIONAL SUPPLIES IF YOU WANT TO MAKE LIDS: *Note: the lids are not functional, they are just for esthetics.
- Nails (I used upholstery nails I had on hand.)
- Jute rope
- Knobs
- Chop saw (not pictured...if you don't have a saw, you may be able to have your common board cut at Amazon)
- Fine grit sandpaper (not pictured)
- Danish oil (not pictured)
- Rag (not pictured)
- Box cutter/X-Acto knife (not pictured)
- 1x6 common board
STEP 1: Prep & Paint frames First, I removed the backing and the glass of all of my frames. I used an old butterknife I keep with my art supplies to push the tabs completely back.
Then I laid my frames out and sprayed them with paint...
...you'll want to let the fronts dry completely, then flip them over and spray the backs. Make sure to get the sides as well!
STEP 2: Secure glass in frames & assemble lantern Next, I used hot glue to put a small drop of hot glue on the inside corners of the frame, then laid the glass down so that it wouldn't fall out when the frames were sitting up. *Note: I had my glue gun on for too long which is why my glue looks yellow.
Once the glass in all of my frames was glued and secured, I assembled my two lanterns. I applied a strip of hot glue to the long edge of each side, sat them up vertically and held them together, tightly, until the glue set.
STEP 3: Trace, cut & glue foam board bottom After my lanterns were assembled, I sat each of them on my foam board and traced around the bottom of the lanterns.
Then, I cut the foam board bottoms out, along my traced outline, with a box cutter.
Here are my foam board bottoms.
After I cut out the bottoms, I applied hot glue to the edges and sat the lanterns on top.
STEP 4: Trace & cut common board for lids (optional) If you want a lids for your lanterns, you'll want to follow this step as well as the next. Much like I did for my foam board bottoms, I also sad my lanterns on a piece of common board and traced around the edge. Then, I cut the marks with a chop saw, lightly sanded the cut boards, and applied Danish oil to them.
STEP 5: Add rope to lids Next, I hammered a nail into some rope on two sides of my lids to create a rope handle.
STEP 6: Finish knobs and install Finally, I applied Danish oil onto my two knobs and installed them into the middle of my lids.
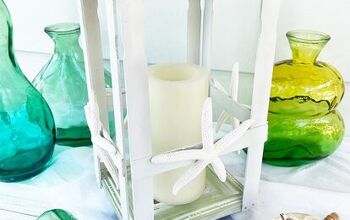
Even though the lids are just for looks, I love how these little lanterns came out! They're perfect for any occasion and all year round.
DIY home decor using old picture frames
Enjoyed the project?
Resources for this project:
See all materialsComments
Join the conversation
-
 Fai80569285
on Apr 30, 2023
I think the lid would fit the lantern better if you placed a smaller piece of wood (about 1/4 inch thick) on the underside of the lid . This way the lid won't slide off when moving it. Just a thought1
-
-
 Catwoman2470
on Apr 21, 2024
I wish that people would read the article, carefully and throughly, before asking questios!!!!! 😜
-













Frequently asked questions
Have a question about this project?
Does the heat of the candles loosen up the hot glue?
Super cute idea, but did you use non flammable foam board? According to google, foam board is highly flammable.
Amazon will cut your wood? Or was that meant to read “home depot?”