


Bergere Chairs Makeover

5 Materials
$200
20 Hours
Medium
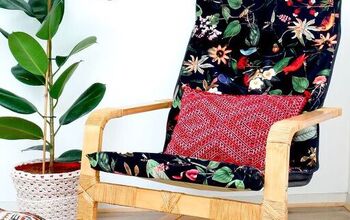
While taking architectural design courses at the local community college, I shared my love of furniture with some of the school staff. One of the advisers had a particular chair she wanted but it was out of her budget. She showed me a photo of her dream chair and I promptly found a settee and two chairs that would be the foundation of her new chairs. This photo is of the finished pair of chairs.
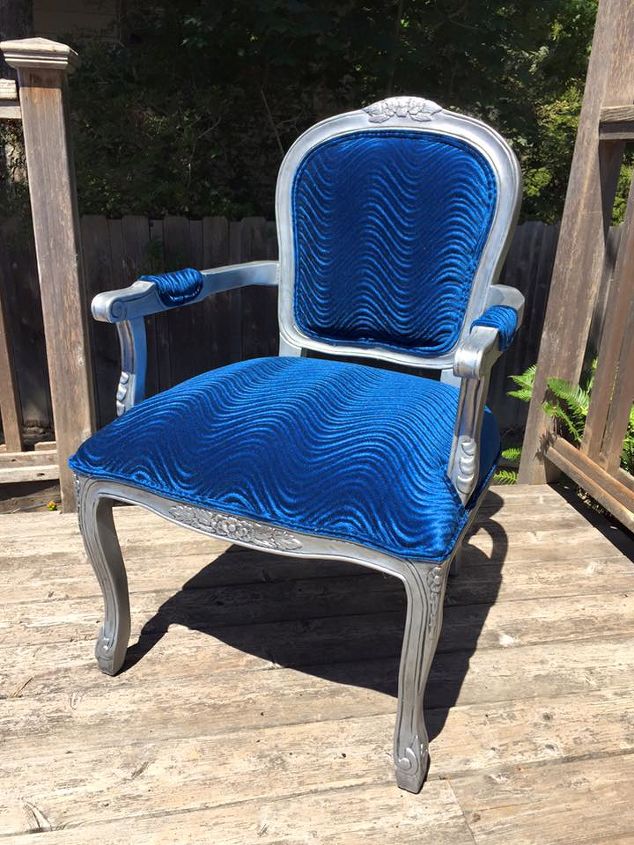
One of the finished chairs - on my deck, on a bright and gloriously sunny day :)
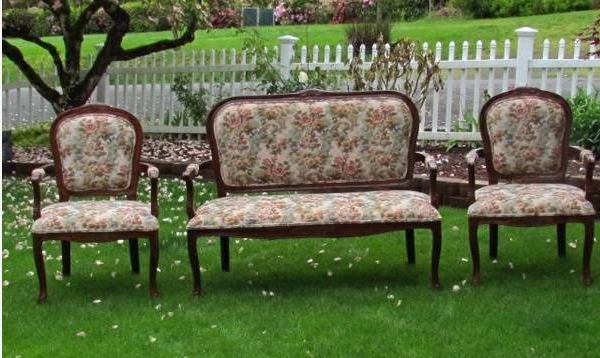
Here's the pic I spotted on Craigslist. All three pieces for just $145!
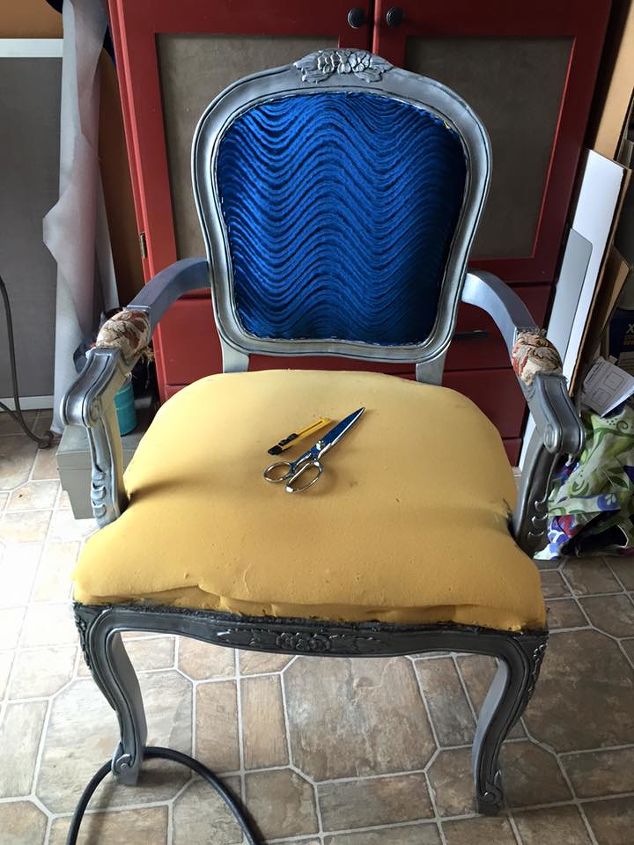
I stripped both chairs of their original fabric covering. I don't have strong hands so use needlenose pliers to pull off some sections. To remove the staples, I use a rubber mallet and a stapler puller. Takes time, but it's the best way. Next, I de-glossed both chairs and painted them with this fabulous acrylic paint from Brush & Trowel (Portland, OR), then antiqued them with Zinc glaze (also from Brush & Trowel
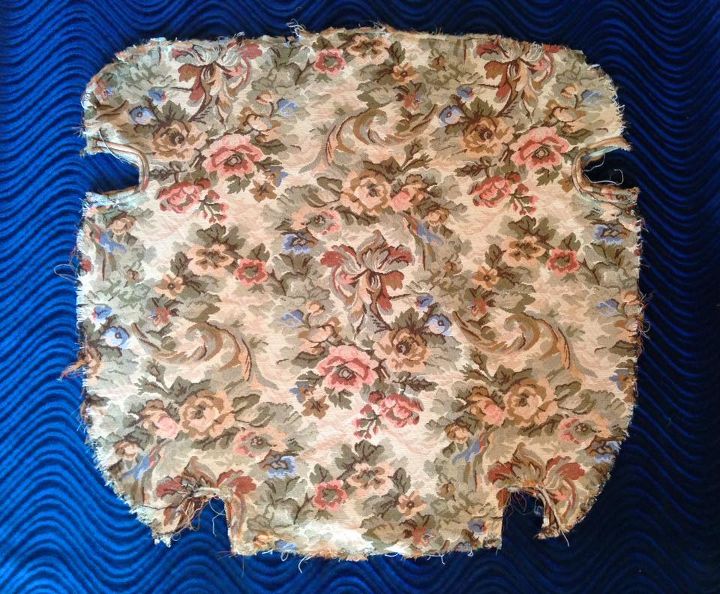
I used one of the original seat coverings as a guide to cut the new fabric.
I used the back pieces to size the fabric for the back, as well and stapled the new fabric over the foam backing, then trimmed close to the staples
The seat foam was intact so I left it alone. Most of the time, I rip everything out but these just didn't warrant the extra work. I fluffed up the seat by pulling apart raw cotton batting and scrunching it back together into tight balls and filled out the seat.
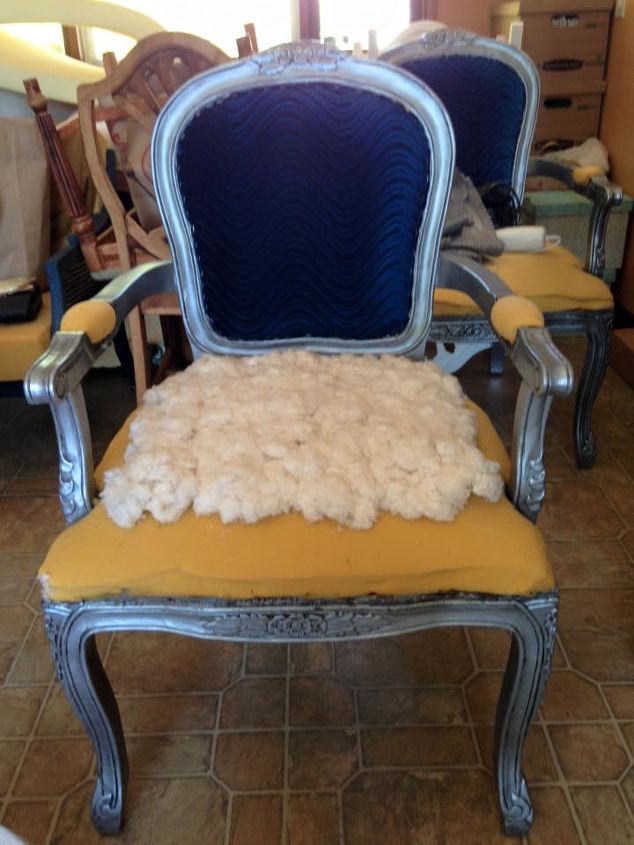
I laid a sheet of natural cotton batting over the scrunched cotton and fit it over the foam seat.

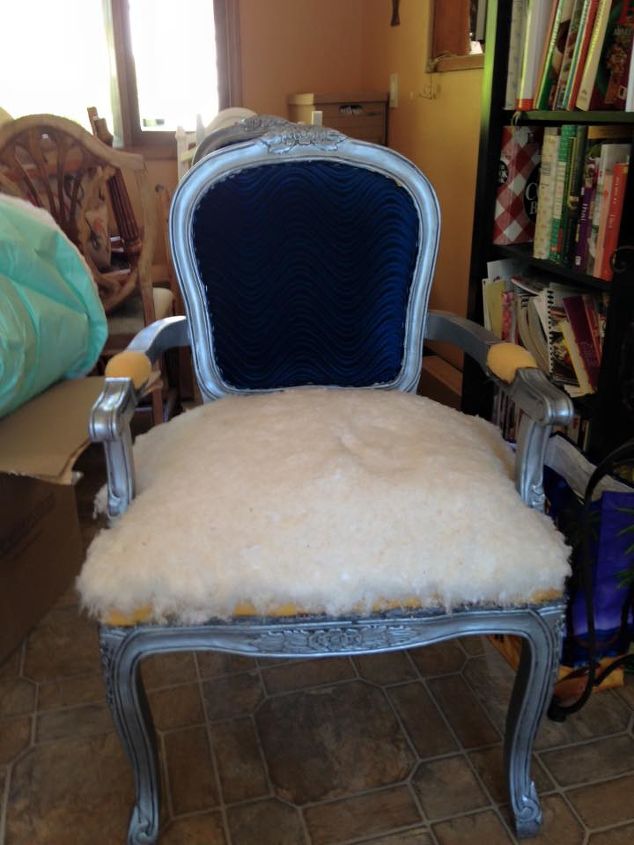
I took a piece of inexpensive cotton muslin and laid it over the top of the cotton batting and foam, then shaped and stapled into place. I used a small razor to trim the muslin close to the staple line.
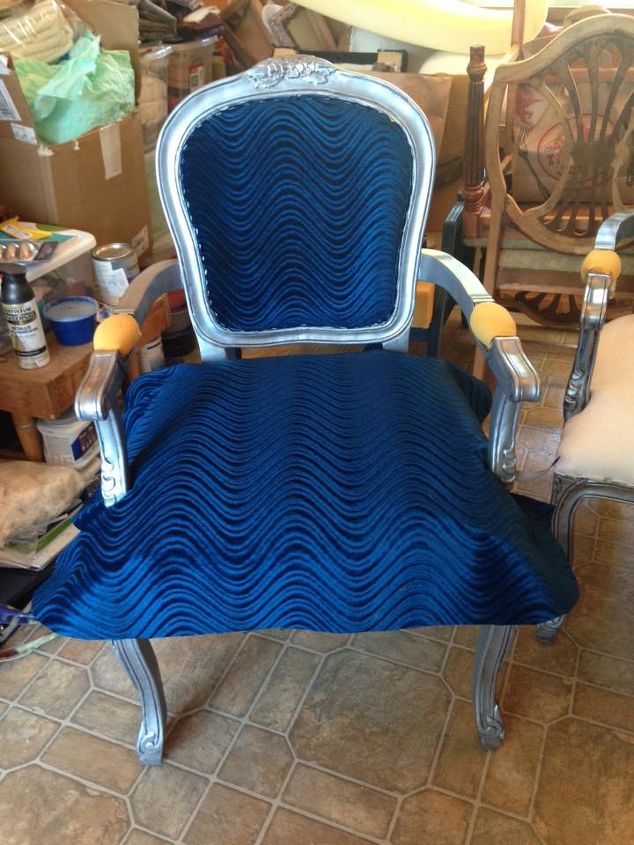
I took the fabric I cut earlier for the seat and fit it over everything, then stapled and trimmed close to the staple line.
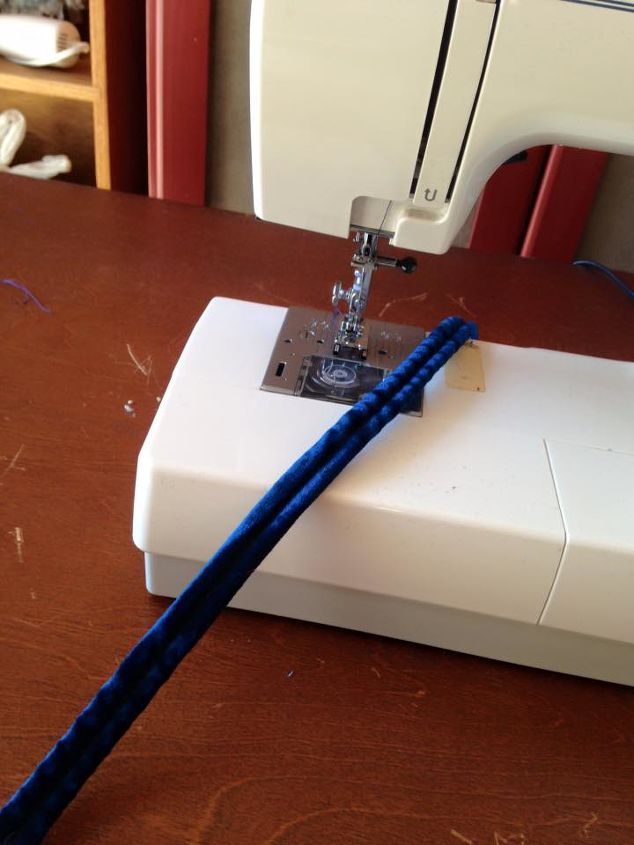
When everything was covered (the arms were done in a similar manner), I sewed the welting. If you have not made double welting before, I recommend watching a few Youtube videos. It's really easy, but you need the right kind of sewing machine foot to make it. After all the welting was made, I used a hot glue gun and went over all the exposed staples, folding in the ends to hide the start/stop points.
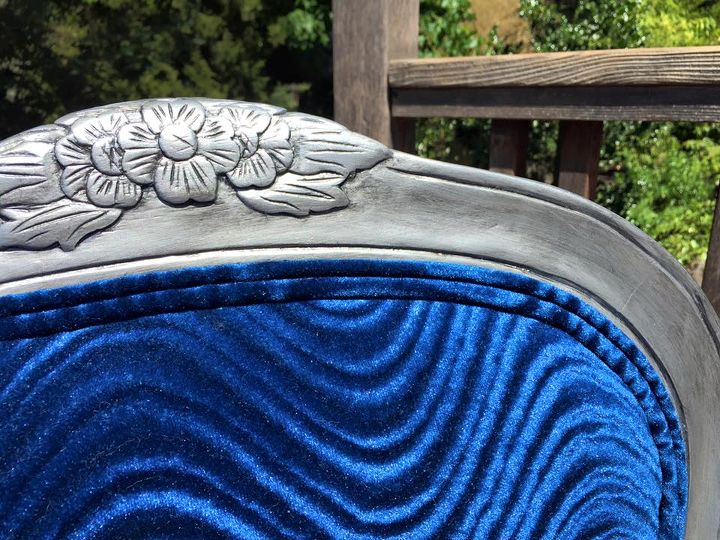
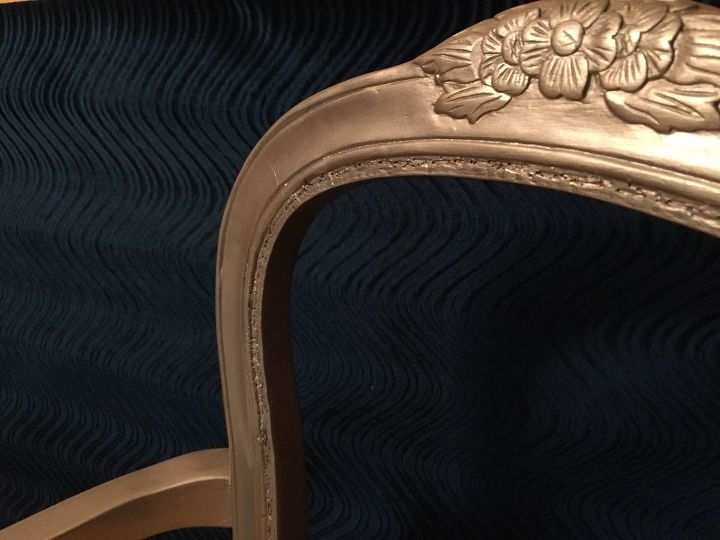
Closeup of the welting and glazing
There's a full pictorial of the process on my facebook page here: https://www.facebook.com/pg/ChairishedFurnishing/photos/?tab=album&album_id=803250423104551
Finished Chairs One of the original chairs. These were in great condition but not in the desired finish
Comments
Join the conversation
2 of 4 comments
-
That blue is fab!
-
OBSESSED this is gorgeous! Great job~


Frequently asked questions
Have a question about this project?