


Make Your Own Shiplap Accent Wall
If you love this project, grab your quick start DIY guide & subscribe to our blog!
Are you looking for a fun way to add a little farmhouse charm to a room? You can make your own shiplap accent wall! Come and see how we transformed our living room!
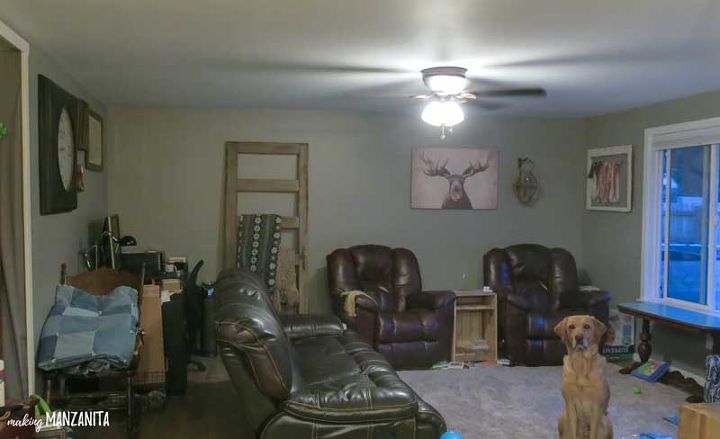
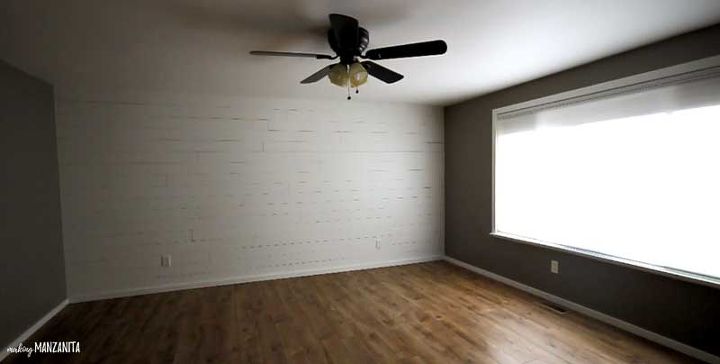
Just a little look back..here’s how we started (before we rearranged the furniture). Pardon the disaster!!
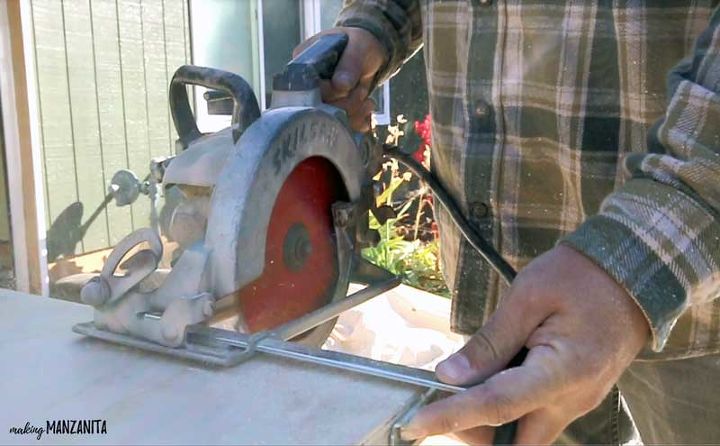
STEP 1: RIP PLYWOOD INTO 6 INCH WIDE PLANKS.
First, start by ripping your plywood sheets down to 6 inch wide planks. You can use a table saw to do this or a Skilsaw with a rip fence like we did.
STEP 2: ROUTER PLANKS.
Next, you will router the tops and bottoms of the plywood planks so they fit together. We used a router with a router table to do this. If you have a wood shaper, you would want to use that instead. Since the router is not really made to handle jobs of this size, we had to do these in shifts so it wouldn’t overheat the poor little router.
Router out 1/2 inch on both the top and the bottom of the plywood planks. This makes the plywood pieces have a 5.5 inch reveal.
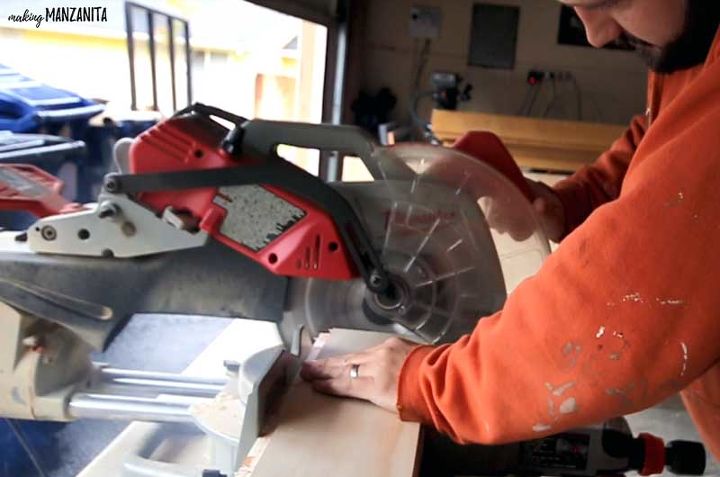
STEP 3: CUT PLANKS DOWN.
Using a chop saw, cut the planks down to your desired lengths. We cut ours at random for a more rustic look to our shiplap accent wall.
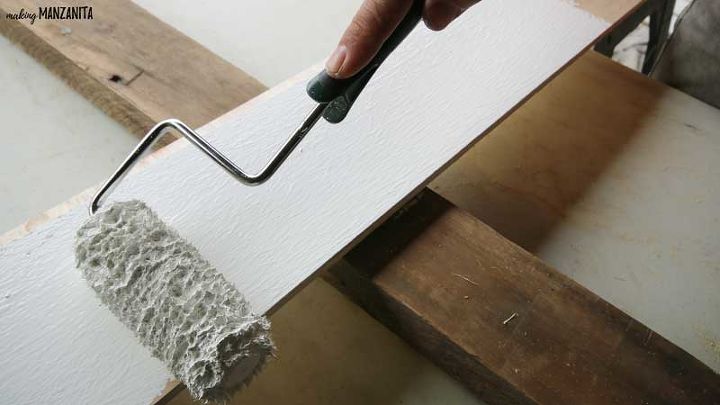
STEP 4: PAINT PLANKS.
We opted to paint the shiplap planks before installing them on the accent wall. We did have to do some touch up later when we were done installing, but this still was a big time saver.
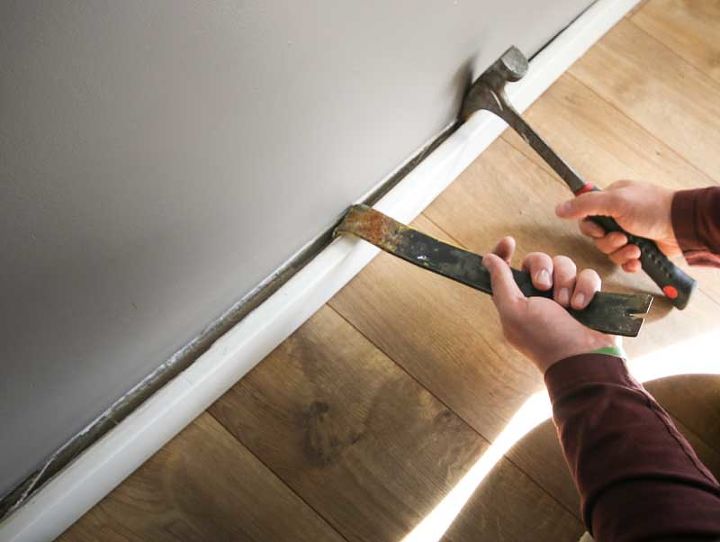
STEP 5: REMOVE BASEBOARDS.
Remove your baseboards.
STEP 6: SCRAPE WALL UNDER BASEBOARDS.
There may be some extra plaster under your baseboards. Just scrape it off.
STEP 7: REMOVE OUTLETS AND/OR LIGHT SWITCHES.
Turn off power to the outlets or light switches and remove the covers. Be sure to cover any exposed wires with wire connectors.
STEP 8: ATTACH BOTTOM BOARDS WITH LEVEL.
Have one person hold the board in place and the other person look at the level and nail in the first boards using an air compressor & finish nailer.
STEP 9: CONTINUE STACKING AND ATTACHING BOARDS.
Continue working your way up the wall and stacking and nailing in the shiplap plywood planks.
STEP 10: FINISH TOP ROW OF SHIPLAP WALL WITH PLYWOOD.
Once you get to the very top of the wall when you need to install your row of the shiplap plywood planks, measure the gap from the ceiling to the reveal on the last row you put up. Be sure to use pieces that are only routered on the bottom side for the top row.
STEP 11. ATTACH BASEBOARD.
Next, you can reattach your baseboard to the bottom of the wall on top of the shiplap.
STEP 12. ADD OUTLET EXTENDERS.
Next, you’ll need to add electrical box extenders to your outlets and light switches to bring them out the to the new wall level.
STEP 13. CAULK THE GAP ON THE TOP AND SIDES.
Caulk the gap on the top of the shiplap wall and the sides. Alternatively, you could also install trim pieces of the top and/or sides.
STEP 14. TOUCH UP.
Lastly, touch up any areas of the shiplap wall with plywood with your paint.
I’m so in love with our farmhouse shiplap accent wall that we added to our living room.
For more pictures and details on the step by step tutorial, visit this post on how to make a shiplap wall with plywood!
Resources for this project:
See all materials


Frequently asked questions
Have a question about this project?
With all that wood in place...does your insurance rates go up?