


Over the Door Organizer Turned Bedside Storage

5 Materials
$15
30 Minutes
Easy
If you like to keep a good book by the bed, or store anything bedside, this easy repurpose project is right up your alley! I have some nightstands by the bed, but this guy can store much more and is an easy arms reach beside you! You can grab a cheap over the door organizer, and with a simple cut down the middle and some grommets and ribbon create a great bedside storage unit. This will give you storage on both sides of the bed and a variety of pockets to keep things neat and tidy.
We want to help you DIY, so some of the materials in this post are linked to sellers. Just so you know, Hometalk may collect a small share of sales from the links on this page.
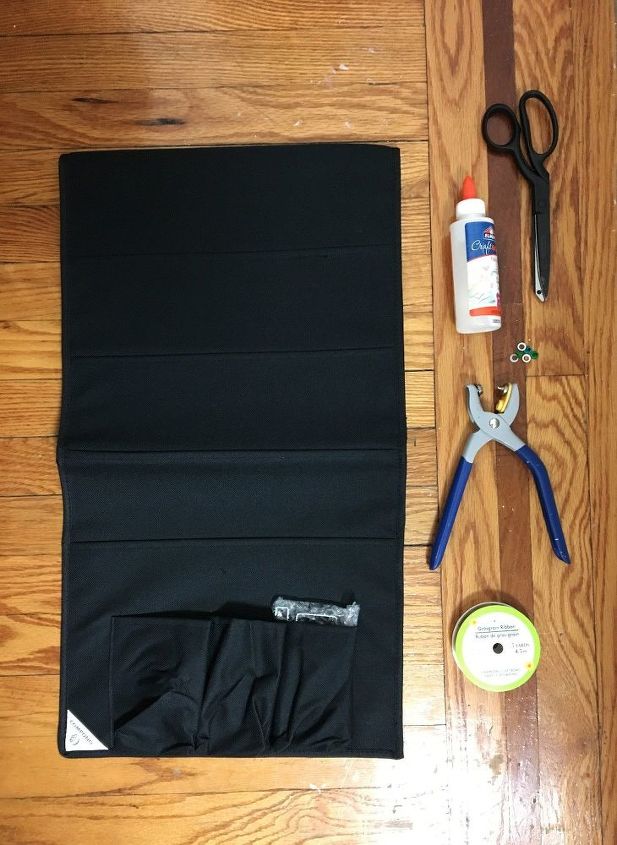
Get materials: first you'll need an over-The-Door Organizer , a ribbon , scissors, eyelets and applicator and finally fabric Glue.
Also, make sure to check out other organizer ideas in the DIY organization project page!
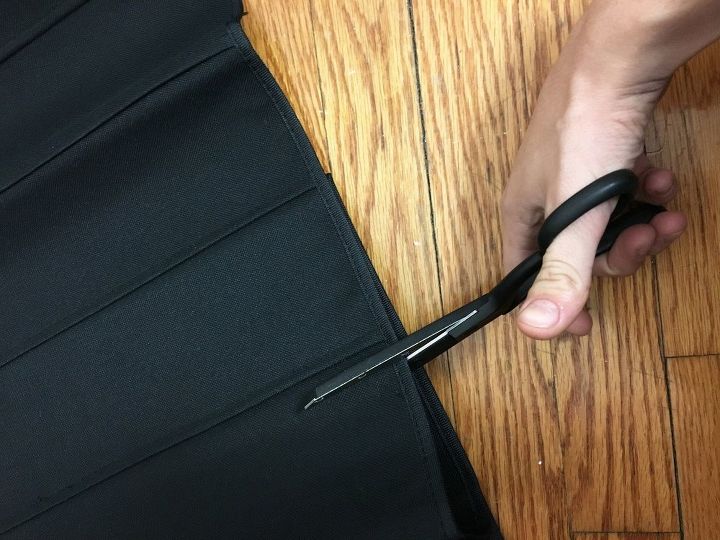
STEP 1: Cut the over-the-door storage unit in half width wise. Make sure you don't cut the bottom of the pocket you are slicing through as you will need it. If you do you can glue a piece of ribbon around the bottom so that it replaced the bottom of the pocket so that you can still store things inside.
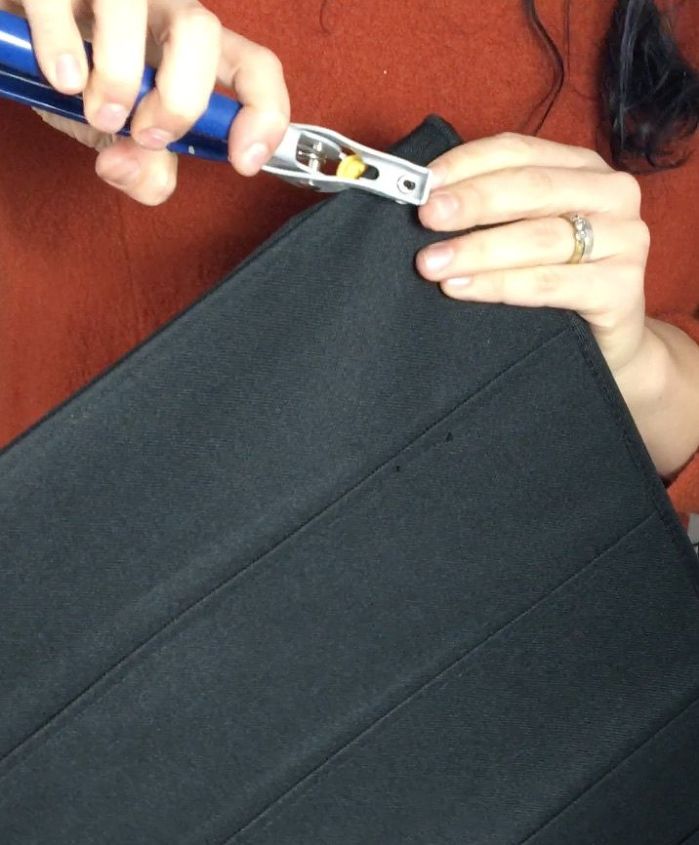
STEP 2: The over-the-door storage unit I bought had grommets on one side so that you could hang it from hooks. Since I cut it in half the other side needed grommets for a future step. Take your grommets or eyelets and the applicator tool and apply them to either side of the top of the unit.
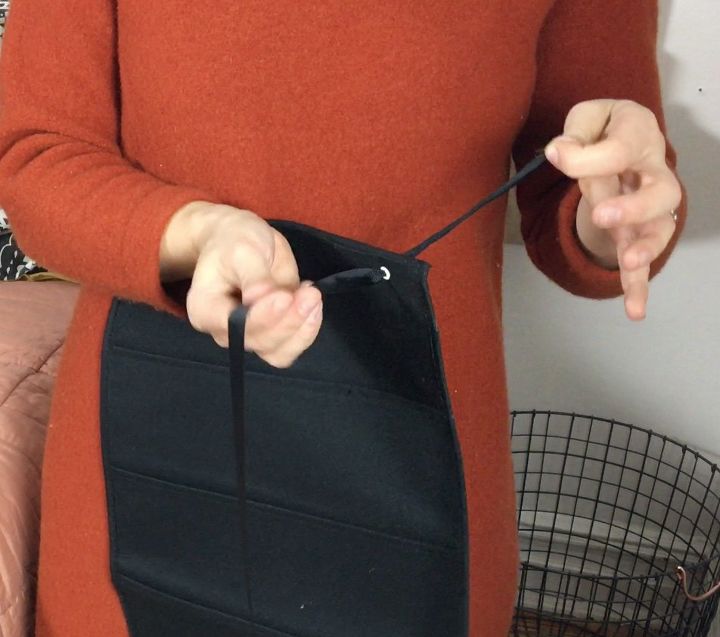
STEP 3: Cut two pieces of ribbon the width of the bed you will be adding storage to plus an extra 12". Feed each of the ribbon pieces through the eyelets/grommets you just added to the one side.
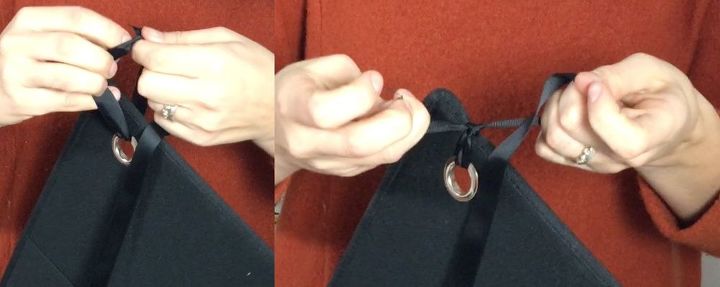
STEP 4: Tie the ribbon in a knot around the grommet so it stays in place.
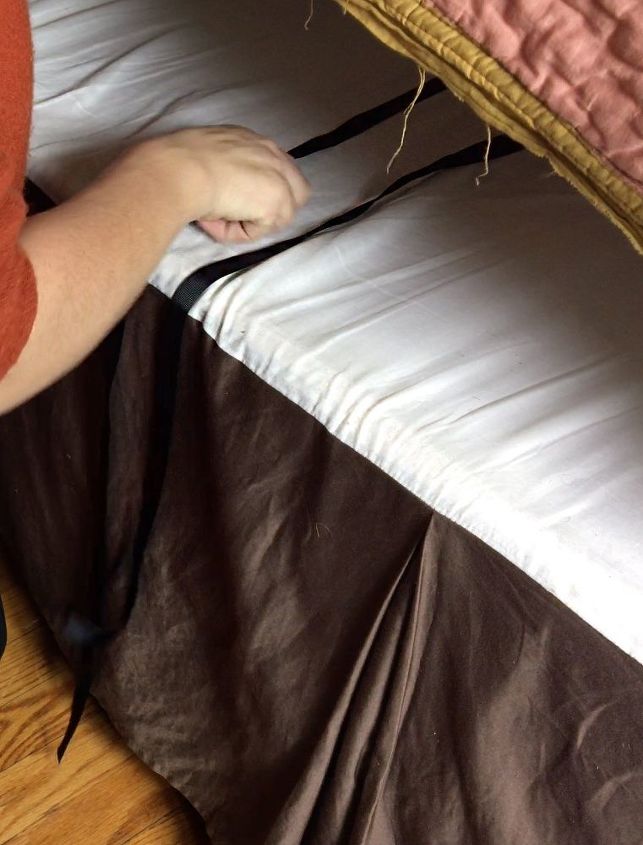
STEP 5: Place the one side of the unit that you just added ribbons to on one side of the bed and feed the ribbon through to the other side of the mattress underneath. Lift up the mattress and pull the ribbon through to the other side.
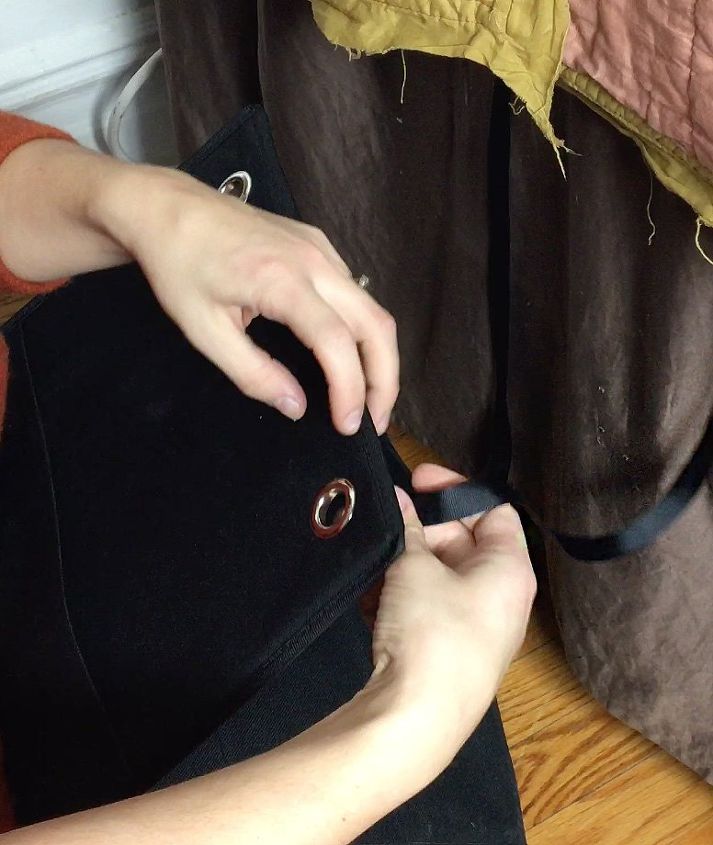
STEP 6: Feed the two ribbons through the grommets on the other half of the unit.
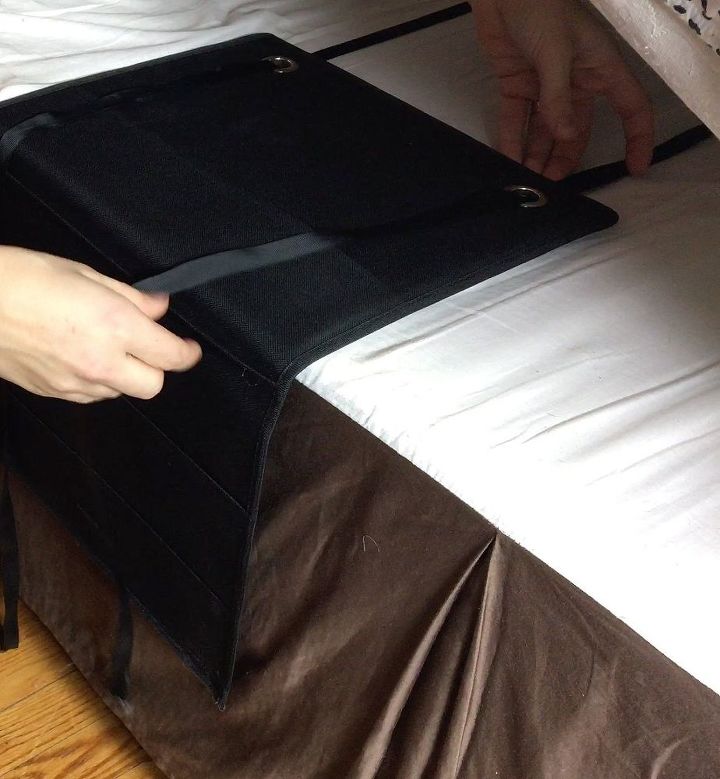
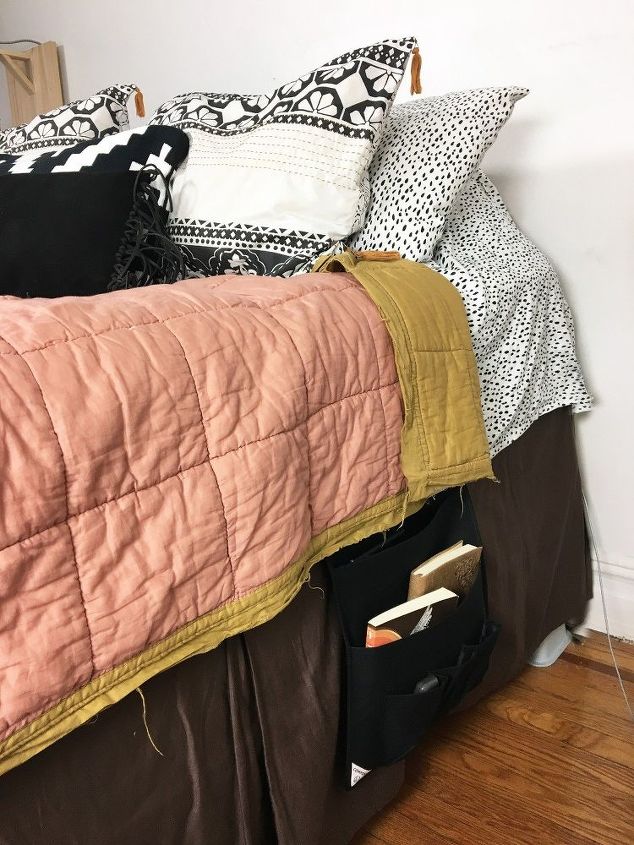
STEP 7: Now place this half of the storage partially under the mattress and position it so that it hangs where you wish, just as you did on the other side with the other half.

STEP 8: Now tie the ribbons that were fed through the grommets in knots so that it is secured into place.
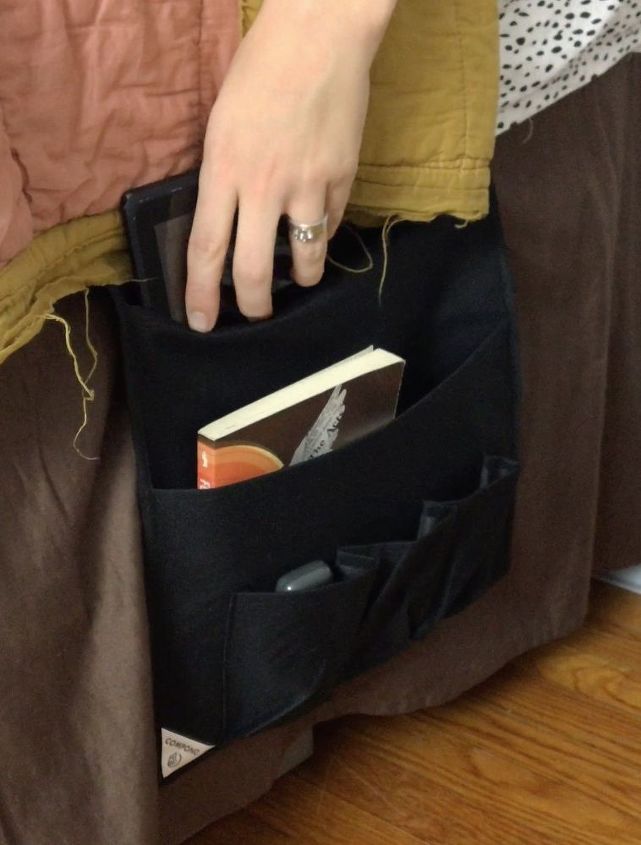
STEP 9: Now just tuck all your books and bedside treasures away in the pockets.
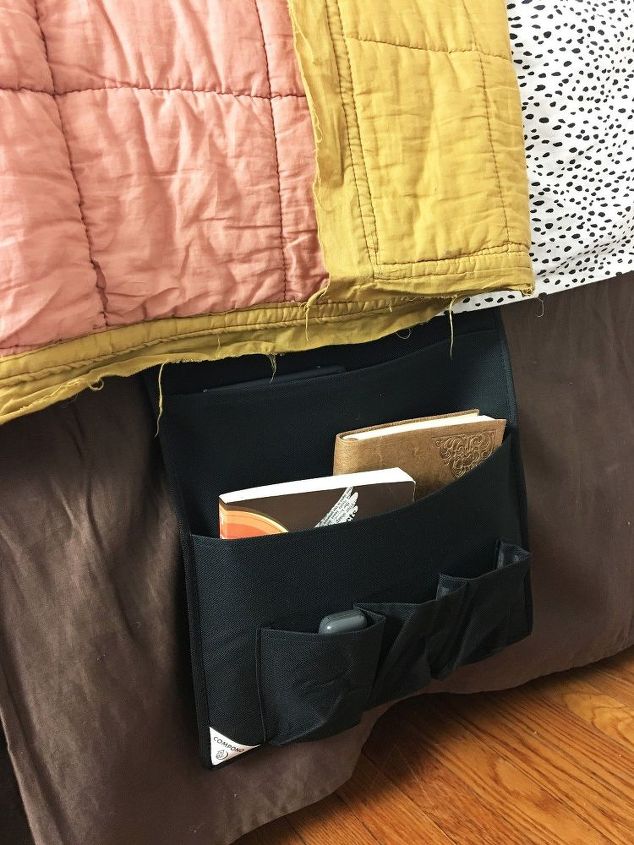
Pleas ignore this ridiculous brown bedskirt. I know I have mentioned before that I have been working on redoing my bedroom and I have yet to find a bedskirt I want, so for now I have this old one from my sister... I must say though that this thing is going to be super handy.
My husband is so excited about this stinkin thing. He also just got a bunch of books for Christmas so it will be serving it's purpose right off the bat.
{
"id": "4094700",
"alt": "",
"title": "",
"video_library_id": "3656",
"thumbnail": "https://cdn-fastly.hometalk.com/media/2020/04/30/6151331/over-the-door-organizer-turned-bedside-storage.jpg"
}
{
"width": 634,
"height": 357,
"showRelated": true,
"noautoplay": ""
}


Any price and availability information displayed on [relevant Amazon Site(s), as applicable] at the time of purchase will apply to the purchase of this product.
Hometalk may collect a small share of sales from the links on this page.More info
Comments
Join the conversation
2 of 269 comments
-
Nice, but Amazon has these for under twenty dollars, and they work great. I love mine.
-
NICE, Thanks Amanda, it's a BIG DEAL, isn't it, Lol


Frequently asked questions
Have a question about this project?
This is brilliant! Do you use Velcro?
Would this work for my 🛋?
I'm confused; why cut the other half off? Why not just leave that part in tact since it's just going under your mattress?