These cabinets are in bathrooms and kitchen.
How to update these cabinets without replacing them?

by
Amy Gill
+8
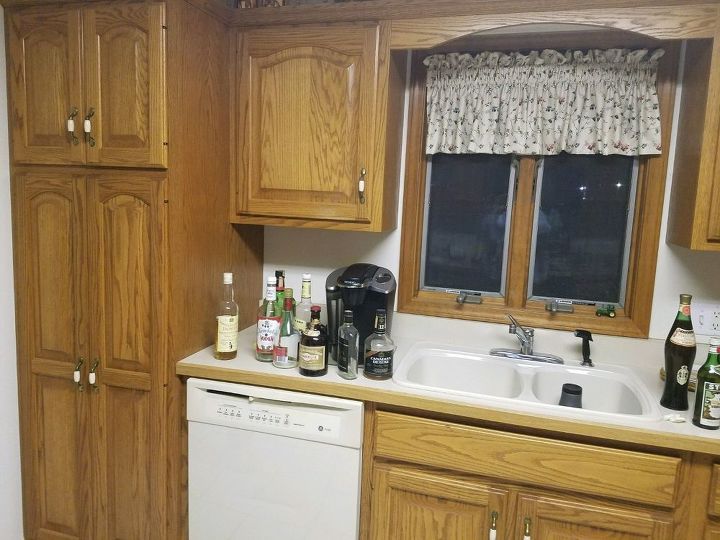
I moved into my friends home and they have cabinets from the 80's, looking for a way to update them without having to replace them. Looking for options.


Amy..I would sand and clean then paint. You could stencil or use mod podge and put around edges of door or center to dress up a little. Then seal with polyurethane.
Peel and stick wall paper!! Paint the wood parts with a coordinating paint! It's easily removed if you move out.
Take one of the doors off and take it to the paint department of your home improvement store. Look at the cabinets they are selling and ask their paint pros what you need to buy to copy that finish/design. They have all of the latest paints, stains and finishes and application tools for a professional job. And they have great ideas!
AAAH! 70's 80's European style kitchen cabinets. All the rage back then. WHY! Best and easiest solution is to paint them.
Make sure they are clean and dry. Remove the doors and hardware. Mark the doors and cabinets with tape where they go. Lightly sand the doors and cabinets to remove any gloss and roughen the surface for paint with 120- to 220-grit sandpaper. Use a tack cloth or damp rag to remove dust after sanding. Prime with a stain blocking primer like Zinsser 123, KILZ,or BIN and have it tinted to the color of the top coat. This will prevent dark or stained surfaces from showing through the top coat. Acrylic, or water-base, paints are low-fume and clean up easily with water. Alkyd, or oil-base, paints require good ventilation because the paint contains solvents that can irritate your lungs and make you feel sick. Alkyd options require mineral spirits for cleanup, but they provide a hard, durable paint finish. Whichever you use, buy the best-quality paint you can afford for a lasting kitchen cabinet finish. Seal with at least three coats with a water based polyurethane. Use a small foam roller and foam brush for a smooth finish.
I would add would trim as others have done with their hollow core closet doors.
I have these cabinets in my kitchen and I'm following these wonderful ideas! I've seen other ideas on here too. My favorite is to upgrade they look by adding strips of wood around the front of the door (which would cover that old wood finger pull on the bottom) then add some updated door pull hardware 😁
My next project, and I can't wait to hear about yours!
If you have a vinyl cutting machine, you could cut and apply a design to match your taste. With the different colors and designs, the sky is the limits.
Fortunately these are Euro-style hinges & full-overlay doors, vs. cheap face frame design.
They should be worth sinking some time & money into. It depends on the quality of the original hardware and the density of the particle board underneath.
Regular ”Paint” is not going to be serviceable in a kitchen where the cabinets will get food and grease vapor on them.
Option 1: Buy a Plastic Laminate coating system. It’s way more than “paint”.
Option 2: Buy a router, a laminate trimming blade, laminate contact cement and sheets of plastic laminate (Wilsonart is typically the cheapest of the Top 3, that you’ll be able to easily source).
and re-laminate them yourself.
You’ll need to practice on something else First, obviously.
Consider that the backing of the plastic laminate is a light brown and you’ve got matching edge banding. 1/16”.
Either select a laminate pattern & finish that works with the edge-banding & exposed brown backing or consider painting the edges or new edge-banding.
Its going to look like $10K of new high-end cabinets for about $15 per door front.
You could attach new trim to the front of the doors to make them look like shaker style doors (just google Shaker style cabinets if you don't know what I mean). Then painting and adding hardware and it would look like a brand new kitchen!!
I was thinking about designing the doors with etching. If you know of a Maker Space in your area (search "maker space" or "hacker space" in your area) and they have a laser cutter, you could get a design cut into your door to allow the wood underneath shine through.
You do have to have a design in a computer file to load, and for that size of wood, you might need a Shop Bot, which is a larger version designed to cut larger pieces. Either way, it can be worth it to cut a professional - looking design in your doors. Then you would have to finish the wood.
Another idea is like what others mentioned above: painting them. My idea is to get Pennsylvania Dutch designs called hex signs to decorate your doors in beautiful, colorful designs. Quilt designs are intriguing, too: stars, wedding rings, drunkard's path, tumbling blocks, etc.
If you design on an art program (Gimp is good), you can print out your design so that you can make a stencil with it.
Try taping the door up solidly with Blue Tape and attach your design to the tape. Carefully cut the design out of the paper along the lines of the paper so you get the design sections. Cut slightly into the tape, but not too deeply. Then remove the paper. Keep the pieces of paper. Use them to help you finish cuts in the tape that didn't come through. Now you have a kind of "paint - by - numbers" kind of project. Remove one section of tape at a time and paint only that section.
If you don't want to have to precisely paint next to a finished section all the time, plan your sections so that the first ones you paint are isolated. And leave the outside sections for last so you can have some relief from precision painting. I recommend a 5x or 6x magnifying lens, and if you get a small one you hold to your eye, then wear it like a pendant so you have it near.
Once finished, pull all the tape off and then touch up your design.
Finish with a finish that will withstand kicks, scrapes, water and food messes. Perhaps polyurethane, as suggested above. Ask your home - improvement consultant at the paint department.