


Snuggle up This Fall With Your Own No Sew Blanket

5 Materials
$20
3 Hours
Easy
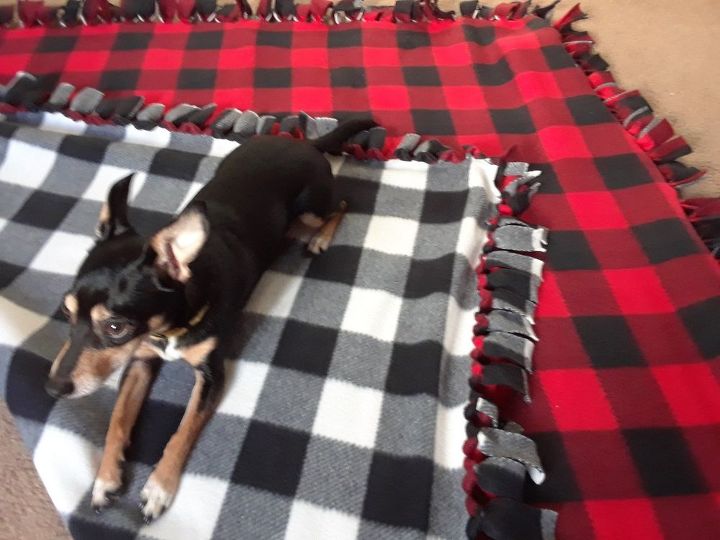
This fleece "no sew" blanket will be great for snuggling up on a cold day.
Lovely way to end my day.
I started this project with minimal sewing knowledge. I don't own a sewing machine and I really wanted to make this blanket for a gift. My sister had made one for me and it's my go to blanket.
Here's what you need to do.
- I bought 2 x 1 1/2 metres of fleece at my fabric store. You can have same colors or alternate (which I used for fun)..
- When I got home I put them side by each and made sure to cut off the uneven pieces left by the store.
- I lined them up on the floor and smoothed them out completely.
You are going to need some space for this.
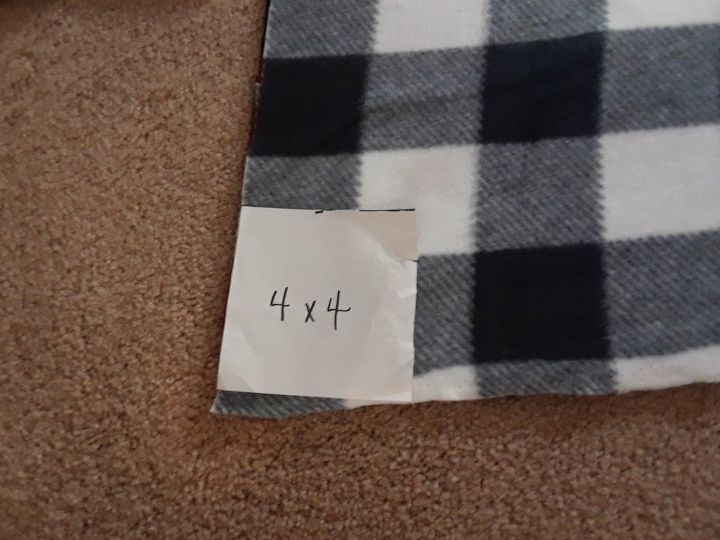
- Using a ruler and pencil with paper, measure out a 4"×4" piece of paper and cut out.
- Put this piece of paper at one corner of the fleece. Using a sharpie or piece of chalk in each corner of the fleece mark out the square. After marking all 4 squares cut the square off each end.
- You do not need to keep them unless you want to save for another project.
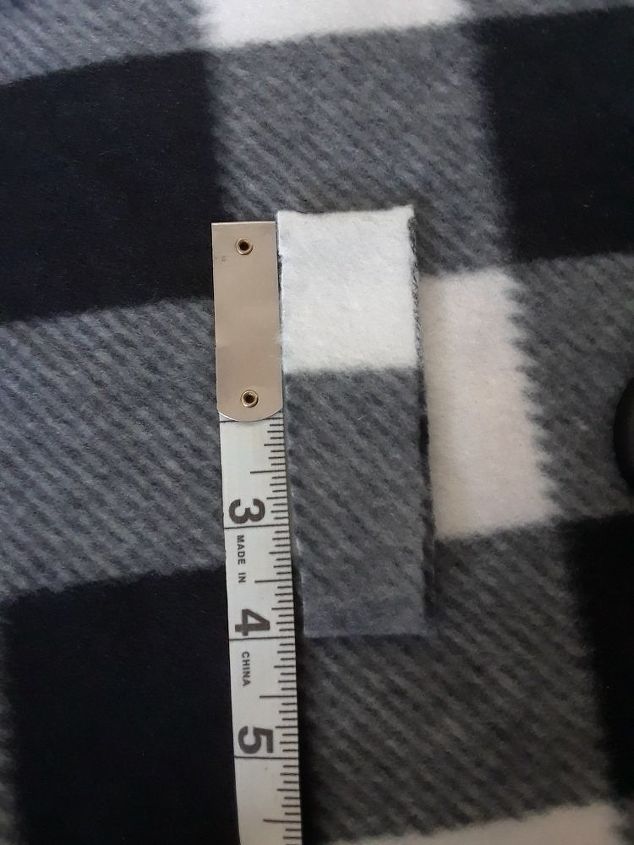
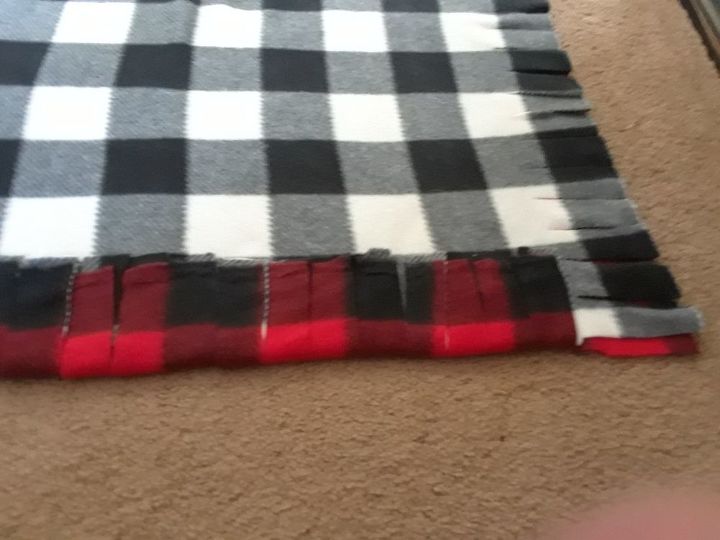
- Using a scrap piece of fleece and my measuring tape I cut out a 4"x 1 1/2" piece of fleece as a template. This was my template for my cuts into my blanket.
- Using the 4"x1 1/2" piece that I just cut, I placed the template right beside the large 4"×4" square space in the blanket.
- Using sharp scissors I cut a slit in the fleece.
- I moved my template down the line making a slits as I went. It should look like a fringe all the way to the next empty square space.
Fringe
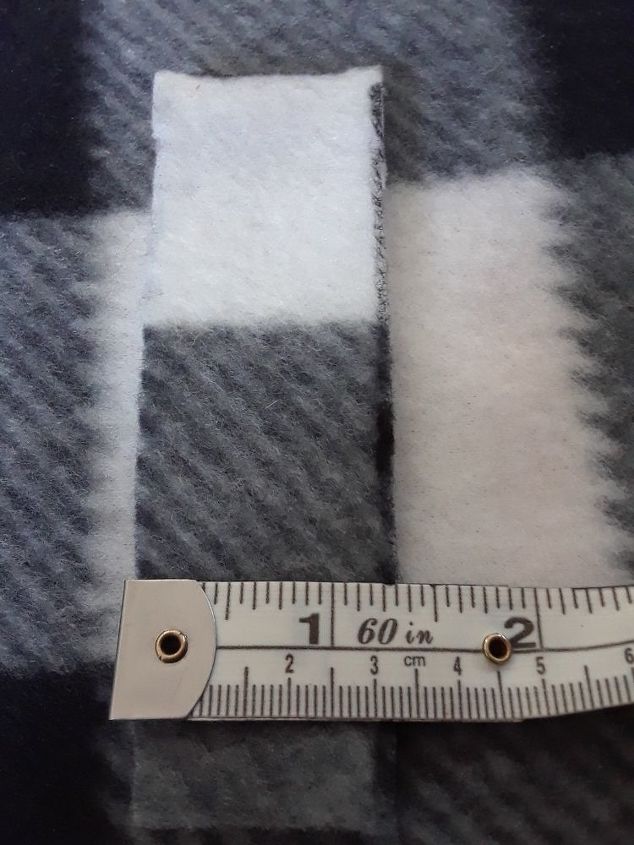
- Moving along to each side continue with the template and make a fringe on both pieces of fleece all the way around the fabric.
- After all the fringes are complete you want to fold up the fringes to touch the blanket.
- Using your scissors cut a small verticle slit. Enough so the fringe of fabric will go through. About the length of your index finger nail. Do this all around the blanket to each piece of fringe.
- When all the way around and all of the fringes have been slit, taking the fringe that faces you, turn it into the slit and pull. This will make a nice loop but not a knot.
- Do this to each piece of fringe until they are all pulled over and into their place. They should be taut but not pulled too hard.
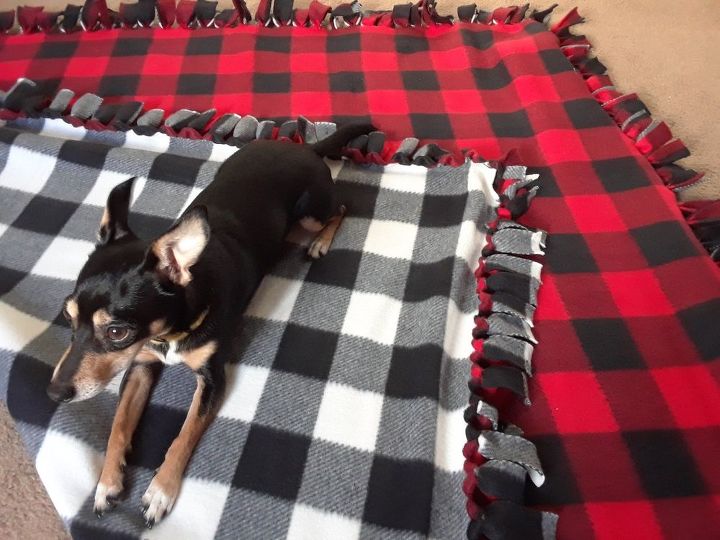
- As you can see by the flip side of the blanket, using a contrasting fleece makes it fun and it seems to compliment the room I made it for. The loops are not tight and when using it to lay down, there aren't any knots to make you uncomfortable.
- Easily washable and is very warm.
Resources for this project:
See all materials


Any price and availability information displayed on [relevant Amazon Site(s), as applicable] at the time of purchase will apply to the purchase of this product.
Hometalk may collect a small share of sales from the links on this page.More info
Comments
Join the conversation
8 of 33 comments
-
After all the “fringe” is cut I’m not sure where the vertical cuts should be. A visual would help. Thank you.
-
I did this for a dog bed I stuffed it with stuffing inside both sides together it worked out great


Frequently asked questions
Have a question about this project?
Does the slot go to the top of the fringe as it is folded on the blanket? Do you cut the slit through both pieces of blanket?
Above, you stated that you tied them together- in response to Phillis asking where the slit goes that you push both fringe pieces through so there is no knot. Is the slit for the fringes to go through midpoint on the width of the fringe but on the body of the blanket? That is what I was picturing. Maybe a single picture of that would help? Thank you so much!
I think we are all confused about the slit. Please can you assist us. Many thanks