


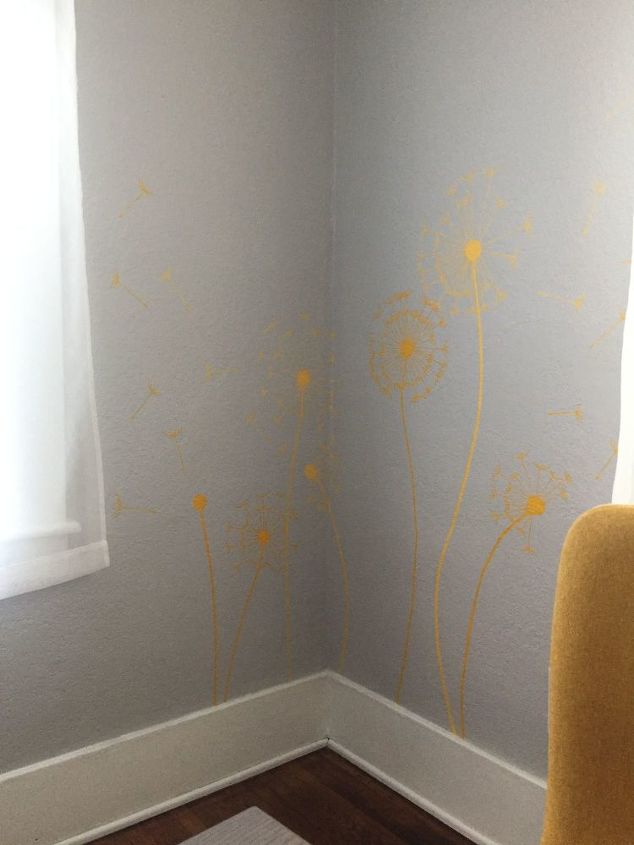
Hand-painted Dandelions on Knockdown Textured Wall
Why dandelions? Well, for several reasons. I’m generally not a flower-type person. I love them but not on my clothes, or walls. I prefer geometry and shapes and patterns. In this case, however, I needed something more cheerful, delicate and positive. It also had to do with placement. I’ve set my eye on this corner between two windows that seemed too empty and needed something… It’s what you see when you walk into the dining room and I wanted it to set the tone for the entire place. I don’t know how and when exactly I got the idea but as soon as it popped in my head, I knew exactly how it’ll look like. I just needed to execute….somehow.The (small) problem is that I don’t draw. Not on paper, nor on a computer. I’m not good at it. But I needed to find a way to draw/paint dandelions on a knockdown textured wall. In theory, it shouldn’t be that hard – it’s just a bunch of lines. But in reality it’s a little more complicated when you don’t have the skills. But, when there’s a will, you’ll find a way!
First, you need to know what it’ll look like. If you can draw it on paper first, great! Look for pictures online and get some inspiration. If you’re set on dandelions, there’s a dozen different wall sticker designs you can get ideas from. If you’re evaluating between applying a sticker and painting yourself, look at the pros and cons of each. Painting gives you more control over design, size and color. But it can be more difficult than just applying a sticker on the wall, depending on how elaborate your design is. Here’s how I got mine done.
STEPS:
It helps to know the proportions of the plant on the wall – how tall will the stem be, how close the plants will be to each other, etc. Mark guiding points on the wall with a pencil.
If you can freehand the stem and seed head, go for it. I tried and failed, so I used painter’s tape. Cut in into narrower stripes.
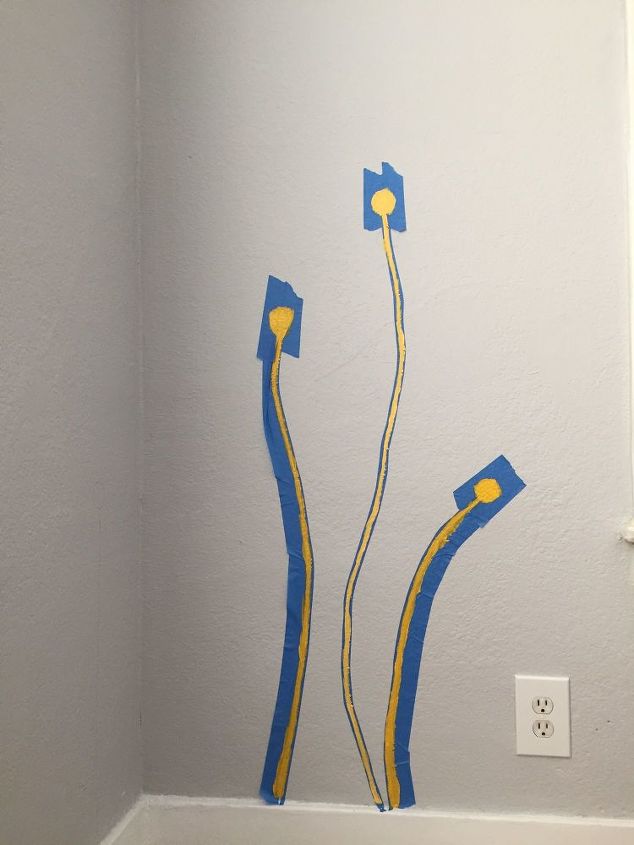
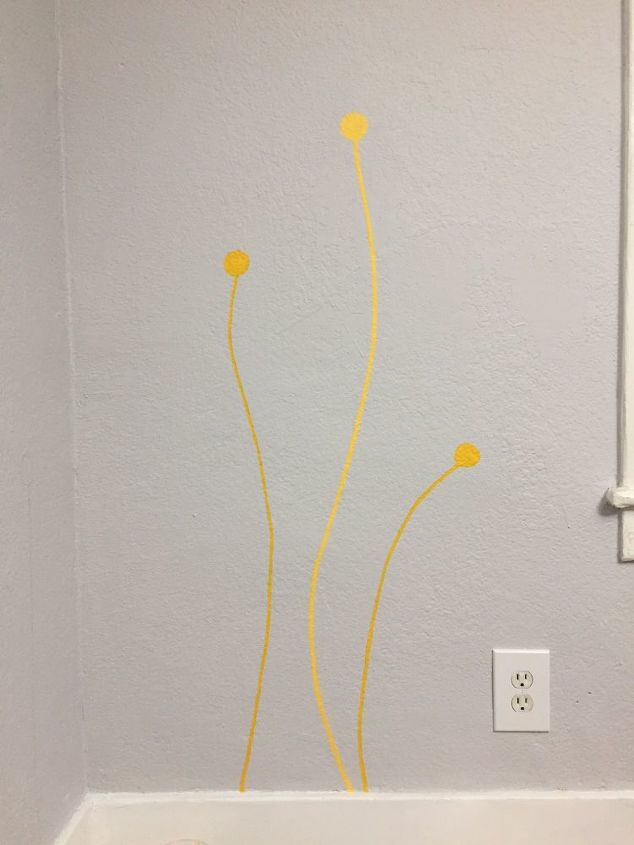
Paint the stem(s) and reapply several coats if needed. Let it dry and remove the tape.
Use a fine point brush to do touch-ups where needed.
Freehand the seedhead if you can. Otherwise use the tape to make a circle.
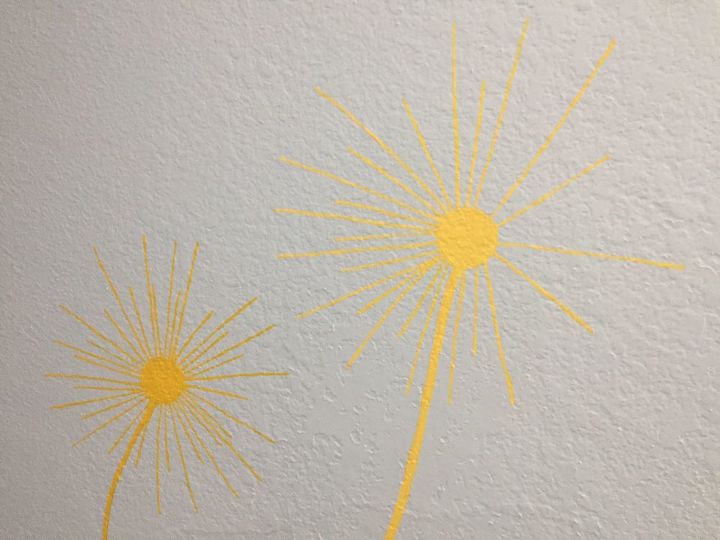
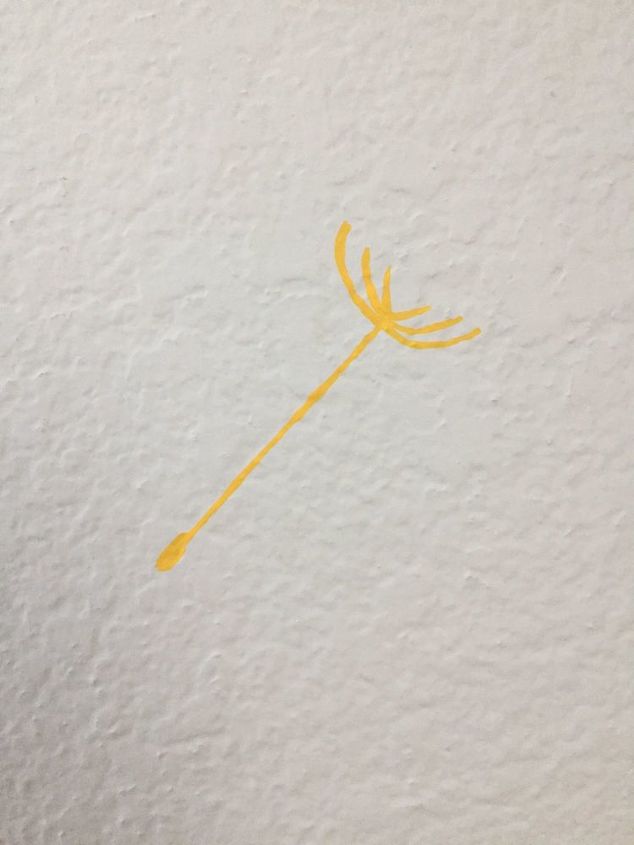
Once dry, start drawing the straight lines for the floaties – distance them as far apart as you see fit, fill in a full circle or not, make two rows or a single one. In other words, do whatever you want. There’s no rules. I free-handed this part and started from the left side and worked my way around. Make sure you give the paint time to dry if you hand is touching a section you already painted.
Now on to the tips – the inverted umbrellas. Again, your choice on how many ‘hairs’ you want to add to each floatie. Most of mine had 6. This will take some time so be patient. Work your way around in the same direction as the previous step.
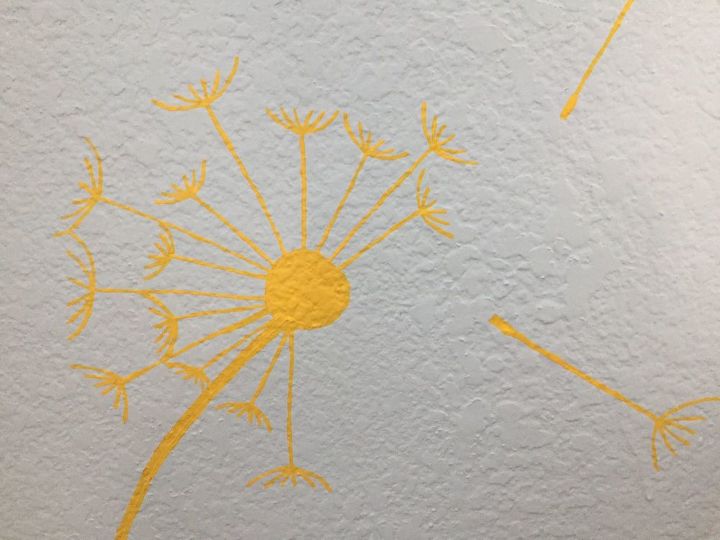
If you want to make some separated floaties from the flower, now is the time.
Not everything might turn great, and if you need to do touch-ups, use a fine brush with the wall paint color and cover up any unwanted parts. Redo if needed
This whole project is a bit tedious and might take some time. The great thing about painting on walls is that it isn’t permanent if you don’t want it to be. You can remove, or make adjustments as much as you want until you get to a result that pleases you.


Frequently asked questions
Have a question about this project?