


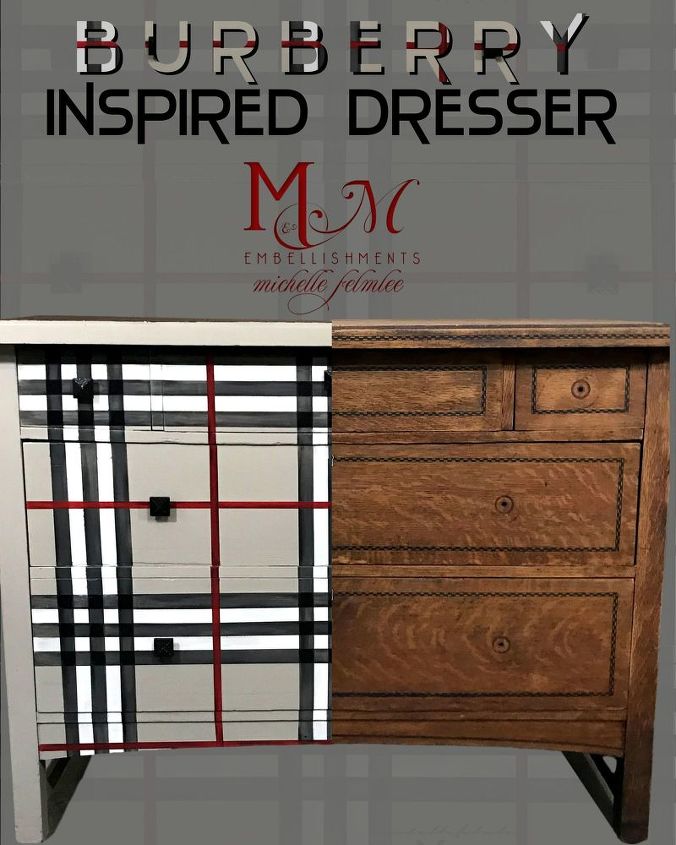
Burberry-Inspired Design on Vintage Dresser

Hello all!!! It's been awhile since you have heard from me, and I apologize! Now that the holidays are done and gone, and I have my 2019 goal of being more tuned-in to my followers, I wanted to share with you one of my latest pieces!
I'm thrilled with how this piece turned out, and I hope that I can give you enough direction if you want to give it a try!! So, let's start at the beginning...
I bought this nice, heavy antique dresser from a sweet local lady.
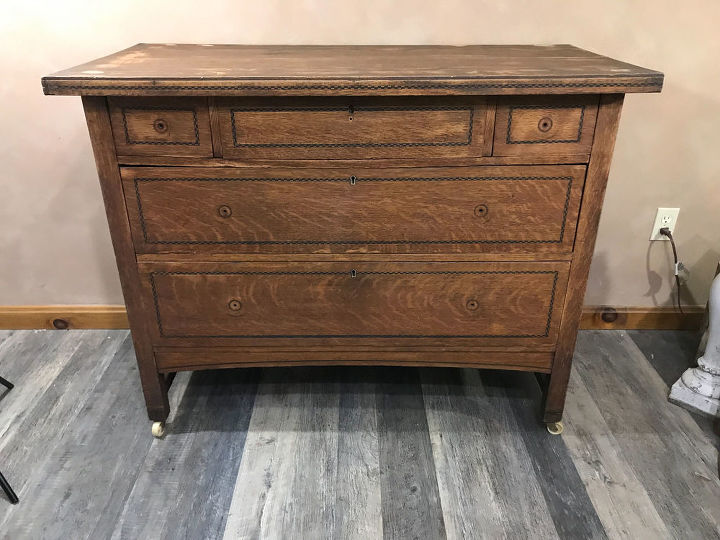
I did my thorough cleaning inside and out on this piece, which includes cleaning with Awesome Cleaner, sanding, and cleaning again with a mixture of 50/50 water and white vinegar.
I then primed the whole piece with my Wise Owl Stain Blocking Primer. This was old wood and when you are painting a lighter color over older wood, you want to seal in those tannins so they don't bleed through your paint. The primer will also help give a good surface for the paint to adhere to.
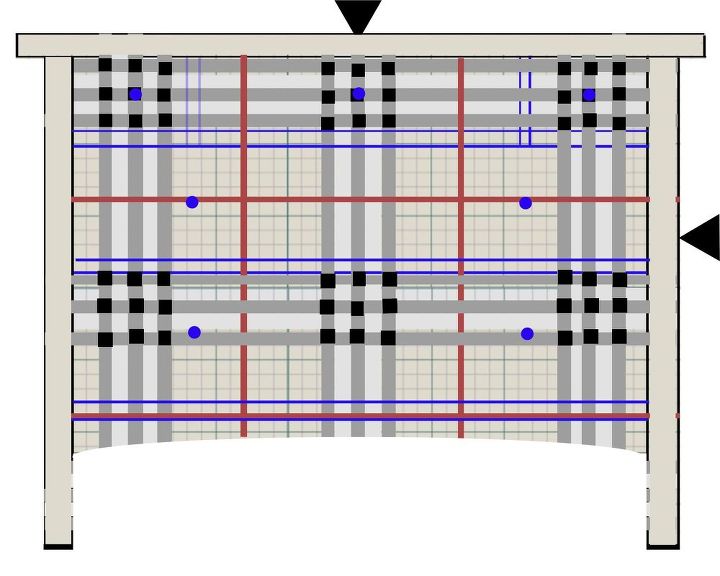
Last month, I was playing around with a lot of different plaid designs on furniture and trays. I wanted to try out this design on the insert of a tray before I ever attempted it on a large piece to make sure I was capable of pulling this off!
So before I ever got to the painting of the dresser, there was a LOT of pre-planning involved. This planning took more time, I think, than the actual painting.
I mapped it all out and this is what I came up with for my plan
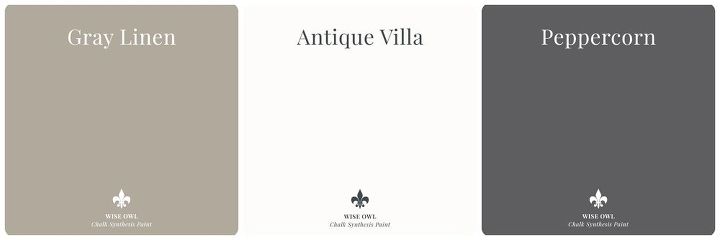
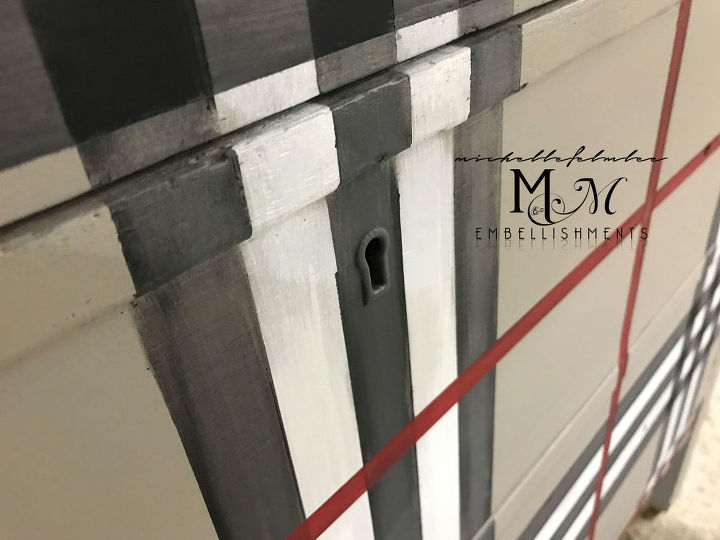
So, after the whole piece was prepped, I painted the everything in Gray Linen. After two coats of Gray Linen and enough time for the paint to dry well, I started the taping. I used Frog Tape for delicate surfaces to keep the paint from pulling up when the tape was removed. You will want to figure out what size tape you need (and FYI, a LOT of tape was used in this design)!
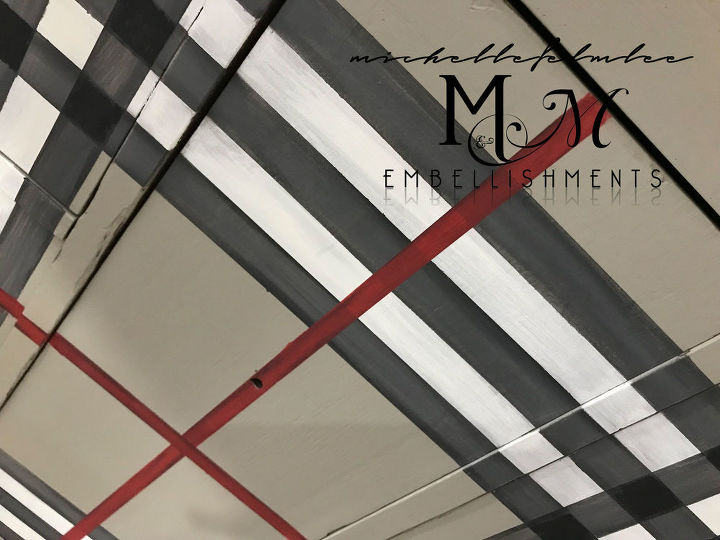
I don't have a video or any type of tutorial for this, but I can tell you the order that you want to paint. Start with your white stripes first, then do your gray stripes. Then you want to find the places that the two gray stripes intersect and paint those black.. You want to finish with the red stripes.
I used Wise Owl Antique Villa for the white, Peppercorn for the gray stripes, Black for the black and Antique Red for the red pin striping.
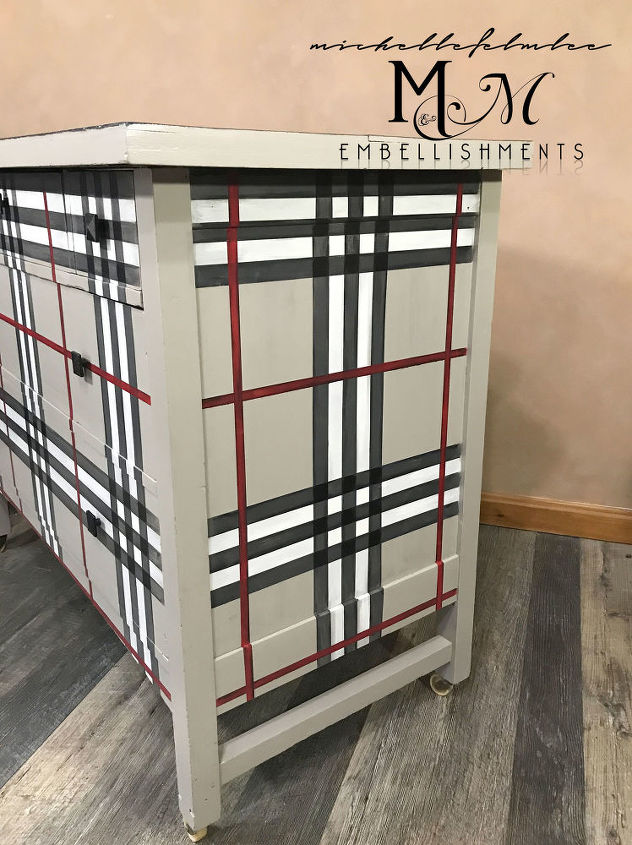
Depending on your piece of furniture, you can decide if you want a border like I have or just continue all the way around from the sides to the front with the design. I had these distinct edges, so I thought it best to make those a solid border.
I decided to paint the top a dark color. I started with the Pepercorn, but it appeared lighter than I liked, so I switched it out to our Carbon.

I also cleaned and refreshed all of the drawers with our Furniture Salve. If you haven't tried our salve, you will be amazed. The first thing you will notice is the absolute wonderful aroma (available in 6 scents and an unscented). It restores old wood, removes oxidation from metal, revives leather, cleans stainless steel... so many uses!!! Use it as your furniture polish instead of Pledge!!!!!! A little of this magical salve goes a LONG way!!!

I sealed the whole piece in our topcoat, which is a quality, durable sealer!!
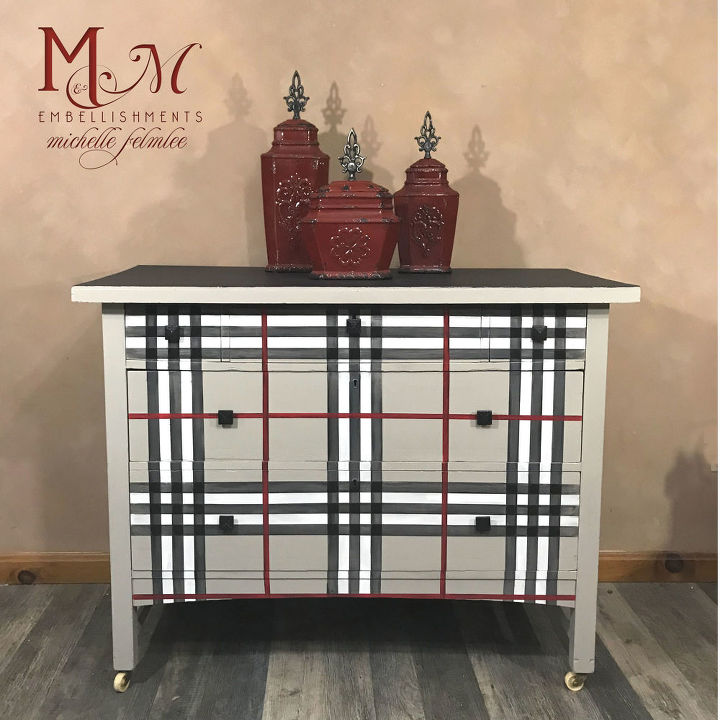
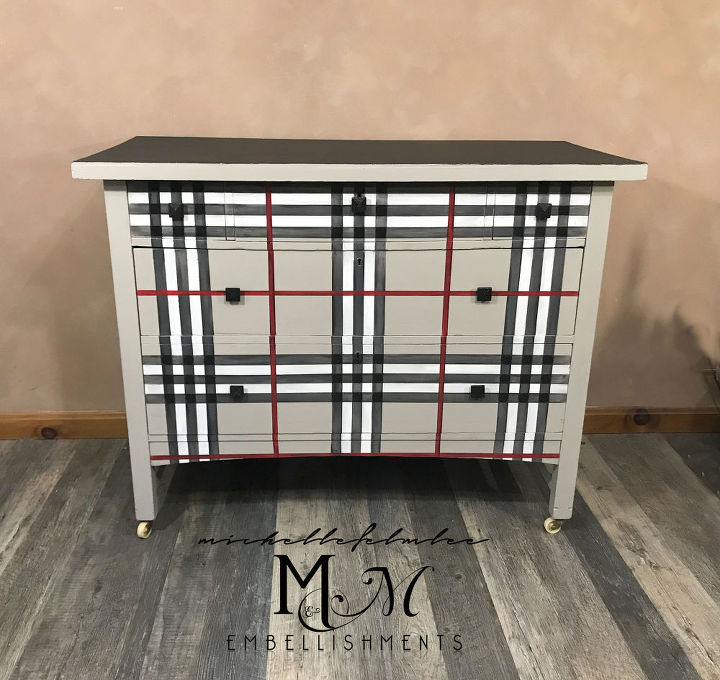
Here is the finished piece!! I love it!!! This piece is still available (at the time of writing this), so if you are interested, be sure to reach out to me!

If you enjoyed this makeover, you might want to check out my other creations over at my website (link below). You can also find me on Facebook, Pinterest, Instagram and I have a shop on Etsy.


Frequently asked questions
Have a question about this project?