


The Absolute Easiest Wooden Fence Installation Tips

Fences are a lovely addition to any landscape. They’re a great way to add curb appeal, frame your yard, provide privacy and a safe enclosure for pets and kids to play. Unfortunately, prefabricated fence panels and professional contractors can be budget busters, but don’t let that get in the way of your outdoor decorating dreams.
We can show you how to build your own wood fence with these easy and affordable ideas.
DIY fence installation isn’t as hard as it looks. As a matter of fact, the process can be broken down into a few very simple steps and, depending on the area you’re working on, it can be accomplished in one weekend.
So whether you gravitate toward traditional split rails, pickets, privacy styles, or something a little more rustic, like one made from pallets, with a few tools and a little bit of DIY, you can have the fence of your dreams in no time flat.
See post: Single Girl’s DIY|How to Build a Two Rail Wood Fence
Design And Prep Work
Before you get started building your fence, you’ll need to decide exactly what you are going to install, so you can design a layout, measure your area and gather your supplies. The style of your fence slats: split rail, pickets or privacy boards, for example, the height of your fence, and the addition of gates or arbors will need to be set before you can proceed with the actual installation.
Other important considerations are your property line setbacks, town codes or permit requirements, and any homeowners’ association rules that may apply to you.
Measurements
Once you’ve settled on a plan for your wooden fence installation you’ll need to measure the perimeter of your area. Mocking up exactly where the fence will be placed with either small posts and string or spray paint is an excellent way to visualize the placement. Measure out exactly where each fence post will be set, keeping in mind the spacing necessary for long runs, corner posts, and gates, if you will be adding them. You’ll also need to measure to determine the number of wooden boards, slats, or cross beams needed for your project.

See post: Pascal Tremblay|Split Rail Fence - How to Build a Cedar Split Rail Fence?
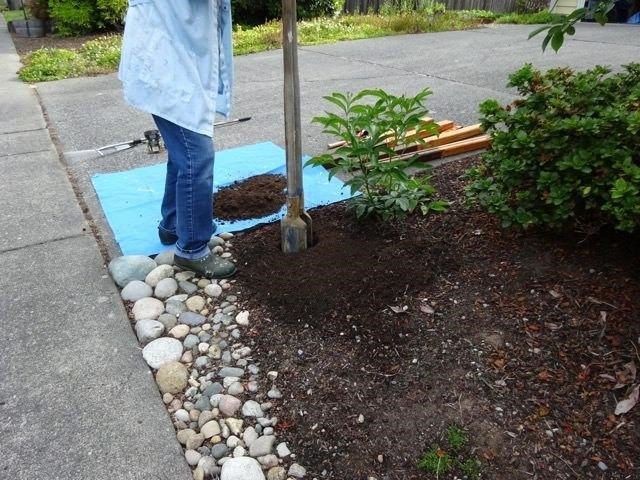
How to Install a Fence Post
Installing a fence post is probably the most important step in the building process. It is the foundation for the rest of the fence and it needs to be properly secured in the ground to ensure the stability and integrity of the slats.
Digging Holes
Before you break ground, it’s highly recommended that you call the utility companies and have them mark off any underground lines, pipes or wires. You never want to dig without knowing where they are.
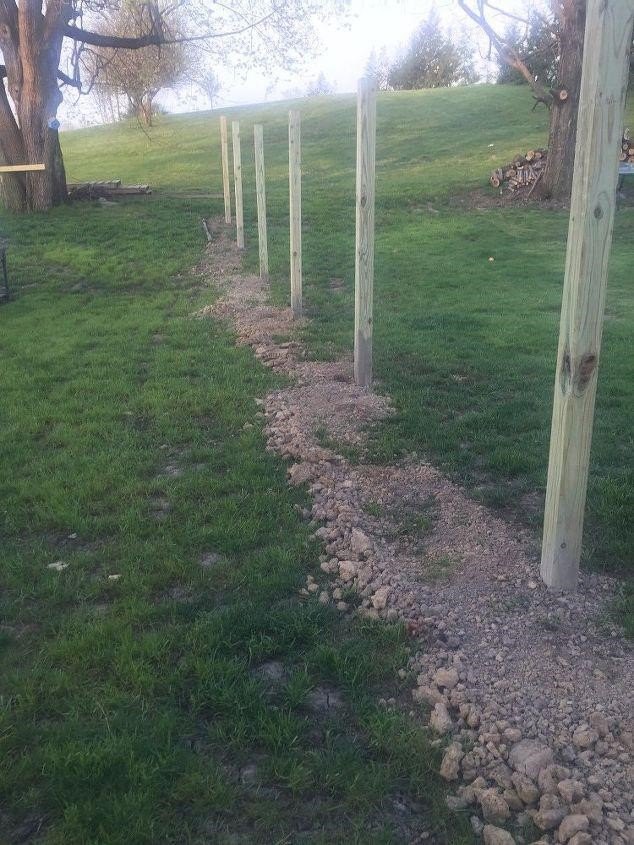
Start by making a hole, approximately two to three times the diameter of the post and about half as deep as your pole is tall. A post hole digger is a handy tool for this purpose if you only have a few holes to dig. If you’ll be digging a large number of holes, renting an auger may be worth it.
See post: Single Girl’s DIY|How to Build a Two Rail Wood Fence
Cementing Them in Place
Pour a few rocks or a bit of dry cement mix into the hole and then fill it with wet concrete mix, prepared according to the directions on the bag.
Place the post in the mixture and make certain that it’s set properly for the desired height. You also want to make sure it’s level with the other posts and that it’s in line with them, as well. Remember, your fence slats will only be as straight and level as your posts.
See post: Sandy|DIY Privacy Fence In Backyard
Adding Fence Panels, Pickets, or Rails
When the posts are set and dry, it’s time to install your rails, slats, panels, pallets, or whatever you plan to use to create your wooden enclosure.
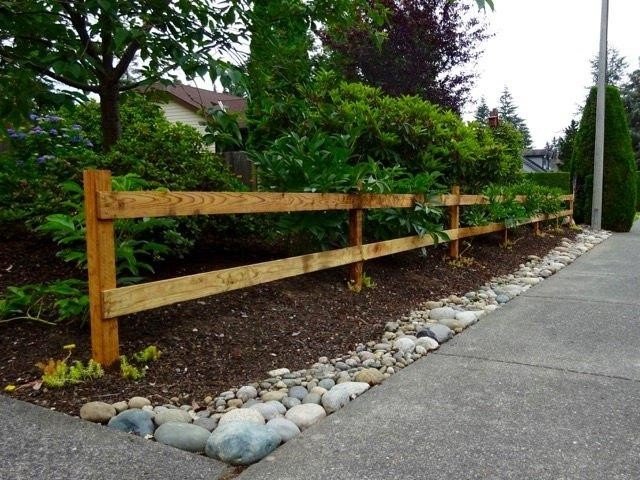
Installing a Two Rail Fence
A two-rail fence is one of the simplest to build and appropriate when a solid enclosure isn’t required. Once the posts have been cemented and set, rails just need to be cut to size and then nailed or screwed onto them. The kind of nail or screw used will depend on the type of wood you’re using to construct your fence. Generally galvanized are best for outdoor unfinished wood.

See post: Single Girl’s DIY|How to Build a Two Rail Wood Fence
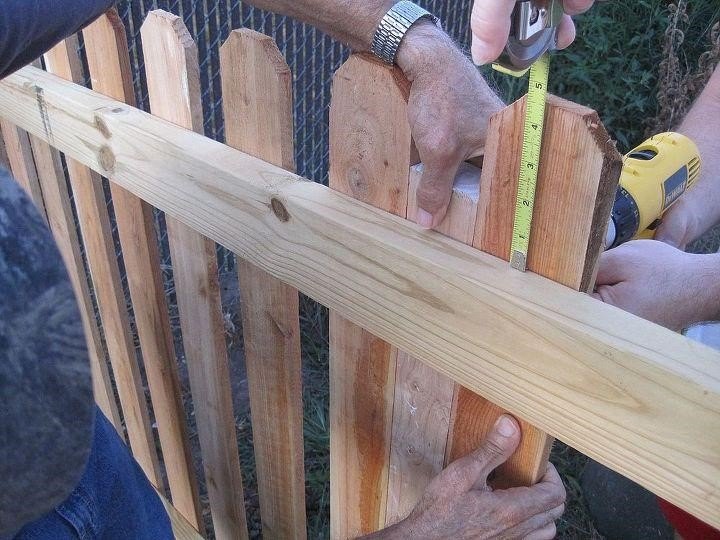
Installing a Picket Fence
Picket fences are a wonderful way to add curb appeal or a decorative accent to your home. They’re also useful when you want to enclose an area and privacy isn’t an issue. While prefabricated picket panels are available in many home hardware stores, building a picket fence is a breeze.
Once the posts are in, fasten two horizontal cross beams between them to create a frame for the pickets. Using a level, make sure the beams are straight before nailing or screwing them onto the posts. Next, cut the pickets to the desired height. Depending on your landscape you may need to trim the bottoms if you want the top of the pickets to be level. To create a uniform space between each picket set a standard measurement or use a board to help with spacing. The last step is to attach the pickets to the beams.
See post: Jennifer @ Decorated Chaos|Tips for Building a Fence
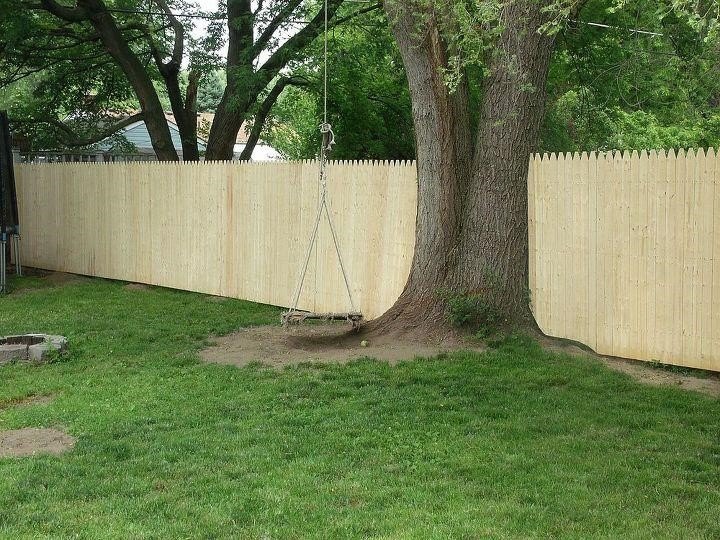
Installing a Privacy Fence
A privacy fence is installed just like a picket fence, except there is no space in between each slat. Privacy fences are often much higher than picket fences. Therefore, they may require the addition of a third cross beam to support the fence slats and panels. After the cross beams are in, the slats are cut and nailed into them. Again, if you want the top of your fence to be straight, the bottom of the fence may need to be trimmed to achieve that look.
See post: Kelley Aho Phillips|New Privacy Fence
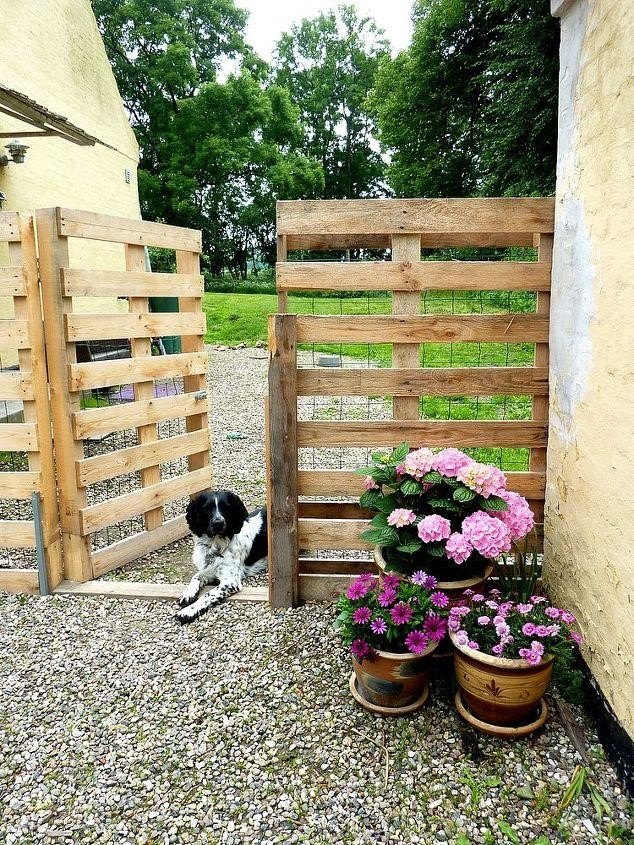
Installing a Pallet Fence
Perhaps you’re a non-traditionalist and you're looking for something a bit different. How about a pallet fence? Pallets are plentiful and readily available and they’re an inexpensive way to access wood. You can either pull the boards apart and nail them individually onto support rails to create a picket fence with space in between each one, move them close together for privacy, or hang the entire pallet, intact, like a fence panel for a rustic aesthetic. If you’re looking for a little more interest, you can mount the pallets so the boards are horizontal.
See post: Siff S|Make a Pallet Fence that will cost you nothing
Chain Link Fix
So you’d love to have a wood fence, but there’s already been a chain link fence installed on your property and you don’t want to go through the hassle and expense of ripping it out? No worries, you can still have the warmth of wood with a little ingenuity. Just grab some bamboo screening, some wire, or zip ties and fasten the two together. The result is a charming facade with the structural benefits of the chain link. It’s a quick and inexpensive way to add privacy and curb appeal without adding posts, slats, or rails.
See post: Barb Rosen|DIY ~ Beautify a Chain Link Fence With Bamboo!
And there you have it, the easiest ways to build and install a wooden fence in a few simple steps. Plan, measure, dig, cement, and nail your way to a functional new landscape for a fraction of the cost of employing a pro. How fabulous!
Are you looking for some more fence installation tips or have questions? Have you installed your own fence and want to share it with our community? Well then check out Hometalk. We have ideas, answers, and a place for you to share your DIY with us!
Written for the Hometalk community by: Kim | Exquisitely Unremarkable
Comments
Join the conversation
-
Hi,
It's indeed hard to express the real feelings in a few words of the amazing tips you delivered to your fans and readers. Really the tips and guidance you explained here of the green shaped area were so so worth to adore. The design and preparation, measurements, digging holes, installation and other activities were tremendously remarkable and skillful. The photos were also eye-catching with their glaring beauties. Love it simply.
-
I will make a fence like this for sure


Frequently asked questions
Have a question about this project?
My fence panel gate was installed but now has a splintered area. How can i put the wood back together?