


DIY the French Country Look on a Budget
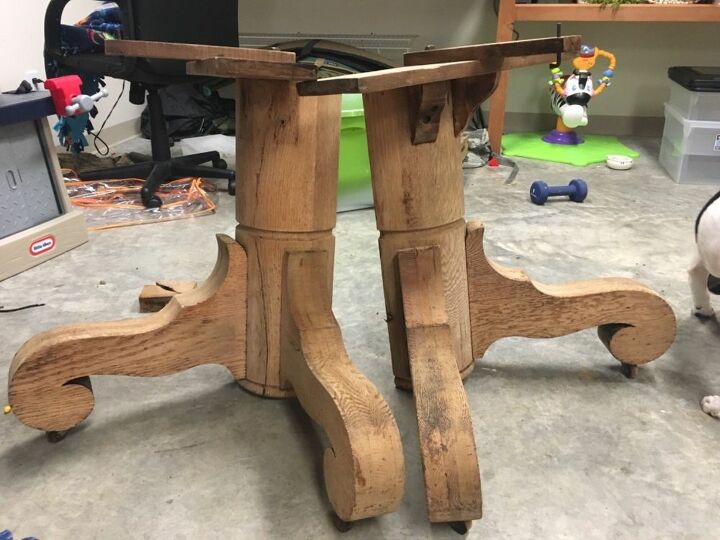
If you’re into DIY, but working on a budget then you NEED to be stalking Facebook marketplace and your local swap pages. I had been looking to change up the feel of our dining room decor, and really had my heart set on a round pedestal table with a gorgeous detailed base. If you’ve looked into purchasing a dining table with any sort of character then you’re well aware they can cost a small fortune. Diligent stalking of the marketplace let me to a table with a gorgeous base for a cool $75. SOLD.
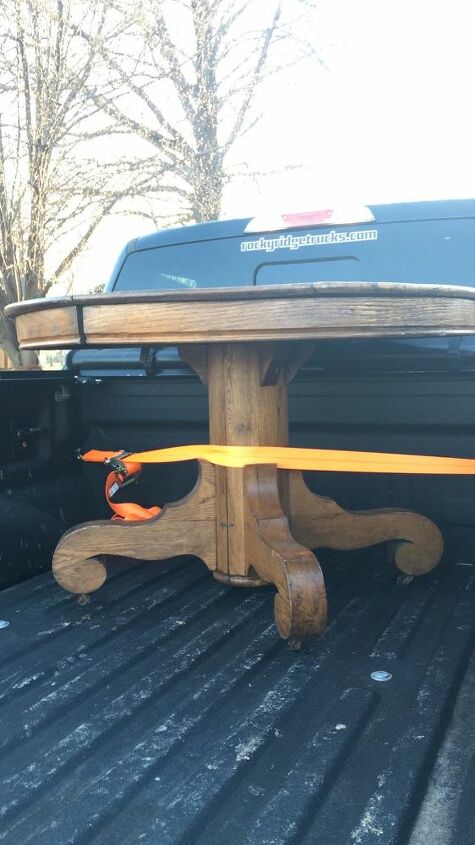
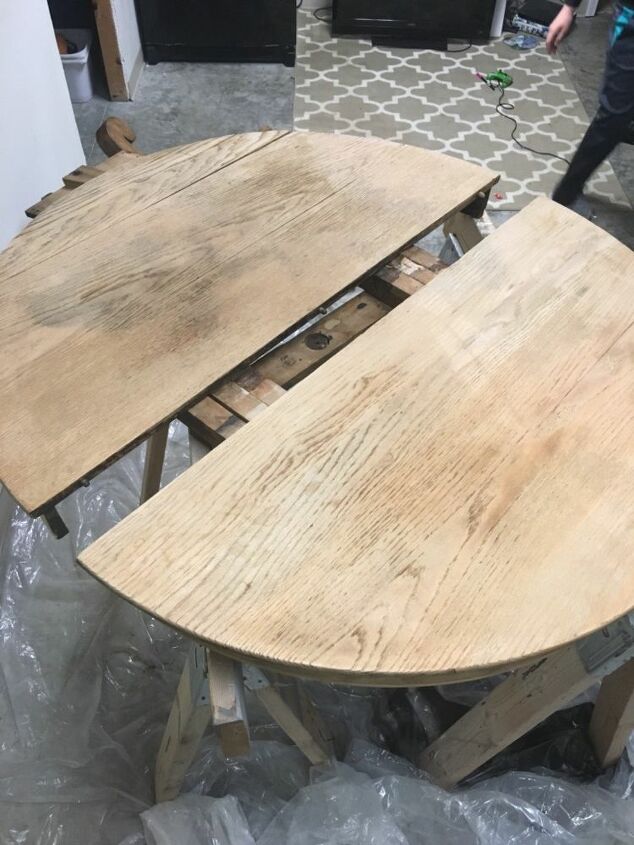
The top needed some SERIOUS work, but that base made my heart skip a beat. Having never stripped a piece of furniture in my life, I naturally chose to tackle this piece as my first project.
Here’s a list of the supplies I used.
- Citristrip
- Saran Wrap
- Stripping pads
- Plastic Scraper
- Old rags
- Drop cloth
- Sponges
- Gloves
- Bleach ( I used regular Clorox)
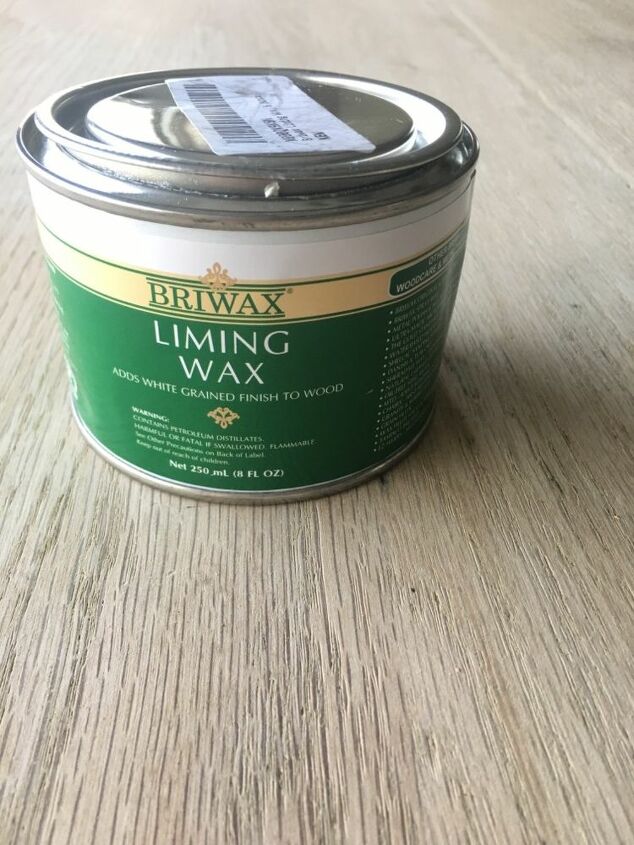
- Liming Wax
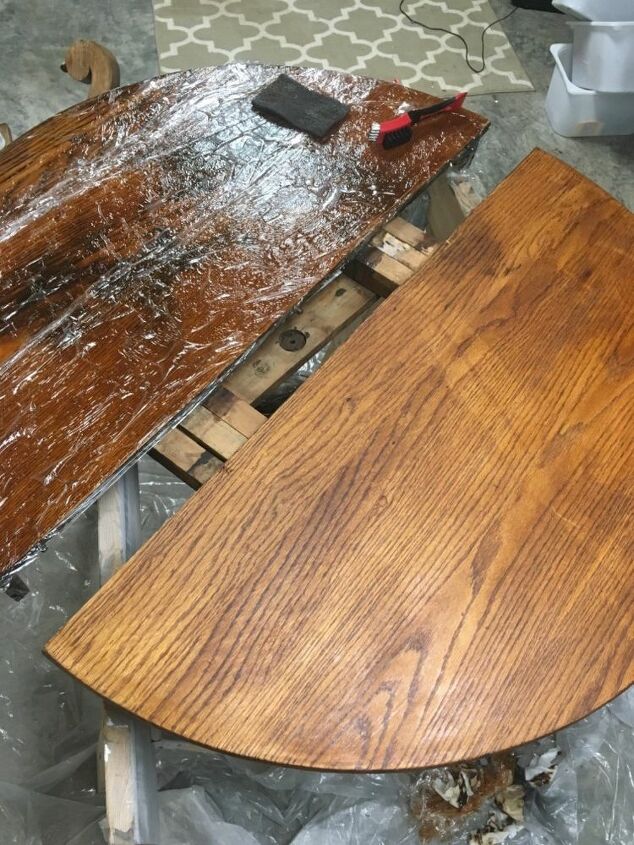
I did my late night Pinterest browsing a.k.a. "research" and found that Citristrip would be the best option to limit the use of harsh smelly chemicals. I purchased both the liquid as well as the spray and got to work.The table originally had a leaf that was now missing and a split base. I dismantled as much as I could to get access to the most surface area possible. I painted the Citristrip onto the top and base using an old chip brush, then used the spray can to get into any nooks and crannies. Multiple DIY-ers recommended covering the piece with saran wrap and letting it sit overnight (shown on the left side of above image).
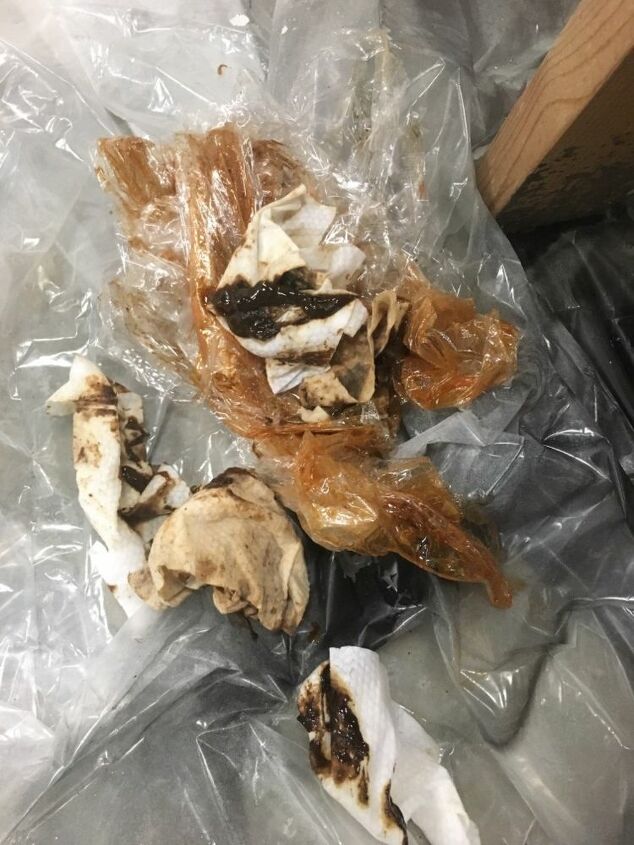
This was the aftermath of an overnight Citristrip "masque." It quite literally resembled something that would come out of an oil filter. I almost threw in the towel at this point, but I had too much invested. I scraped off as much as I could with a plastic scraper, then scrubbed with the 3M stripping pads and a little bit of water. I did a final wipe down with mineral spirits to get any remaining residue off.
After TONS of scrubbing and scraping I was left with this on the top.
and this on the base.
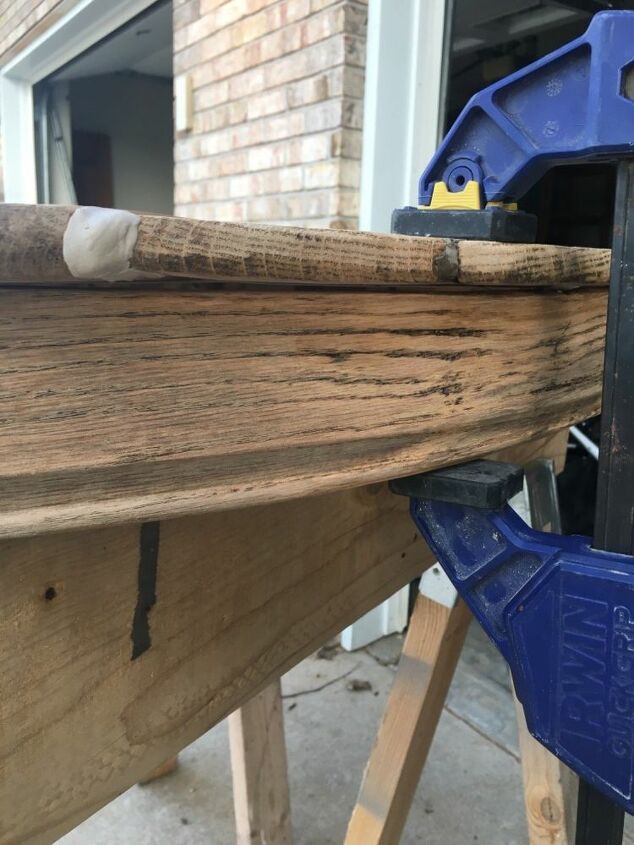
The top still needed some sections repaired. I filled in any substainal missing wood and rot using JB Kwik Weld putty and wood filler.
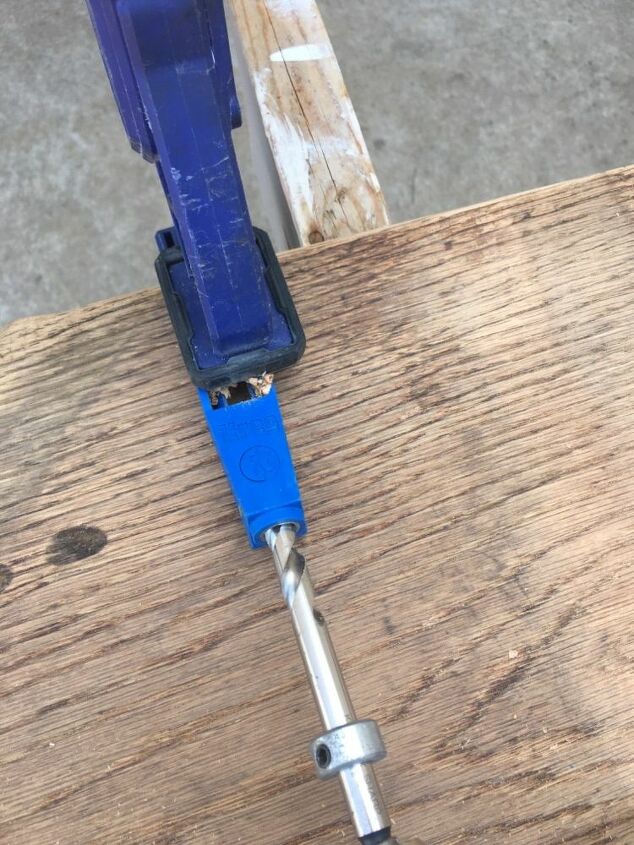
A portion of the top had been broken off at one point, and poorly repaired. A removed that portion of the top, sanded down the old glue and reattached using my Kreg Jig for extra stabilizing.
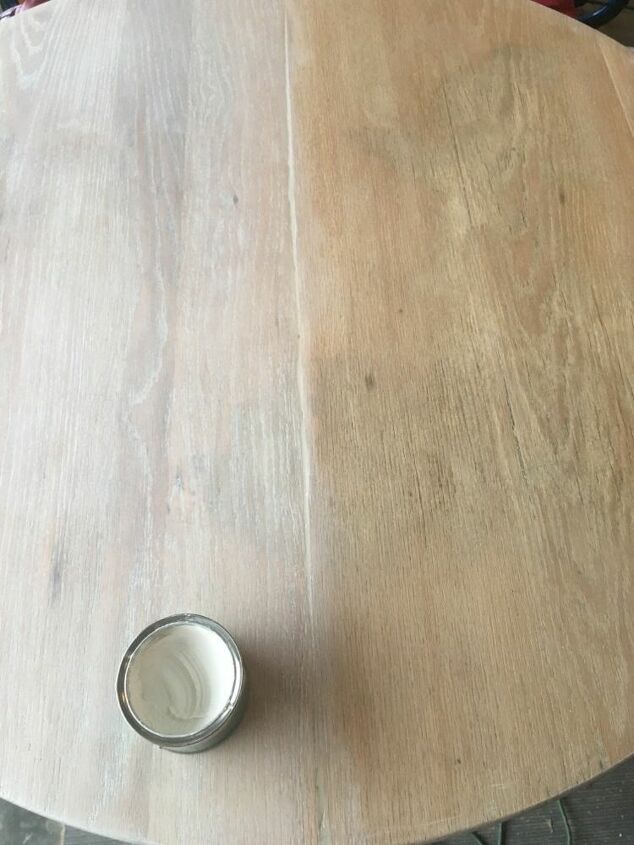
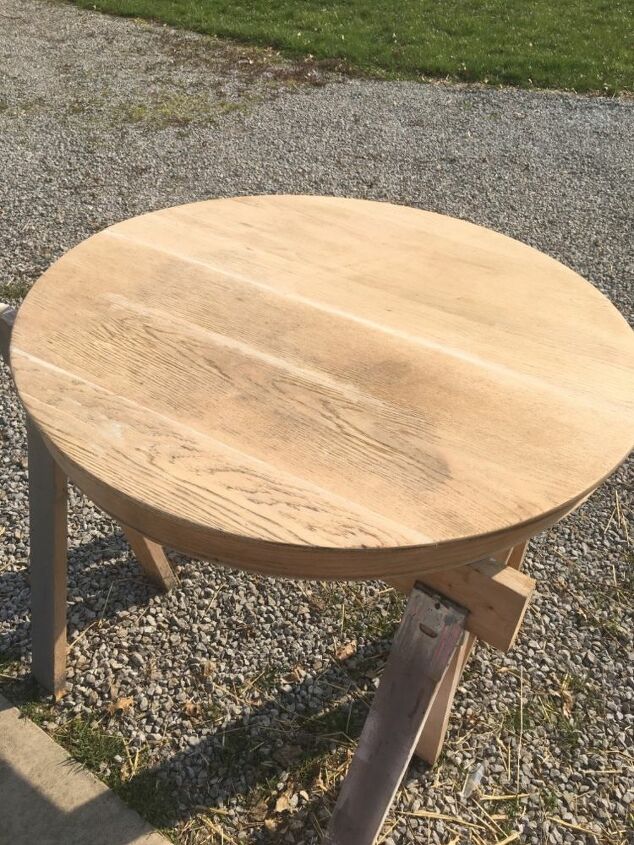
For the bleaching process I simply wiped the surfaces down with 100% kitchen bleach. Be sure to do this outside for ventilation purposes, and use protective gloves. Doing this on a sunny day will speed up the drying process. I bleached with six coats and was left with the lightened wood look you see here on the right. After sanding down with 220 grit sandpaper I applied the Briwax liming wax (shown here on the left side for comparison).
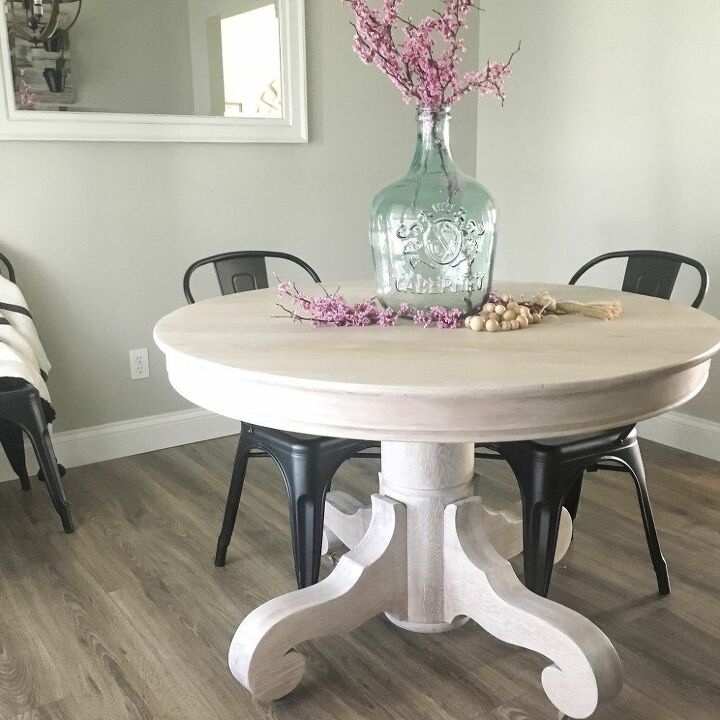
Once everything was reassembled I was left with this beauty! The French Country look on a budget. This was a very time consuming process, but the end result was so worth it. You can see even more after images as well as instructions over on the blog!
Resources for this project:
See all materials


Comments
Join the conversation
-
Absolutely gorgeous!
-
Hi Jessica, this came out beautifully. Thank you for sharing your project. I have the same dining table that I got from a well known shop on sale. Your price is much better :) I have the insert for the center of the table to make it larger. To bad you weren't able to get that also. Always love the design of your chairs too. :)


Frequently asked questions
Have a question about this project?
I have stripped varnish many times with this same method but I have never bleached wood, You really just used standard bleach on the wood? Did you use liquid or the nosplash thicker gel like bleach?
Simply beautiful!! How is it holding up? Did you seal it? If so what did you use? I'm planning to try this with my ugly coffee table.
In our bedroom I have very solid pine furniture, which over the years, has 'yellowed'. The buffet is very heavy, so would have to stay in the bedroom. The coating is just a satin lacquer finish. So I guess there wouldn't have to be too much in the way of sanding away the lacquer (I hope). Now my question is, after a long hunt (I'm from Sydney, Australia) I found some Barkeeper's Friend. Can I use that to hopefully take away the lacquer??? or will it, have to be sanded with sandpaper? Will Barkeeper's take away the yellowing on the wood, or would I still have to use bleach?? Thanks for your help (ps love what u did to the table).