


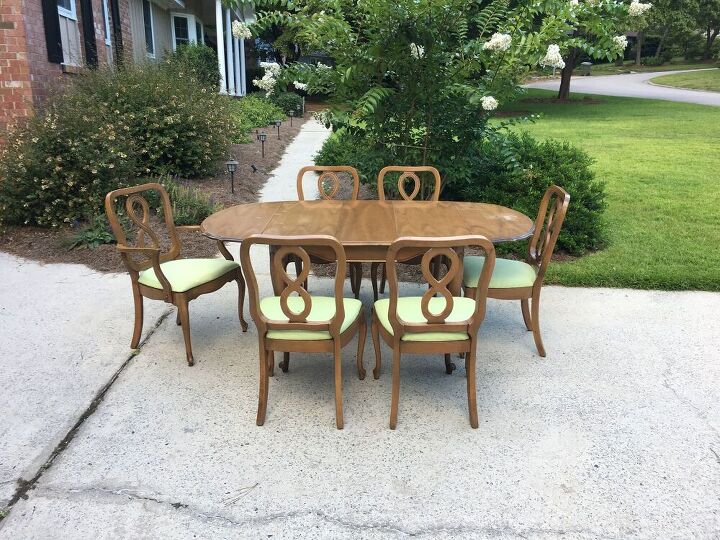
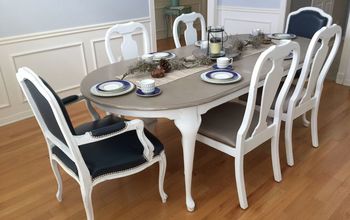
Giving a French Provincial Dining Set Some OOH LA LA

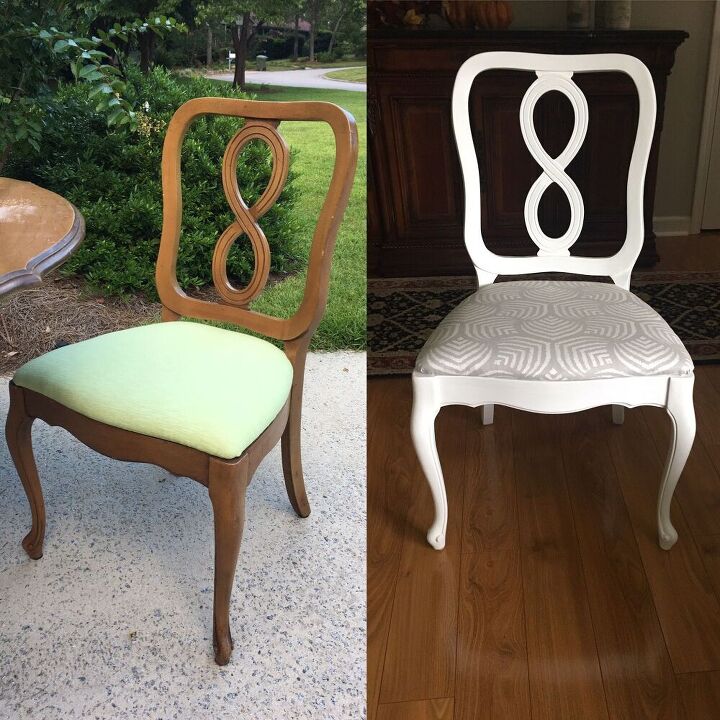
I've always been a push over for any furniture with beautiful curvy legs so it wasn't a surprise that I had to buy this French Provincial dining set. I also LOVED the chair backs!
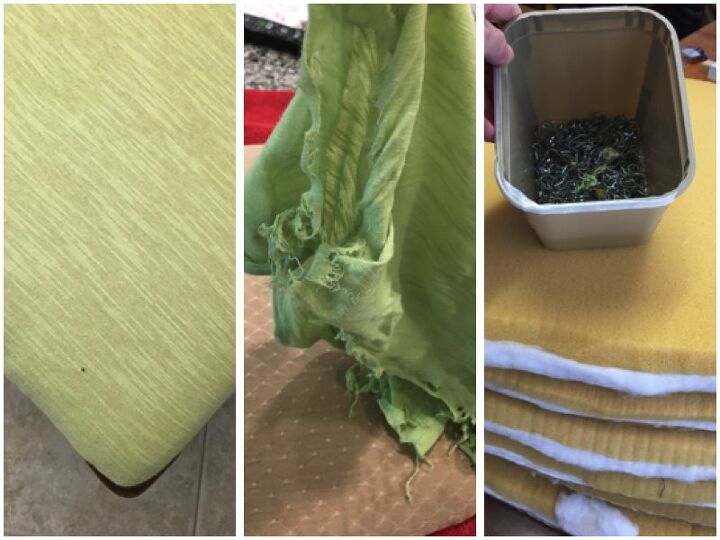
Before cleaning, I removed the seat cushions from the chairs and decided to go ahead and take off the fabric. The first layer was a stretchy tee shirt fabric. The second layer was a nice upholstery fabric once upon a time. This was a job and a half! There were tons of staples. I also numbered the seats and chairs using painters' tape and a marker. This helps to make sure the seats fit when it's time to reattach them.

I gave the table and chairs a good cleaning using Simple Green, a Scotch Brite sponge, and a clean bucket of water.
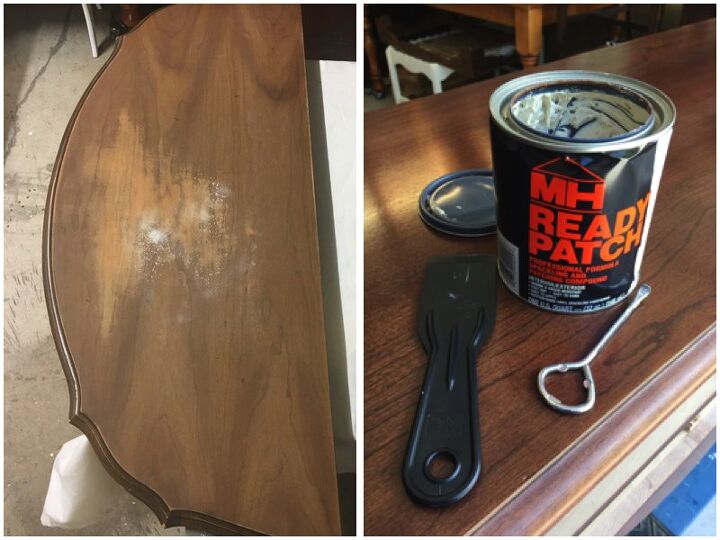
It was time to give the table and chairs a quick sanding using an orbital sander and a 220 grit pad on the table top. I hand sanded the chairs. I wiped down everything with a microfiber cloth. The table top had quite a few deep scratches and chipped veneer on the edge. I removed the drop leaf sides to make it easier to work. To repair the damage, I used wood filler. After the filler dried, I sanded those areas.
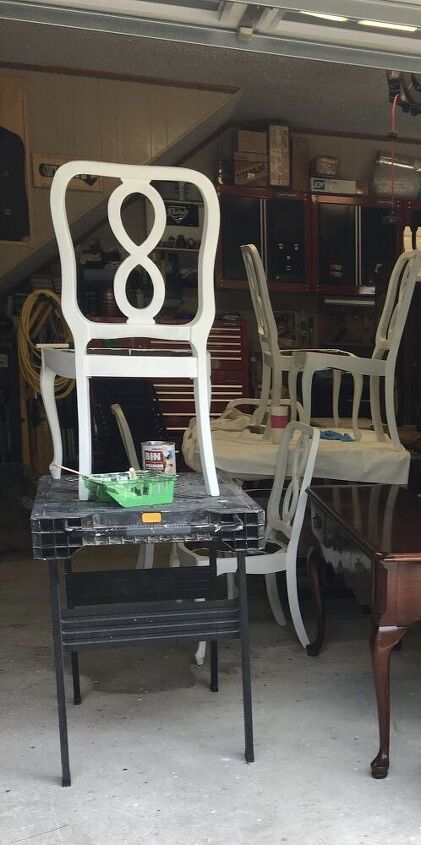
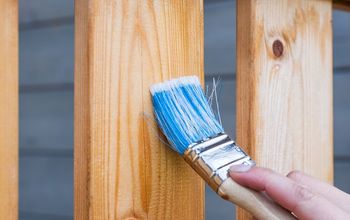
I primed the table skirt, legs, and chairs with my go to primer, Zinseer Bin Primer with Shellac. This primer is great for preventing bleed thru when using light colored paint. I like to use a high density foam roller and then a foam brush to get in the tight spots. I painted on 2 coats and gave them a light sanding in between for a smooth surface.
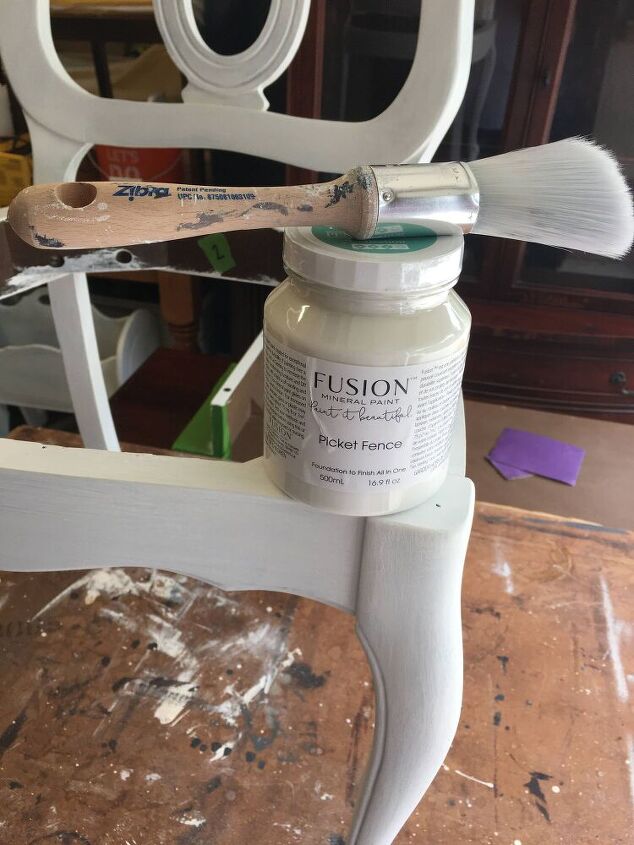
I chose to paint the chairs and bottom of the table with Fusion Mineral Paint in the color Picket Fence. I love this paint because it has a built in sealer. Since I was using a white paint, I applied 3 coats.
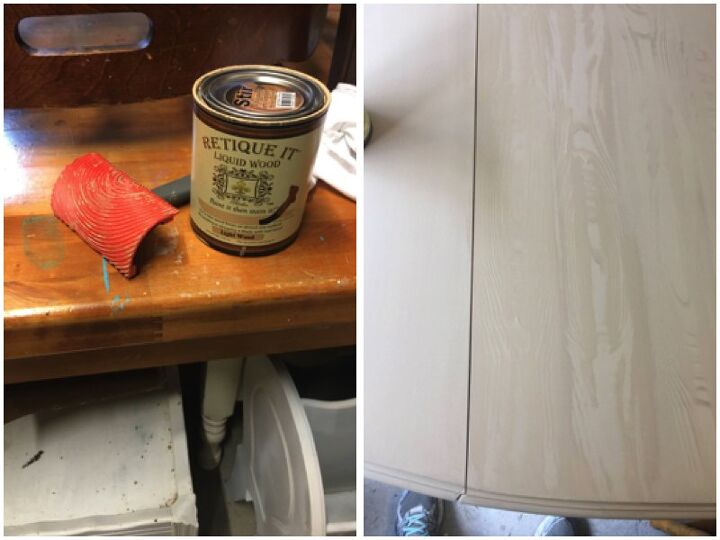
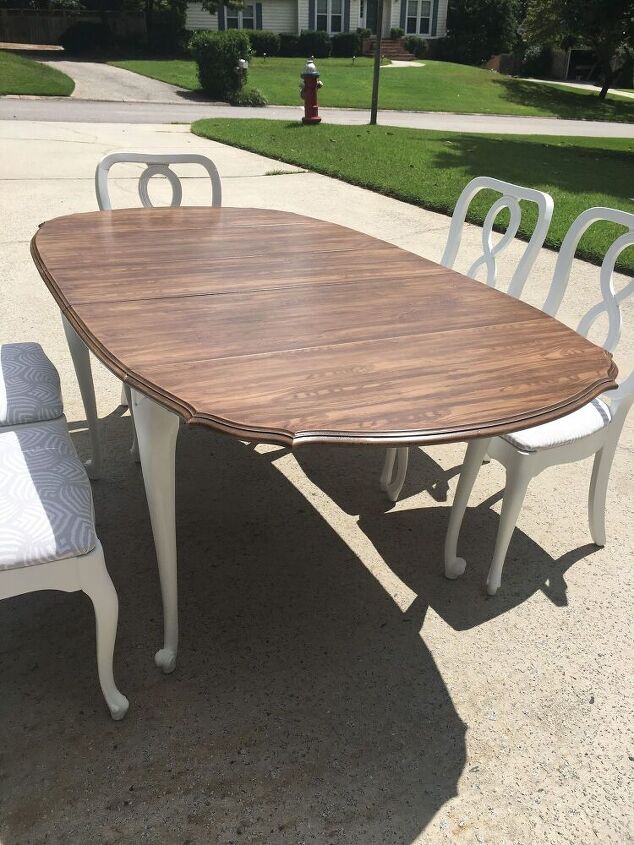
I really wanted a stained top but there was damage to the table top and because it was veneer I was afraid that sanding may do more damage. To solve this problem, I used a product called Retique It. This is a liquid wood product which is applied with a brush. I applied 2 coats of the the Retique It to get full coverage of the original top. Then it was time to create the grains.
This effect is created using a graining tool which is drug across the Retique It while it is wet. You use a rocking motion as you drag the tool. I watched MANY YouTube videos first. Then I practiced on scrap wood several times. You have to PRACTICE. A few things to remember are:
1) Paint it on a row at a time.
2) Use the graining tool immediately after painting a row.
3) Rock the tool slowly.
4) Alternate directions when dragging the tool.
After the finish was dry, I did lightly sand it with 320 grit sandpaper to smooth out the finish.
*In the photo, you will see the side on the left is before graining.
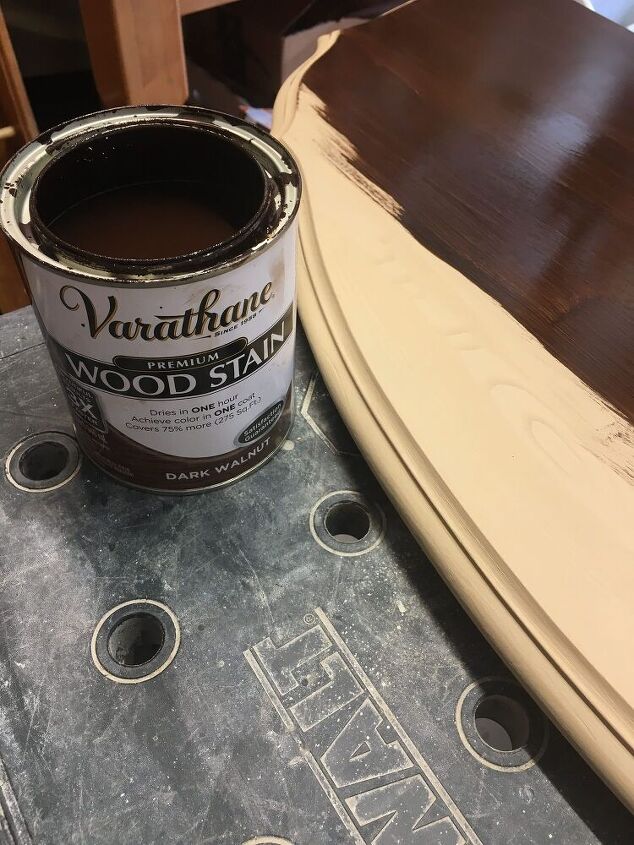
Retique It recommends not using an oil based stain. I used Varathane in Dark Walnut. I applied the stain with a lint free cloth and then wiped of the excess with another cloth. I did have to rub hard to wipe back the stain excess.
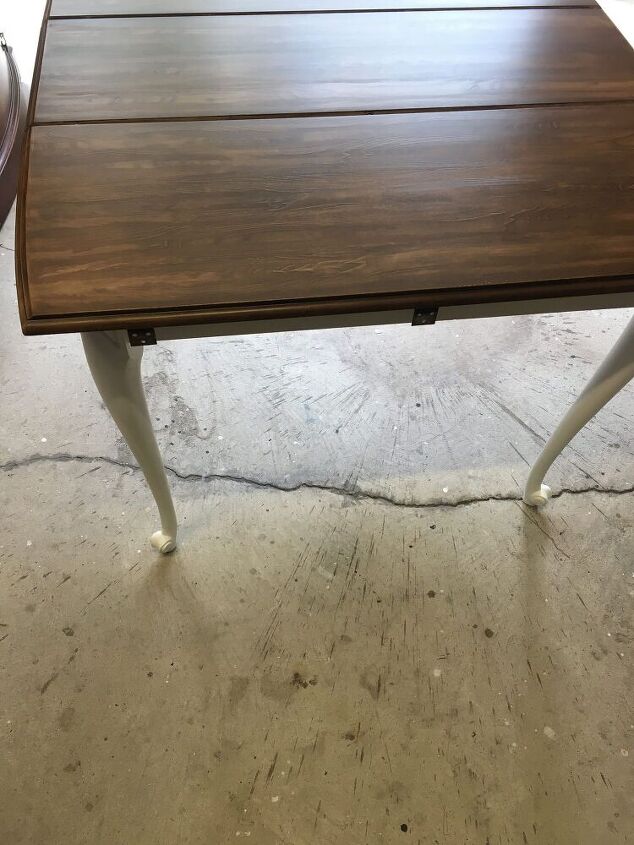
Not bad for my first time!

To seal the table top, I applied 4 coats for Varathane Ultimate Polyurethane in Satin. I use a high density foam roller first. There will be tiny bubble in the finish. To eliminate the bubbles, I then use a foam paintbrush to wipe over the area I just rolled.
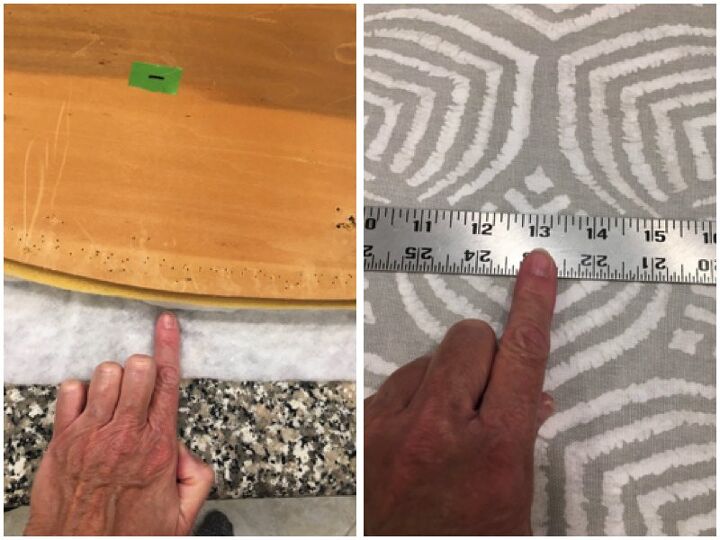
Luckily, the foam on the chair seats was in good condition. I did, however, want to make sure the yellow color did not show through my fabric and give them a little more cush. I laid out my batting and just used my finger to gage how much I needed to fit. After cutting the batting, I attached it with my electric stapler.
For my fabric, I had to make sure the pattern matched and lined up in the center of each chair. I measured from the middle and cut my fabric accordingly. I like to fold the fabric so I don't have a raw edge underneath. This gives the staples more to grip and it just looks neater.
What a difference!!!!

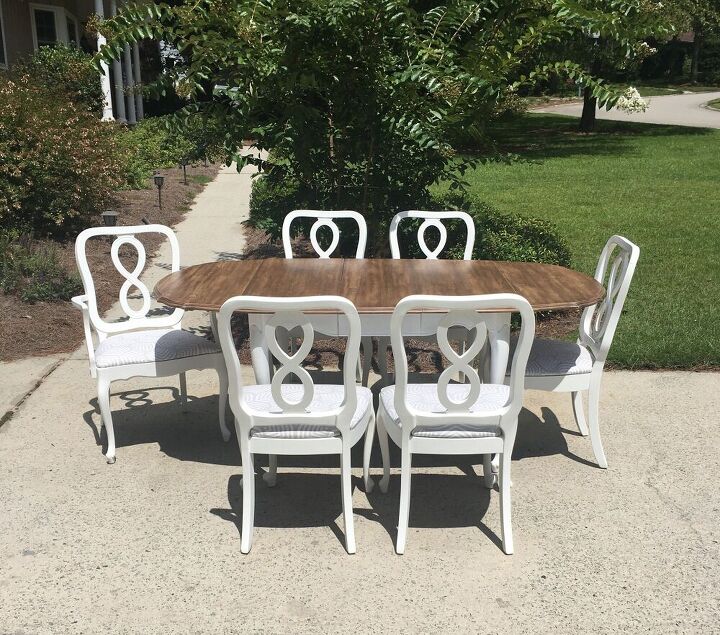
The end result is definitely worth all of the work!
Resources for this project:
See all materials


Comments
Join the conversation
-
Well done! I love those Table Legs !
-
Very nice. I love wood grain and glad you were able to keep top with grain showing. Far too many times paint just gets slapped on everything without honoring the piece and its time period. I love simple green too. Cleans well and safe to use in many areas. Thanks for shary


Frequently asked questions
Have a question about this project?
do you keep this outside to use? or brought back into house
Absolutely beautiful! What is the color of the Retique It?