147K Views
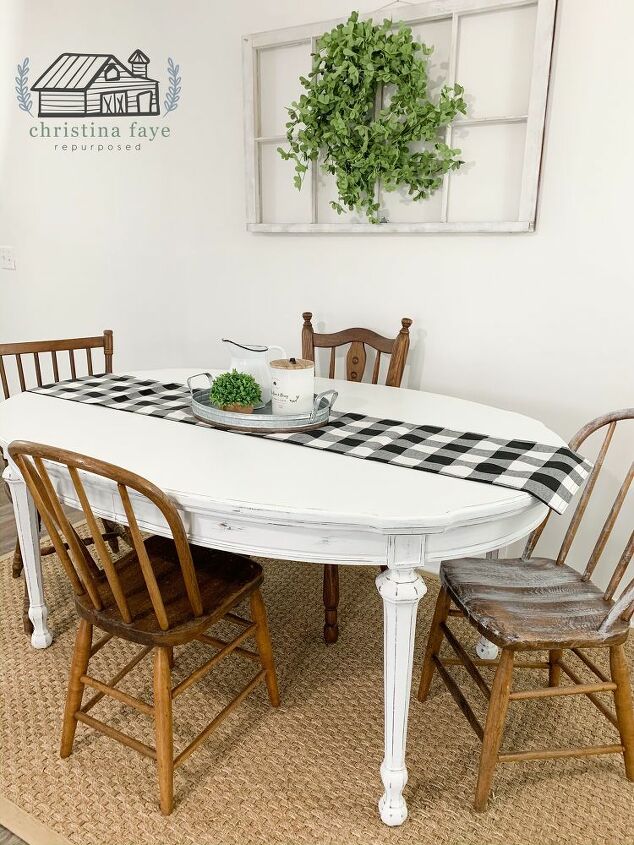
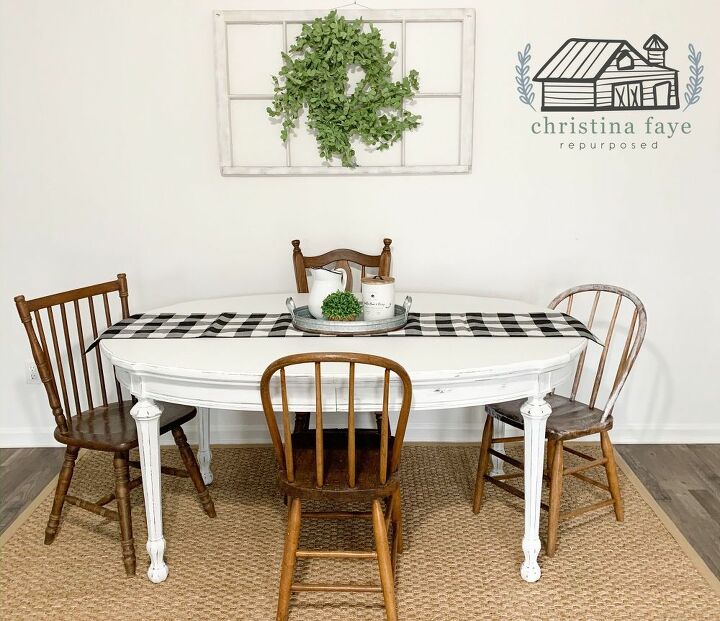
DIY Dining Table Makeover
by
Lucie - Oh my sander
(IC: blogger)
5 Materials
$75
2 Hours
Easy
I have been wanting a change in my dining area for quite some time. As much as I love my farm table, I was ready for a change. Above all, the colors of the dining room area are what I call southwestern, so it needed some brightening up. I decided I wanted to do a DIY dining table makeover, and find all used pieces.My goal was a bright, cheerful, farmhouse style dining area. The dining area is small (It’s more like a breakfast nook). Most importantly, I was tired of the dull colors. I wanted bright, crisp colors. The Table SearchWhile scrolling through the Facebook Marketplace while the Hubs was working night shift (I do this a lot when he is working nights), I found this round table for $13.00. Yep, you heard right. It was hard to tell from the photo if the table was sturdy, but at thirteen bucks, I figured I had nothing to lose.
Hometalk Recommends!
Refresh your furniture with this highly recommended chalk paint that Amazon reviewers swear by!
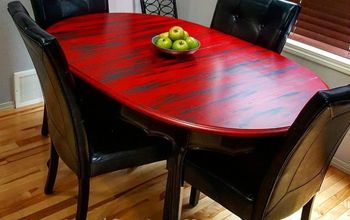
As the Hubs and I drove to pick up the table, I couldn’t help but think the worst. How can a sturdy, well-made table be $13.00? My fear was that the legs would be really wobbly and that the table would be flimsy.Â
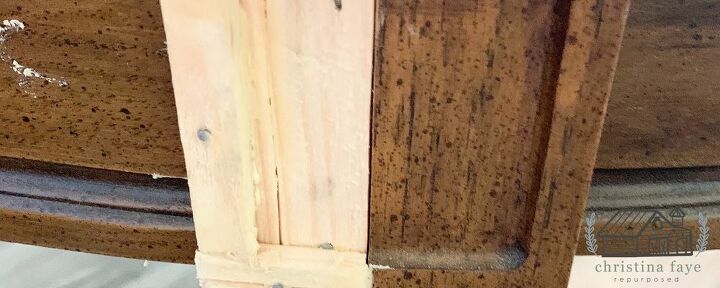
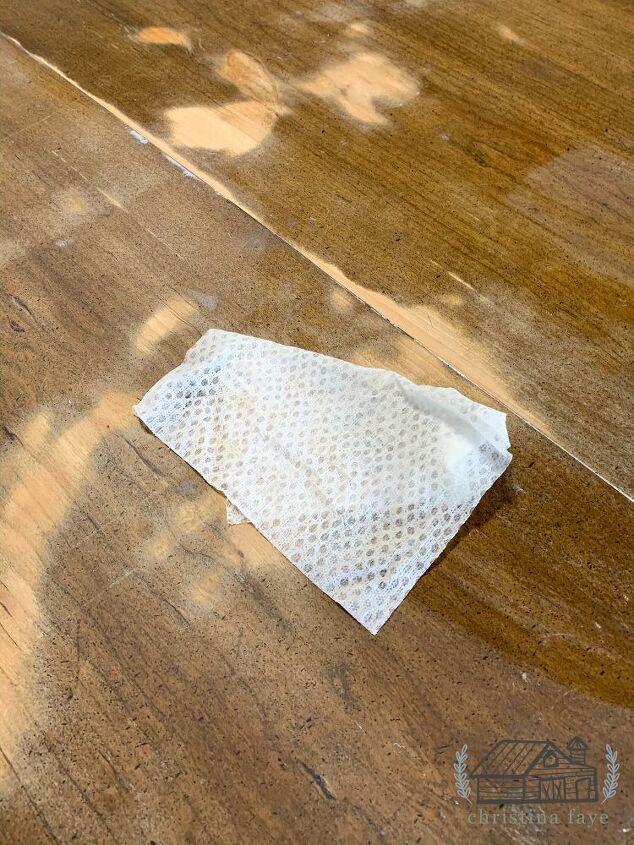
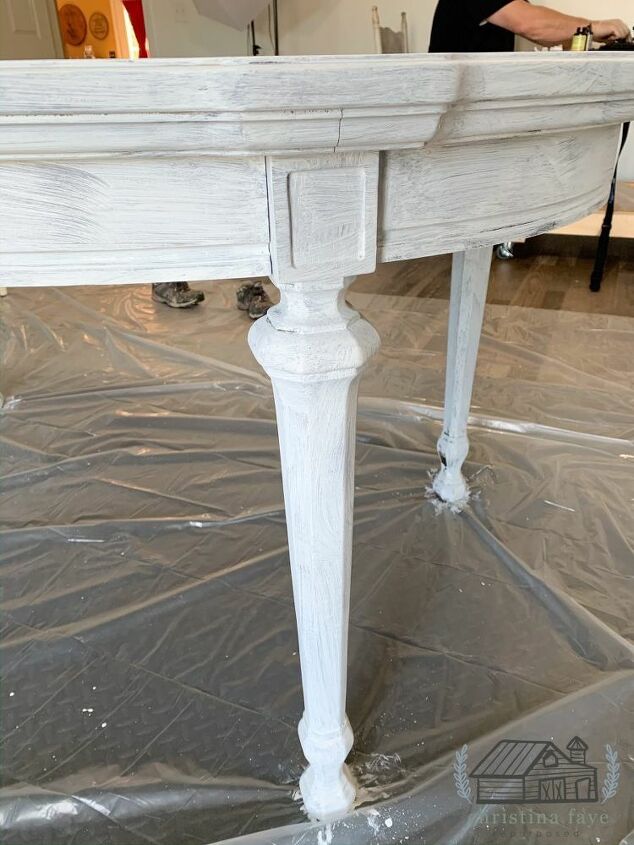
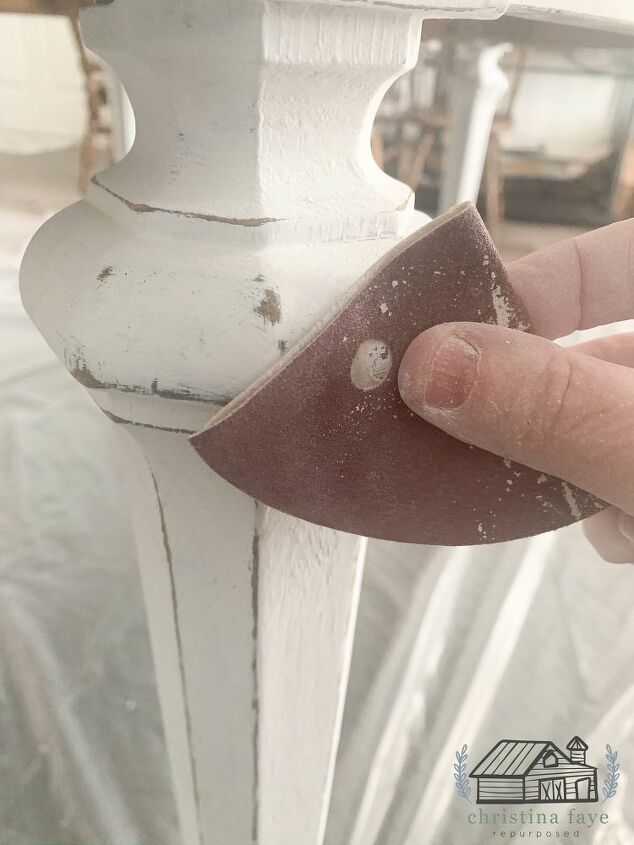
The seller left the table on her front porch because she had to run out unexpectedly. We drove in the driveway, and as I walked up, I could immediately see it was well worth the asking price. I could not believe how heavy it was when we lifted it. It was very well made. The only issue was that a piece was missing on one of the corners, but nothing the Hubs couldn’t fix. For some reason, I did not take a picture of the damaged area! But here it is after the Hubs repaired it.
The Chair SearchOnce I got the table home, I knew the hard part was ahead of me. The chairs. I wanted a total of six chairs, mismatched. To clarify, four would be placed around the table, and the other two would be backups. That is when the hunt started. I scanned Facebook Marketplace and other sites, but not much luck.
About two days later, a friend who owns a vintage store posted chairs for sell she had in her store. I saw two that I liked and messaged her to see if they were still available. I told her what I was looking for, and she informed me that she also had a storage shed full of chairs. The Hubs and I drove to the store and were taken to the shed. I could not believe my eyes! There were four chairs the exact same style I was looking for!
To say I was excited was an understatement. To find the exact chairs I was looking for never happens. It pays to have great friends who help you out.
The legs were sanded with 220-grit by hand to scruff them up.Next, I gave the table a good cleaning with Lysol wipes, making sure to remove all the sanding dust.
The Paint Process
Make sure to keep your paintbrush damp. This allows the chalk paint to go on smooth, with less brush strokes.
After about 4 hours of drying time, I applied the second coat. Lastly, I painted the final coat on the legs with my paintbrush. For the top, I used a roller brush. This is to give it a smooth, even finish.
I painted the first and second coat using a paintbrush because I did not have rollers on hand at the time nor did I have a paint tray!
I allowed the table to dry overnight. This gives the paint time to set. I then used my 120-grit sandpaper and heavily distressed around the legs and the table base. The table had beautiful detail, and this really made it stand out.
Here is the base distressed.
The Top Coat
Three coats were applied, allowing about 2-3 hours of drying time in between. After I applied the first coat, I lightly sanded with 220-grit sandpaper, making sure to clean the sanding dust before applying the second coat. The final coat dried overnight.
In conclusion, I loved the way the table turned out! I can’t wait to get it set up in my dining area.
Remember to visit the blog and subscribe for DIY tutorials right to your inbox!
Enjoyed the project?
Resources for this project:
See all materials
Any price and availability information displayed on [relevant Amazon Site(s), as applicable] at the time of purchase will apply to the purchase of this product.
Hometalk may collect a small share of sales from the links on this page.More info
Want more details about this and other DIY projects? Check out my blog post!
Published January 3rd, 2020 2:55 PM
Frequently asked questions
Have a question about this project?
Sooooooooo cute/love the different chairs
Great job! Love the 4 chairs! 🥰
I just bought a house and I need a dining set. In fact I need a few pieces of furniture. I would like if you could put me on to the friend with the vintage store so I can take a look and see what she has in store. You did an amazing job with your project. Also what state are you in?