


How to Make a Board and Batten Accent Wall

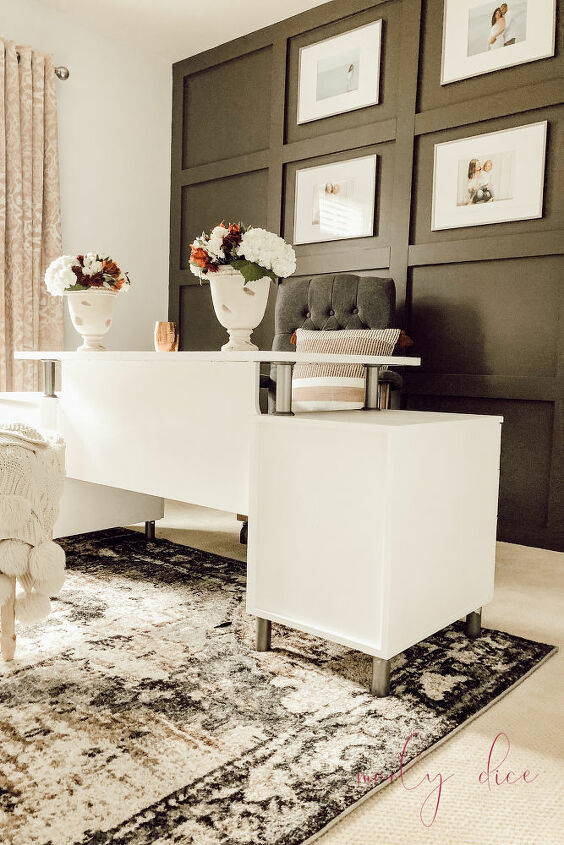
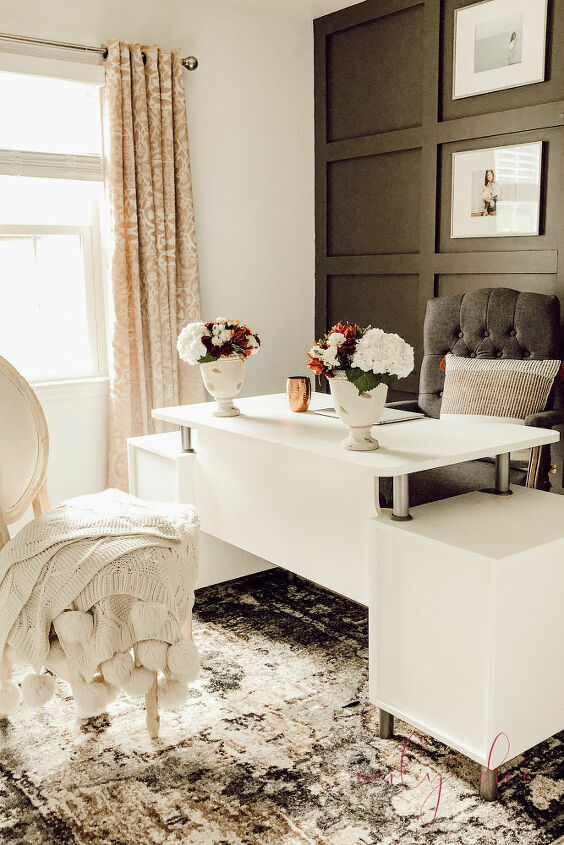
Learn how to make a board and batten accent wall in any room of your home! It is the showstopper in my home office, and I absolutely love the design it brings to the space.
Make sure to check out my blog for more fun DIY projects and decorating ideas!
HOW TO MAKE A BOARD AND BATTEN WALL:
Step 1: Measure your wall & gather your supplies.
For this project, you'll need:
- Poplar wood boards (we used 1'' x 4'')
- Miter saw
- Finish nailer air gun and compressor and nails
- Level
- Measuring tape
- Hammer
- Stud finder
- Caulk & caulk gun
- Liquid nail glue
- Chisel
- square
- sheet rock knife
- Oscillating multi-purpose tool
- sand paper
- paint (we originally used a light gray color called Sterling by Behr Paint but later changed it to a dark gray color called Intellectual by Behr Paint)
You'll need to first measure your wall and determine the amount of wood you'll need to get at the store. We decided to do a 4 x 4 grid.
Our wall is 8′ x 10′ 2”. We bought five pieces of wood 8′ long for the vertical boards, two pieces of wood 11′ long for the top and bottom of the wall, and three pieces of wood 10′ long for the horizontal boards.

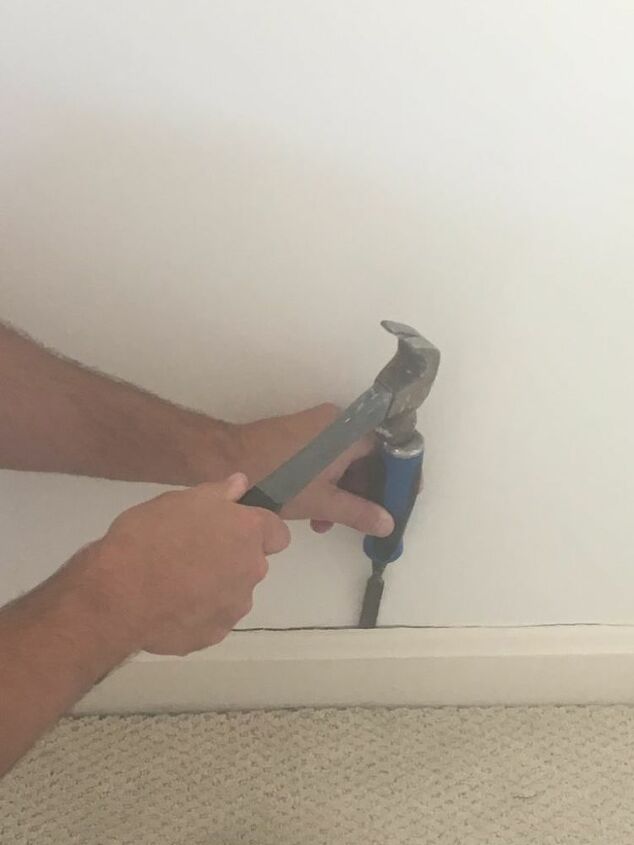
Step 2: Remove baseboard
We chose to remove our baseboard first so we could utilize the entire wall for our board and batten wall.
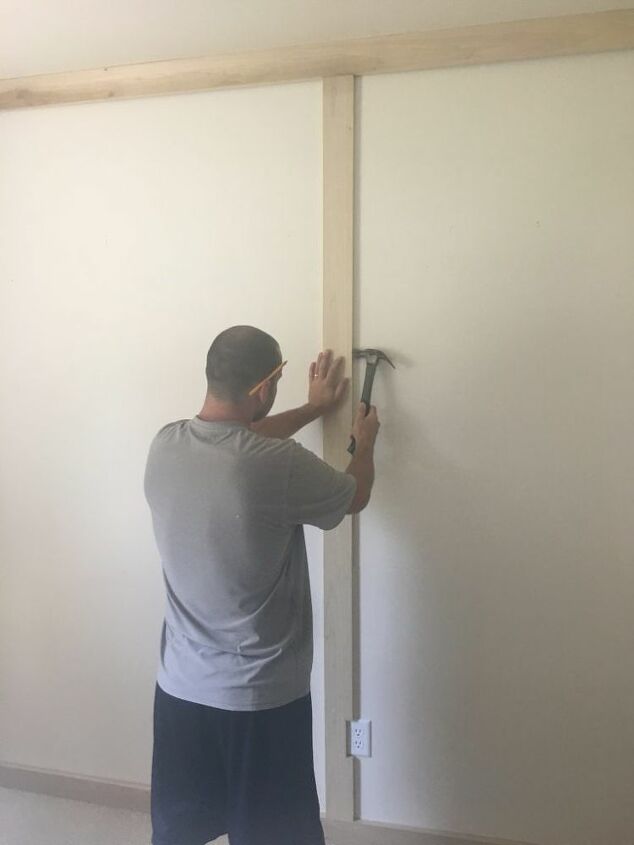
Step 3: Install poplar boards
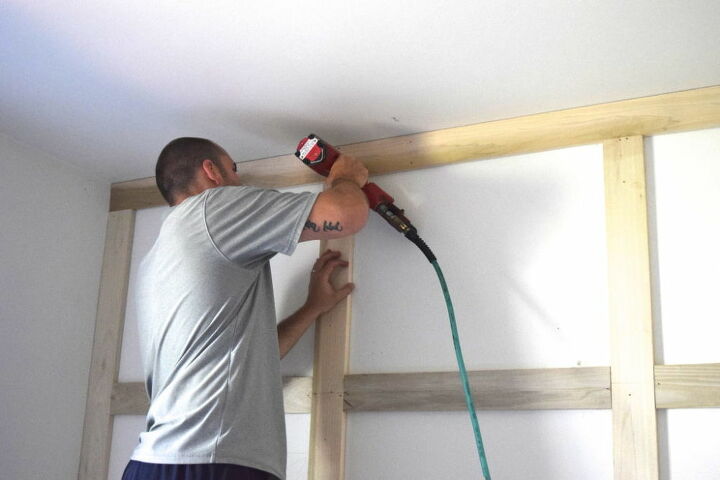
Next, Jason installed the boards.First, he installed four poplar boards to frame the entire wall. Then, he installed the vertical poplar boards.Lastly, he installed the horizontal boards. The horizontal boards were a lot more tedious because they required a lot more cuts between each board.
To install the boards, Jason triple measured the wall to make sure we had the right measurements. After he cut the boards to the measurements, he used liquid nail glue to secure them to the wall. He used a level and square each time to ensure the boards were perfectly straight. Then, he finished securing each board using the air gun and compressor, after ensuring he knew where the studs were by using a stud finder.
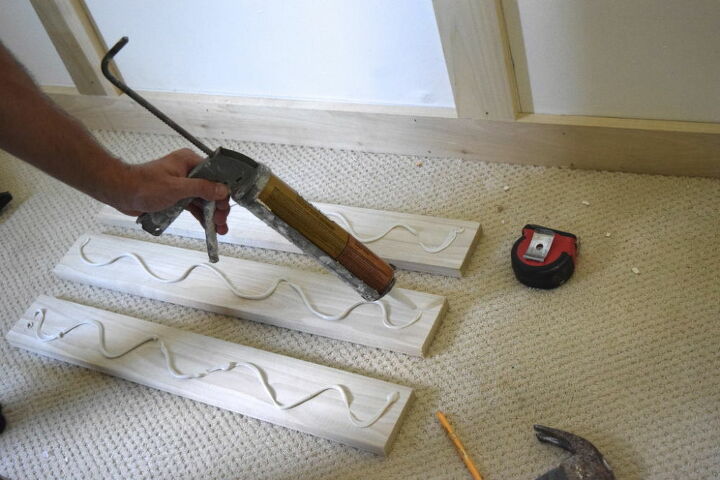
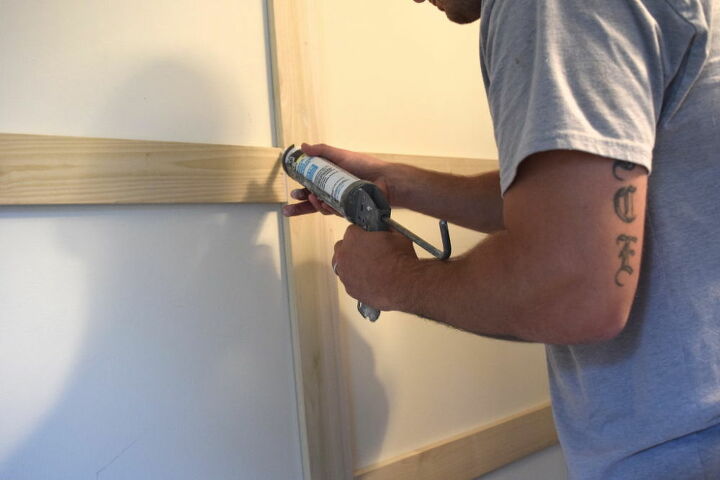
Step 4: Apply the caulk
To give it a finished look, Jason applied caulk in the gaps.
Step 5: Sand & Paint
It's important to let the caulk dry completely before proceeding to this step. We waited until the next day to sand the wood.
I gave them a light sand and then I painted the wall. I initially painted the wall using the color Sterling by Behr Paint.
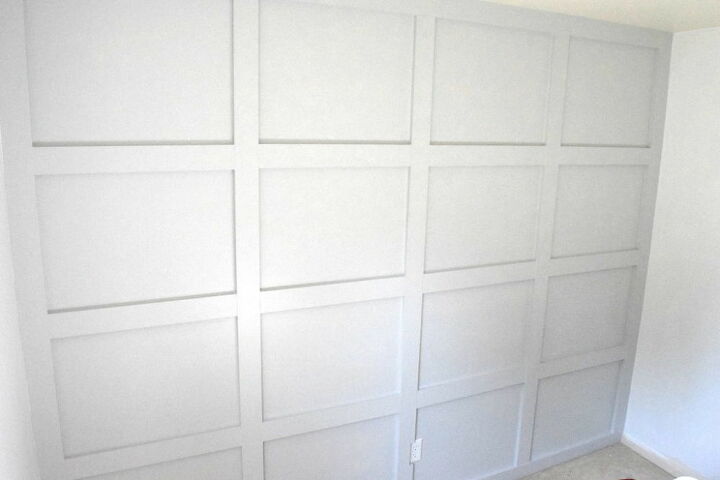
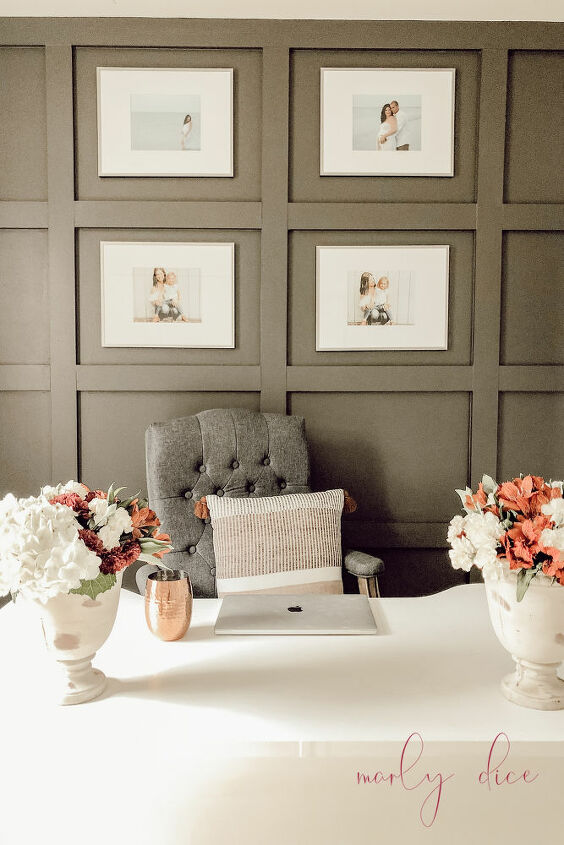
I really liked how it came out but I wanted a bit more contrast so I repainted it dark gray.
The exact color is called Intellectual by Behr Paint. I also decorated the space and added some photos between the squares.
Make sure to subscribe to my blog for more DIY projects, decorating ideas, and more!
Resources for this project:
See all materials


Comments
Join the conversation
-
Beautiful!! The darker color really stands out.
-
Really bourgeois. Bravo


Frequently asked questions
Have a question about this project?
what kind of caulk are you using to glue the boards to the wall???
I am planning to do this project and figured out the dimensions. My grid will be either 4 x 5 or 4 x 6, which will work out perfectly. But...using either of these rectangles, neither will hit the studs. Yikes! Now what? Of course they are 16” on center, but this won’t accommodate either grid design. Help!
Would you have to use the glue? I would hate to tear all my plaster off the walls in 10 years if I want to change that wall. If it is not glued wouldn't the nails hold it securely? Love the idea of painting before putting them up! :)