


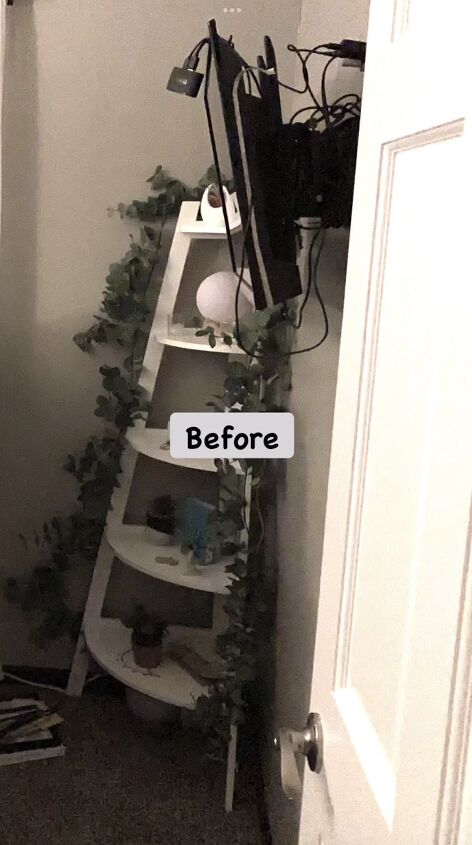
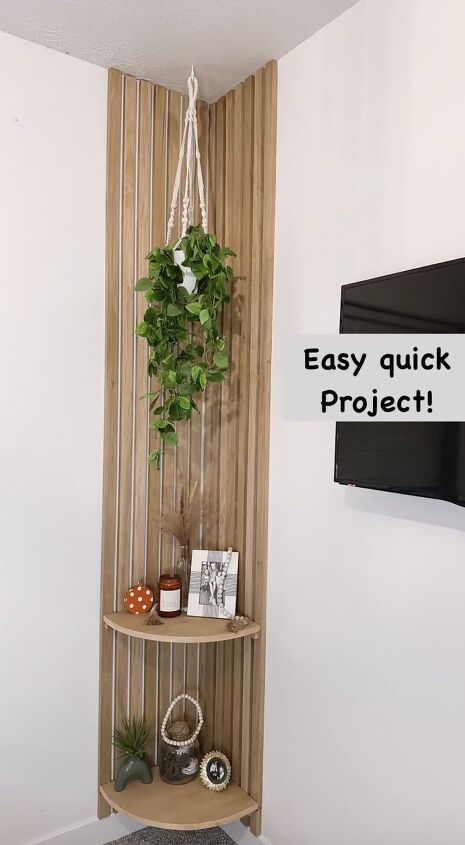
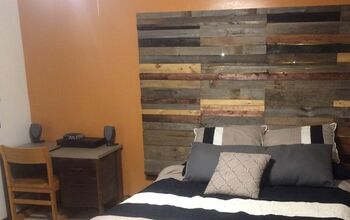
How to Build a Decorative Corner Slat Wall in 6 Simple Steps

Creating a chic and functional corner slat wall can elevate the aesthetic of any space. In this article, I'll take you through the step-by-step process of building an easy corner slat wall using 1”x2” pine boards. Follow along as we transform a plain corner into a stylish storage and display solution.
Best wood stainer!
Tools and materials:
- 15 pieces of 1”x2” pine boards
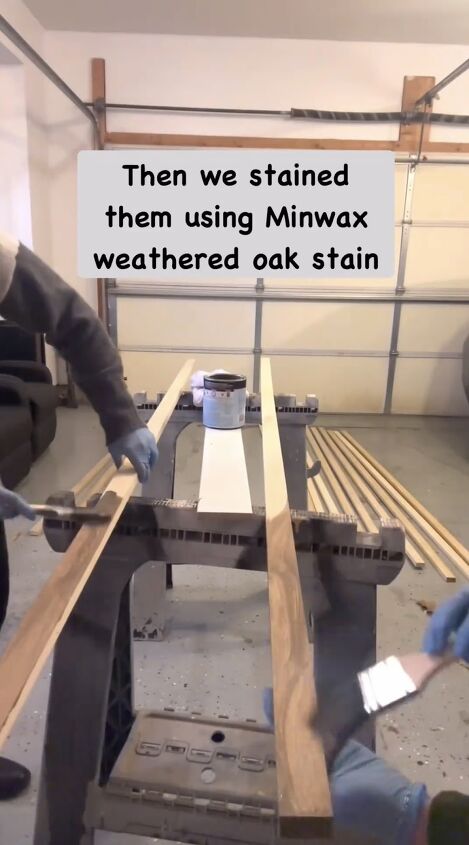
- Minwax wax weathered oak stain and polyurethane for finishing
- Edge banding
- Wood brackets
- Nails
- Screws
- Jigsaw
- Level
- Iron
- Spacer (3/4”)
- Measuring tape
- Saw
How to build a corner slat wall
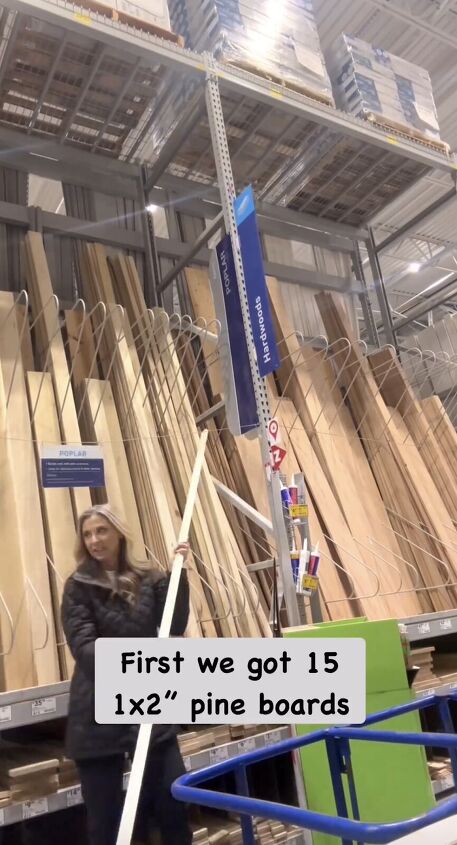
1. Prepare the Pine Boards:
Begin by acquiring 15 pieces of 1”x2” pine boards. These boards will serve as the foundation for your corner slat wall.

Trim them down to your desired height for the unit using a saw.
2. Finishing Touches:
To enhance the appearance and durability of the boards, apply stain and seal each one with polyurethane. This step ensures a polished and professional look for your corner slat wall.
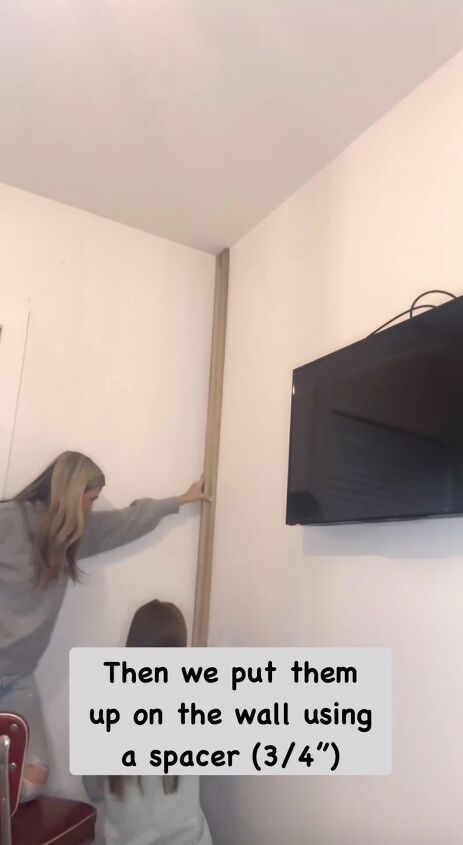
3. Installation on the Wall:
Start the installation process by nailing the boards to the wall. Use a 3/4” spacer to maintain even spacing between the boards.

Begin in the corner, placing a board on each side of the corner to create a seamless and visually appealing design.
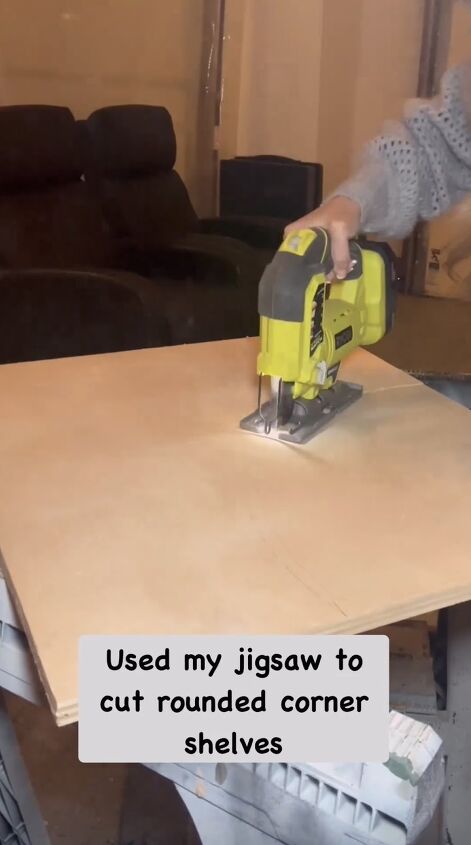
4. Creating Rounded Corner Shelves:
Utilize a jigsaw to cut rounded corner shelves. Once cut, stain and seal each shelf for consistency with the rest of the slat wall. This addition adds a touch of sophistication to the overall design.
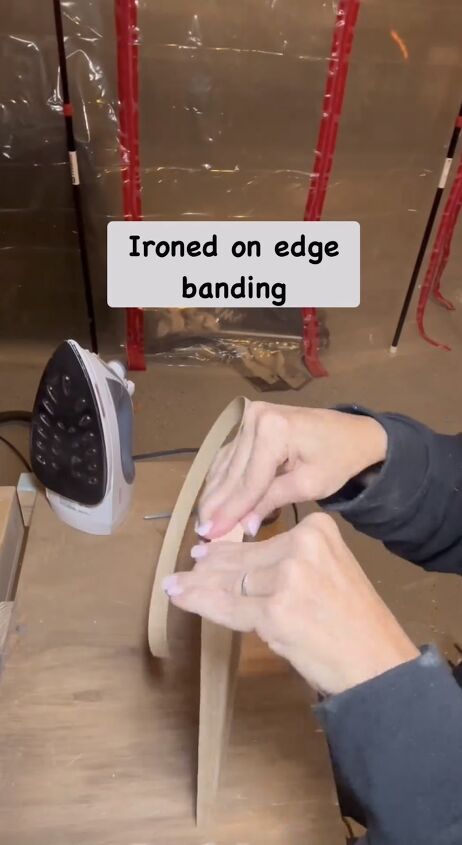
5. Applying Edge Banding:
Iron on edge banding to achieve a clean and finished look for the shelves. This step not only enhances the aesthetic but also adds a layer of protection to the edges.
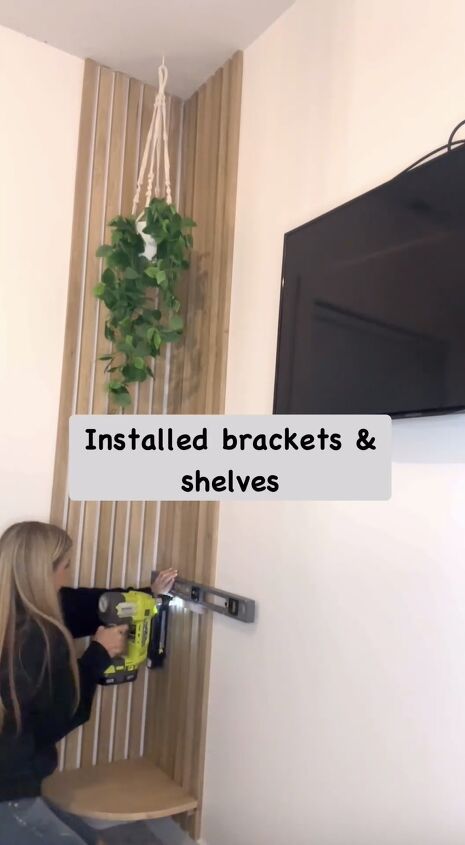
6. Installing Wood Brackets:
Position wood brackets on the wall, ensuring even placement with the help of a level. Attach the shelves securely to the brackets, providing a sturdy foundation for your corner slat wall.
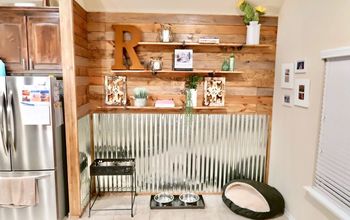
Corner slat wall
Building a corner slat wall is a rewarding DIY project that can transform a neglected corner into a stylish and functional space. By following these steps and using the specified materials and tools, you can create a custom corner slat wall that adds character to your home or workspace.
Let us know in the comments below if you created this project, and any tips you have.
Follow @a_bit_unexpected_diy on Instagram for more DIY ideas.
Comments
Join the conversation
-
looks great
-
Looks great and I love the tunes !!


Frequently asked questions
Have a question about this project?