


Scrap Fabric Bowl-DIY
A friend had given me a shoe box full of postage stamp-size squares cut from vintage fabrics. Now to find just the right project. Rather than stitch them together, I decided to layer and stiffen them into a scrap fabric bowl.
Have you ever had something so long that you don’t even notice it anymore? It’s been quite some time since I crafted a project using liquid fabric stiffener. Actually, it’s been years. While tossing out some bottles of dried up adhesives my eyes finally registered a couple bottles of fabric stiffener. They were so old I was sure they would be dried up. Nope. Great consistency and no smell. Perfect!
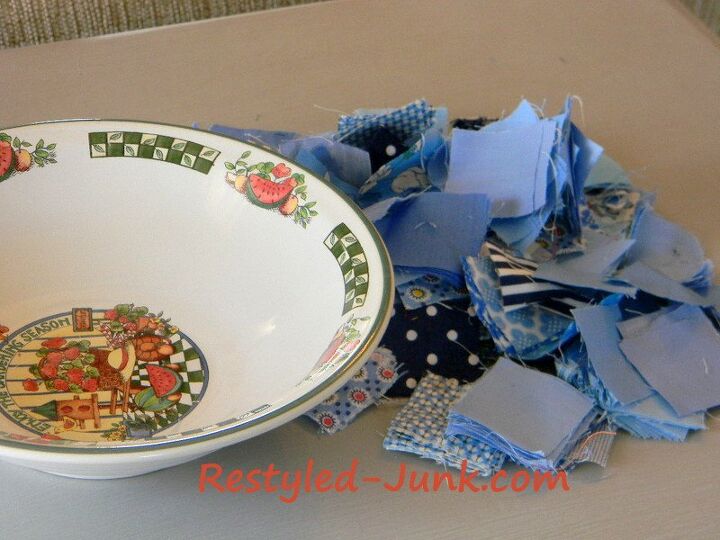
A variety of blue fabric squares were chosen for the scrap fabric bowl.
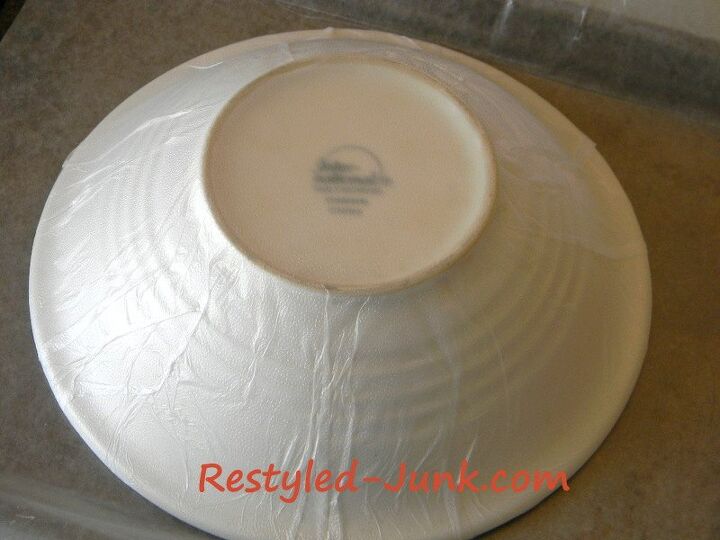
I found a bowl in my cupboards to use as a mold. To protect my work surface (a cookie sheet), I covered it with a sheet of parchment paper. The bowl was placed upside down on the cookie sheet and the outside of the bowl was covered with plastic wrap.
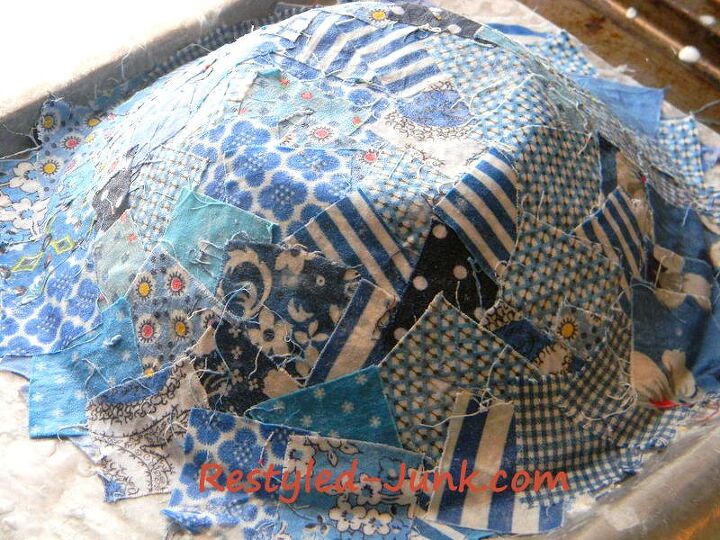
I poured the stiffener in a small bowl and added a handful of fabric squares. After letting them soak for a few minutes, I squeezed out the stiffener and completely covered the outside of the bowl with a layer of squares.
Each square was smoothed out with my fingers, turned in different directions and overlapping each other. Warning: It’s messy, but worth it.
Since this layer would be the inside of the scrap fabric bowl, each square was placed face down so that the right side would be showing when the bowl was turned right side up. Two new layers were added facing right side up.
Then it was time to let it dry. I don’t know about you, but I’m an impatient crafter. I like results right now. I figured with all the fabric layers it could take a day or more to dry.
No, no, no!
I set my oven to a warming temp and placed the cookie sheet inside. The scrap fabric bowl was rock hard 3 to 4 hours later. Something to note…if you try this method of drying, don’t set your temp any higher than a food warming temp. You do not want to melt the plastic wrap or brown the fabric edges.

Peel the scrap fabric bowl off of the bowl used for a mold. To help loosen the hold, I inserted a butter knife between the bowls. Once released from the mold, I used household scissors to trim the edges. It’s thick and hard, so don’t use your good fabric scissors or you will be very, very unhappy.
Check out more scrap fabric projects on the blog.


Comments
Join the conversation
-
LOVE this project and such a great use for all the hundreds of fabric scraps from my prior sewing projects ~ a project from a project ~ fun!
Thank you for sharing and inspiring!!!!

-
I love it !!! That is just so super cute !!! I am going to have to try this with some vintage fabric that I have ....Thank you for posting this ...I am keeping it as a reference ....


Frequently asked questions
Have a question about this project?
do you leave the plastic on it? Or does that come off when you take it out of the bowl?
I have the same questions everybody else has. How can you clean this. With soap and water? I would think this wouldn’t be good. So what can you use the bowl for?
How do you make the edge of the bowl so nice?