


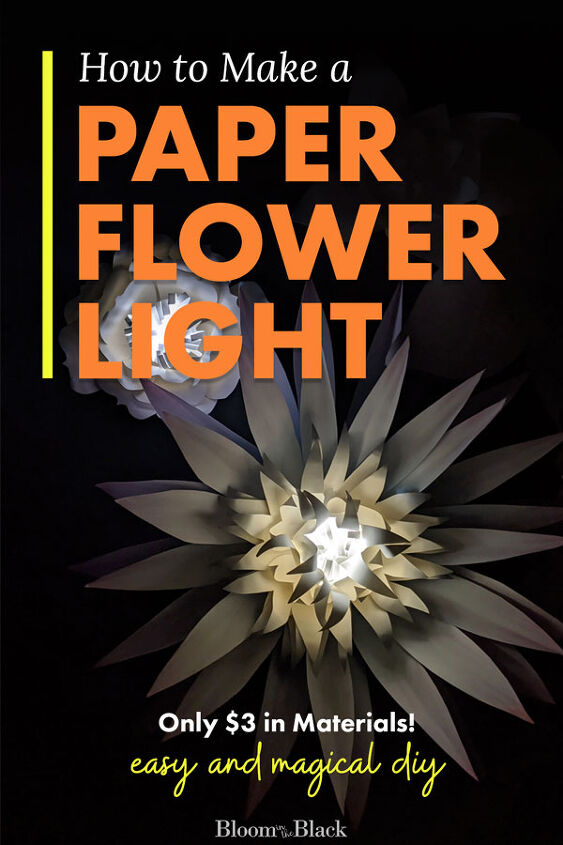
DIY Paper Flower Lantern: Only $3 in Materials
I recently designed a “Secret Garden at Night” bedroom for my kids with a giant light-up flower garden on the wall. It turned out so cool though -- I could easily see these light-up paper flowers being used for a dorm room, a first apartment, or any sort of celebration.
Here's how to make these DIY paper flower lanterns using a few sheets of cardstock and some inexpensive puck lights.
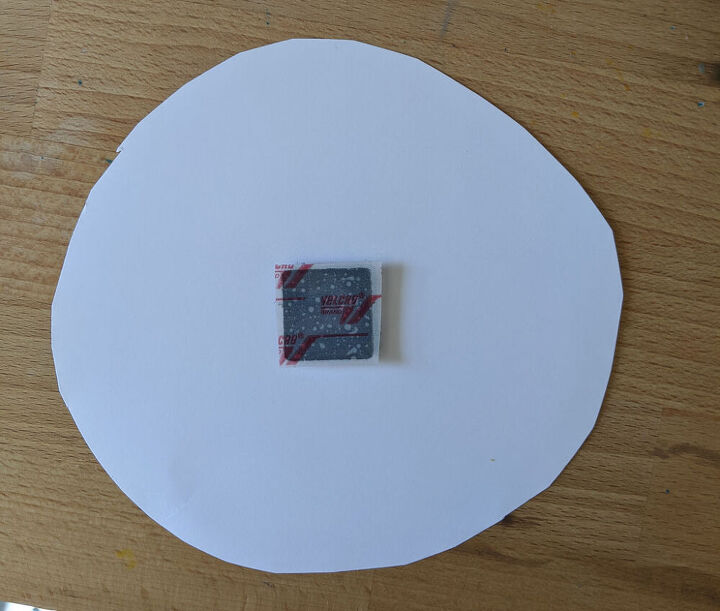
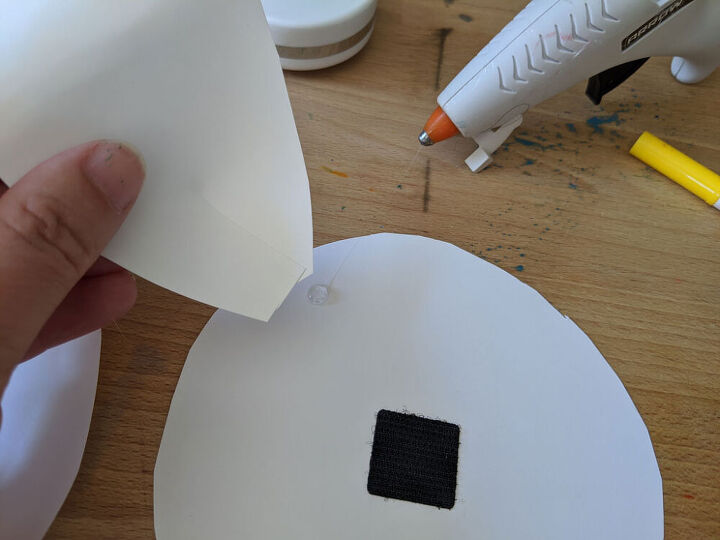
The circle should be about 6″ diameter. The size doesn’t have to be exact and the cut can be rough since you won’t see this once the lantern is finished.Then, stick a square of self-adhesive velcro to the center of the circle.
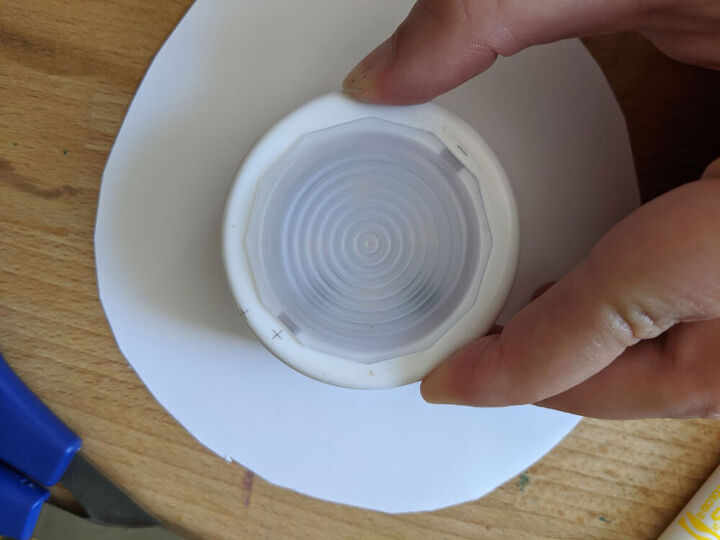
Peel back the film from the adhesive on the velcro, then place and firmly press your puck light down to adhere. Gently pull the puck light up. The velcro should separate so one side is on your light, and the other is on the base.
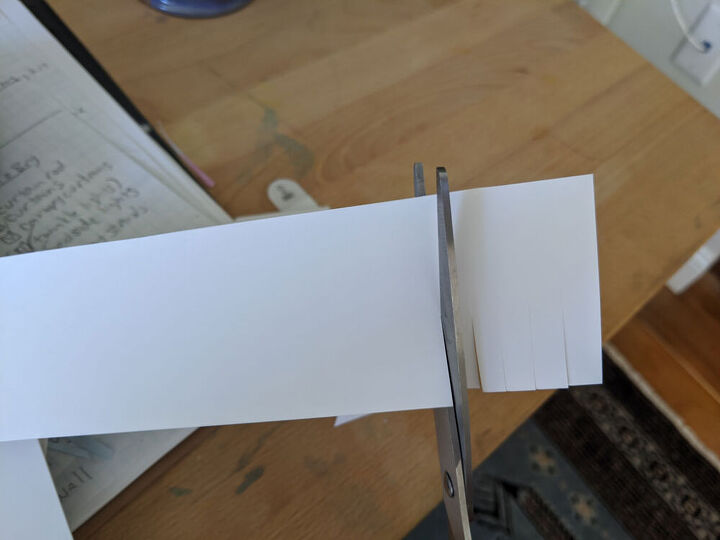
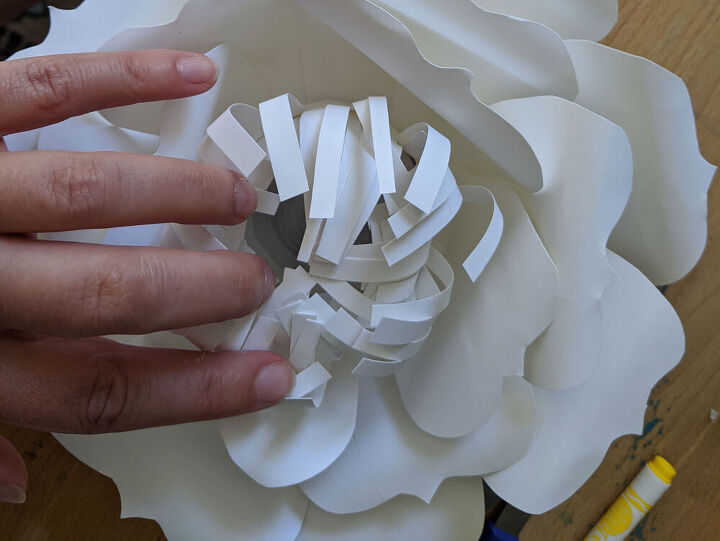
Cut a long strip of cardstock about 2.5″ inches wide, then make vertical snips down the length. Make the snips close together so you create the frilly look that the center of many flowers has.Once your snips are complete, cut this long piece into shorter sections about 2″ to 3″ wide to glue to your puck light in the next step.
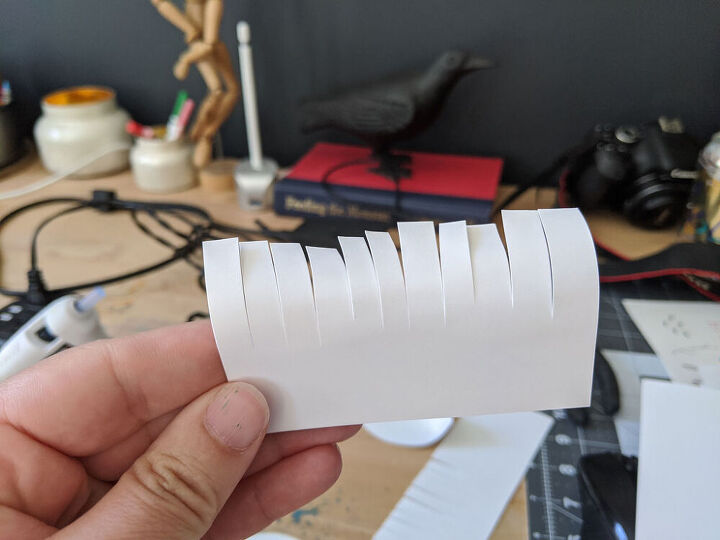
Gently bend the paper around a marker or pencil to curl your frill edges.
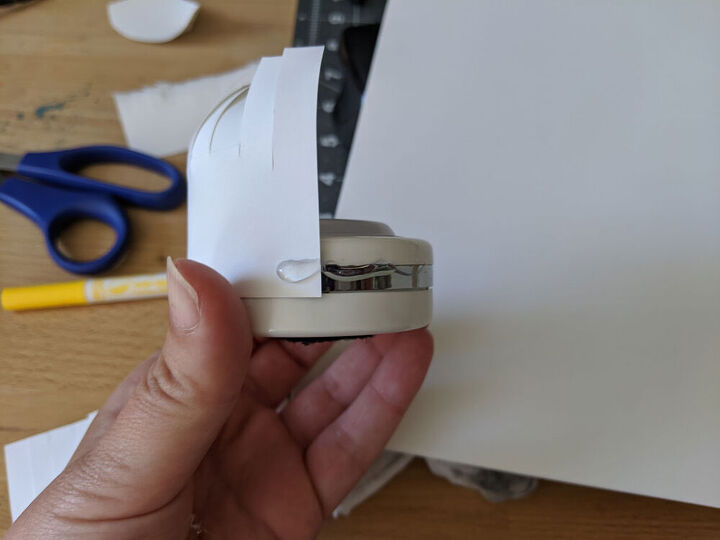
Then piece by piece, hot glue the inner petal strips to the top half of your puck light, aligning the bottom edge of the cardstock to where you open the light to replace the batteries.Continue gluing to the light, overlapping the strips slightly, until you like how it looks. I added about three layers to achieve my desired fullness.
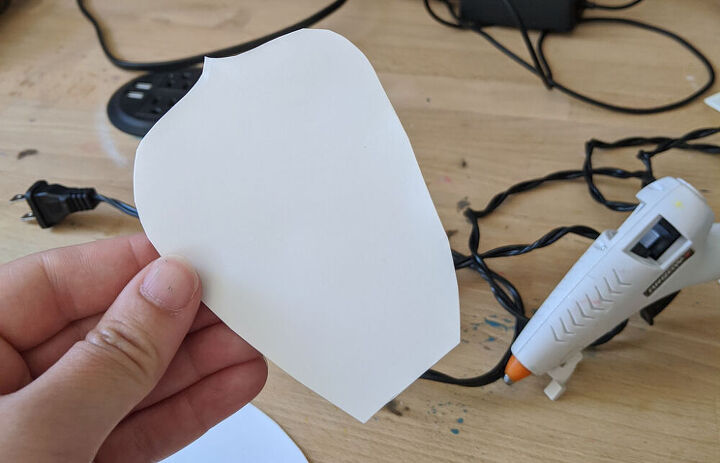
I find it’s worth it to cut and prep your petals ahead of time to make things go quickly. You may not use all of them, but it’s better to have extras than to have to stop and cut more.Each flower will be unique, but a good number of petals to start with would be:
- 8 large petals
- 8 medium petals
- 4 small petals
Cut the petals freehand to achieve the most natural shape.
Visit the post to download my cheatsheet of petal shapes if you want more ideas.
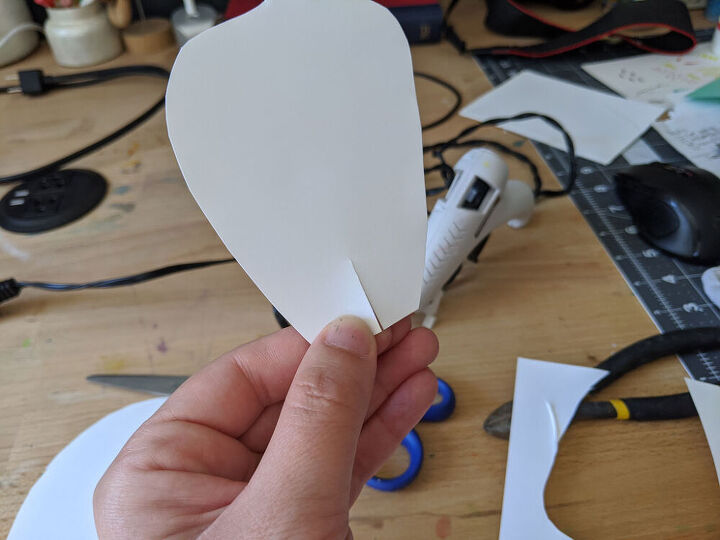
Cut a small slit in the base of each petal, about 1″ long.
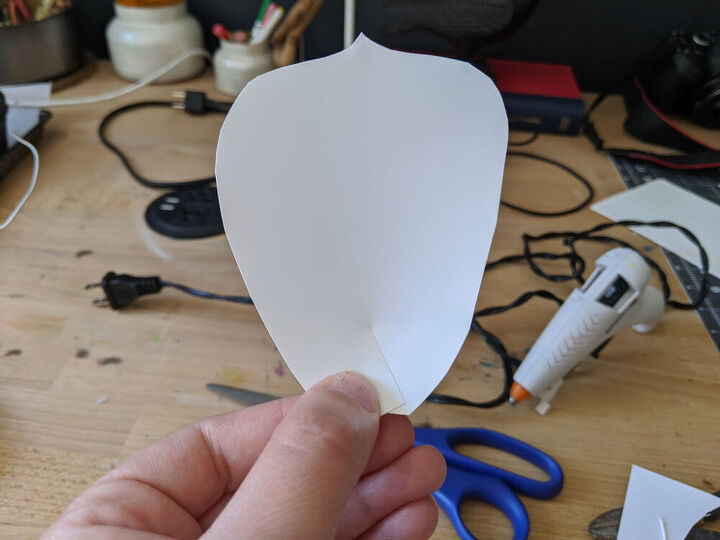
Use a small dab of hot glue on one side of the slit, cross the other side over, and press gently to secure. The more you overlap these slits, the higher the petal will stand.For the outside petals, use a small overlap so they lay lower. Use a pencil or marker to gently curl the tops of the petals away from the overlap we just glued. The final result will be that the petals curl toward the wall when the paper flower lantern is hung.
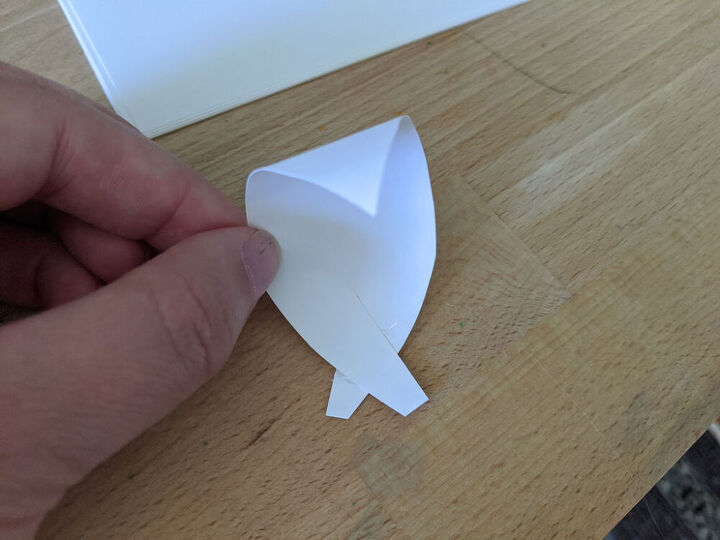
For the innermost set of petals, use a deep overlap, and curl them in towards the overlap, rather than away. We want this final set of petals to hug the center and camouflage the plastic light casing.
Starting from the outside edge, glue two of the large petals directly opposite each other. Then two more, like this:
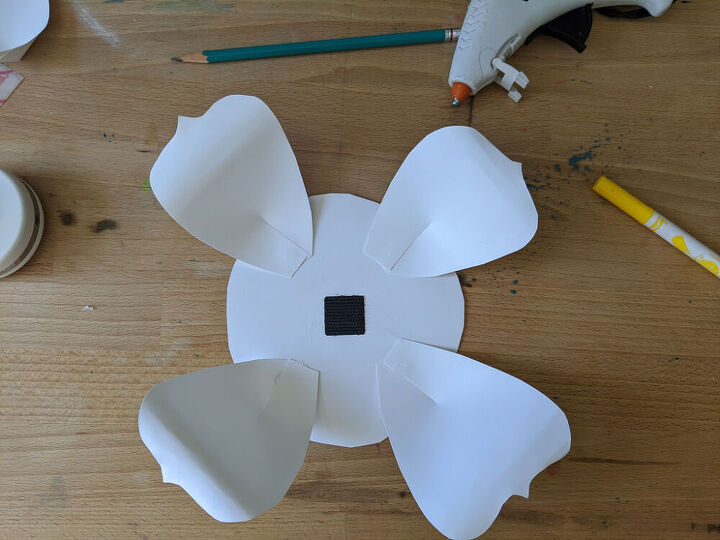
Continue gluing sets of two in the gaps between petals, moving inward, and using increasingly smaller petals until you’ve reached the boundary of where your center light will go (you can test for fit periodically).

Finally, reattach the puck light to the base. Press the velcro pieces gently back together and muss up the frill a bit to give it a more natural look.
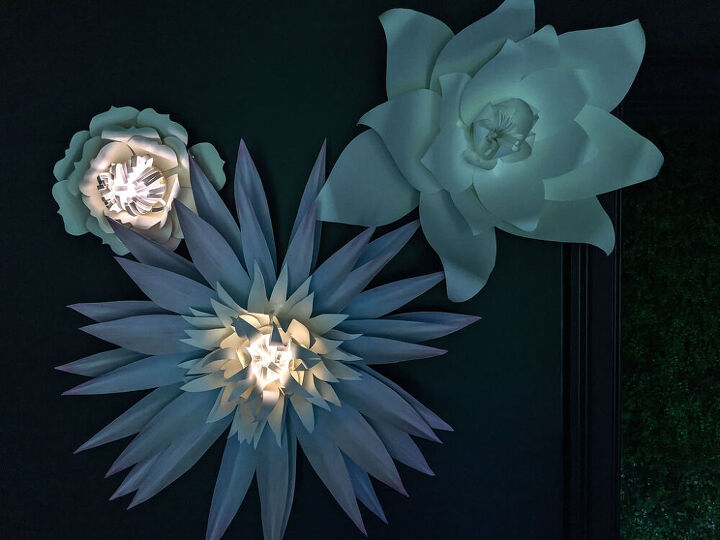
We just made the small light in the upper left corner. To make the giant double layer version in the photo, create a the smaller flower light we just went over then:
- Follow the same steps outlined above, using a larger circle as your base and cut 32 long spiky petals.
- Rather than curl these petals, fold them in half to create a ridge down the center.
- All of these spiky petals should have a smaller overlap at the base so they lay relatively flat. You’ll get all your height from the smaller center flower.
What you’re going to do is build this outer set of petals around the smaller flower lamp you just made. Treat this smaller flower as the puck light center from the main tutorial, but instead of velcro you can hot glue it to the base in the final step since you only need to be able to remove the puck light.There are multiple options for hanging these flowers. Visit the full post for the rundown.
Resources for this project:
See all materials


Comments
Join the conversation
-
So very pretty.........different and unique is what I like.......inspiring definitely!!

-
Very kewl! A nice way to have a nightlight that is pretty. 😎


Frequently asked questions
Have a question about this project?
How do you turn them off and on? Or are they on all the time?