How to Clean Silver Easily With Baking Soda & Aluminum Foil

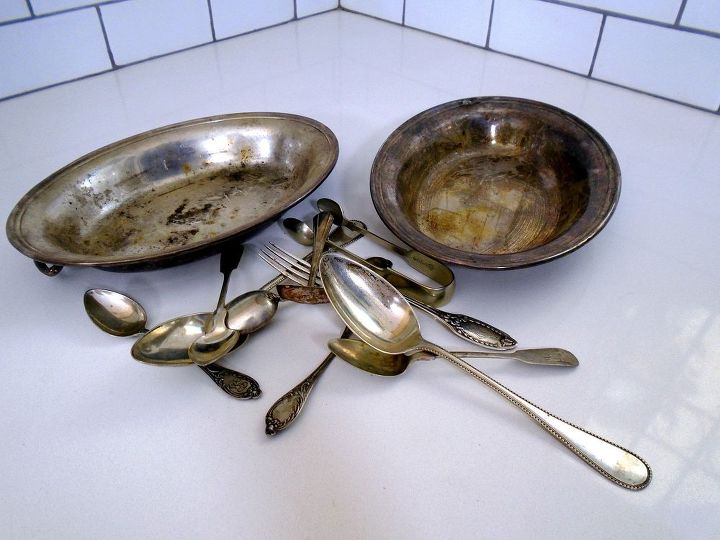
My tarnished silver was getting me down, but there was no way I was doing all that polishing!
Instead, I decided to try this baking soda silver cleaning trick I've been seeing all over the internet. I'm sure you've seen it too, but there are several versions of it, and I wanted to know which version was the one that actually worked - and why.
So, after doing some research, I chose to use baking soda, aluminum foil, and a pot of boiling water. Here's how...
What causes silver to tarnish?
Turns out, silver tarnish is actually what happens when the air interacts with the silver and turns its outer layer into silver sulfide (which is black).
You could take some silver polish and use a lot of elbow grease, and polish off the layer of silver sulfide, which will rub away some of your silver each time, or you can sit back and use science to turn that silver sulfide back to shiny silver.
Step 1: Boil a Pot of Water
This step is fairly obvious - I just filled a pot with water and turned my stove onto high heat.
Step 2: Add a Ball of Aluminum Foil
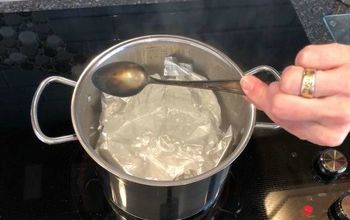
For the second step (equally easy), I ripped a piece of aluminum foil off my roll, crumpled it up into a loose ball, and tossed it into my pot as it boiled. You don't want to crumple it up too tightly, because your silver will have to be touching the aluminum foil for this trick to work.
Step 3: Add a Cup of Baking Soda
Once the water came to a rolling boil, I added a cup of baking soda (a tablespoon at a time), and turned the flame lower.
I had a lot of silver, so I wanted to water to stay hot for a while, but you could turn the stove off completely if you have less silver to shine.
Step 4: Dunk Your Tarnished Silver into the Pot
Now, here's where the fun starts! I slipped a silver tray into the pot, letting the whole piece slide right in. Because it was big enough and would be touching the foil on its own, I didn't need to hold onto it.
For the smaller pieces, I made sure to place them carefully in the pot or to hold them against the foil. Remember, as long as your silver piece is touching the foil, this trick will work.
For something with a light tarnish, a quick dip is all you'll need. For a thick coat of tarnish, like my grandmother's silver tray, you may have to leave it in for a few minutes.
If you're doing a large amount of silver in more than one shift, you may have to add another half a cup of baking soda.
Step 5: Wipe Your Silver Dry
When my tray was looking really bright and shiny, I slipped on a heavy glove and removed the tray from the pot. Silver is a great heat conductor, so make sure to use a glove or tongs to retrieve your sparkling pieces.
Using a cloth, I buffed off the water, to prevent my newly-shiny silver from getting any watermarks.
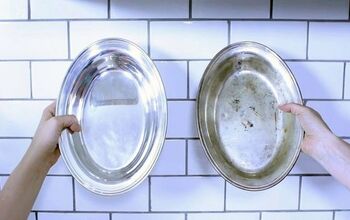
How to clean silver with baking soda & aluminum foil
And here's the difference! One dunk later and my fingers aren't even a little bit tired. Look at that crazy shine, all thanks to science!
Enjoyed the project?
Comments
Join the conversation
-
 Dee Dee Caswell
on Oct 26, 2022
Yes I will try this. If it works better than peanut butter I’ll use it but I have found peanut butter works really well.
-
 Nannette (Nett)
on May 16, 2023
Please explain the peanut butter method
-
-
-
 Amy Patterson Buchert
on Jan 17, 2023
That’s might be the coolest thing I’ve ever seen!
-











Frequently asked questions
Have a question about this project?
Can this method harm my silver pieces?
Please, did you mean 1 cup or 1 tbsp baking soda? Thanks!
I have a HUGE tray that weighs a ton with feet. Any suggestions of how I might use this technique?