


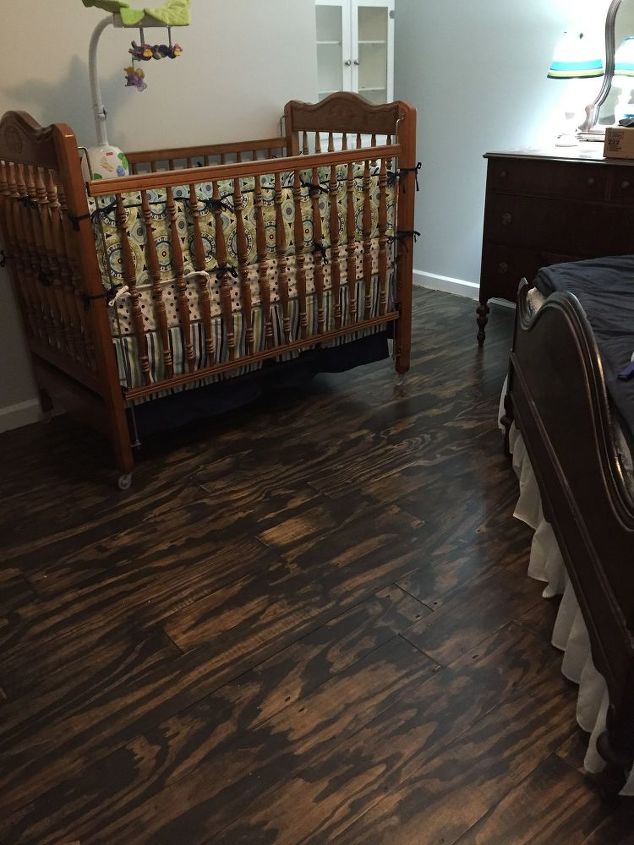
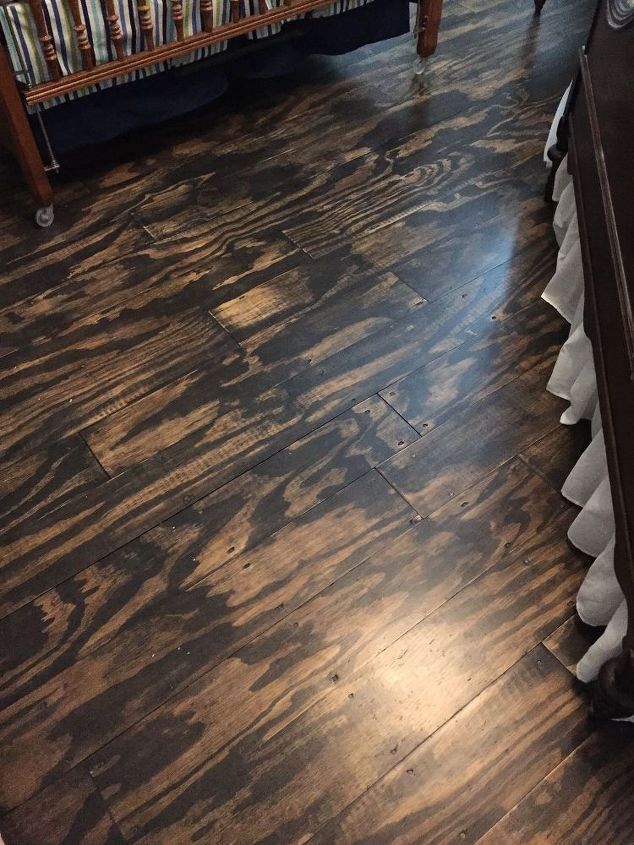
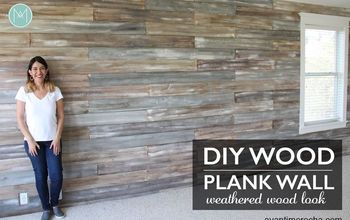
DIY Plywood Plank Floors

Resources for this project:
See all materials


Comments
Join the conversation
-
lONG AGO, 1983, WE DID THAT SAME JOB, WITH PINE SHELVING, OVER PARTICLE BOARD, USED SOME GLUE AND SOME NAILING, THREE COATS OF POLY, OVER A LIGHTER STAIN, LASTED LONG TIME, IN KITCHEN AND HALLWAY, AND SITTING ROOM. lOVED IT
-
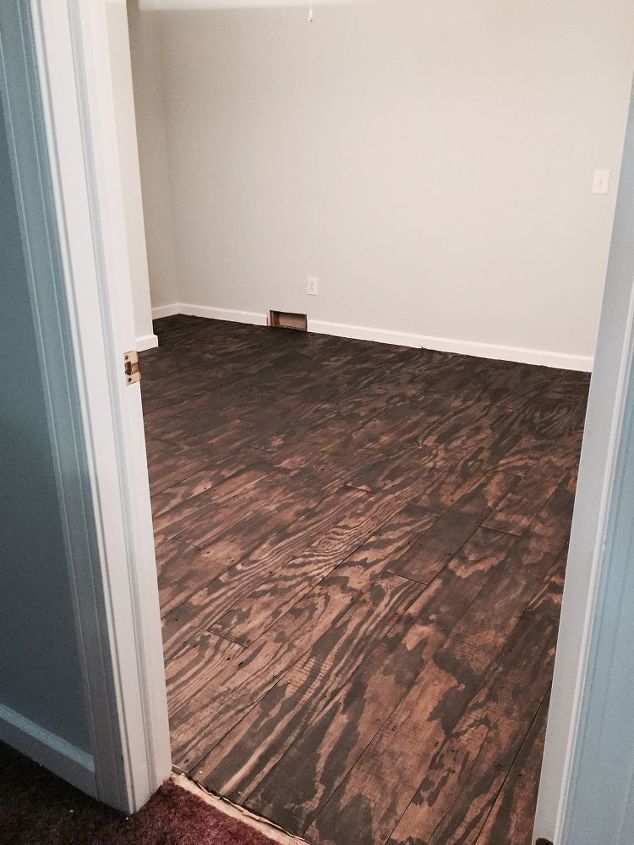
I have had this in a dark oak in my front room for years. It just seems to last forever. Last year I did my bedroom, but I got the plywood cut up into 10in planks and white washed them. I have also cut up the plywood into smaller blocks, and have made my own kitchen parquet flooring. I love the way the grain shows through each block. I also did my passage in the fake parquet style, but i lightly coloured the blocks in different shades. The varnish brings out the different colours and I am very pleased with the results. Well worth doing if you don`t mind DIY. It makes the house feel warmer and it is not expensive to do. It looks amazing and you can choose how you want the finshed look.


Frequently asked questions
Have a question about this project?
Shari will you post a picture of the tongue and groove you say you guys would have used if you knew or are going to use next time? I have a 16x18 room I have to do and this is brilliant. I did my hallway with 1x4 boards and I wish they were wider and they didn’t have the beveled edges for stuff to get in between them. But it works and looks great stained like this.
Why do you need to sand and what type of poly did you use? How do you apply it?
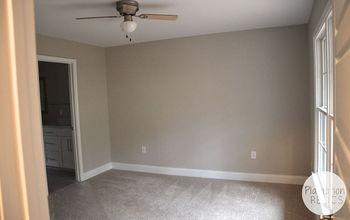
I also have “squeaky floors”. What did you put down as subfloor. Does this mean you now have 2 subfloors? What did this do to the height of this room? Thanks