


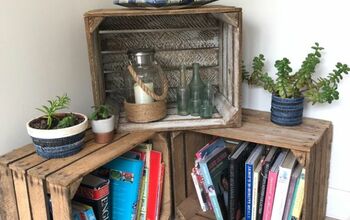
DIY Stackable Wooden Storage Crates

3 Materials
$50
2 Days
Easy
Hello there!
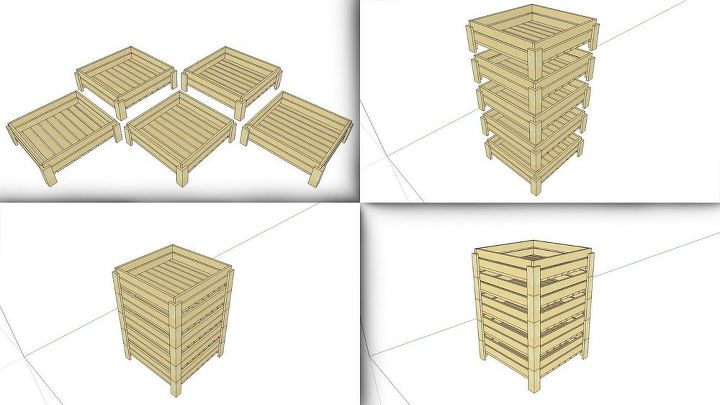
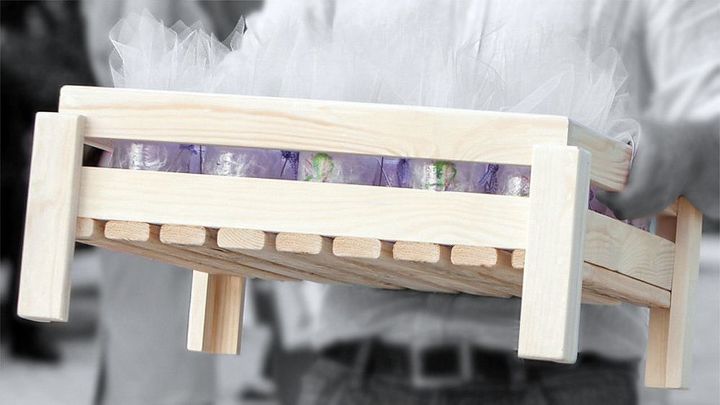
Take a look at this project, where you will see how I built some simple modern stackable wooden crates, made out of pinewood, that I created for the favors of my niece’s baptism.
{
"id": "4097411",
"alt": "",
"title": "",
"video_link": "https://www.youtube.com/embed/4MxjEzW4v28",
"youtube_video_id": "4MxjEzW4v28"
}
{
"width": 634,
"height": 357,
"showRelated": true
}
Watch the detailed, step by step video above to understand better!
Step 1:
I built them in such a way that each one can be placed inside the other, in order to take up less space and be easier to move.
Step 2:
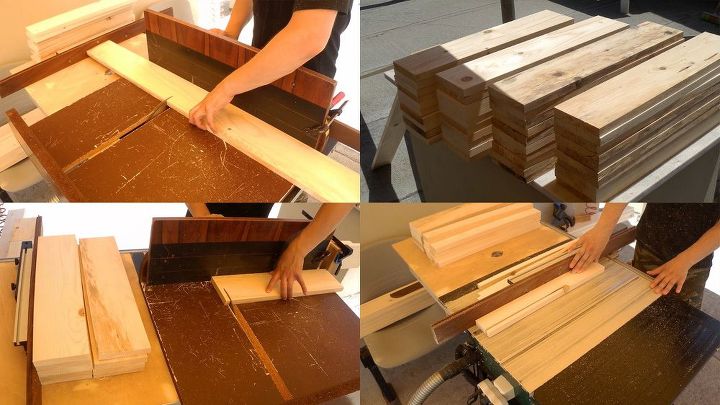
Because these lumbers come in 3 meters length, I started to cut them in smaller pieces. Then I put a stop block and cut all the pieces precisely in the dimensions I need them to be. Firstly at the right length and then at the right width. That in this case is 5cm.
Step 3:
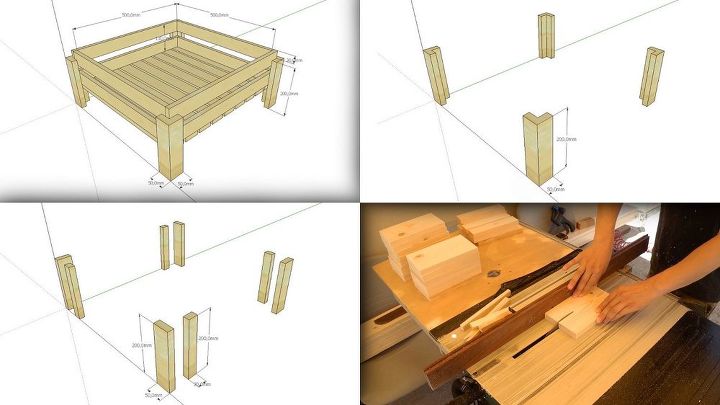
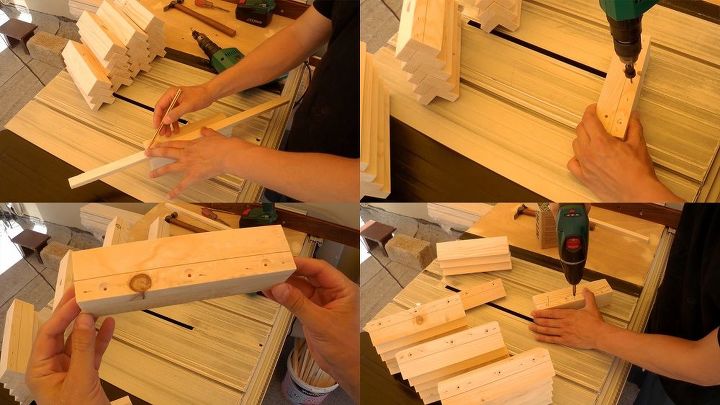
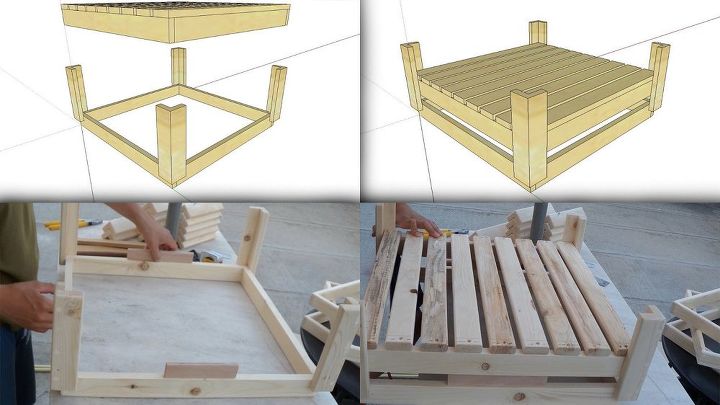
Every wooden crate has 4 legs, 20cm long and 5cm wide, and each of them consists of 2 pieces of wood. This means that I have to cut 40 pieces in total.
Step 4:
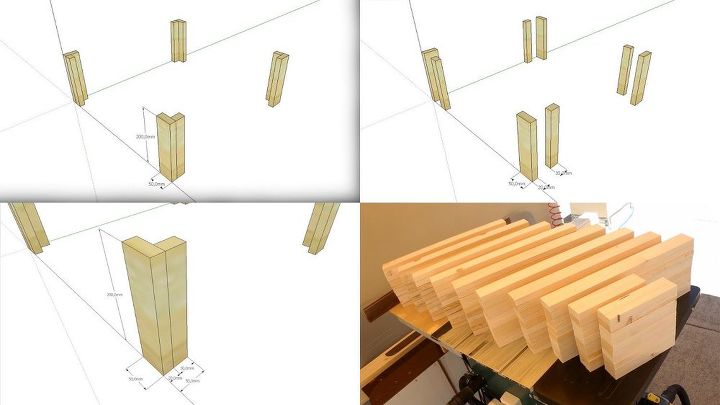
In order for every leg be the same on every side, I measured the thickness of the wood and then I subtracted it from the total width of a piece. And then, I started to assemble all the pieces together.
Step 5:
Firstly, marked, drilled and screwed all the pieces for the legs.
Step 6:
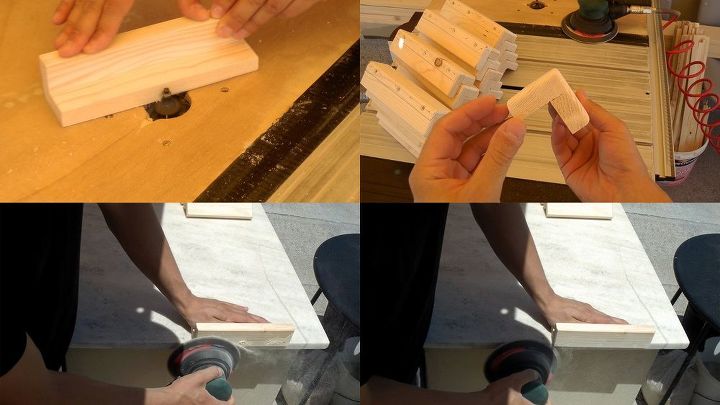
I rounded all the edges with the router, sanded them, puttied all the holes and sanded them again for a smoother feeling.

Step 7:
Then, I repeated the same process for the side pieces of the wooden crates. Nailed them, marked them, drilled them, screwed them, sanded them, rounded all the edges, puttied all the holes and then sanded them again for a smoother feeling.
Step 8:
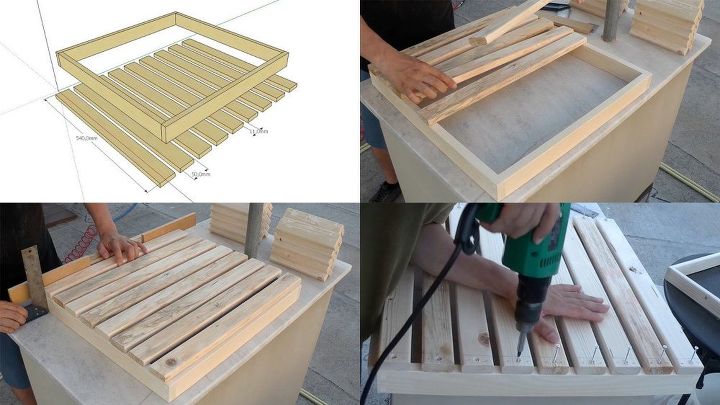
For the bottom of the wooden crates I used nine pieces of 54cm length and 5cm width. Also I left a space of 11mm between them. Marked them, drilled them and screwed them.
Step 9:
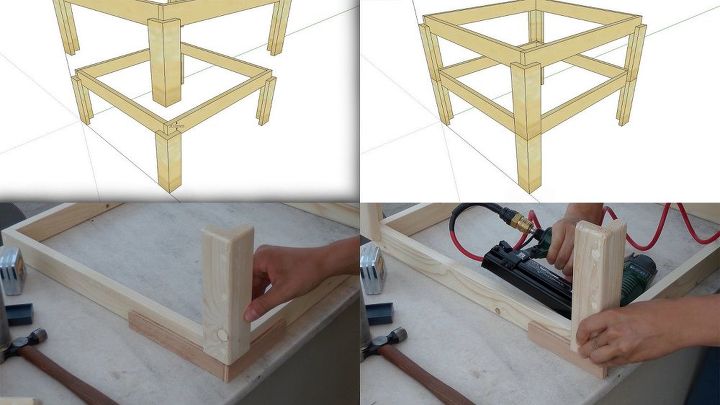
After the bottom of every crate is ready, I took the remaining pieces and installed the legs on them. I left 3cm from the top, so that every crate can fit in into the other.
Step 10:
Now, I took the bottom pieces I built before and installed them onto the other pieces with the legs. (Also left a 3cm gap between these two pieces).
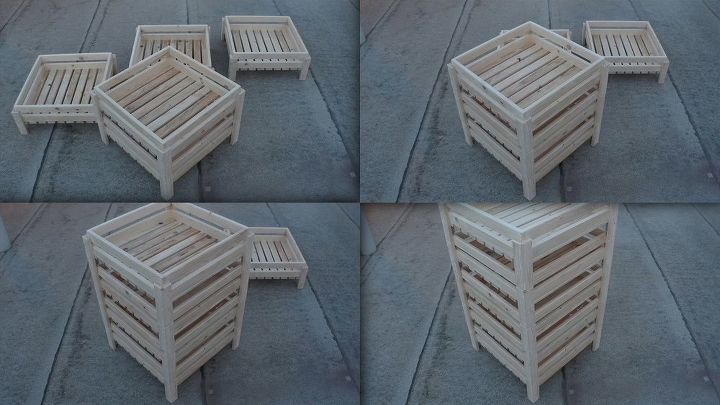
Step 11:
Nailed them, screwed them and the crates are ready!
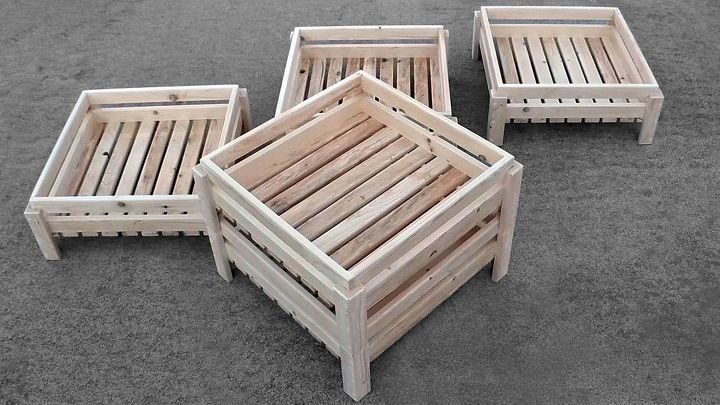

Thanks for reading! I hope you liked it!
Click the link below to watch more DIY projects!


Frequently asked questions
Have a question about this project?