


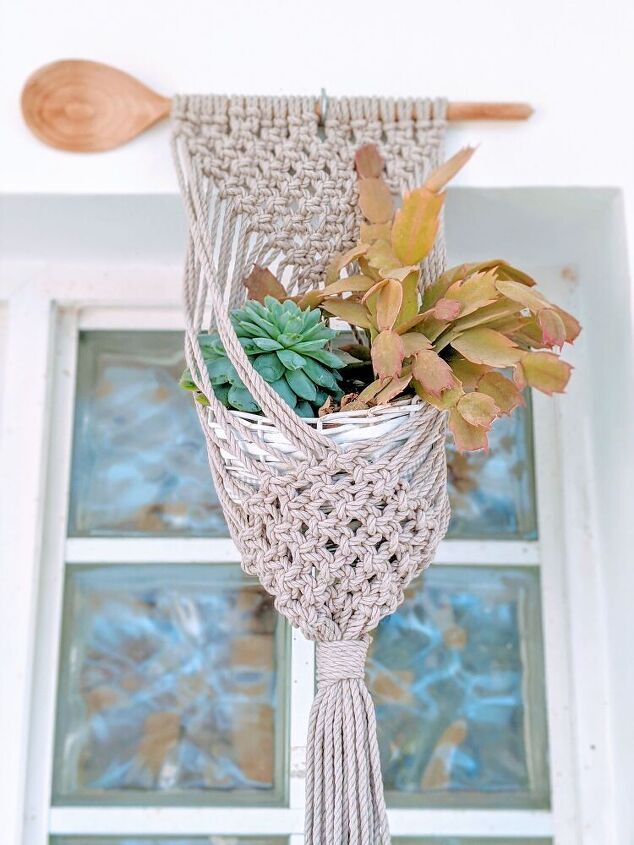
Plant Hanger

My mom and I spent a lovely afternoon together, making this beautiful plant hanger: low budget project and excellent quality time. We love doing macrame together; my mom knows all the excellent knots and has enough patience to teach me.
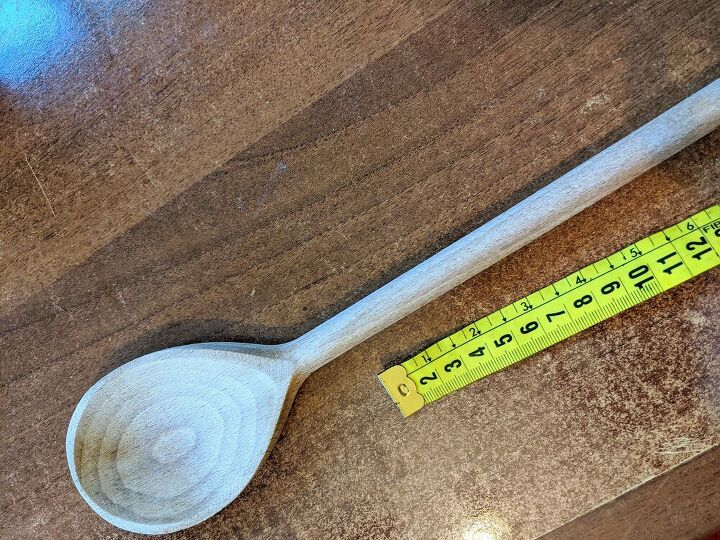
My parents have this wooden spoon in the drawer for quite some time now. Someone accidentally placed in the dishwasher and got an awful texture. As we were sorting the drawer, my mom picked it up. She is creative and immediately thought about making a wall plant hanger with it. It could be made with any 25cm/10 inches stick.
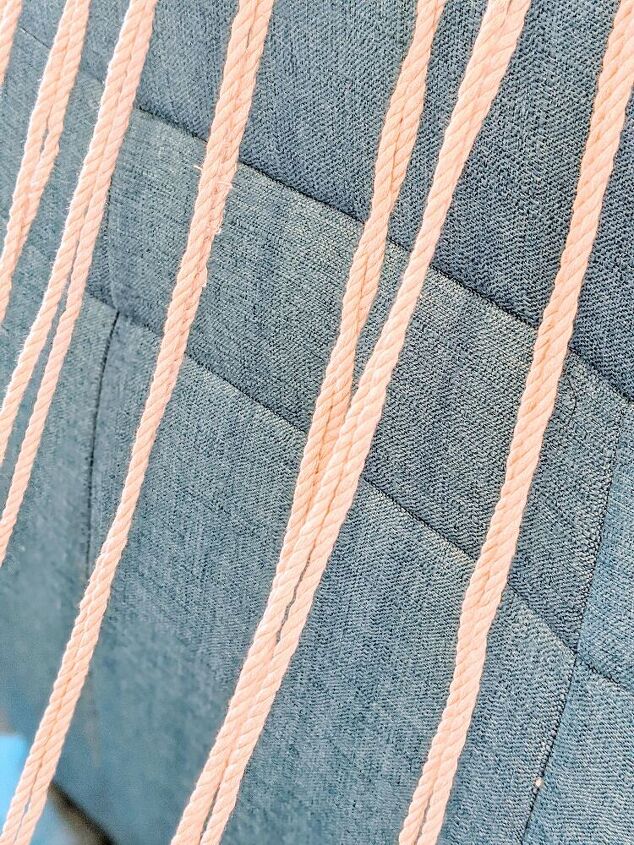
First, we cut the cords to the size we wanted. We made 18 cords of 79 inches long, out of the twisted cotton rope (4mm) we had. We like to work with a natural 100% recycled cotton; therefore, it could be washed and cleaned easily, plus it is good for the environment. We used a semi-off white colour.
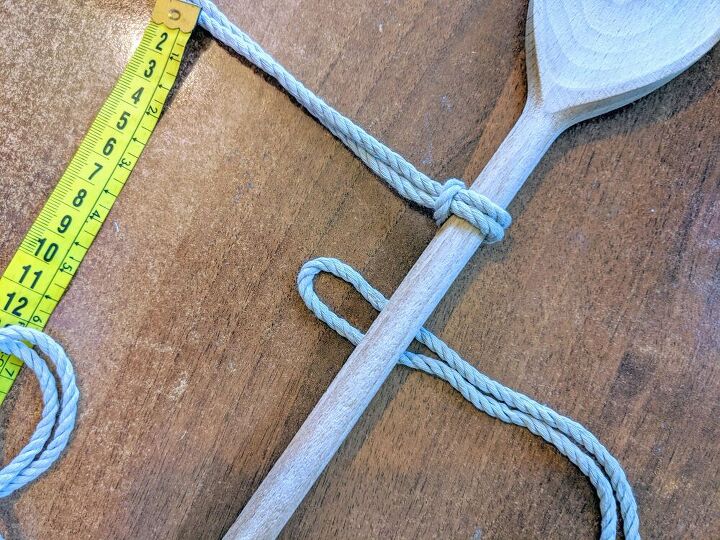
Once we had all the cords ready, we folded them in half. The loop of the fold was placed underneath the wooden spoon,
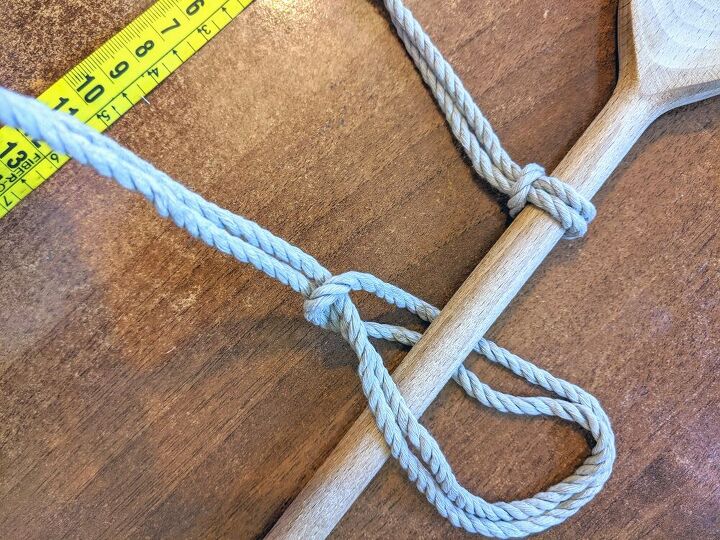
and we tight it on it.
Until all the cord were neatly on the wooden spoon.
We made sure that the cords are aligned and spaced out evenly before we began macrame-ing.
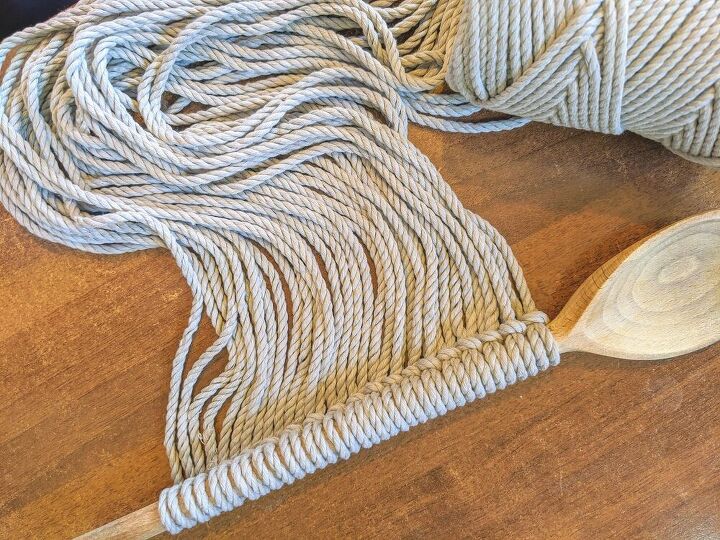
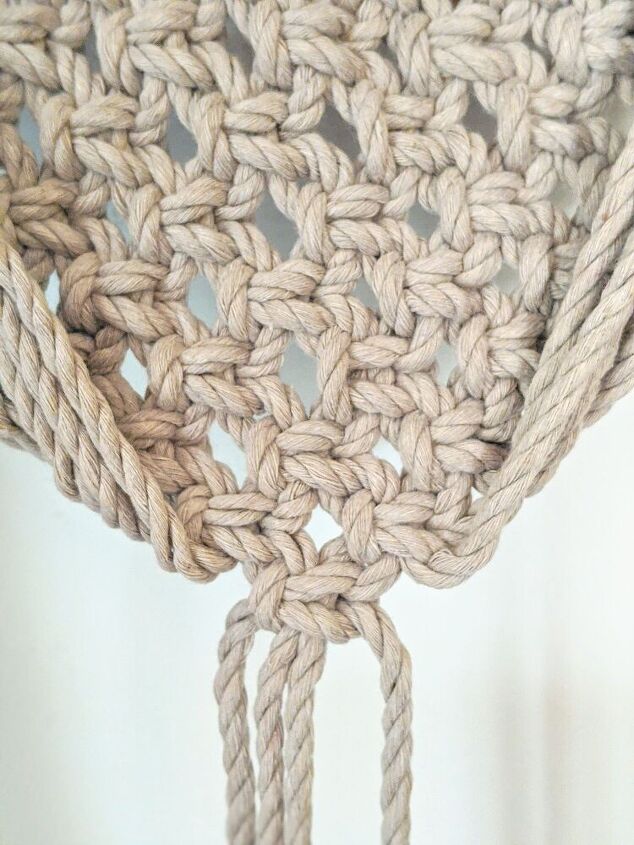
Then, we square knotted the first row. My mom started on the left, and I was on the right, standing near next to each other, how fun!
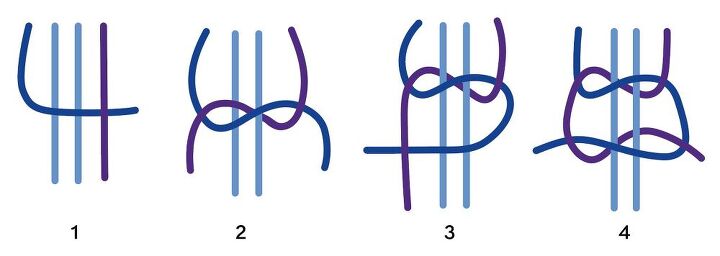
Suppose you are unfamiliar with a square knot, it is the most simple knot in macrame, and the only one we used for this plant hanger (excluding the gathering knot to tie everything together at the end). I made an illustration, click on it to see the full image. It starts with 4 cords (2 cords folded in half). Place the left cord (royal blue) over 3 cords, and under the right cord (purple). Bring the cord through the loop formed and pull. This is the first half. Then, repeat on the other half with the purple cord- bring the right cord above all three cords and under the royal blue cord and through the loop formed and pull.
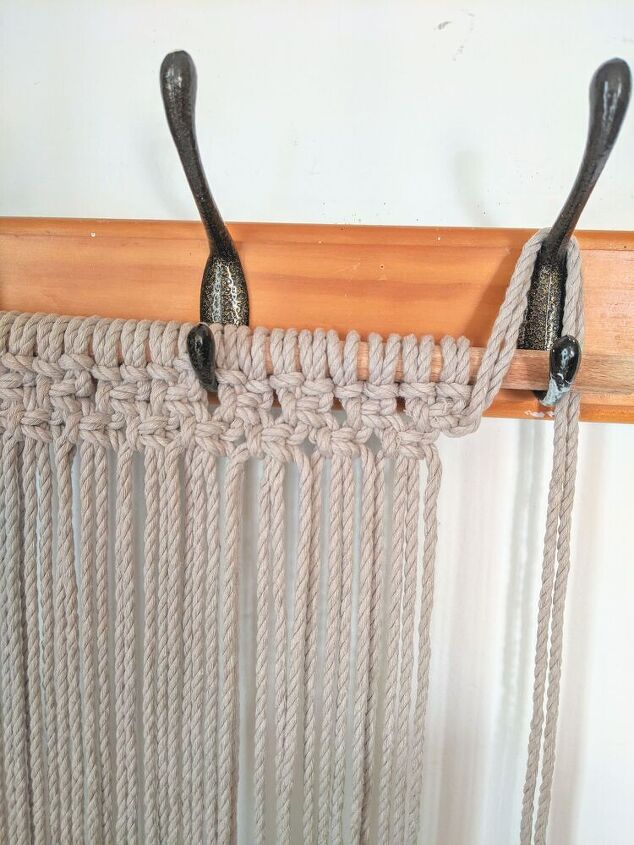
After finishing the first row, we placed two cords aside- from each side, leaving 4 cords in total out, and repeated the process.
It looked like an up-side-down triangle,
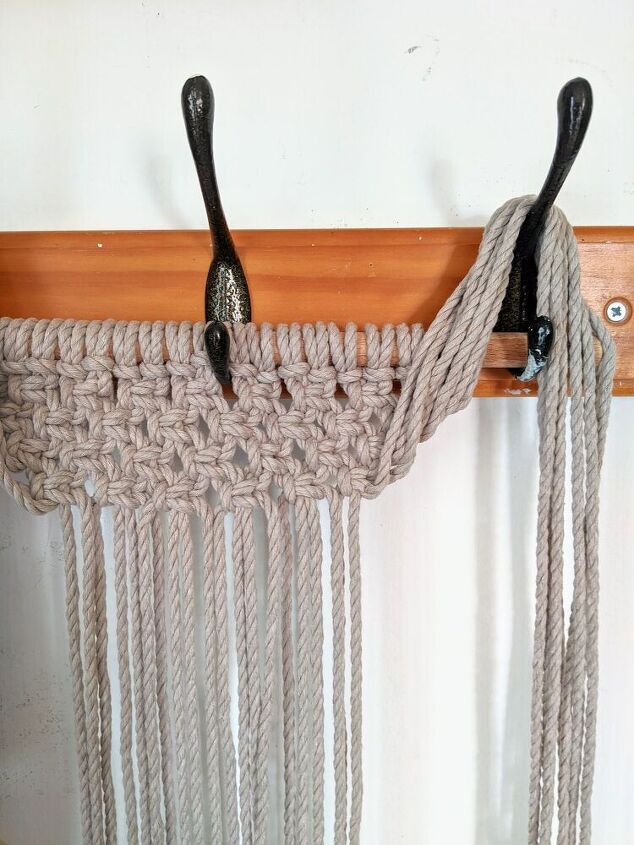
Once we only had 4 cords, we made the final square knot and the triangle was complete.
As it took us nearly 40 minutes at that point, and the rain was pouring down on the window- it was a perfect time for a tea break.
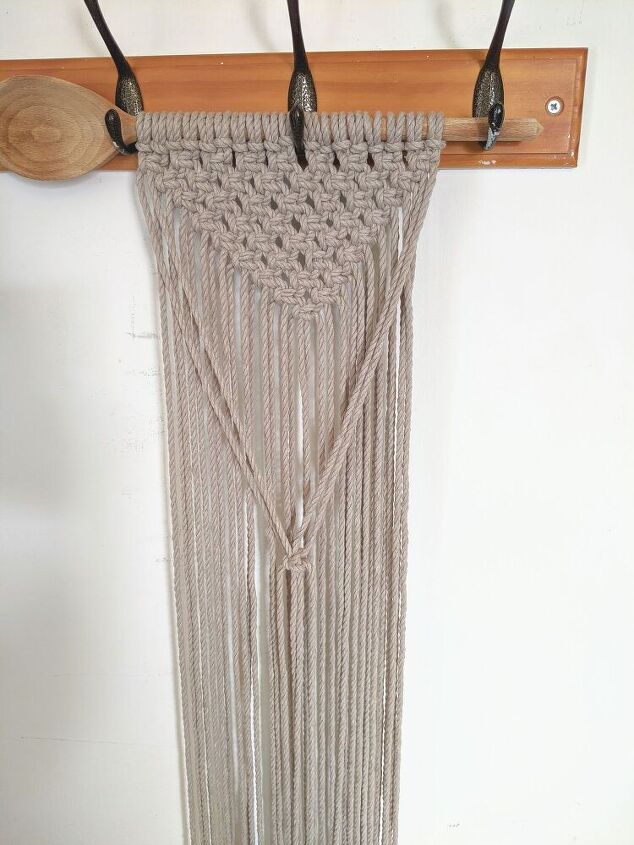
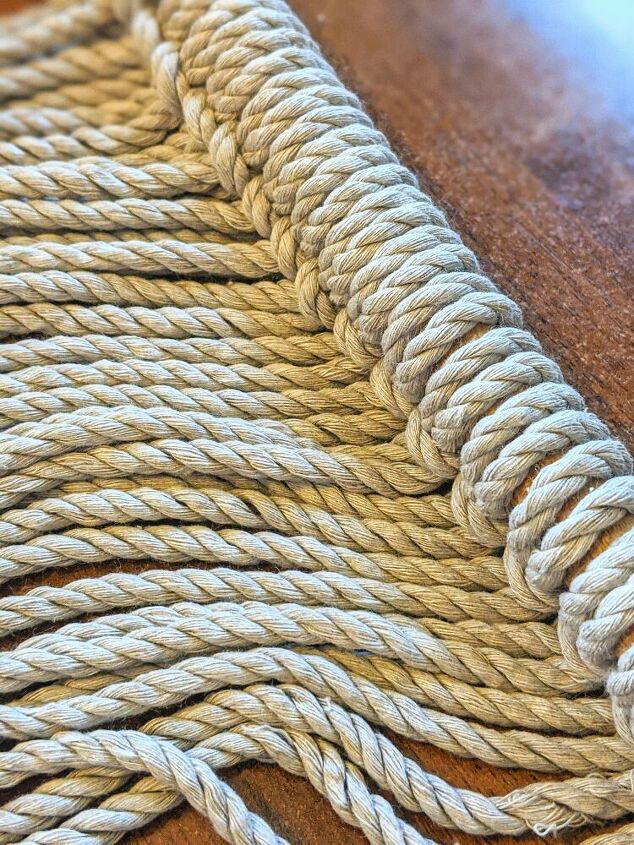
Then, we picked a pot from my mom's garden that would be hanged inside. Based on the pot, we decided what the height of the next triangle would be. We used a measuring tape to find the aligned middle and made a square knot out of two cords from the right and two from the left.
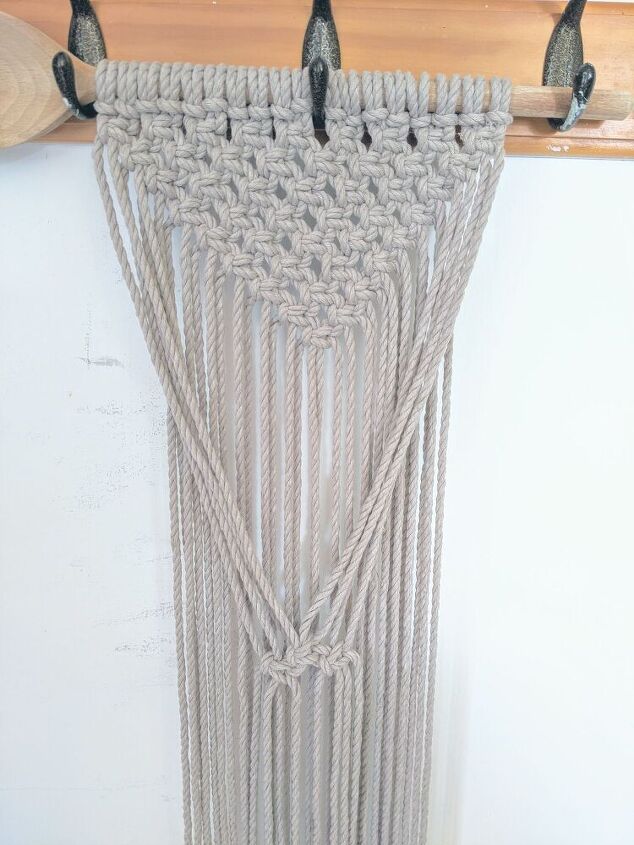
We basically did the opposite of the first steps, and we made square knots from 4 cords, 2 from the left and 2 from the right, each time.
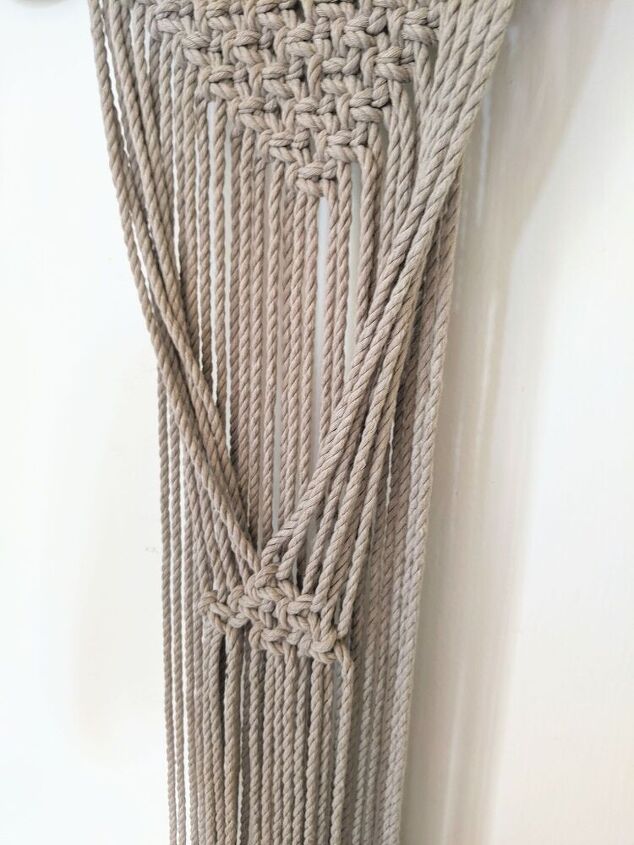
The cords should be placed on top of the last triangle, creating a space that in the end, would be the place for the pot.
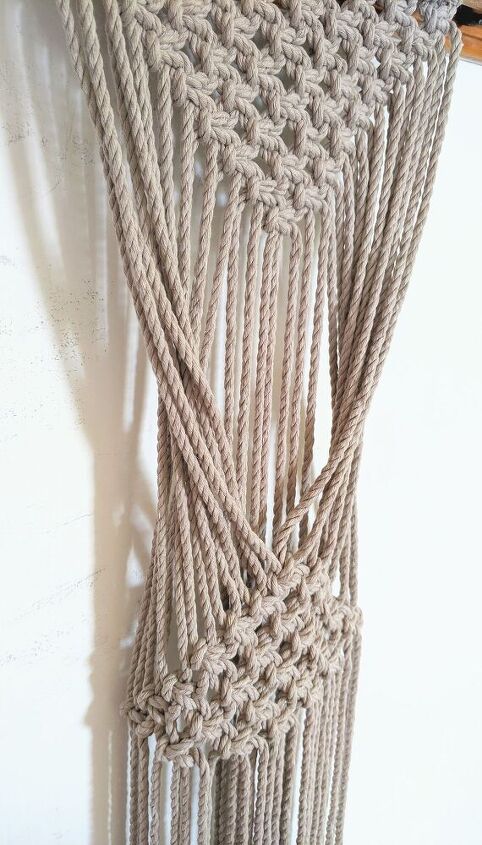
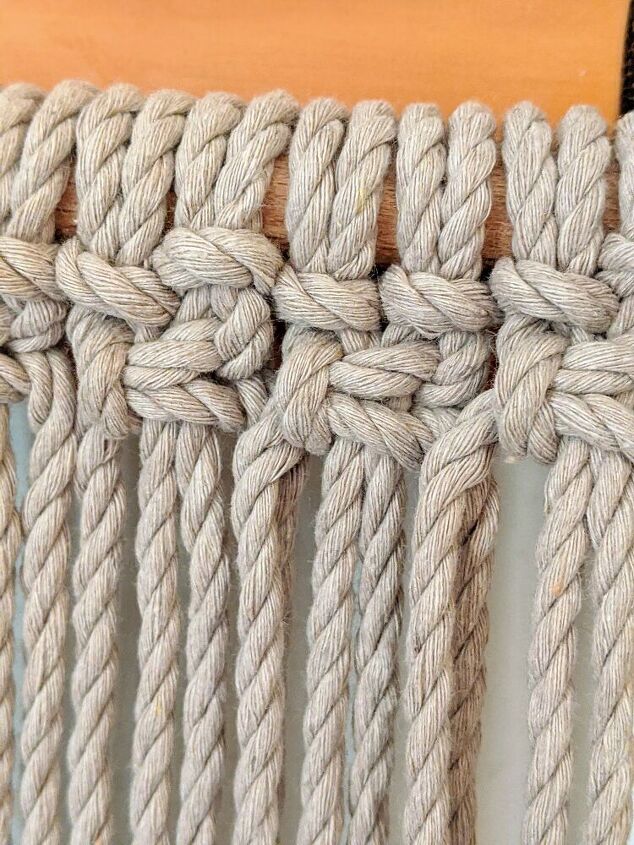
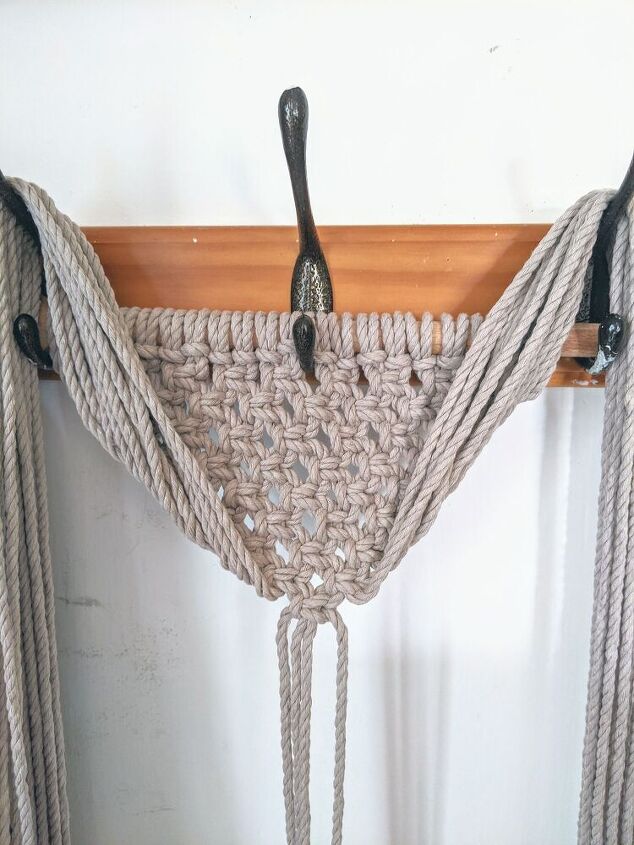
We had to make sure all the square knots are aligned and have the same height. It took us some time, untying a lot of knots... Once all the cords were tied into a square knot,
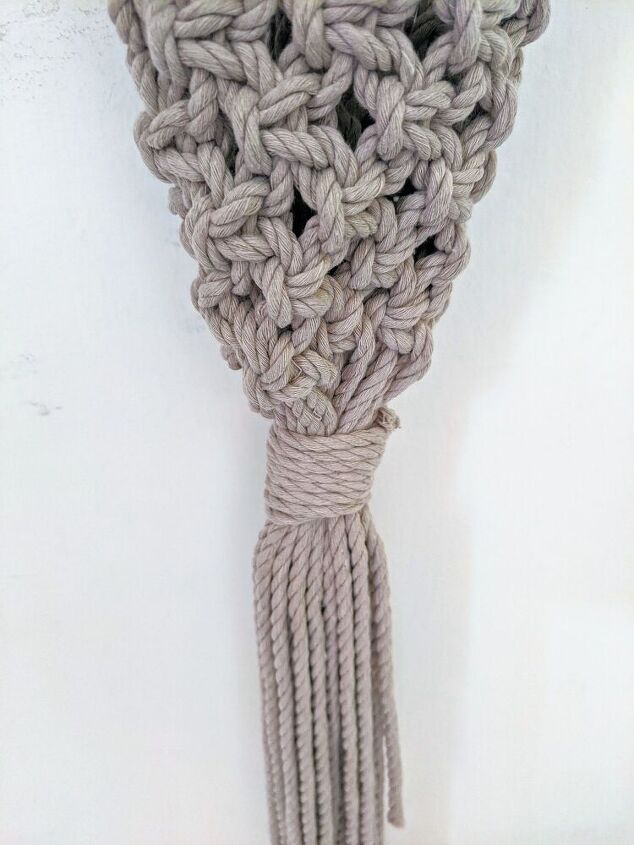
We wrapped all the cords together and used a gathering knot to tie it firmly.
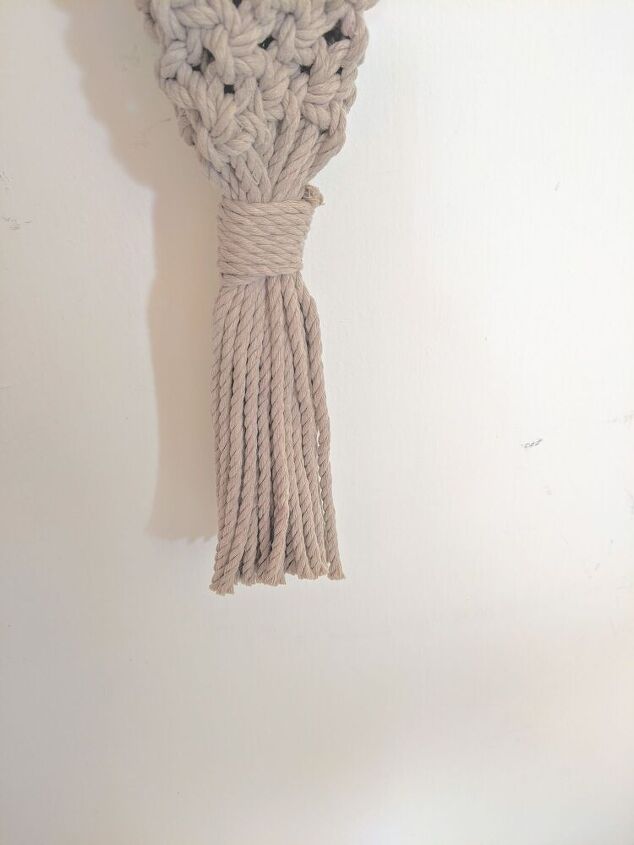
We cut all the cords to be at the same height, more or less (it always surprise me how you can start with the same length of a cord and at the end, it is all in different sizes, how!). We placed the pot inside the pocket that was made out of macrame,
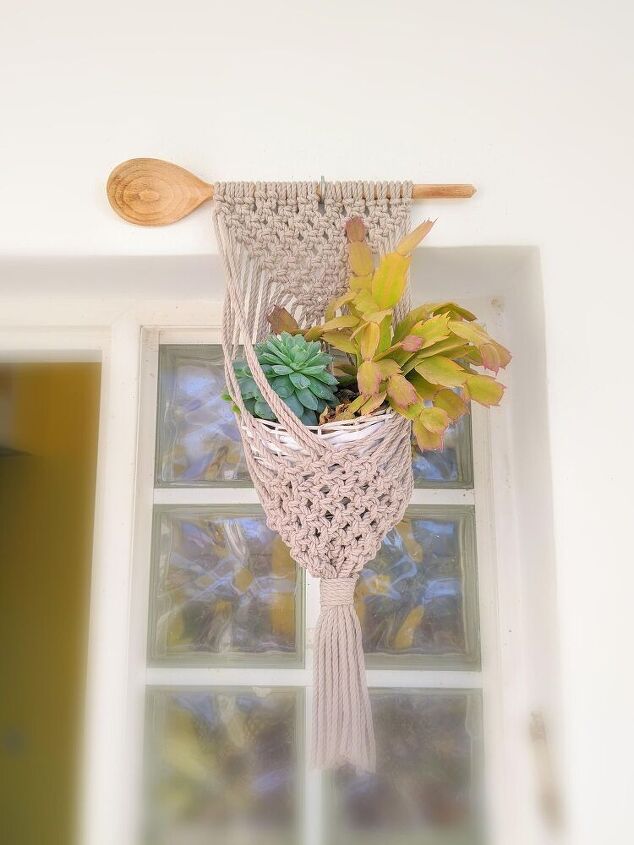
and my father helped us drill and put a hook on the wall. We placed the wooden spoon to rest on it.
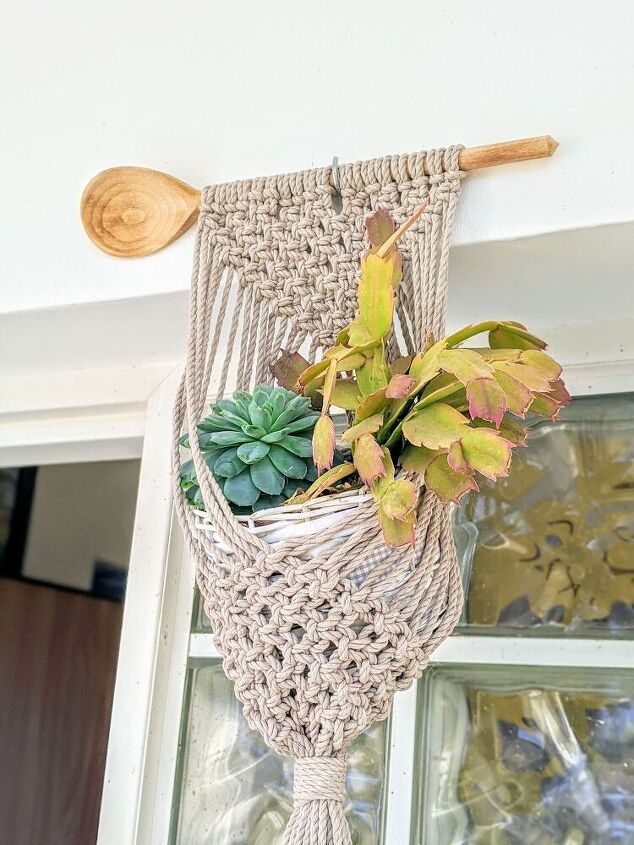
After two hours and a lot of fun, it is ready! 
Resources for this project:
See all materials


Comments
Join the conversation
-
I have always wanted to try this… you give clear and beautiful instructions on how I too have the ability to complete this project thank you!
-
Pleasant surprise. Unique ! I like it. Very good tutorial. I can learn macrame. Thank you.


Frequently asked questions
Have a question about this project?
why not spray the foam the color of the balls ?