


Patriotic Farmhouse Fabric Stars
Add a touch of Americana to your farmhouse decor with these easy-to-make DIY fabric stars. You don't even need a sewing machine to complete this project, and it's fun for kiddos to learn some basic hand-sewing skills, as well!
The decorating possibilities are endless for these sweet fabric stars. Use them in your tiered trays, as shelf tucks, or nestled into patriotic vignettes.
Plus, stars are perfect for decorating year-round! These would be just as great for Christmas tree ornaments, or for a child's space-themed birthday party--so many options from one simple pattern!
Let's dive into the project!

To create these stars, you'll need:
- Star pattern (I've created a printable template for you, linked at the end of this post)
- Fabric of your choice
- Embroidery floss
- Embroidery needle
- Poly-fil
- Scissors
- Pencil
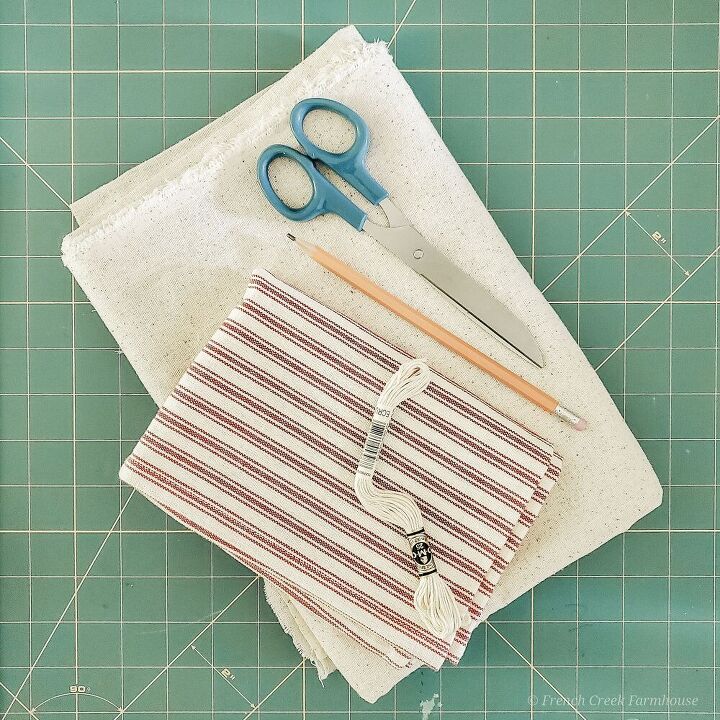
STEP ONE: GATHER YOUR SUPPLIES
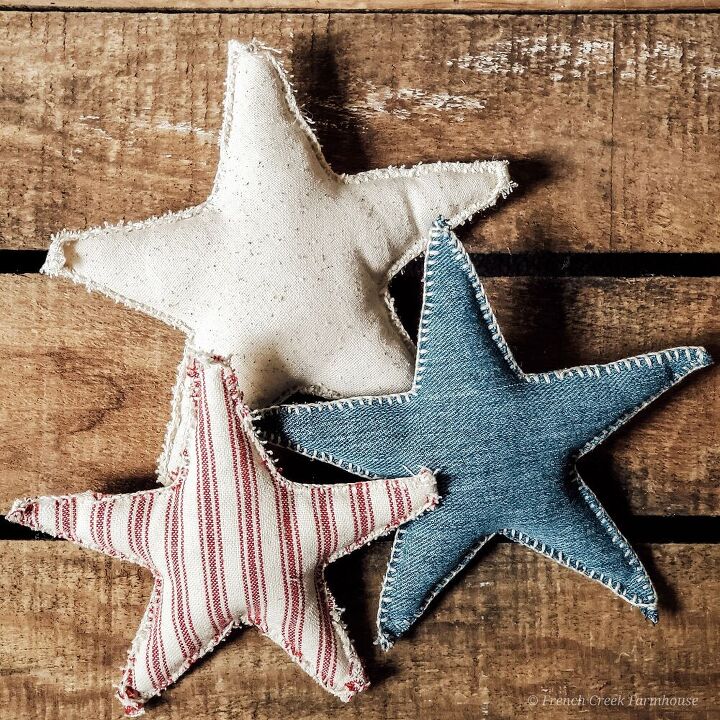
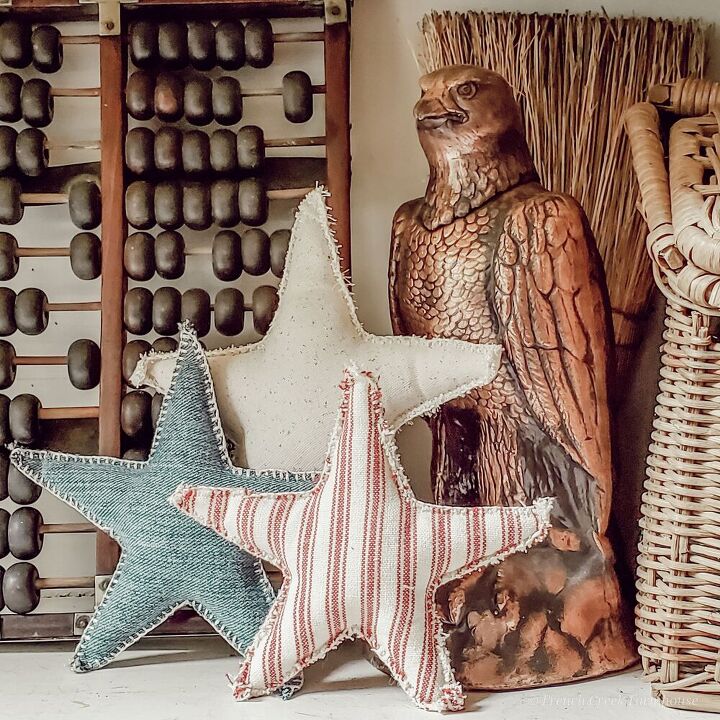
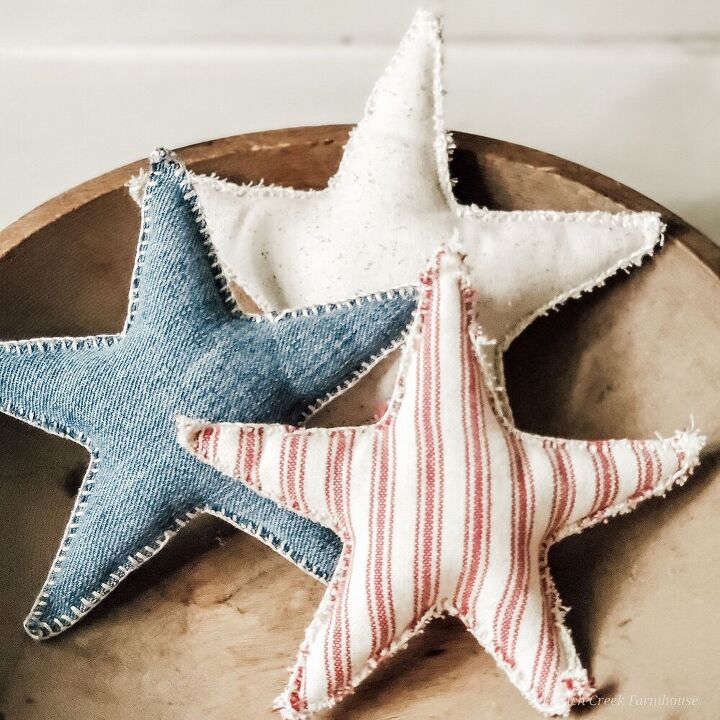
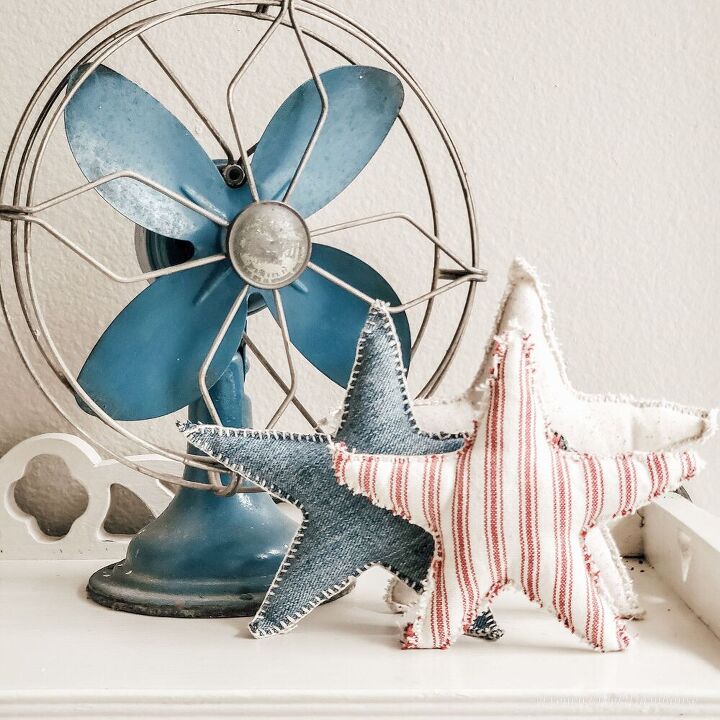
Since I wanted my stars to have a patriotic farmhouse vibe for Independence Day, I made them using three different fabrics: red ticking stripe, a neutral grain sack, and denim from an old pair of jeans.
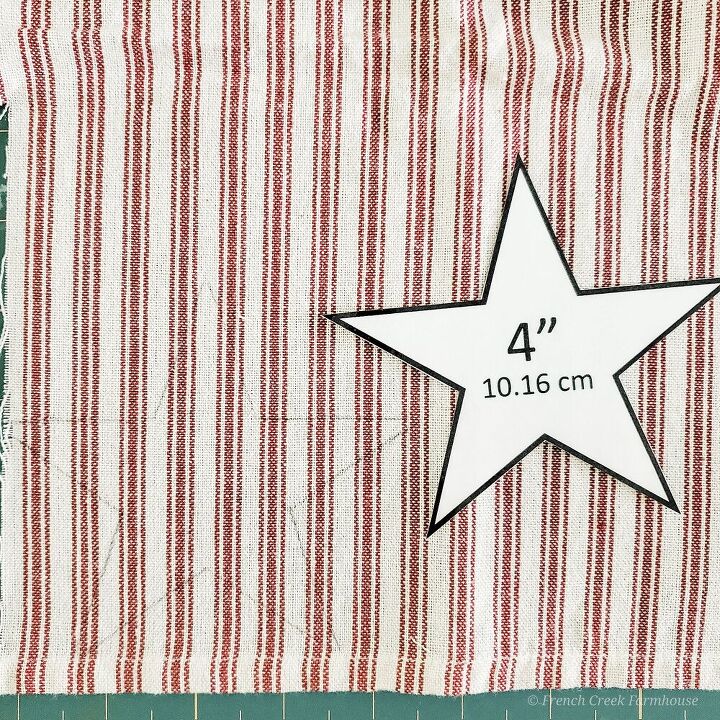
STEP TWO: CUT OUT STARS
I made my stars in three sizes: 4", 5", and 6". I wanted them to sit at staggered heights when grouped together, but you can make them any size you like.
You'll need to cut two stars shapes for each completed star (i.e. a front and back piece).
I have a printable pattern on the blog (linked at the end of this post) for perfectly shaped stars ranging in size from 2" to 6", so do feel free to snag that template to get started!
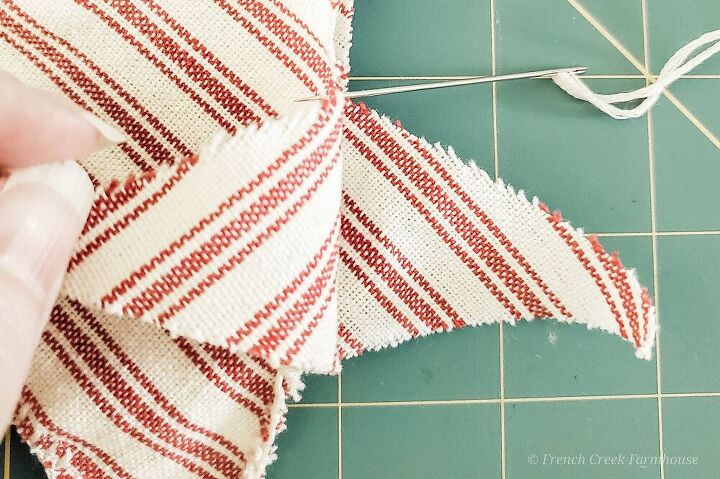
STEP THREE: BEGIN STITCHING
You can really start stitching from anywhere you like, but I prefer to start my first stitch on an inside corner for the most clean look possible.
This project uses the blanket stitch, which is a simple hand-sewing technique that leaves a perfect farmhouse finish around the edge. I have a step-by-step tutorial {HERE} if the blanket stitch is a new technique for you. Once you get the hang of it, there are so many fun projects you can make without a sewing machine!
Of course, if you prefer to top stitch with your sewing machine, that works too!
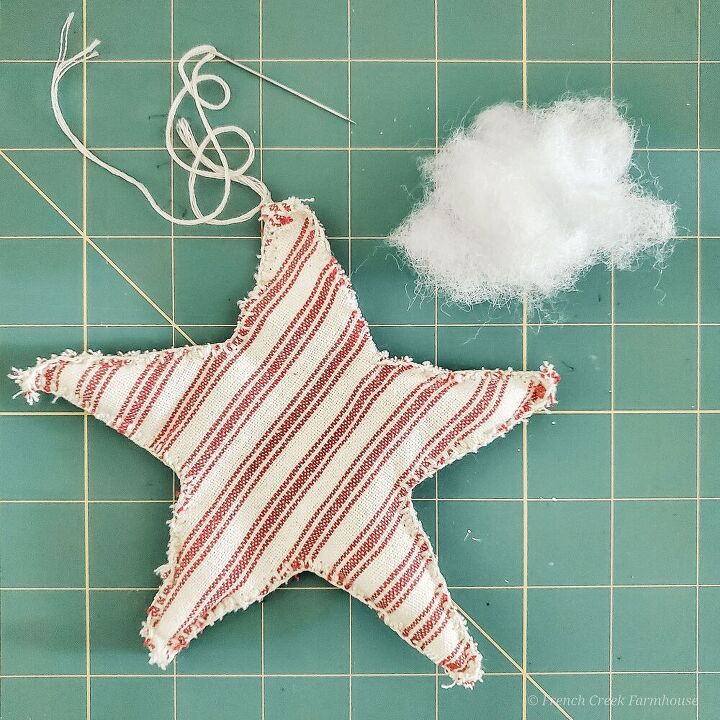
STEP FOUR: STUFFING
Stitch all the way around until you get to the fifth point. Pause your sewing and leave an opening so that you can stuff the inside of the star with poly-fil.
I recommend stuffing the tips of each point first, since they're the toughest to reach. You might find it helpful to push the stuffing into the point with a crochet needle or pencil, but use caution not to push so hard that you rip out the seams!
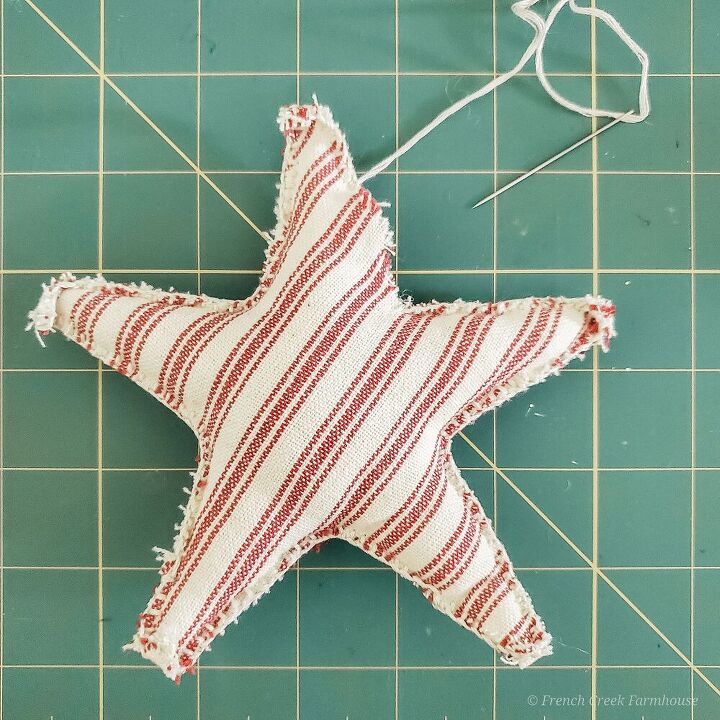
STEP FIVE: FINISH SEWING
After you've stuffed your star to the amount of fluffiness you like, finish stitching the last little bit to the end.
Then, knot your thread and lose the stitch into the middle of the project so there are no stray threads.
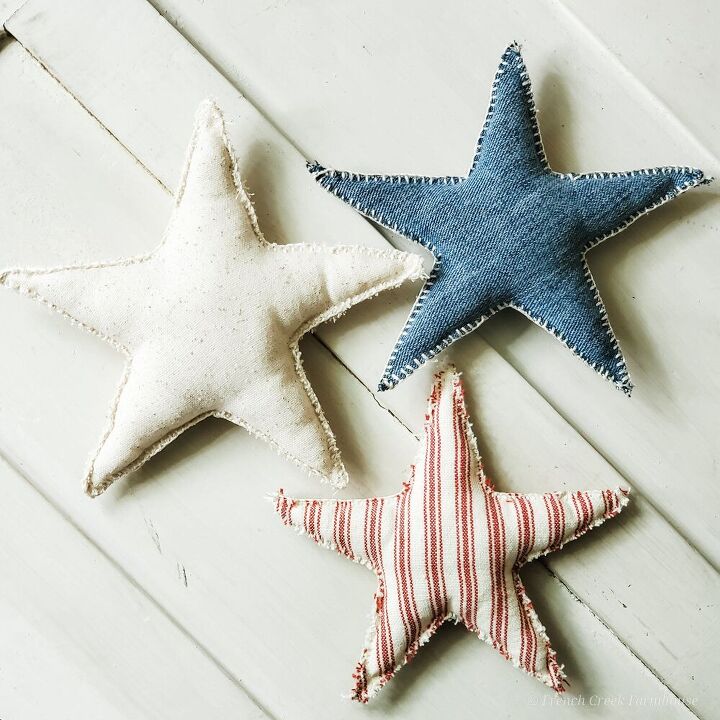
THE FINISHED PROJECT
In the above photo, you can see the effect of the blanket stitch around the edges, which leaves a charming farmhouse look! Using a contrasting color of thread, like I did on the denim star, will really make this technique stand out.
DECORATING IDEAS
Stars make perfect decor accents any time of the year, but if you're creating vignettes for Memorial Day, Independence Day, or Veteran's Day, they're a lovely way to show your patriotism.
Tuck them into a shelf for subtle touches of American pride.
You can make several stars and use them as bowl filler!
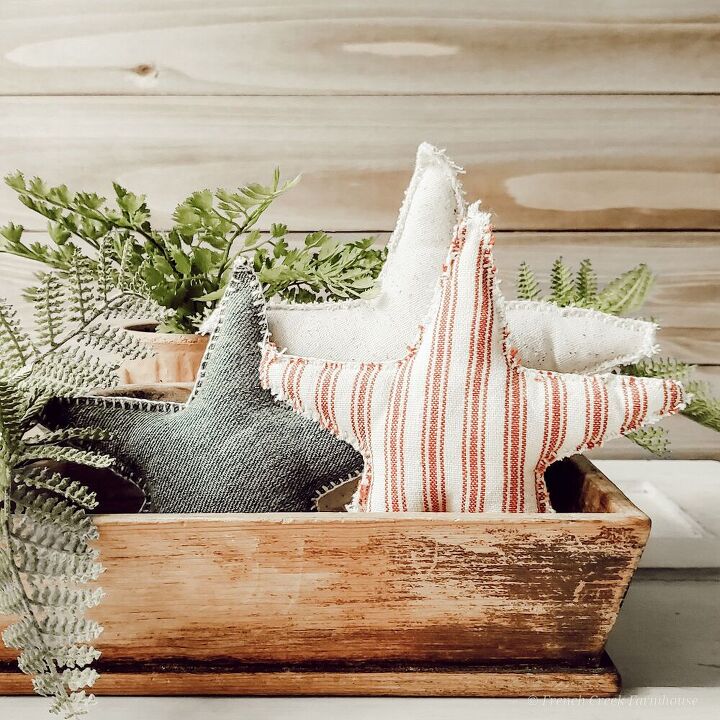
Include a pop of patriotism in your trays!
You can get more ideas for decorating with these stars, as well as a printable pattern to make your own, HERE.
If you enjoyed this project, please like, save, and drop a comment to let me know! 
To see more projects, be sure to follow me here and on Instagram, Facebook, and Pinterest @frenchcreekfarmhouse to keep up with all of my farmhouse-inspired DIYs!


Frequently asked questions
Have a question about this project?