


$4.99 Salvo Furniture Flip!

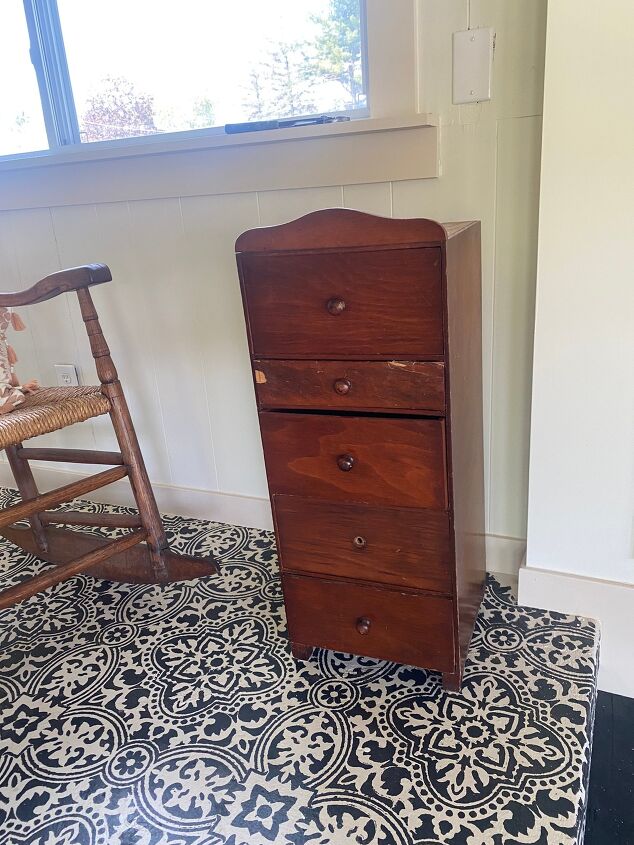
I was browsing through the local Salvation Army one day and stumbled across this small piece of furniture that I honestly am not even quite sure what to call it. But, I immediately saw the potential. And, the best part is that it was only $4.99!! Here is the before!
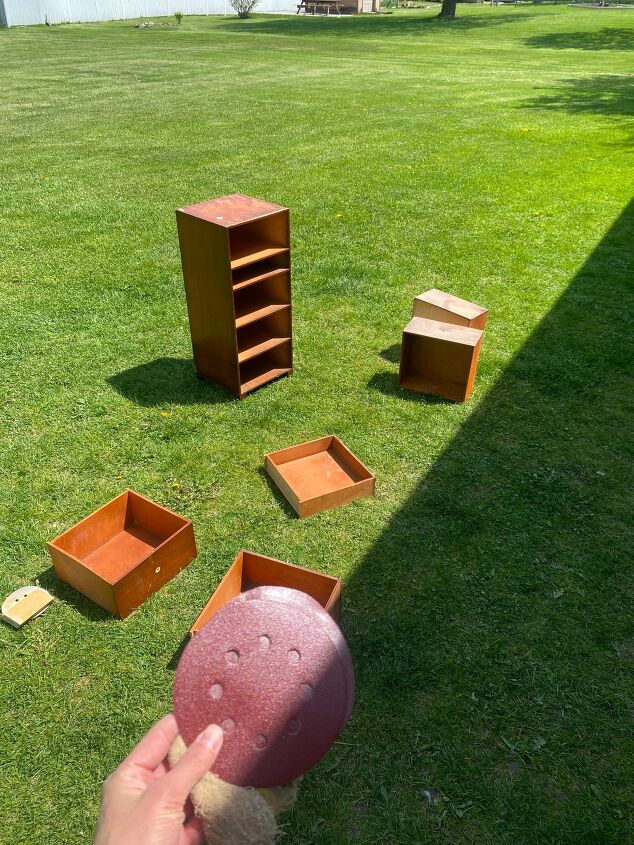
First I took off the old knobs and top decorative piece. Then, I brought it outside and gave it a quick sand down with 120 grit sand paper! After it was all sanded down I used a tack cloth to clean off the sand and dust.
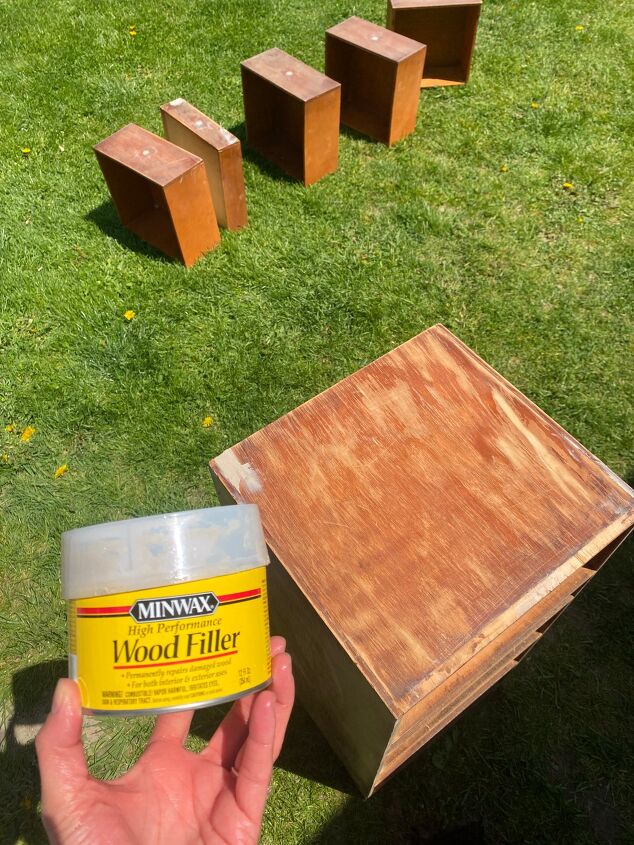
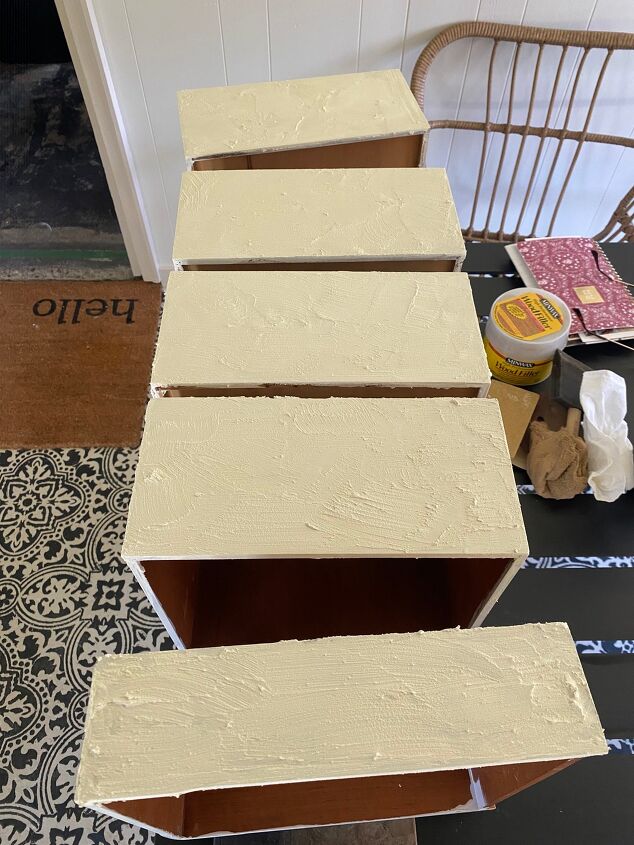
I then mixed up some high performance wood filler by Miniwax and filled the holes and all of the imperfections. This wood filler is strong! I little more expensive, but in my opinion worth it! Once the wood filler dried, I gave those areas another quick sand down with 120 grit sandpaper. Then again wiped away the sanding dust with a tack cloth.
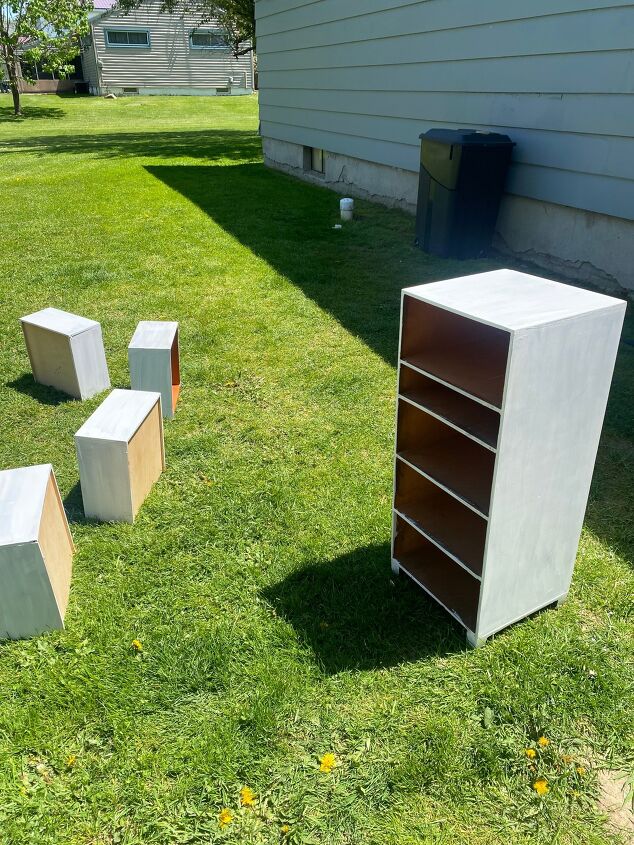
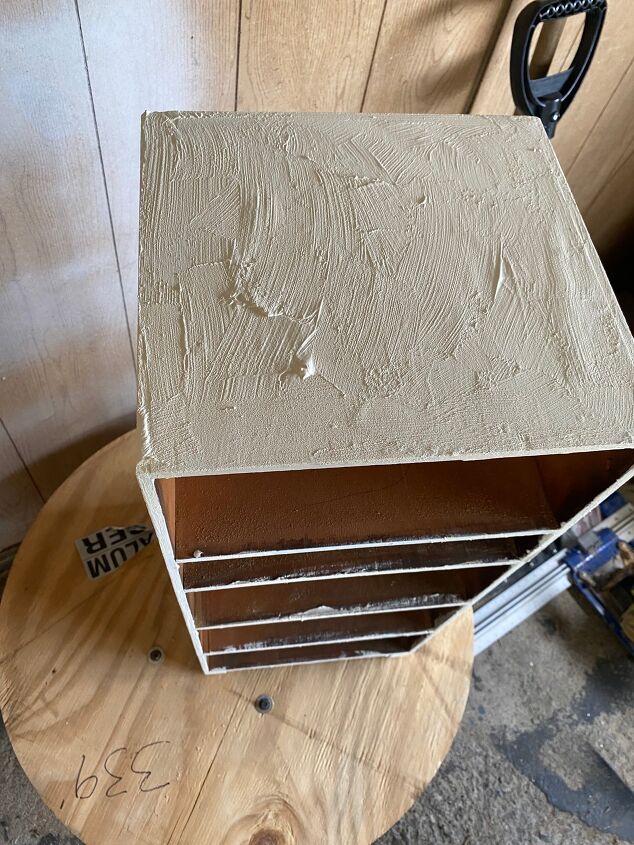
Next I primed it using BIN Zinsser Primer. I did 2 coats. I love this primer because it prevents any bleed through from the tannin in the wood. Even though I believe this piece is veneer, I didn’t want to take any chances. I definitely don’t want that yellow/orangey bleed through. This primer is also shellac based and just the best primer ever, I use it for everything. Again, I little more pricey, but worth it!
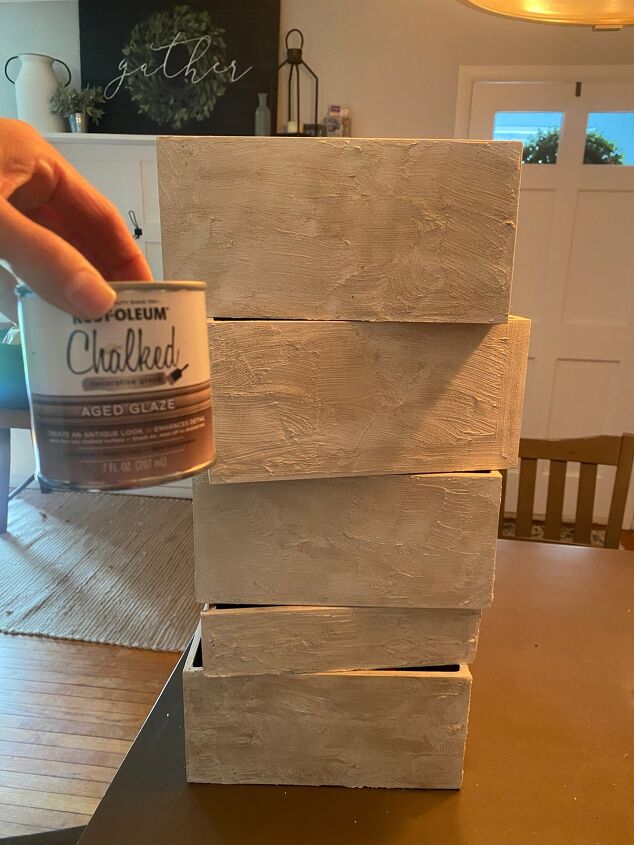
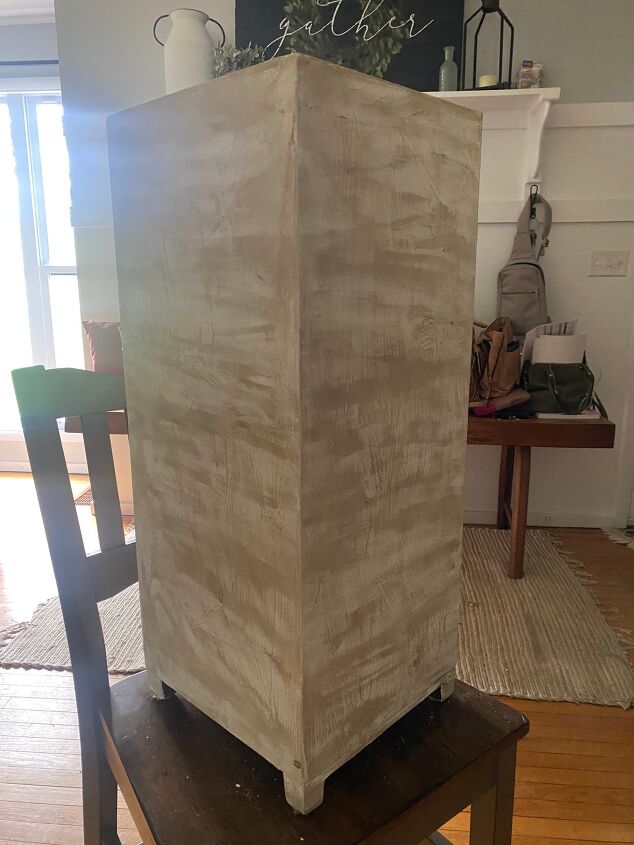
Then I was ready to paint! I wanted a white cabinet with a lot of texture! I had been hearing/seeing people mixing baking soda in with their paint and decided to give it a try! I did not read up on this I just kind of wung it and made it work in my own way – but I really like how it turned out! I started with pouring a small amount of paint into the tray. I used Alabaster white in eggshell, this is just what I had! I then just started to add a small amount of baking soda to the paint and mixed it together with my paint brush. I quickly realized I liked the look of a lot of baking soda. I probably mixed about half paint half baking soda to achieve this look. I wanted a lot of texture! I used my paint brush and brushed/dabbed on the paint/baking soda mixture! Adding more baking soda as I went – again I just was winging it!
The more texture the better in my opinion. You can always sand down any really big clumpy sections and smooth out any areas once it is all dry.
I let that dry overnight. I was curious how the baking soda would dry with the paint and if it would flake/fall off. It didn’t at all. It dried very hard and I used A LOT of baking soda. I then used a damp old rag and wiped on this Rust-oleum chalked aged glaze. This gave the piece some character and made it look somewhat antique appearing.
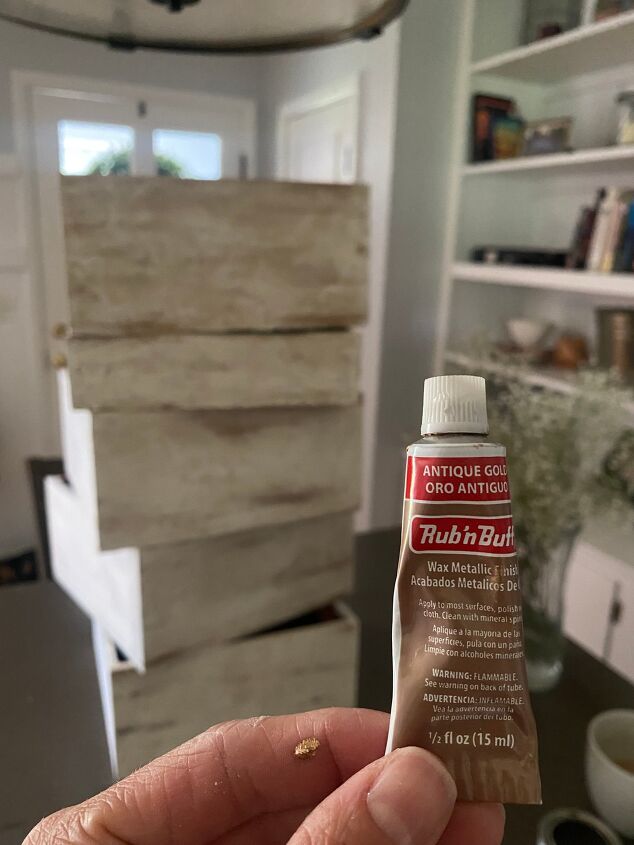
I wanted even more character added to this piece so I dug up my antique gold Rub’n’buff and added a small amount of this to some areas as well.
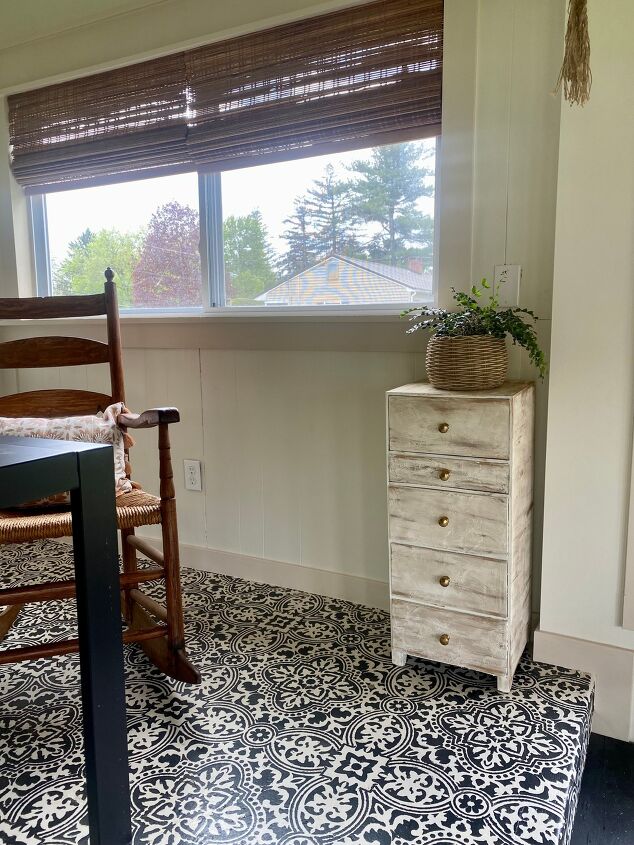
Once this dried I drilled new holes in the drawers for some new knobs I got from Hobby Lobby! I thought the simple gold knob was the perfect touch! And here is how it turned out!
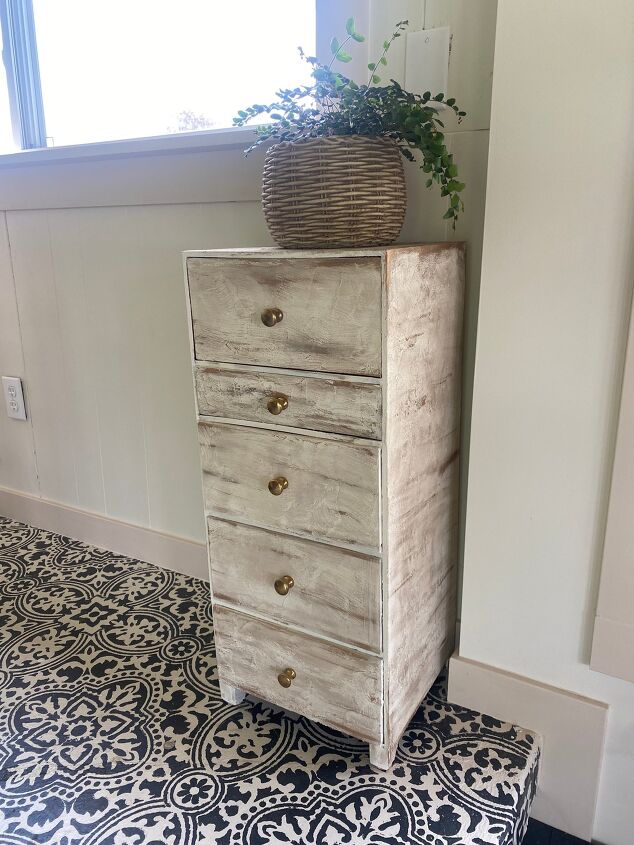
I really love it! It adds the perfect touch to my sunroom!! I have a whole highlight saved to my Instagram with videos on how-to if you are more of a visual learner! Follow me on Instagram @abbbclark_homeee for more DIYs just like this!
Comments
Join the conversation
-
Nice job. It looks aged and antique. Really like the look.


Frequently asked questions
Have a question about this project?