


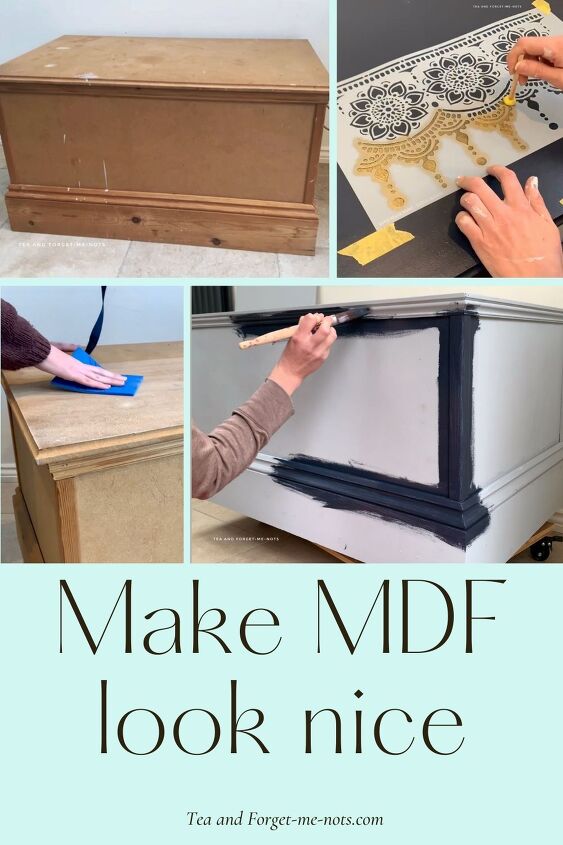
How Do You Make MDF Look Nice?

Can you make MDF look nice? MDF is a budget-friendly option but not very pretty. You need to know the right products to use to make it work.
However, a lick of paint and some decoration goes a long way to help make MDF look nice.
But there are a few things you need to think about when painting MDF. MDF isn’t solid wood and has to be treated right. Otherwise, there’s a good chance that it won’t last and will be a waste of time and effort.
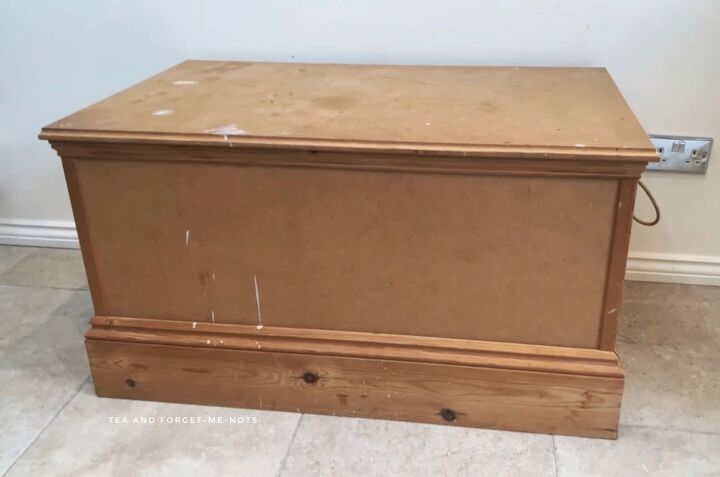
I got this chest for free on Freecycle.
It was really heavy due to the MDF and solid wood trim. So much so, that the rope handles didn’t completely convince me that they wouldn’t break at some point.
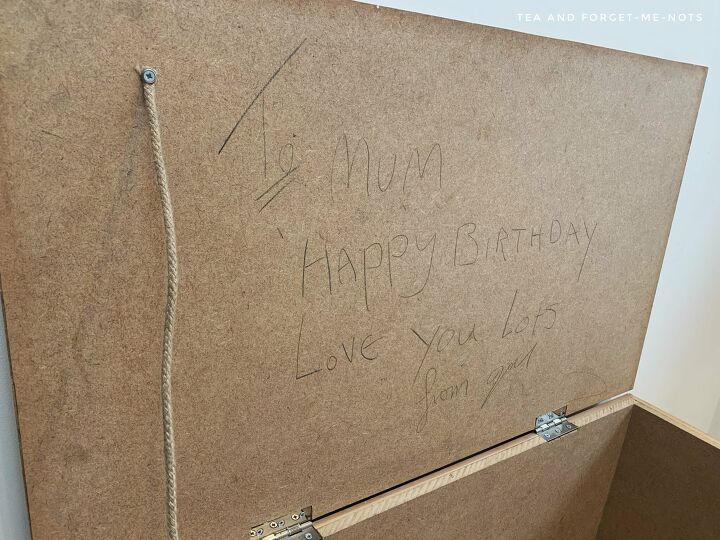
It was a handmade gift for someone’s mum, based on a message written under the lid. So, it had a nice story behind it and clearly love had gone into making it.
But I suppose because it was big, heavy and not the prettiest, it was eventually given away.
Unless something is really dirty, you shouldn’t wash MDF. The best way to prep the surface is to roughly sand it and then remove the dust.
I used a new (to me) sandpaper called R.A.D pad by SurfPrep, in the fine grit. They’re similar to my usual sandpaper which also has a foam backing.
I find this style comfortable to use and it moulds well around different shapes, like the wooden trim.
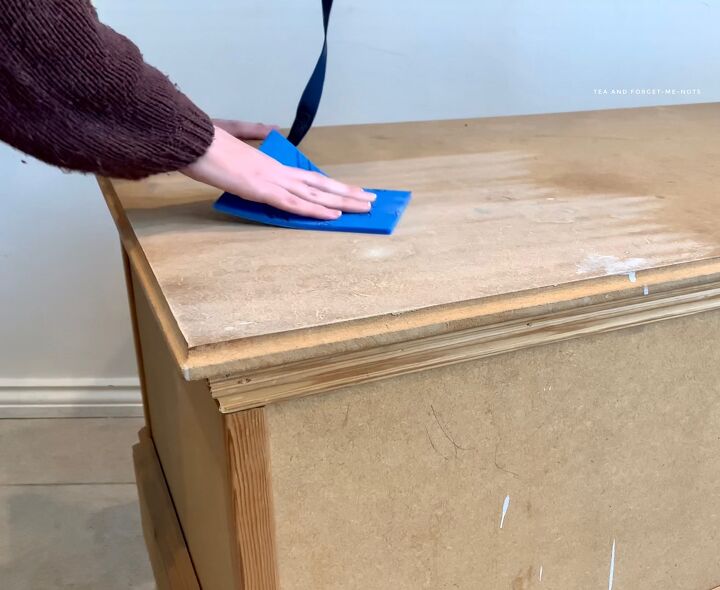
Then I used a sticky tack cloth to wipe the dust off, for a smooth start.
The chest was in good condition but I still found a few spots to make the most of some wood filler. In particular, I filled in the small gaps between where the baseboards met. I also covered the small nail holes which attached the trim. It gave it a crisp, solid foundation to paint on.
As MDF is basically wood fibres glued together, water damage is a risk.
So priming has two purposes, to create a barrier between the MDF and the paint so that it doesn’t cause the wood fibres to swell and create bubbles. This needs to be a non-water based primer.
And secondly, primer is good for lower quality wooden surfaces. This is because they’re generally more absorbent. This means that it takes more paint to get good coverage.
Priming was important to stop the MDF from swelling and to avoid using more paint than necessary.
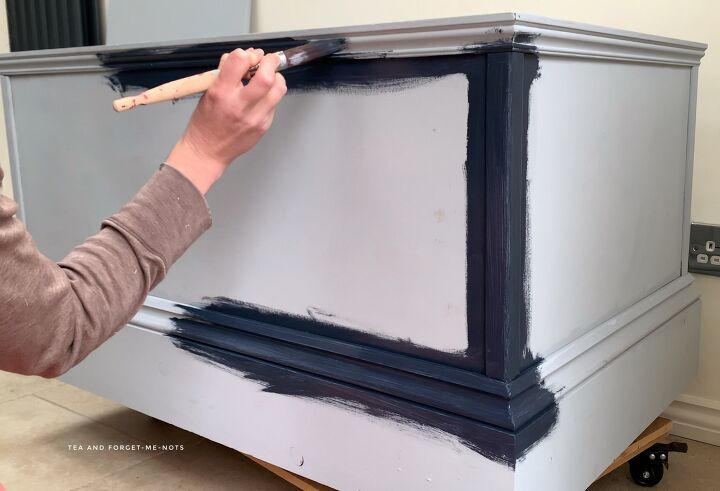
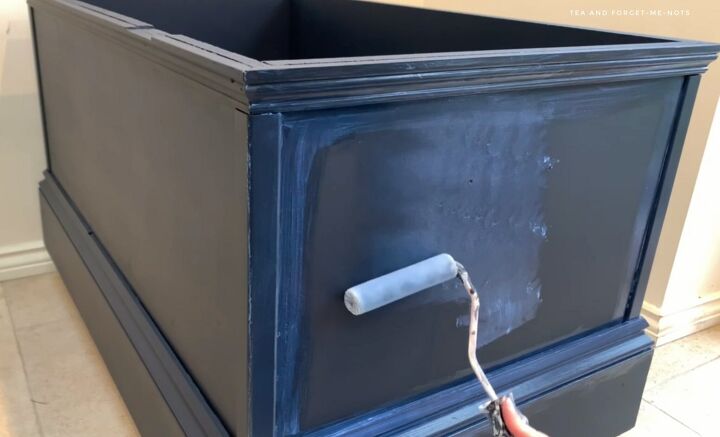
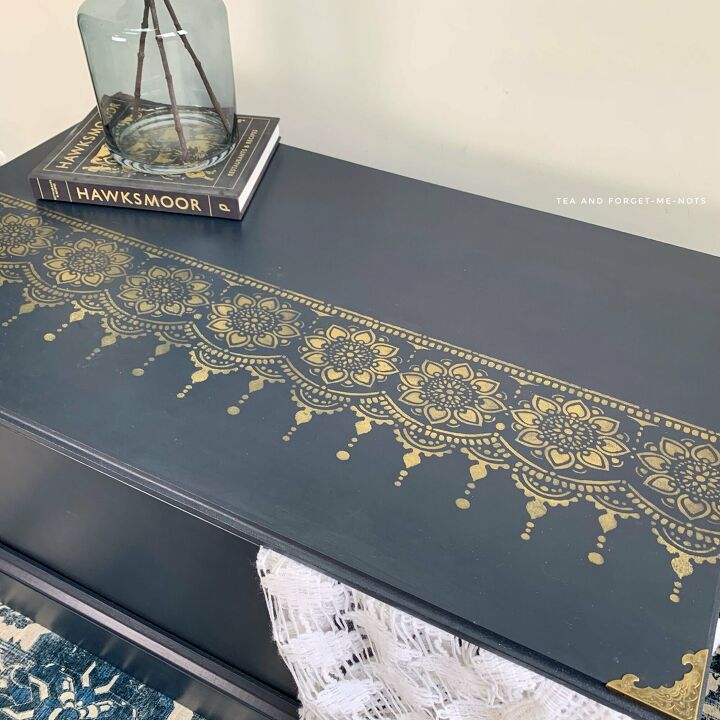
I wanted a rich colour for the chest and chose the dark navy, Deep Sea.
The MDF areas needed three coats and the solid wood trim needed just two coats.
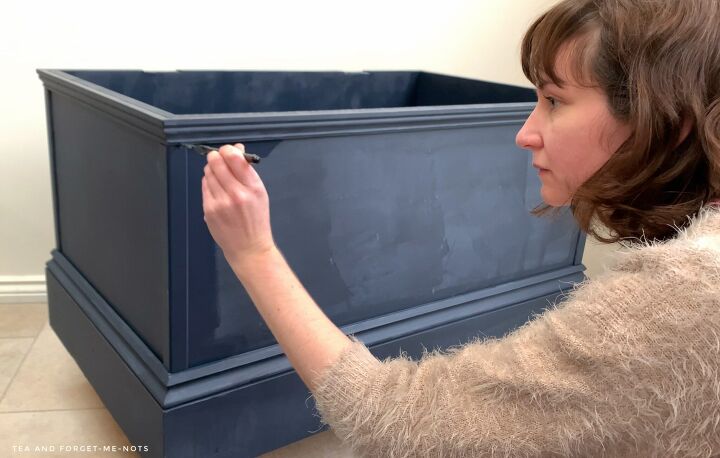
I tend to paint with a combination of brush and roller. I did the trim with a synthetic brush and the large surface with a roller. Using both at the same time gives me the best smooth finish.
I also went back with a small detail brush to get into the tiny corners.
I seal all of my projects, even if they have a built-in top-coat in the paint. And it was particularly important for this project, to protect the MDF as much as possible.
I did two full applications of Dixie Belle’s Clear Coat in Satin. I chose Satin because I prefer the slightly matte look, but the glossier the sealer, generally the more protection it offers.
This top-coat added a lovely sheen to the paint which worked well with my extra decorative elements.
While I loved the colour of the chest, it was basically a big blue box. So, I decided to add some bling to make it more glamorous. I chose the stencil, Lotus Bloom. Which has a mix of floral and Princess Jasmine vibes.
I often use stencil spray but used Frog Tape only this time, which worked perfectly fine.
Although, I did forget my tape measure so if you watch the YouTube video you’ll see my back-to-basics method of finding the centre of the chest!
To complement the navy, I used Gemstone Mousse in Gold for the stencil colour. I was expecting the mousse to have an airy texture so was surprised to see that it was a thick liquid.
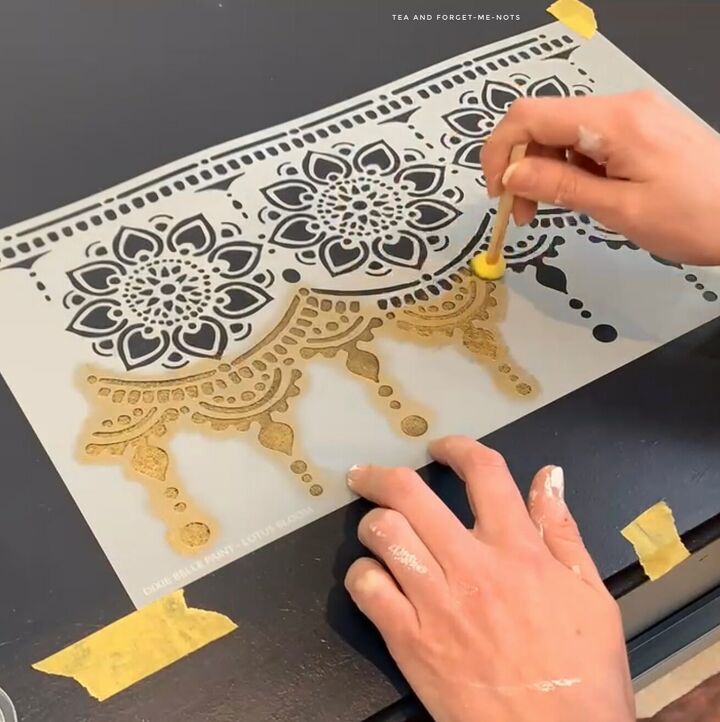
As always, I used sponge dabbers with the bare minimum of paint on to dab the stencil into place.
Using a stencil with a repeating pattern, you might need several applications to cover a piece. Fortunately, as the layer of the mousse needed to be so minimal, so as not to bleed out of the edges of the stencil, it dried very quickly.
I was able to place the stencil on top of the end flower to match the pattern and continue adding the two extra flowers, almost straight away.
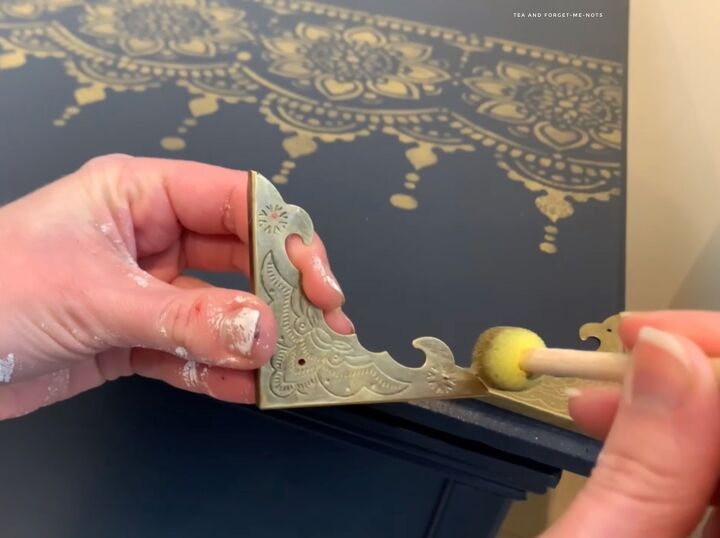
In addition to the stencil, I added these bronze corner protectors. I’ve been waiting to use these on a project for two years and this is the first piece they looked right on.
Because the bronze wasn’t a perfect match for the gold, I lightly painted over them. But I kept some of the original colour to add dimension.
The original rope handles did the job but no longer matched the more glamorous look that I was aiming for. I bought these cast iron handles in a set of two and they were reassuringly heavy themselves.
To attach them, I used my trusty Frog Tape to mark on the back where the screw holes would go. I then put the tape on the chest and used a spirit level to make sure that it was lined up correctly.
That meant that I could drill my holes over the pencil marks, knowing that the handles would be straight.
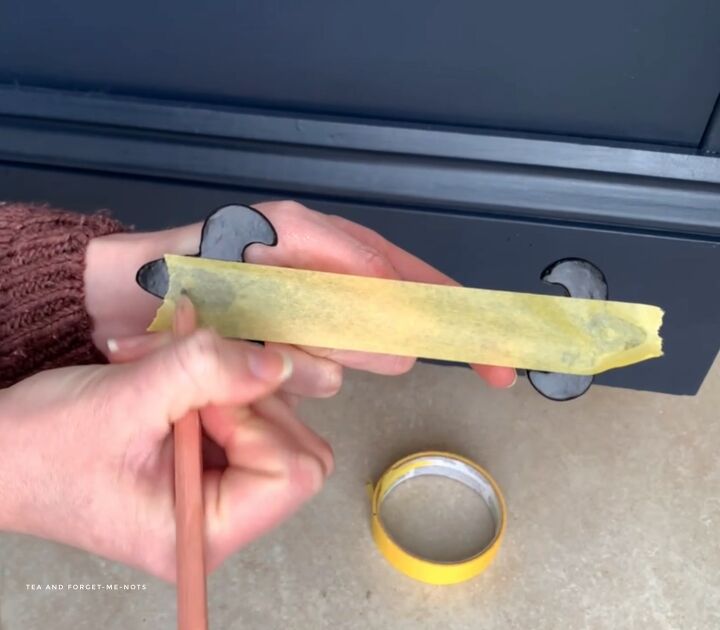
Unfortunately, the handles didn’t come with screws. So, I used my own screws but they were silver, rather than black.
To make sure they didn’t stand out I wanted to paint them black to match.
This was the first project that I’ve used Slick Stick on. Which is a product to use on shiny surfaces to help paint stick to it. I’ve since used it on a laminate dressing table and I’m sold, the product mattifies so well.
So after covering the screw heads with Slick Stick, I used my darkest black, Anchor, to paint over them. They now blend in perfectly.
I think the transformation is like night and day… Or maybe day and night.

So, can you paint MDF? Absolutely. You just have to think about your products.
Is it worth it? That depends on the quality that you start with. You can’t make a silk purse out of a sow’s ear, as they say. But you can go a long way to making it a really pretty piece.
Thanks for taking the time to follow this project from start to finish.
I hope it gave you some ideas on how to keep more furniture out of landfill. Budget materials that are in good condition can still be pretty.
There are more behind the scenes in the YouTube video if you’d like to check that out too.
Want to know the 5 tools under $20 that will make your life easier?
Resources for this project:
See all materials


Comments
Join the conversation
-
Love the color and finish, it’s so smooth! The gold in the 4 corners of the top is perfect!
-
Thanks so much for all the tips on MDF. Oil based primer seems to be the key.


Frequently asked questions
Have a question about this project?
I need different sizes and ways to make shelf to go in my closet for storage please and thank you
Can you paint mdf that has a coating of paper usually white in color
Why don’t add wheels to the bottom so you can move it easily? You said it heavy.
Beautifully Done!