


Queen Headboard PLANS

Headboards can be rather pricey. So why not use these free plans to build this simple but timeless queen headboard.
follow along with me and I will show you how it’s done.

Materials needed
- (5) 2x4 pine boards
- (1) 4x8 MDF -1”
- white paint
- glue
- 1/4” plywood or MDF
I do just want to note, that I made this mostly out of MDF so this headboard is best painted. If you want to stain it you need to use different wood material.
cut list
- (4) 2x4’s cut at 50”
- (1) 2x4 cut at 64”
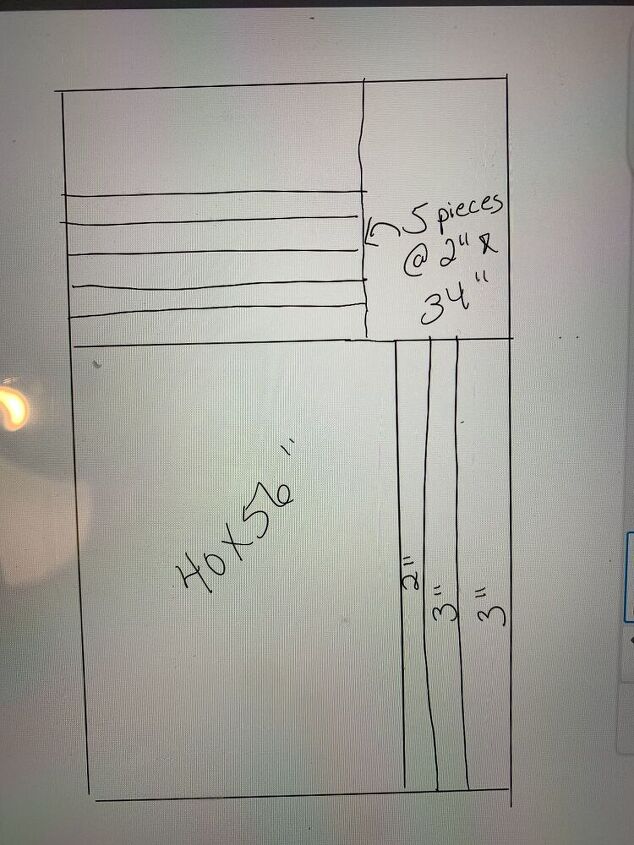
- MDF cut 40”x56”
- MDF cut (2) 3” x56”
- MDF cut (1) 2” x56”
- MDF cut (5) 2”x34”
- 1/4” plywood or MDF cut at 1” x 30” (optional)
make the posts.
glue and clamp together two 2x4’s (50” long) . Repeat this so you end up with two posts. let dry over night.
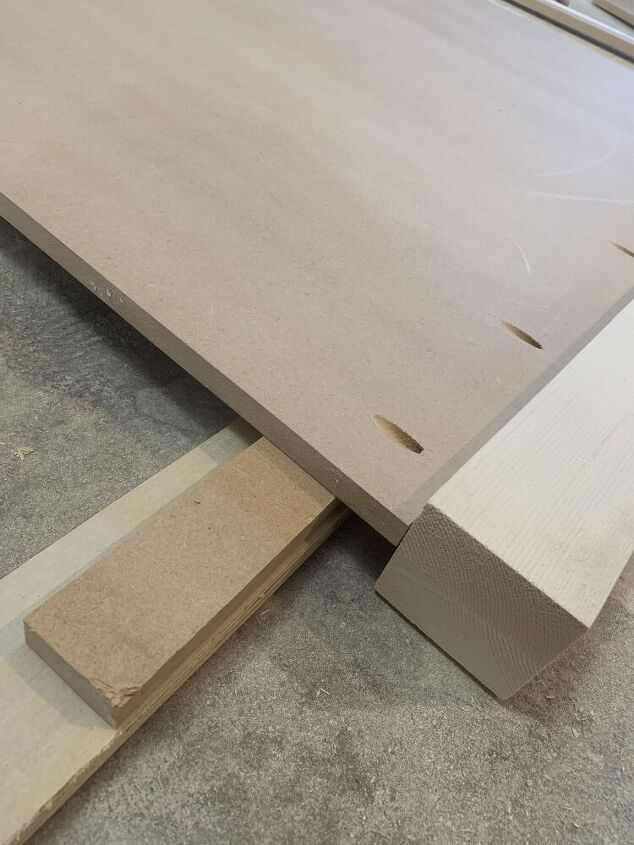
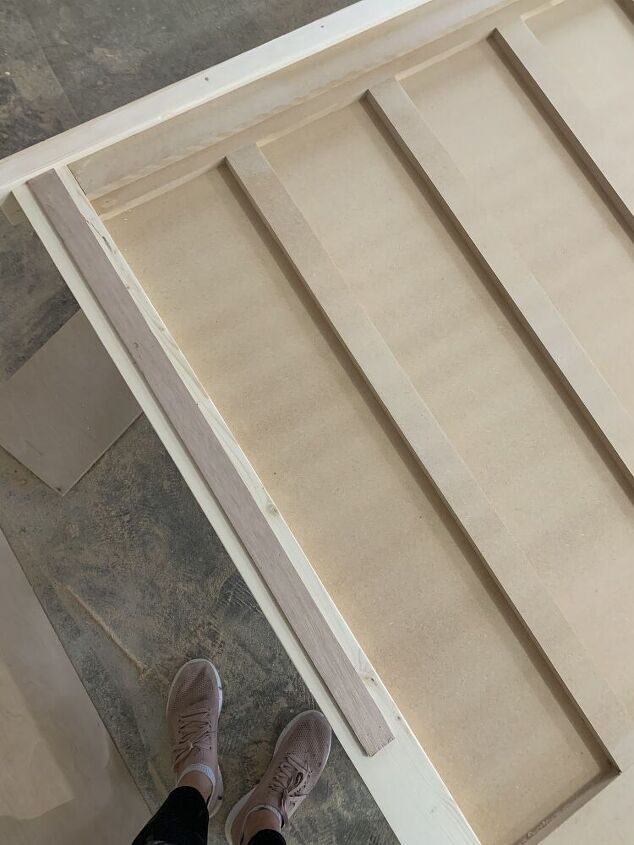
put 6-7 pocket holes on either side of the MDF (40” sides” and secure to the posts. When doing this, raise up the MDF 1.75” . I used a scrap 3/4” piece of ply wood and some scrap 1” MDF.
attach both posts. And then flip the piece over so.

Now detail can be added to the front.
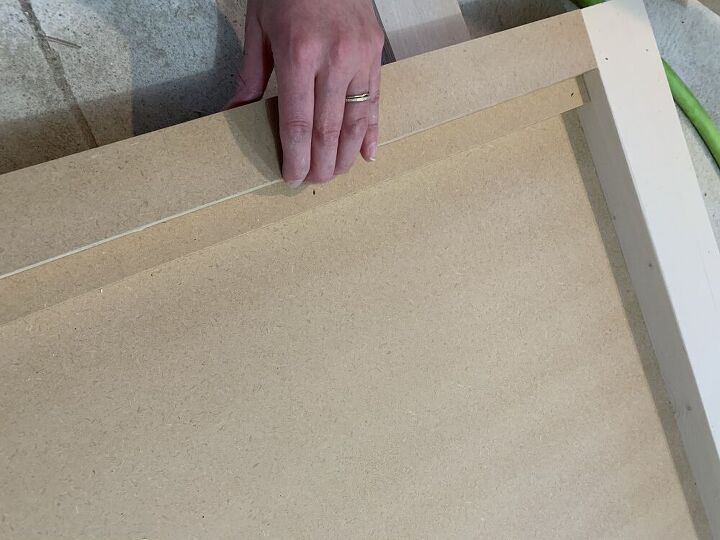
At the top, glue and nail on the 3” x56 “ piece and then stack the 2” x 56” piece on top of that . Glue and nail on as well.
you will then take your other 3”x 56” piece and glue and nail it onto the bottom of the MDF backer.
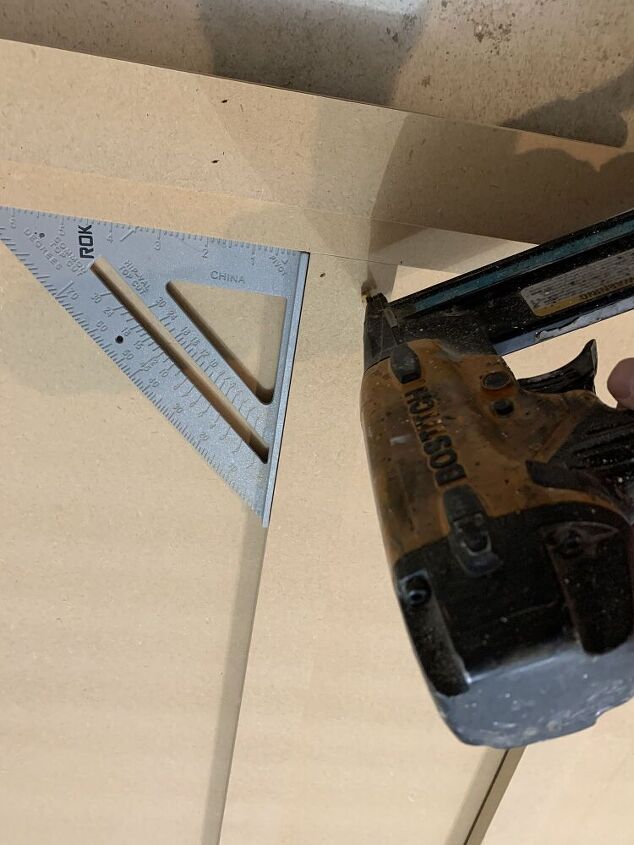
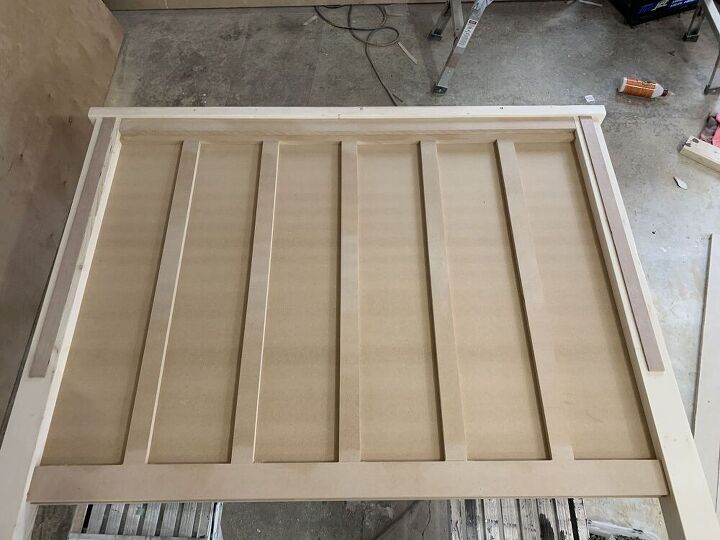
add on vertical pieces.
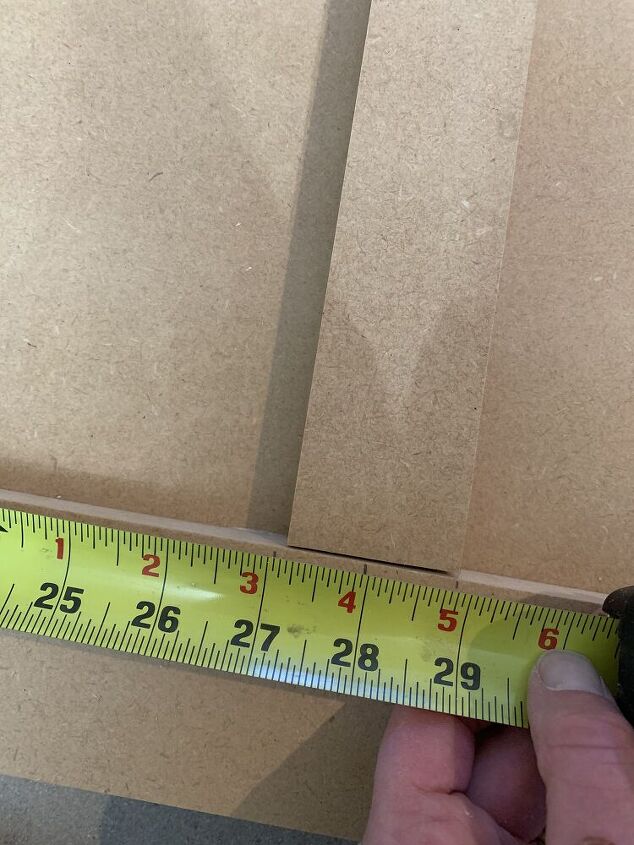
now take the 2” x 34” long pieces and attach these. Start by placing the centre of the middle one at 28” as seen in the picture.
glue and nail in place. I used a speed square to make sure they are square and straight.
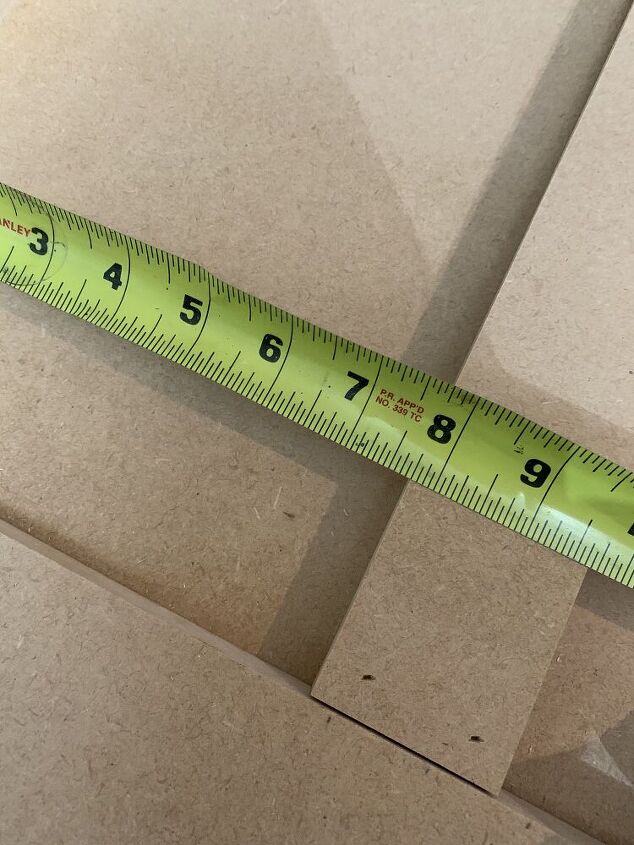
Add the other vertical pieces, two on either side of the middle one. Each one will be placed approx 7 3/4” inches from the other.
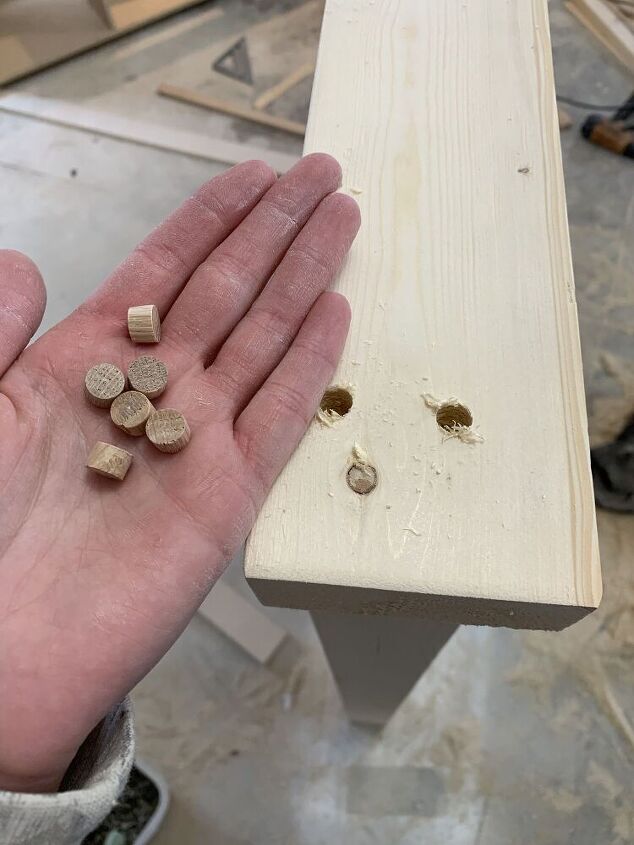
stand the headboard up and secure the 2x4 on the top. I countersank 2.5” wood screws and used wood plugs.
OPTIONAL STEP
i had some 1/4” plywood laying around so decided to add some detail onto each of the posts. You don’t need to do this step if you don’t want to.
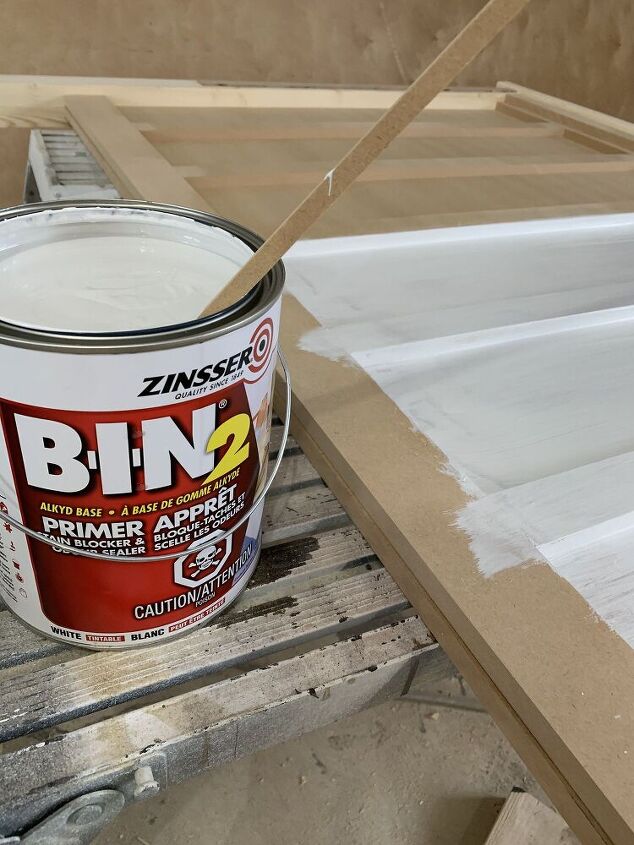
Fill all the nail homes and prime. Once this is dry paint the color of your choic.
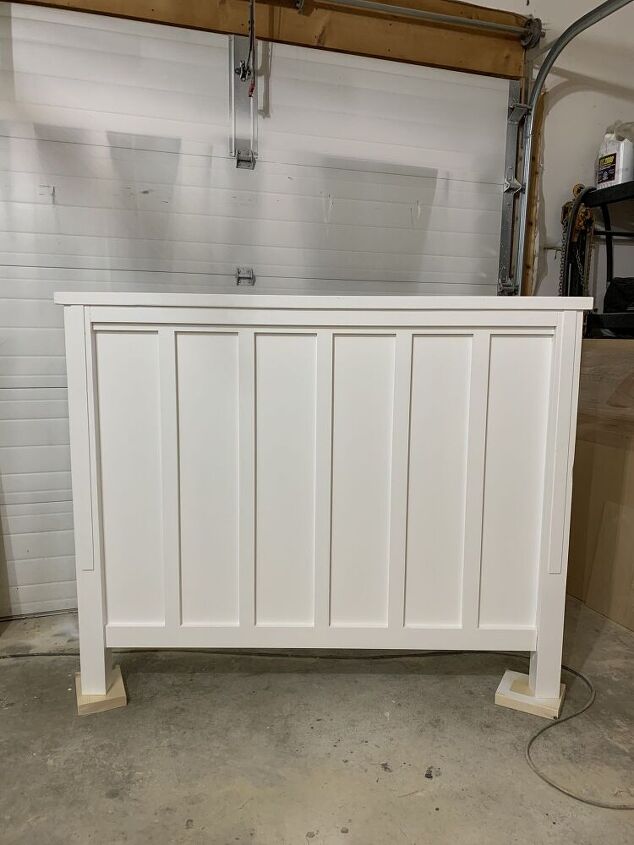
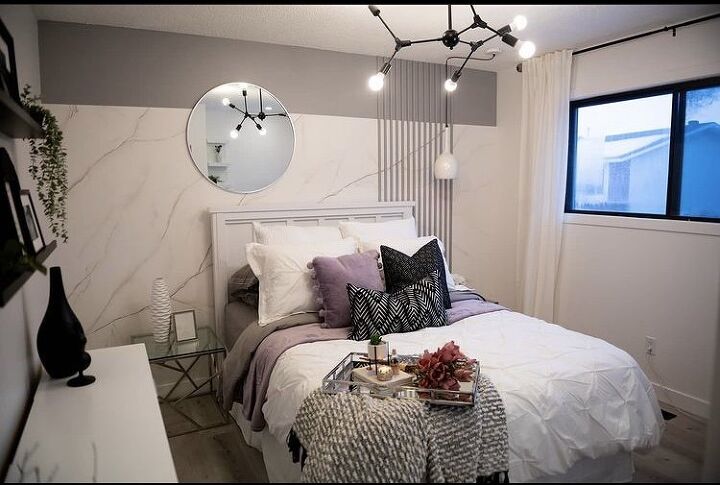
Gorgeous and timeless. I love this headboard for those reasons.
be sure to follow along with me on here, hometalk, as well as Pinterest and INSTAGRAM where I post daily projects I’m currently working on.
cannot wait for our next DIY together
x
Amber
Comments
Join the conversation
-
I love it! You make it look so easy but I know it never is lol


Frequently asked questions
Have a question about this project?