


Concrete Wheelbarrow Ramp

I built a small retaining wall in my sloped backyard and needed a ramp to get the wheelbarrow up and down for two new raised beds going in. I've worked with concrete patch before, but never with something that needed a form. So, I winged this whole project and it worked!
Firstly, I've had RA for 12 years and deal with physical limitations. On this project, the limitation is the weight of a bag of concrete. So, I had to use Quikrete - Polymer Modified Structural Concrete Repair. It comes in a 20 lb bucket for $20. I ended up using 2 buckets. This is a type of cement that you can actually sculpt if you wanted to. I've used it on vertical repairs, so I'm comfortable working with it.
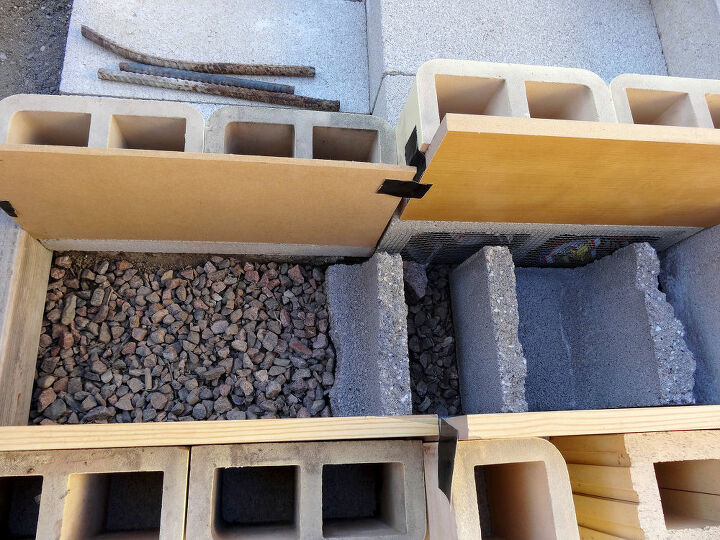
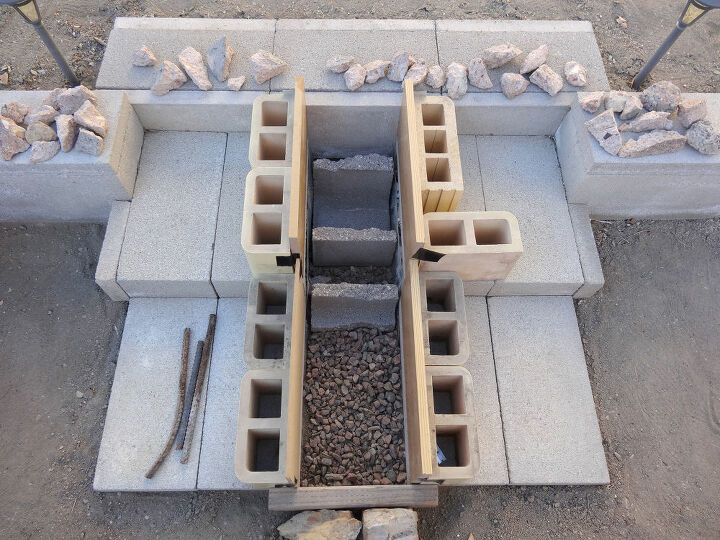
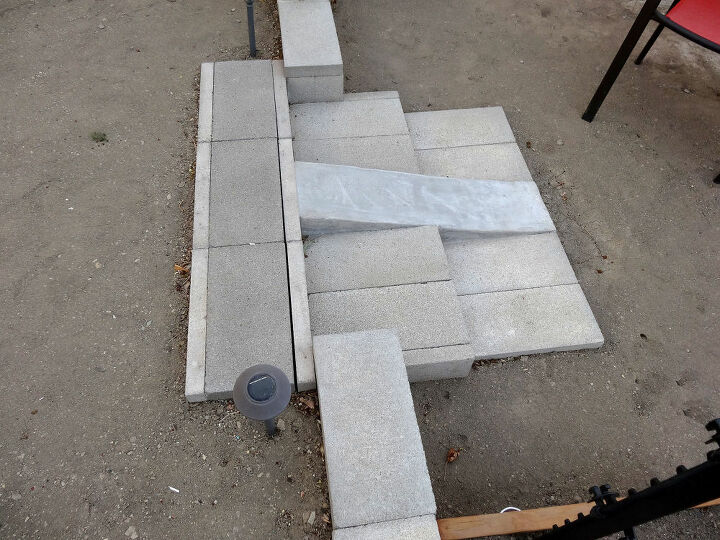
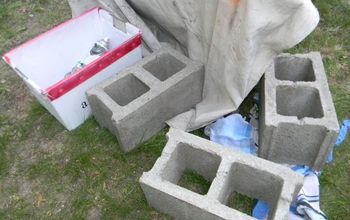
I needed to keep costs down, so I added various fillers and supports from leftover scrap. At the top of the ramp, I placed two pieces of concrete block cut-offs. At the bottom of the ramp, I used scrap wood with a couple of rocks to hold it in place.
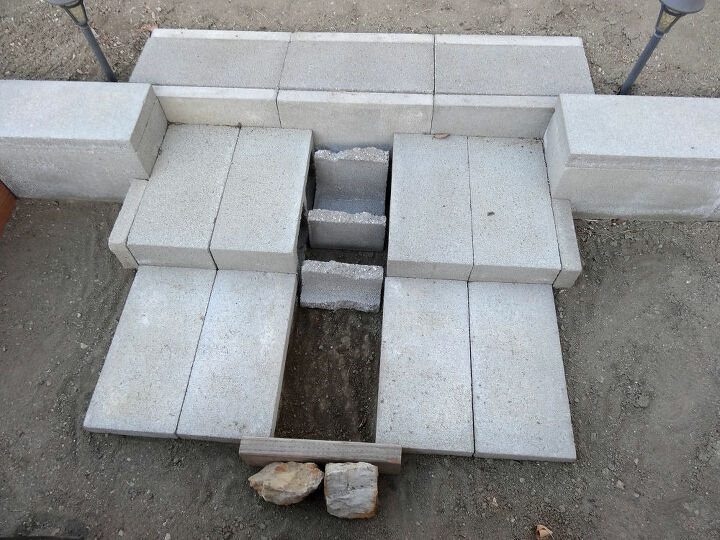
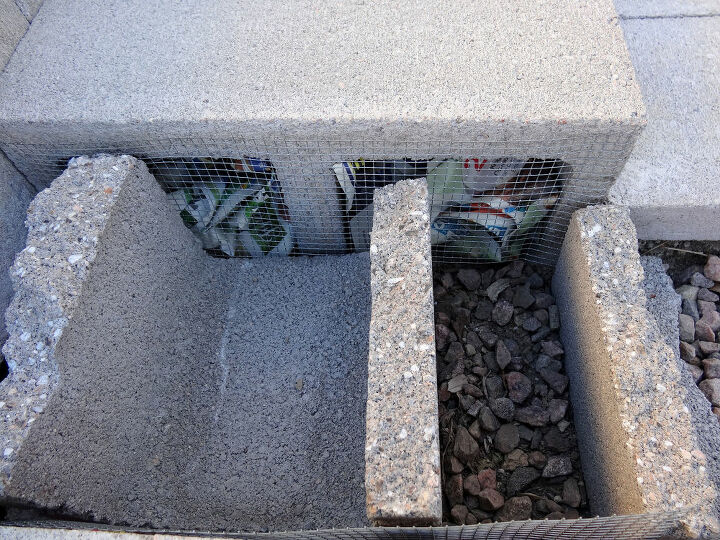
I cut and placed some hardware cloth over the openings in the top steps. I also added gravel over the dirt. Ignore the balled up newspaper, I'm winging it here and probably didn't need it. It was my first option before I remembered I had the leftover hardware cloth.
I then assembled some items to use as fillers and support and placed them close at hand because this stuff dries fast! I used bits of broken concrete and some cutoffs of rebar.
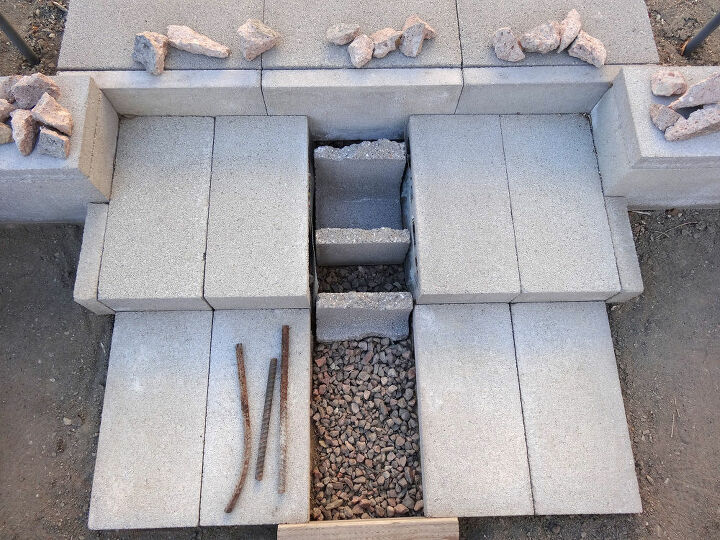
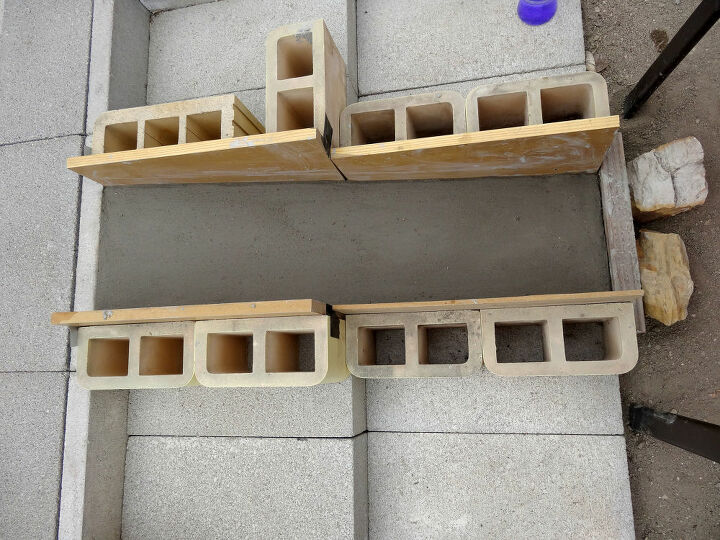
I cut some scrap wood to fit the step lengths and used concrete blocks for the side supports. The wood was then attached to the glazed blocks with Gorilla tape.
Not shown here is a string taped to the boards, running from the top of the ramp to the bottom, so I had some sort of line to follow for the slope.
With the supports in place, I was ready to go!
I don't have photos of adding the cement mix because this stuff dries fast. You have approximately 15 mins after mixing before it sets. So, there wasn't time to remove gloves and take photos. But basically, I just mixed the first batches up and added about 40% filler of slag.
I pushed the filler chunks of cement into the batches as they were poured. At the bottom of the ramp, in between layers, I added the rebar and also another piece of hardware cloth along the length of the step.
For the top layers, I did not add filler to the mix.
I used a trowel to level and smooth the top and then wiped with a big wet sponge to roughen it up.
After cleanup, I popped the boards off and spent some time sculpting the edges with a putty knife to round them out a bit. This was just basically dragging the knife down the edge and wiping with a sponge.
It needed to stay wet and cure for 7 days to strengthen. So, to keep it wet and protect it from 35' degree nights, I took two old bathroom towels and wrapped them around the ramp. I soaked the towels with water and then covered them, first with a plastic tarp and then a blanket.
This worked so well, I only had to soak the towels down once throughout the week.

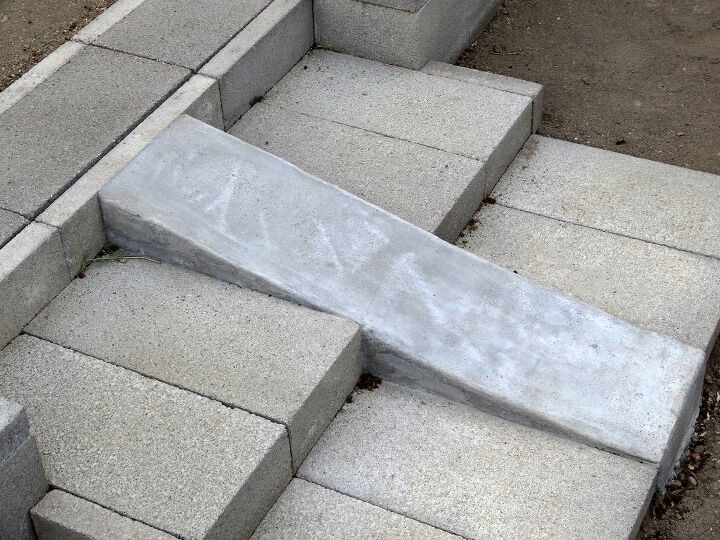
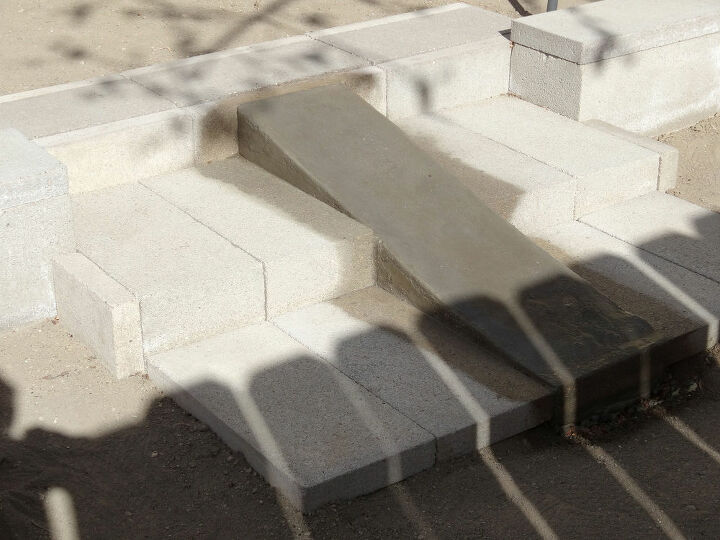
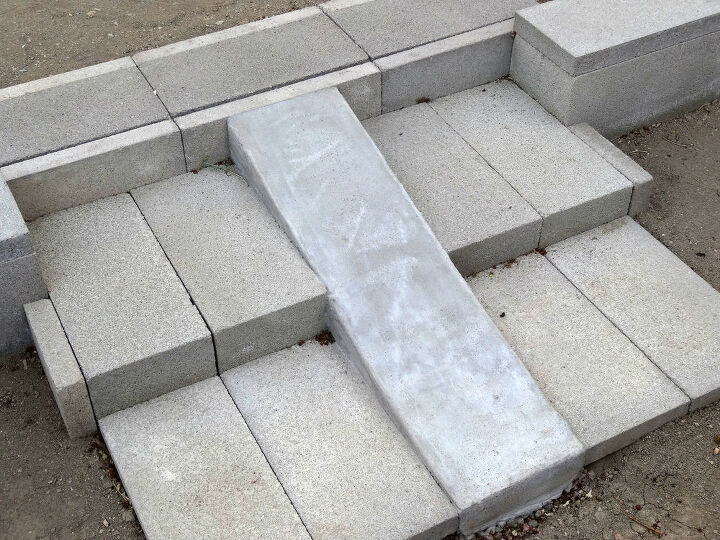
And here it is 7 days later. The slope is a little wonky, more like a skate ramp, but I'm okay with that.
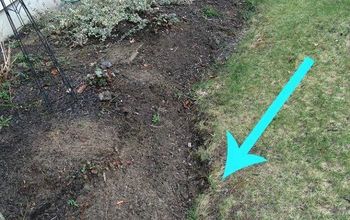
Landscape rock will eventually be added to the upper and lower levels of the wall so there won't be a big gap at the edges.
I'm really happy with the way this turned out despite 'winging it' and using an inappropriate product.
If you used regular bags of cement, the whole project would be a lot cheaper.
Resources for this project:
See all materials


Comments
Join the conversation
-
Of course, I think you’re right but this seems more stable than some of the wooden ramps I’ve seen. Any ramp requires some mathematical calculations.
-
You did a fantastic job. I love how you were able to incorporate the wheelbarrow ramp into your stairs. Great work!


Frequently asked questions
Have a question about this project?
This is a pretty neat project. Were you able to complete the raised beds using this ramp. Do you have a wider angle pic of the completed project?