


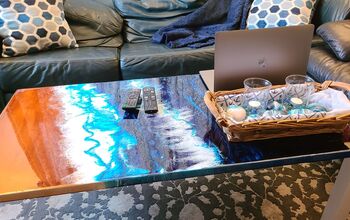
Acrylic Pour Galvanised Tray

Thrifty art pleases me no end and with a tray from Good Will for $1, I couldn’t wait to transform it into this bold and colourful display tray. A step-by-step process video of how I did this particular acrylic pour can be found on my youtube channel, please take a look! I would also really appreciate any feedback, a ‘thumbs up’ and if you would kindly subscribe for future crafty videos.
A step-by-step photo tutorial is also below for anyone who prefers to follow instructions this way.

Warning, there’s a risk you could become extremely addicted to acrylic pouring if you attempt this tutorial 
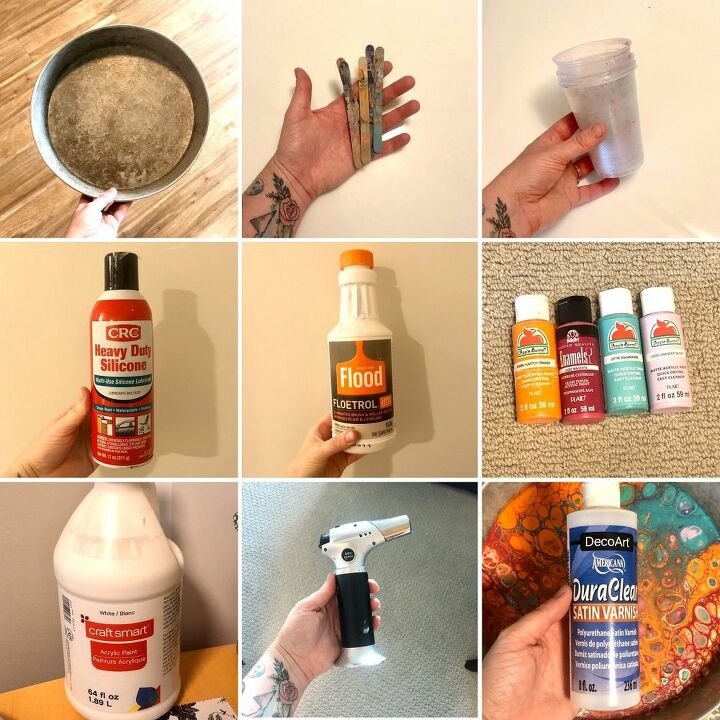
What you’ll need
- A tray
- Mixing sticks
- Mixing cups
- Silicone (mine is in aerosol form)
- Floetrol
- Acrylic paints
- A blow torch/lighter (optional)
- Varnish/Resin
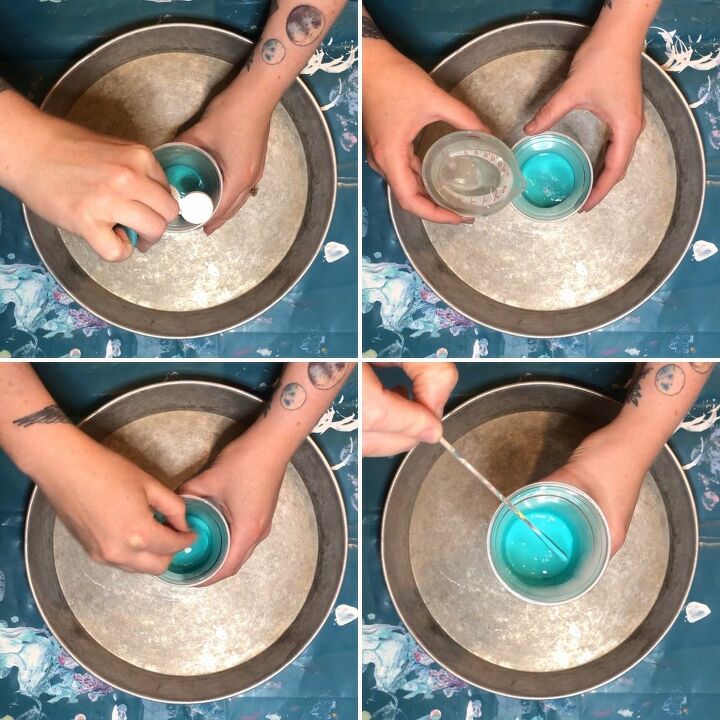
First, pour a small amount a paint into one of your mixing cups.
Add a few drops of water into the cup and mix very well until both ingredients are combined.
Scoop up some paint onto your mixing stick and let it run off the end, the consistency you are looking for will be similar to honey. If the paint is still a bit thick and blobby, just add a little more water until you’ve achieved the right consistency.
Next, add the floetrol. You want to have a 1 to 1 ratio of paint to floetrol, so that’s not including what you added to the mix for water. Again, mix well until all the ingredients are fully combined.
Check the consistency of the mix and, again, you’re looking for a honey-like dribble.
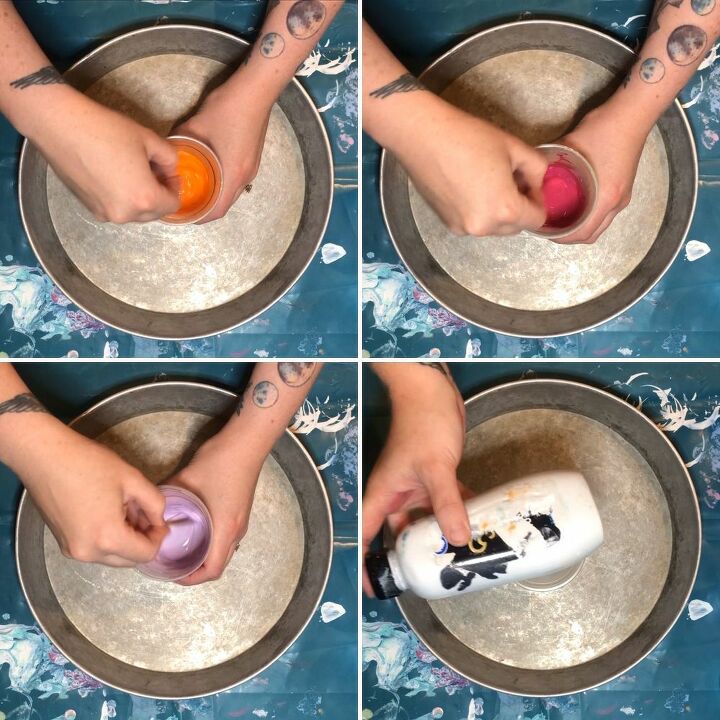
Repeat the above steps with all the other colours.
You also want to make a white mix in the same way as above. I’ve made a large amount of pre-mixed white simply because I get through a lot of it.
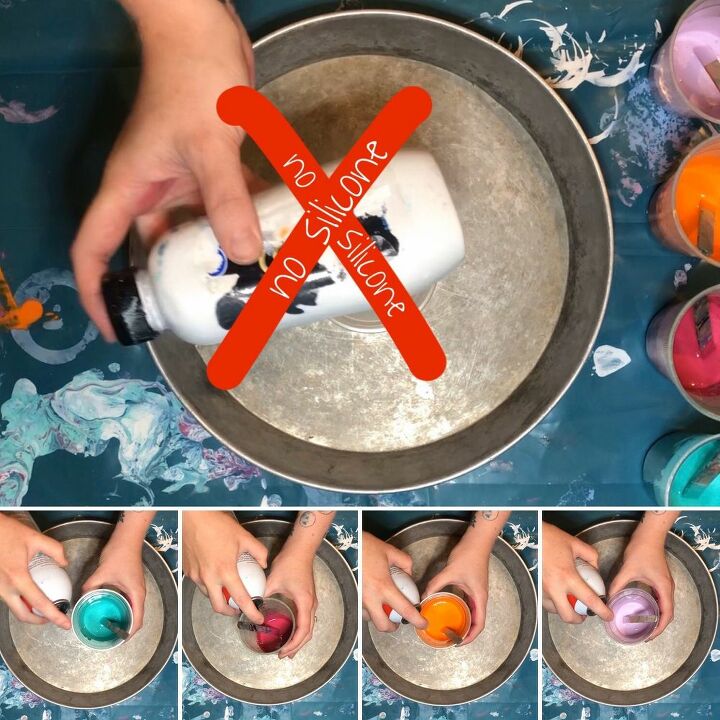
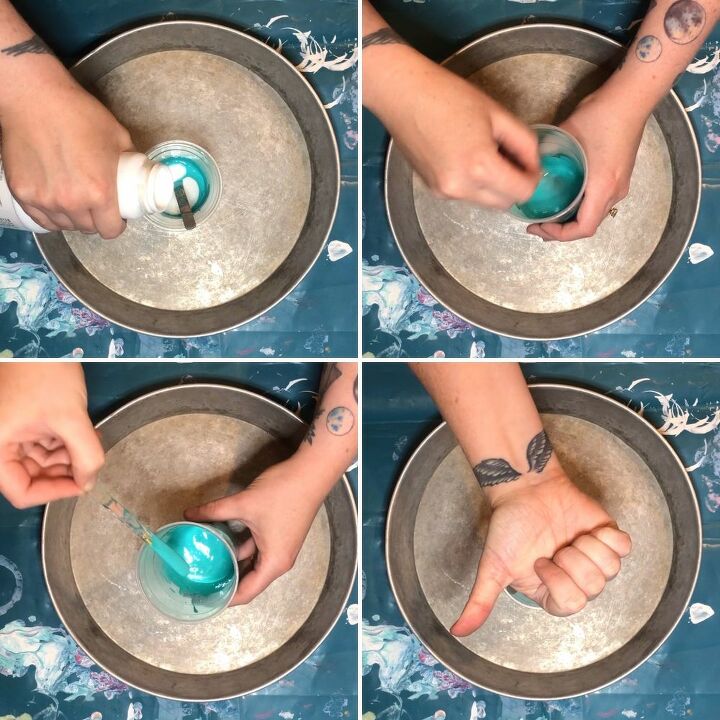
Now time for the silicone.
Firstly, and most importantly, do not add any silicone to the white. It doesn’t need it. The white is used to carry all the other colours and does a mighty fine job of it.
Give the silicone can a quick shake and then add a very short spray to each of the other colours.
Do not mix the silicone in well, simply make a couple of turns in each cup using your mixing sticks. The more you mix the silicone, the smaller your cells will end up in your final pour, and I personally love BIG cells!
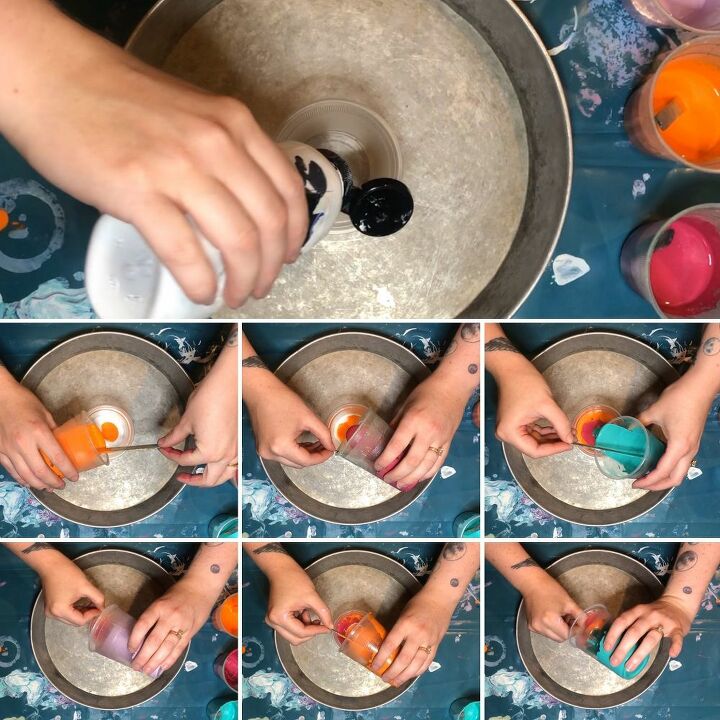
Now, in a separate cup, first pour in an amount of white paint. The amount will depend on the size of your cup and the size of your pour, knowing how much will come with practice. I added approx 1cm in depth of white paint to my standard sized plastic cup.
Next, add all the other colours, 1 by 1, in whichever order you like. The picture above shows the order I chose.
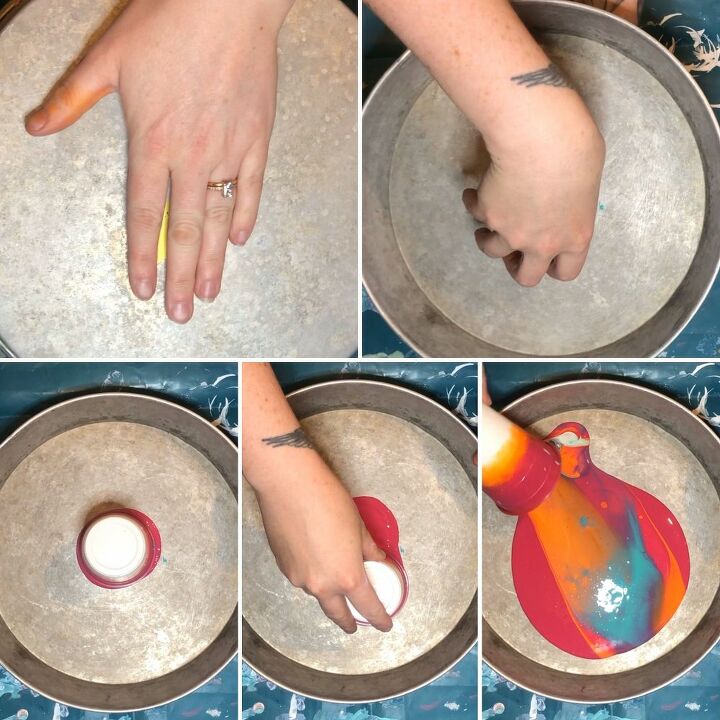
Once all the colours have been added, you want to flip the cup upside down.
You do this by first laying the tray upside down on top of the cup. Make sure there are no air-gaps between the tray and cup so that the paint doesn’t slip out.
Now flip the cup on it’s head so that the tray is now the right way round and the cup is upside down.
Tap the base of the cup to make sure all the paint falls down on the tray.
Push the cup up and off center so that when you lift and drag the cup away, releasing the paint, you have enough room for all of it to flow out.
Use your blow torch/lighter, if you have one, to pop any surface bubbles. You can even gently blow on the paint which should do a decent job.
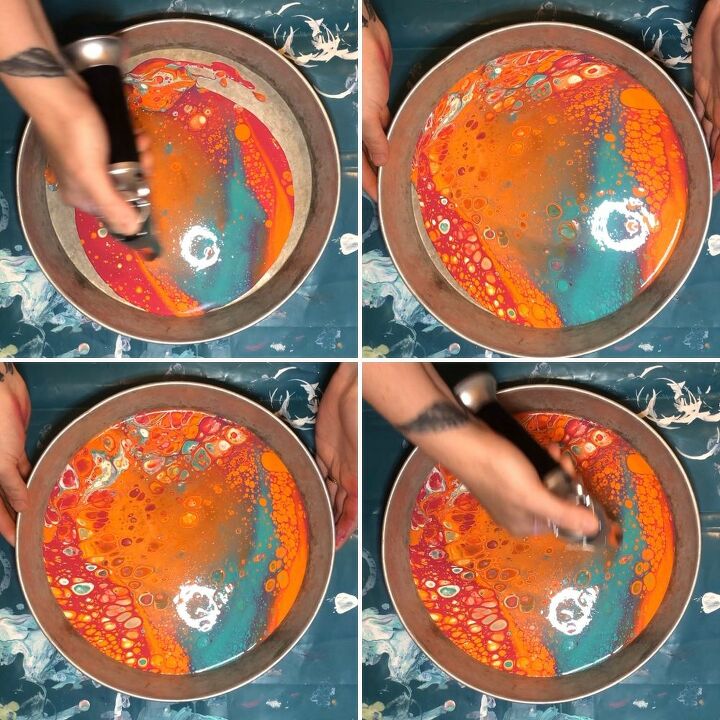
Gently and very slowly, pick up and tilt the tray until the whole base is covered with the paint mix.
Set your tray aside on a flat even surface for a good 2 days to dry out throughly before varnishing/coating in resin.
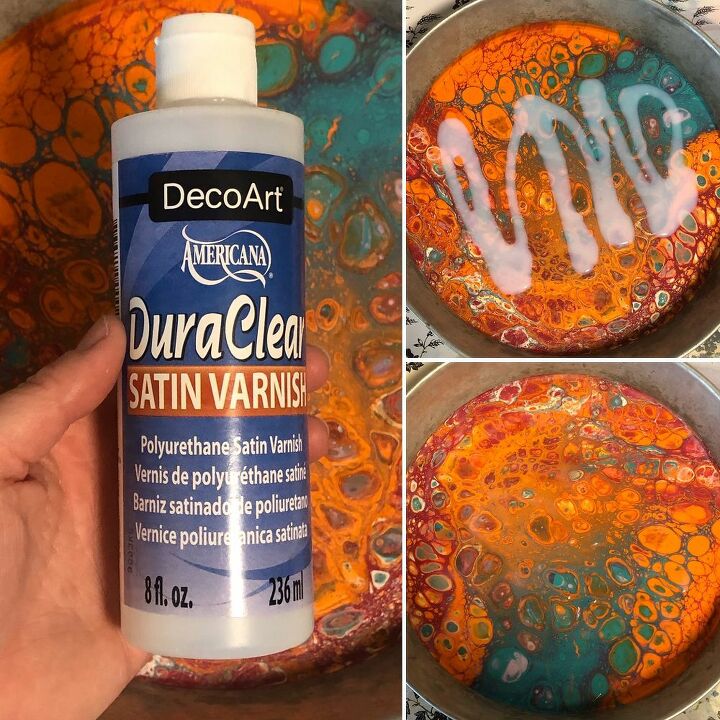
You can either coat your tray in resin or, apply a layer of DecoArt’s ‘Dura Clean Satin Finish’ varnish like I have.
You can always apply resin at a later date for a glass-like, smooth, even finish as the varnish doubles as great primer.
If you fancy treating yourself to some resin then take advantage of getting 10% off your entire order with Rockstar Resins by using my code HANNAH at checkout. I would probably advise going for their 4 Star 1:1 Thin Coat product for this sort of project but most of their resins will work beautifully!
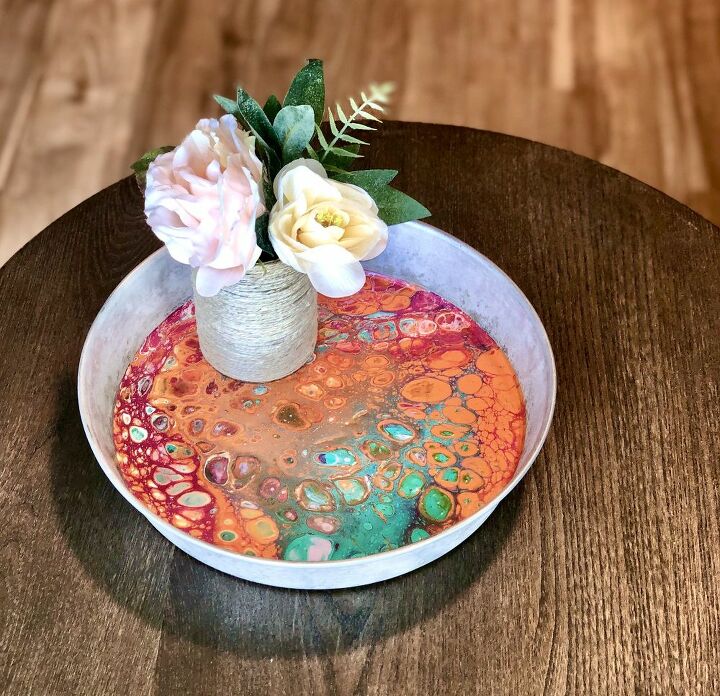
And your display tray is ready to go!
Good Will is great for finding trays and boards for re-purposing so I encourage you to have a little route around in there to keep costs down if you want to give this tutorial a go.
Please also take a look at my YouTube video for the full tutorial for this pour.
Please like and subscribe and let me know of any tutorials that you might like to see on there.
Thanks so much for reading/watching!!!


Comments
Join the conversation
-
Wow cool an crazy love it...i have all evan the blow tourch(I love using that ha) deffo be making one off these thanks for shareing 👍yours looks fab..happy crafting ;)
-
So, so cool!! Love the colors you picked.


Frequently asked questions
Have a question about this project?
I love your idea! I have all the materials except the blow torch...so, my one question is: will a heat gun be a good substitute? Thank you for sharing your beautiful with the world!
Could you pour this into wood as in a crack in a piece of wood or would it just sink in
thx Lin
I love the color combo and the cells, it's gorgeous. Sadly you lost me at where you used the white paint? Or it wasn't used in this particular pour?