


DIY Decorative Kitchen Tray Build And Decorate

Hello, today we are going to create a decorative kitchen tray. I was inspired to create my own kitchen tray after taking a trip to my local Target store. While there I saw a tray and figured I would create my own.
This tray is easy to create, and only uses just a few materials. So, if you're ready let's dive in, and create our tray.
Hello, today we are going to create a decorative kitchen tray. I was inspired to create my own kitchen tray after taking a trip to my local Target store. While there I saw a tray and figured I would create my own. This tray is easy to create, and only uses just a few materials. So, if you're ready let's dive in, and create our tray.
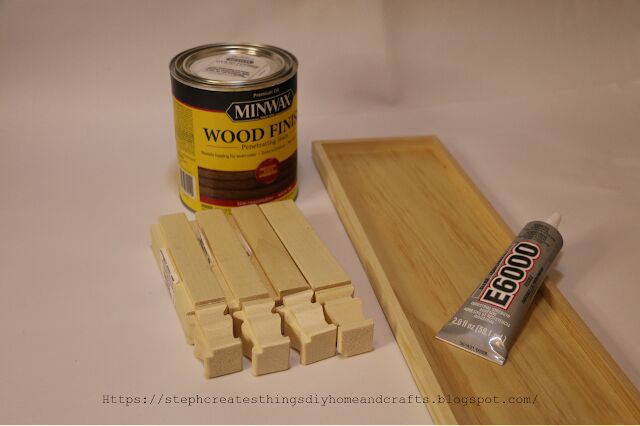
Materials needed-1 wooden plaque(I purchased this at my local Michael's store, and this will be used as our tray)
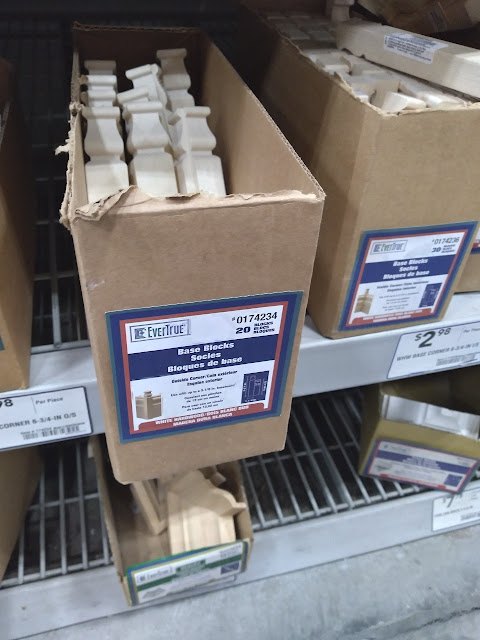
-4 wooden base blocks(I purchased these at my local Lowe's store)
Total spent $20
Materials I already had on hand
- Wood stain(I picked up 1QT of this stain since I have several other projects that I will use my stain for. You could purchase a smaller can just for this project)
-E6000 GlueYou can use wood glue or even hot glue.
Creating your wooden kitchen tray
First let's start off by taking the four wooden base blocks, and cutting off the bottom decorative section of each block. You will cut around 1 inch off. My husband used his miter saw. If you don't have a miter saw you can use a simple hand saw.
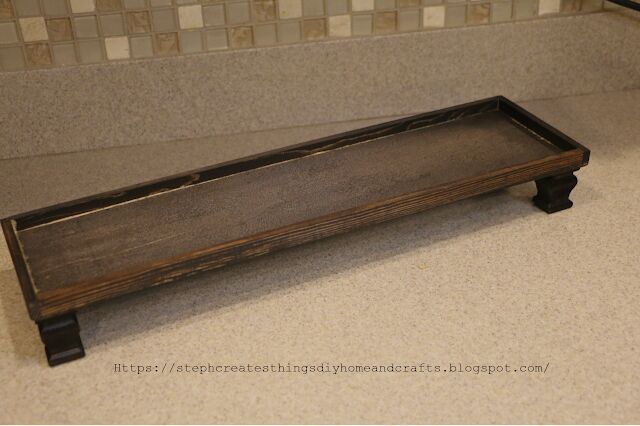
Next, we will take our stain, and apply the stain on the tray, and wooden legs. Make sure to wear latex gloves to protect your hands, and make sure the area is well-ventilated. I used a paper towel when I applied my stain. You can use a sponge brush or any paintbrush that works with stains. Once you have applied your stain to both, the front, and back of your tray, set it aside, and allow it to dry completely. You will do the same for the wooden legs. Set them aside, and allow them to completely dry.
Once you have finished with staining, take each wooden leg, and glue them on each of the four corners on the bottom side of your tray.
Decorating our tray
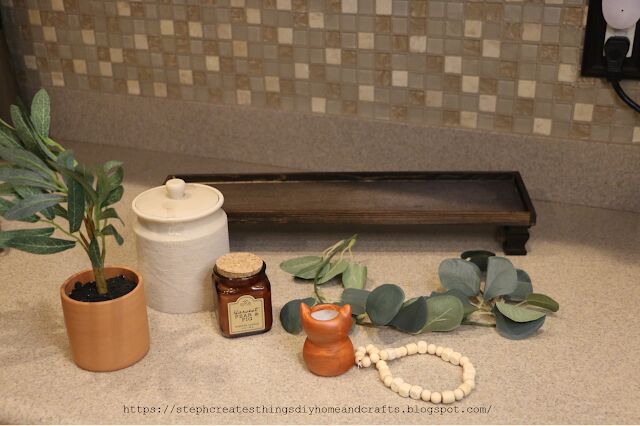
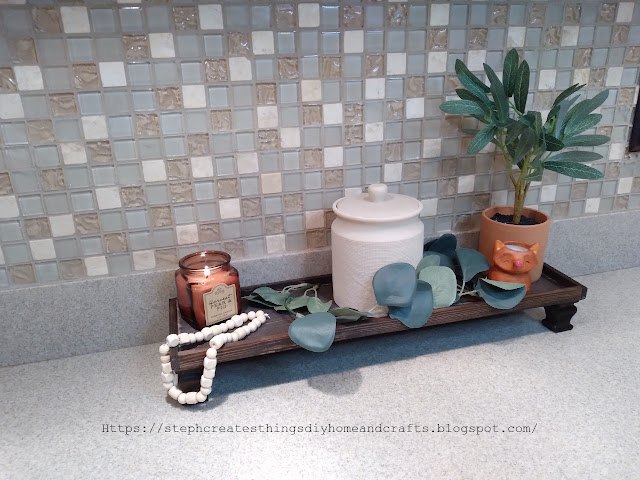
A few items I purchased-One mini tree-One candle-Eucalyptus garland-Ceramic fox-Beads-One pack of stretch cord-One ceramic canister
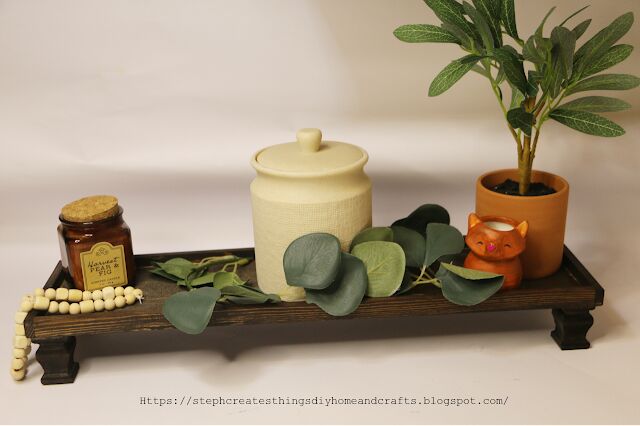
This part was so much fun, and I was able to find some cute items at the store. You will find the list of stores and prices of each item in my video tutorial. Start off by adding your eucalyptus garland. I cut just a small section of my garland off for this project. Place your garland in the middle of your tray. Next, take your ceramic canister, and place it in the middle of your tray. I placed a few tea bags inside my canister. Add your candle, tree, beads, and your painted ceramic fox.
Quick DIY -Creating your mini wood garland I thought adding a mini wood garland would be a simple, and cute addition to my tray display. Take your stretch cord, cut a strand off, and start adding your beads to the cord. Once you have added your wooden beads tie the cord together and tie a knot.
You're all done! Your beautiful tray is complete. I love how it turned out. This tray is perfect, and you can easily add a variety of decorations for each season. Be sure to visit my video tutorial for more on the decorations I used for my tray.
Thank you so much for stopping by, and I'd love to hear from you. In the comments below, let me know if you'll be creating your very own kitchen tray.


Frequently asked questions
Have a question about this project?