


How to Turn Glass Into an Antique Mirror

Years ago I bought two old oval picture frames but never hung them. I love the shape and decided it was time to turn them into something I love and get them up on the wall.
This project can also be done with new frames, or an old frame that needs glass, get it cut and make your mirror custom.
This is an easy DIY you can do in just a few hours and hang in 24.
All you need is glass and a frame!
Hometalk Recommends!
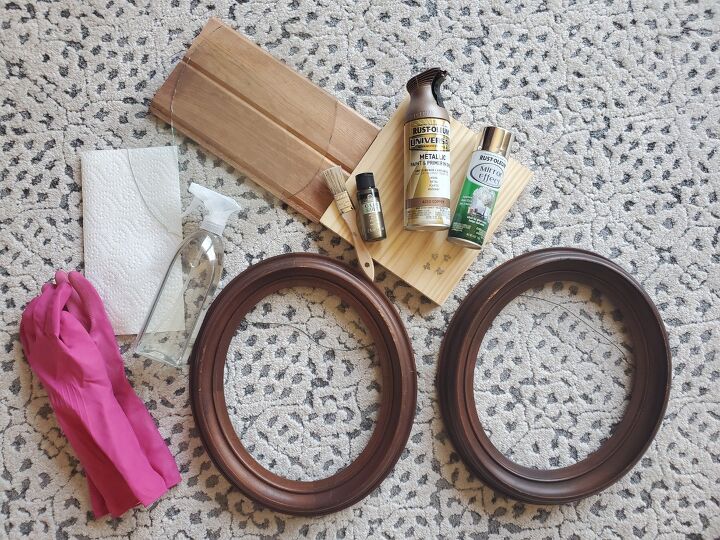
Material List:
- Glass you want to make into an antique mirror
- Rust-oleum Mirror Effect spray paint (there are lots of options on Amazon...like gold mirror spray paint!)
- Paint (spray paint, acrylic craft paint, etc. -- optional step)
- Vinegar & water in a spray bottle
- Paper Towel
- Rubber Gloves
- Gorilla Glue - Clear (compared to E6000 glue)
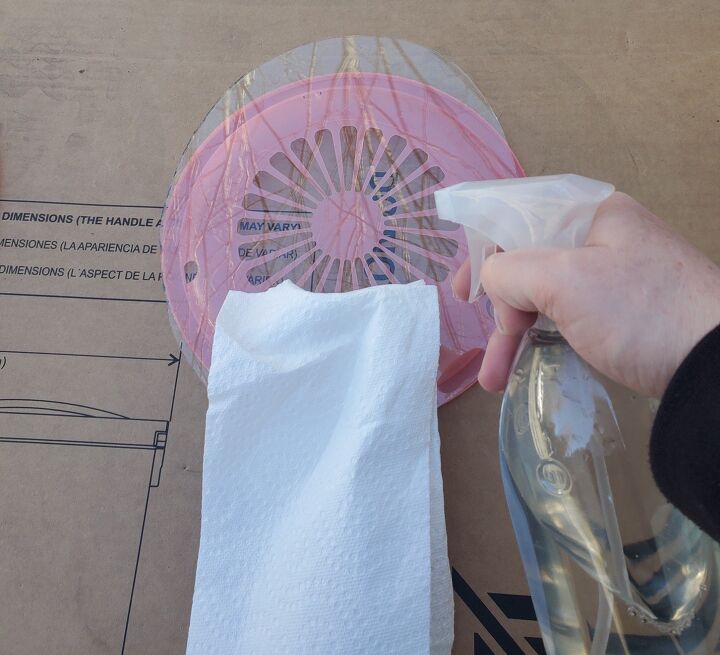
I took my glass and supplies outside and set up an area to work.
Start by making sure the glass you want to turn into a mirror is clean.
Once clean, I sprayed the glass with a vinegar and water mixture.
I used a 50/50 ratio of vinegar to water.
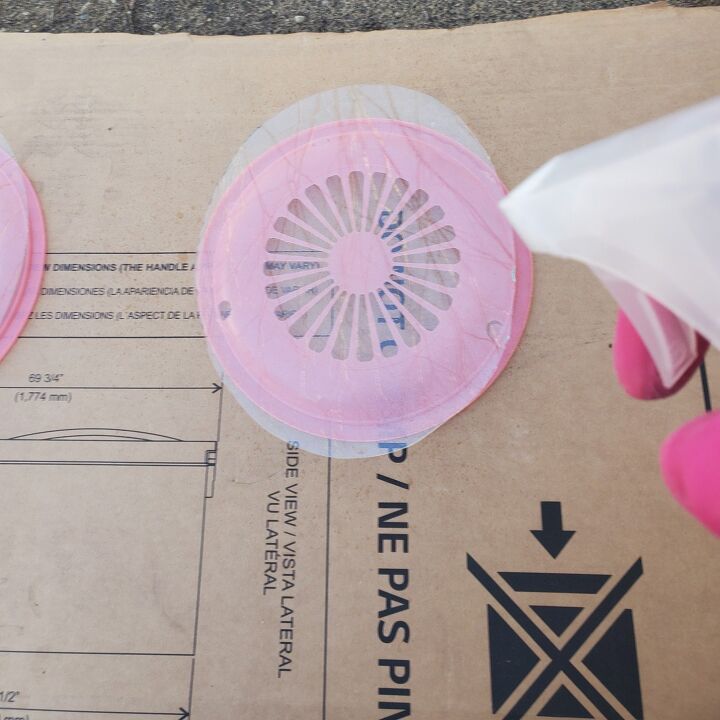
Then I sprayed a light coat of the mirror spray paint over the vinegar/water droplets.
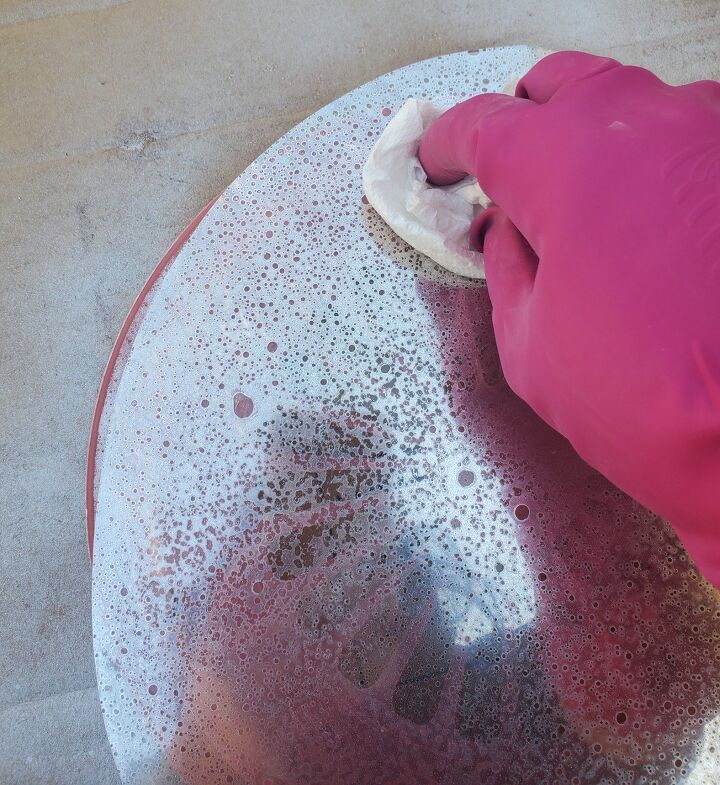
I let the mirror spray paint sit for a minute (this time will depend on the outside temperature and how thick the coat of paint is) and then using a clean dry paper towel dab off the vinegar/water droplets.
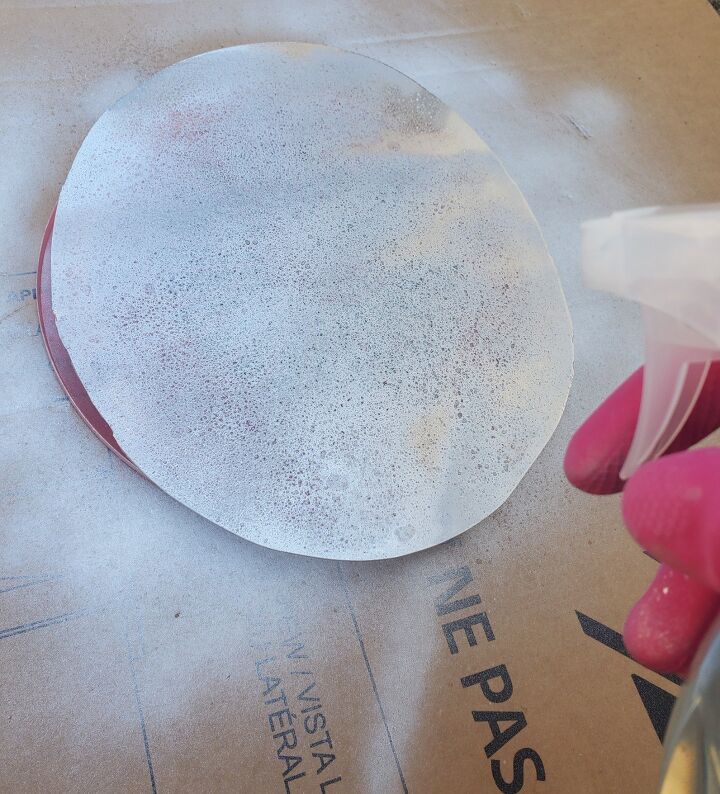
Then do it again.
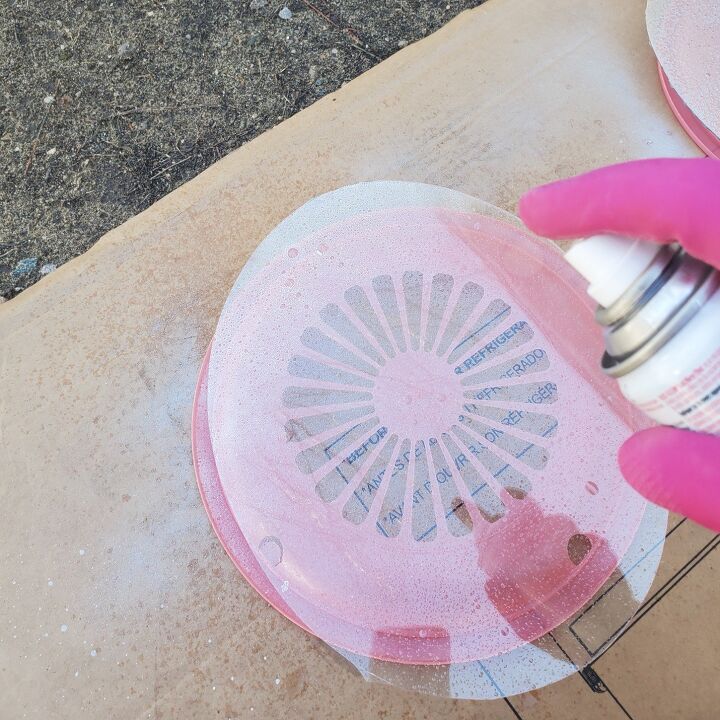
I alternated spraying the glass with the vinegar/water mix and then the mirror spray paint on top.
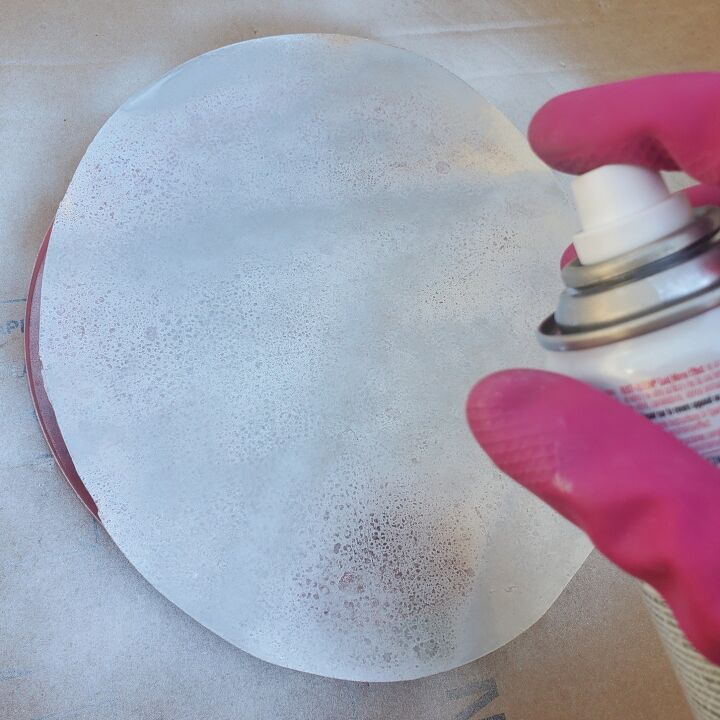
You can do as many coats of mirror paint and vinegar/water as you want to achieve the look you desire. I ended up doing 4 light coats to achieve the look I was after.
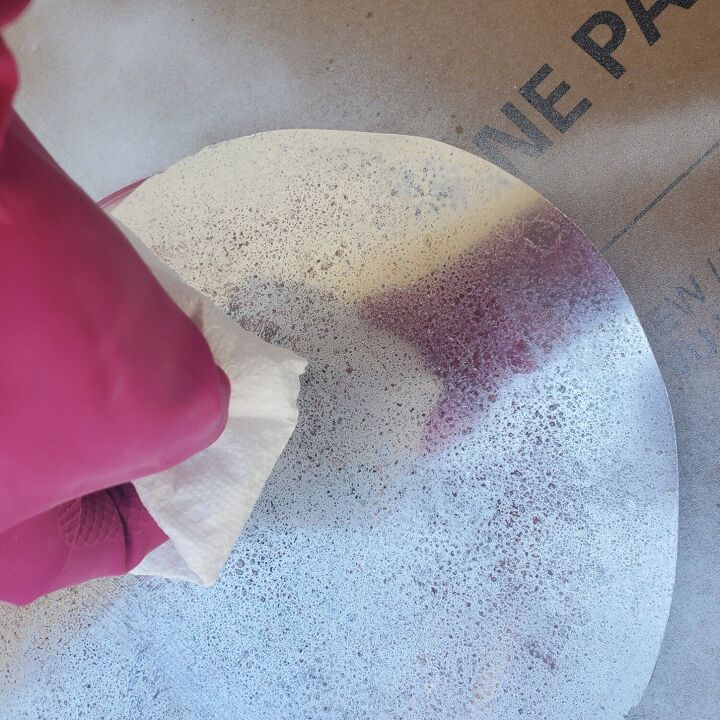
After each layer, use a clean dry paper towel and dab off the vinegar/water mix.
TIP:
Remember to flip over the glass to see the opposite side than you are spraying. The side you are spraying will be dull and less reflective. The opposite side is considered the "right" side or the mirror side, but you can use either side depending on which you like best.
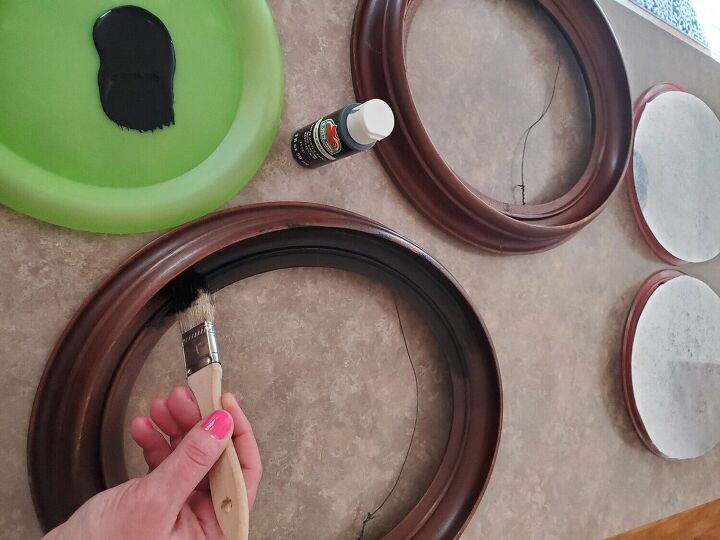
While the mirrors are drying, I decided to paint the old frames black.
This step is completely optional and dependent on your specific project. If you do paint your frames, use the paint needed for your project. I used acrylic craft paint from Walmart. (FYI- I did not paint the back of the frames)
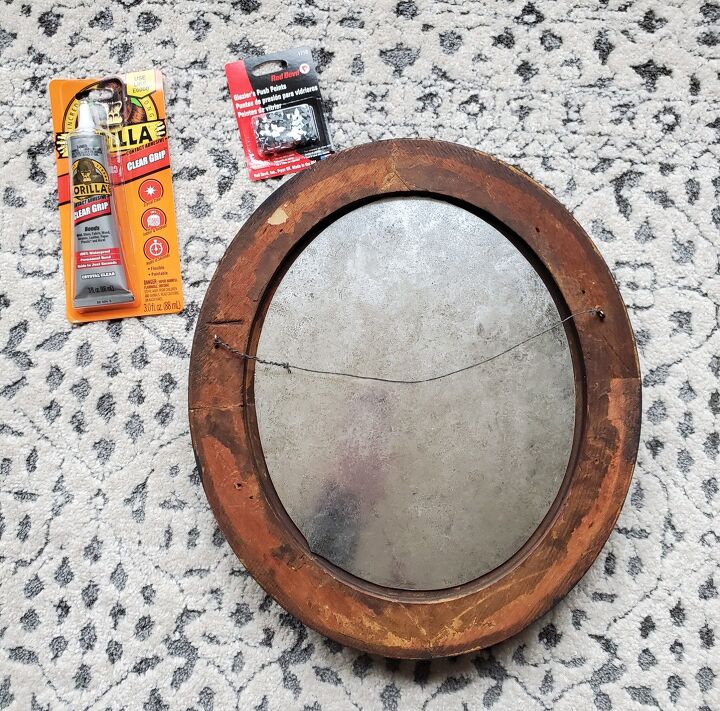
With the frames painted and the mirrors dry it's time to put them back together. My first intention was to use the the glazing points so I could swap the reflection sides if I wanted.
The glass in my frames has been hand cut. The glass in one of my frames is a lot smaller than the opening cut for the glass. That is why the glazing points won't work. So, I'm moving to plan B...glue.
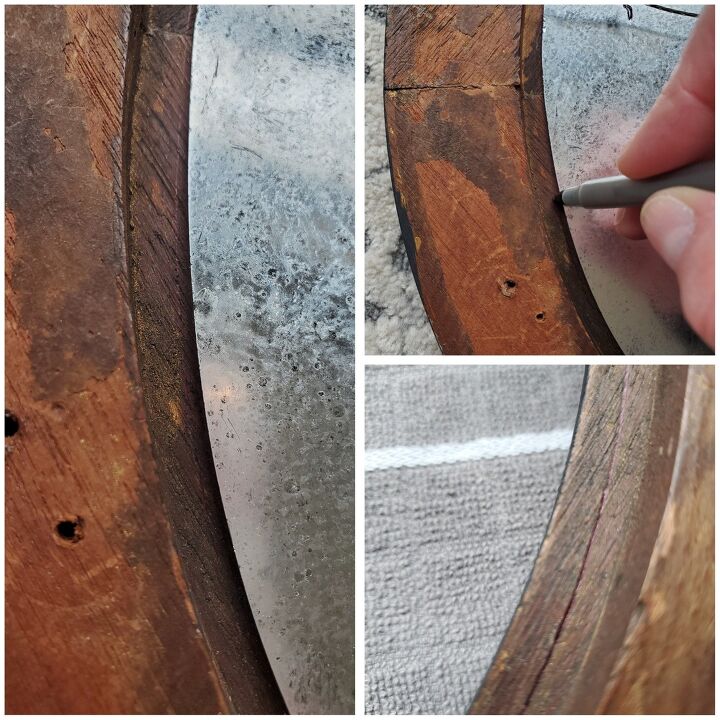
Here you can see how large the gap is between the edge of the opening and the mirror. I placed the mirror in the frame and held it up to see where the mirror landed on the frame and got it so I had space to add glue to the frame.
Left photo- The gap
Top right- Trace your mirror with a pen. Hold the mirror and go over it twice to make sure your line is visible.
Bottom right- The traced line
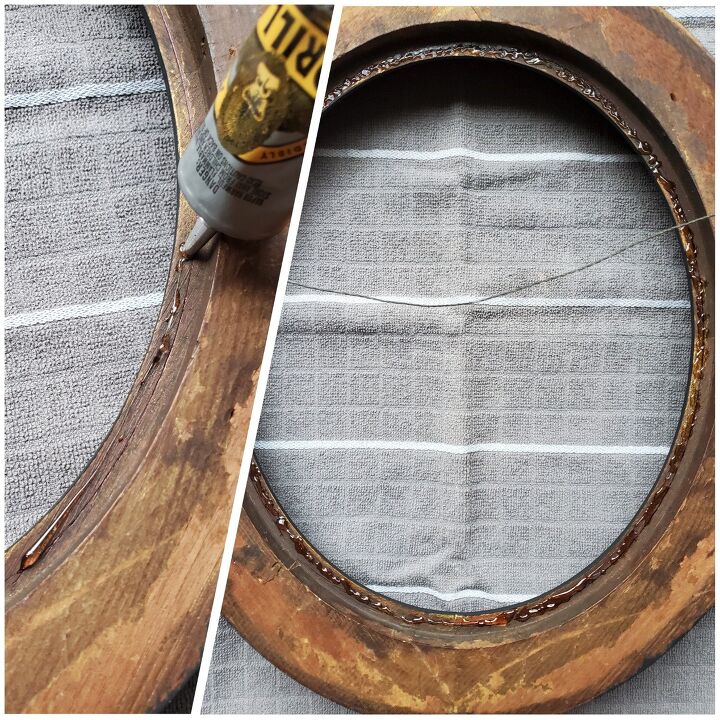
Since my mirror will barely catch the lip of the opening, I added the glue to the edge.
Once I glued both mirrors into the frames I held the mirrors down for 1 minute and then added heavy objects to the mirror to keep pressure on overnight. Take care to not slide your heavy objects across the mirror finish, it will scratch.
NOTE-
My specific glue says it bonds instantly with little repositioning time. It also said to put down the glue and let it set up 1-2 minutes for best adhesion.
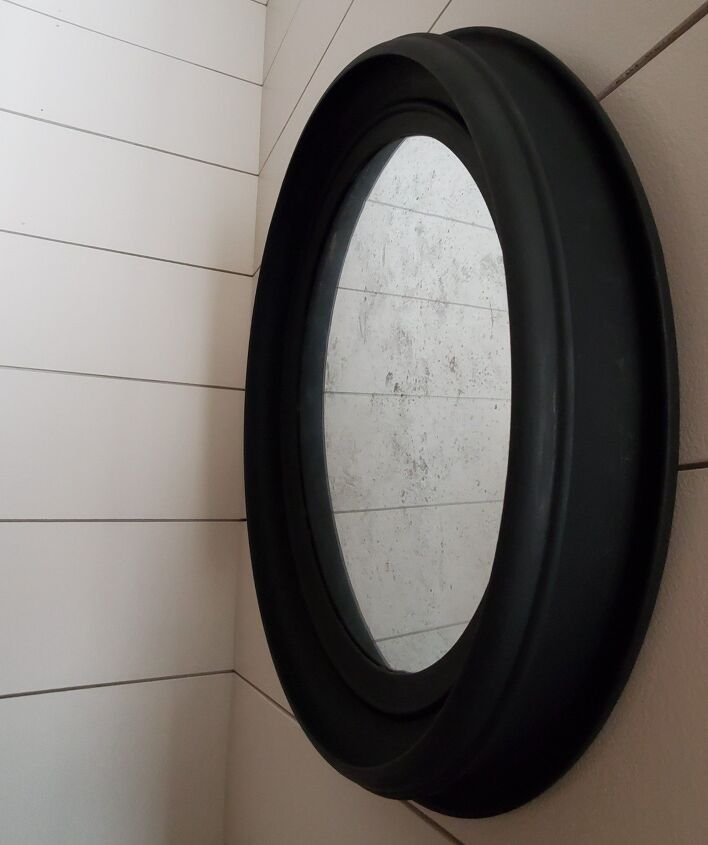
Here is a close up of how the antique mirror turned out.
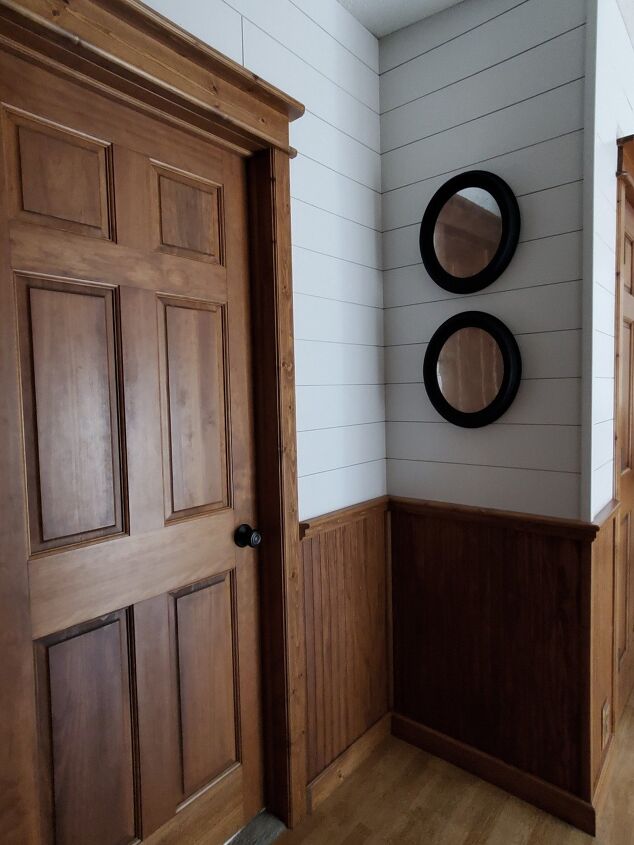
This wall has been bare for years. I love how the mirrors look here. I'm now on the hunt for other frames I can add antique mirrors to.
Comments
Join the conversation
-
These turned out beautiful. I understand the painting of the frames black; for a greater dramatic look on that wall. Personally since you were “antiquing” the mirrors I’d have left the original stain and maybe even sanded it a bit; to carry on the antique appearance. I can’t wait to try this DIY. I have a large collection of our families ancestors in photos in all different sizes; I might put several in larger frames with glass in front and antiqued glass mirrors in the back; sandwiching the photos.
-
Very nice. And your woodwork is beautiful!


Frequently asked questions
Have a question about this project?
Nice but how many did you make…..oval ones here but round ones on your wall?
Cool project but I didn't see the frame get sprayed with vinegar. 😉 The title of the article doesn't reflect the actual project. [See what I did there? Mirror? Reflect? 😜 ]
Sorry. I'll show myself out. 😬
The finished projects look awesome!
In the second, third, and fourth photos, what is that pink thing? It looks
like a frisbee with a design on it!? I don’t see that listed on the ingredients list.
btw, your project looks cool. I like how it turned out.