


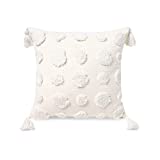
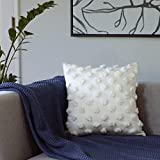
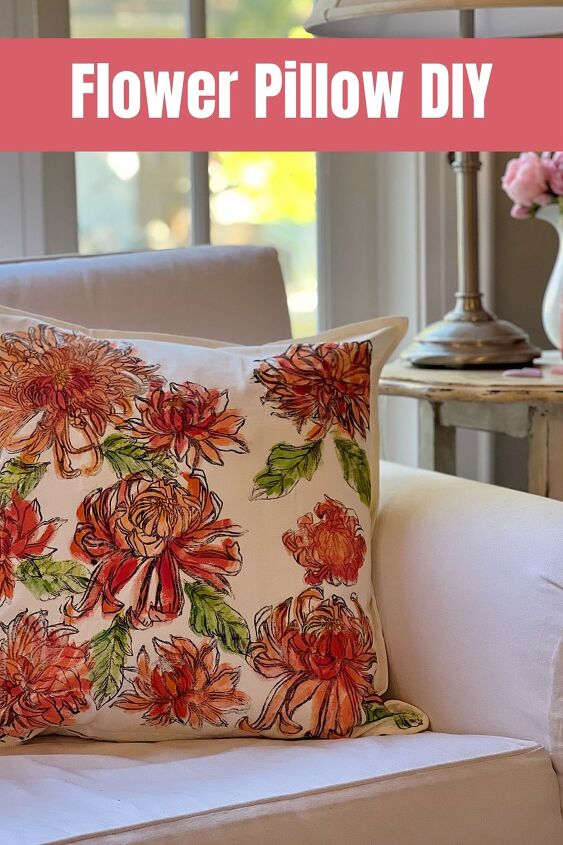
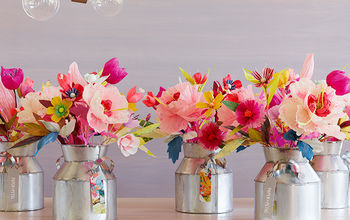
Flower Pillow DIY
I love to make a pillow for every season and holiday and there is nothing better than a flower pillow. You can use it year-round!
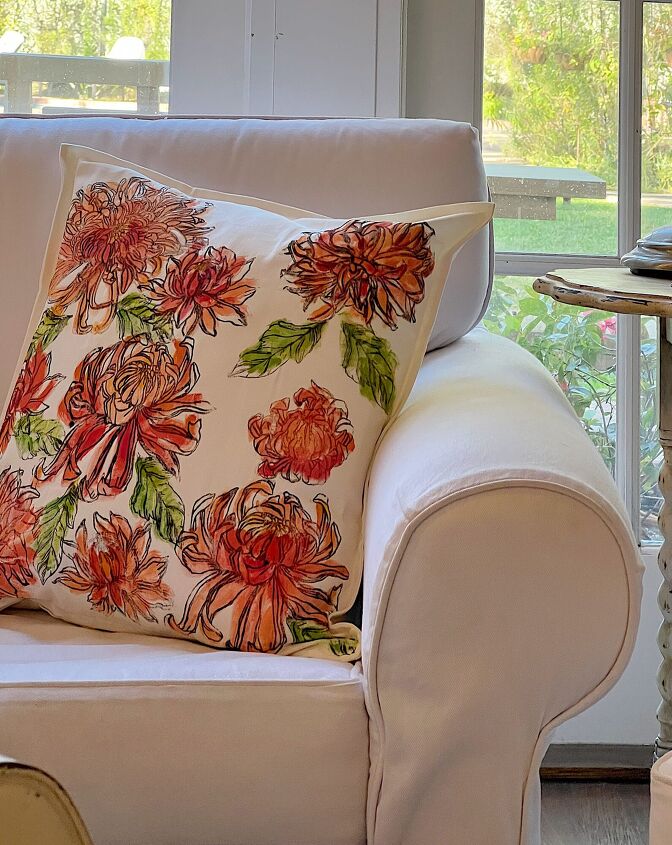
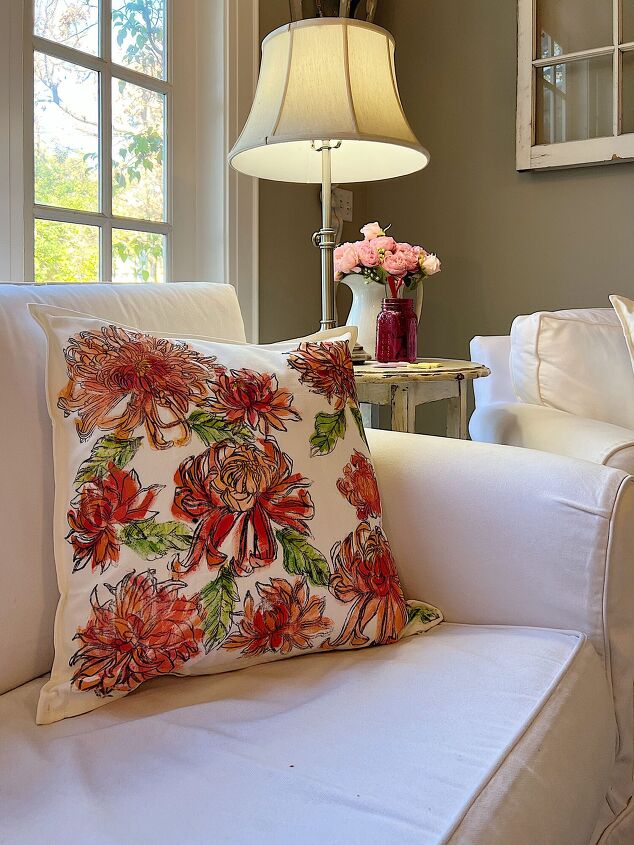
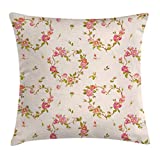
I have so many pillows in this color palette and I can always use another flower pillow in pinks and oranges. I can now outfit a couch (or sectional) with lots of pink and orange pillows!
You will see this DIY is very easy to do.
But it is made not how you think!

Flower Pillow DIY
In case you are thinking this is a Paint and Stitch pillow (aka free motion embroidery) … it is not!
It is a paint and stamp pillow!
I used an Iron Orchid Design Chrysanthemum stamp which made the process so easy! I absolutely love how this turned out and it looks amazing in our family room.

If you look at these two photos, you can see how I made this flower pillow. Can you believe the difference between the two photos?
Iron Orchid Designs
I love Iron Orchid Designs. You all know how much I love to craft and I am always looking for new ideas that look amazing and are not hard to do. Iron Orchid Designs has the most incredible products for crafts and DIYs. Their designs are so creative, they are a company of wonderful people, and their products will easily help you to discover amazing new DIYs and crafts.
If you go to the IOD website you will find “DIY tools and tutorials to inspire your creative soul”. They have decor moulds, decor stamps, and decor transfers to make fabulous items for your home. Today I get to share how I made used their decor stamps to decorate my homemade pillow.
Where can you buy Iron Orchid Designs products? Just click here to find a retailer near you! (You can also order online from some of the retailers.)
I used the IOD Decor Chrysanthemum Stamp.
How to Make a Chrysanthemum Flower Pillow

- Iron Orchid Designs Chrysanthemum Decor Stamp
- Pillow cover
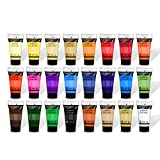
- Assorted Acrylic Paints
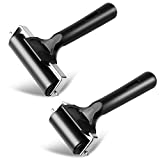
- Brayer (I actually used two and I would suggest you do the same.
If you are enjoying my blog, you can sign up to receive my blog updates here. .
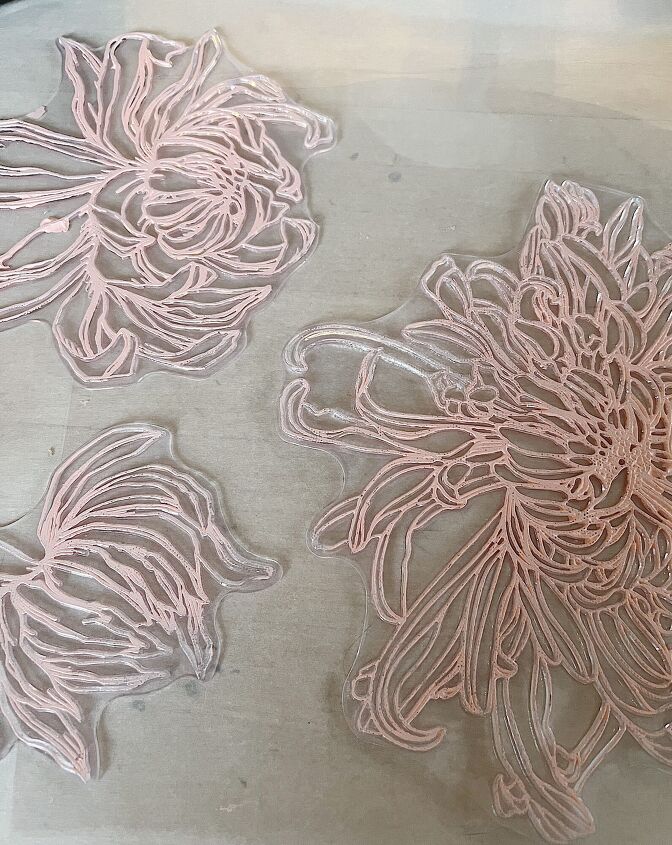
- Iron the pillow cover and lay out the stamps to decide a design for your pillow.
- In order to make the painting step very simple, choose a light color of paint and roll paint on the stamp with the brayer.
- Stamp the design on your pillow. This will help you paint your design.
- As soon as you are done with the stamps, place them in warm soap and clean off the paint. They are very easy to clean if you do this before they dry completely.
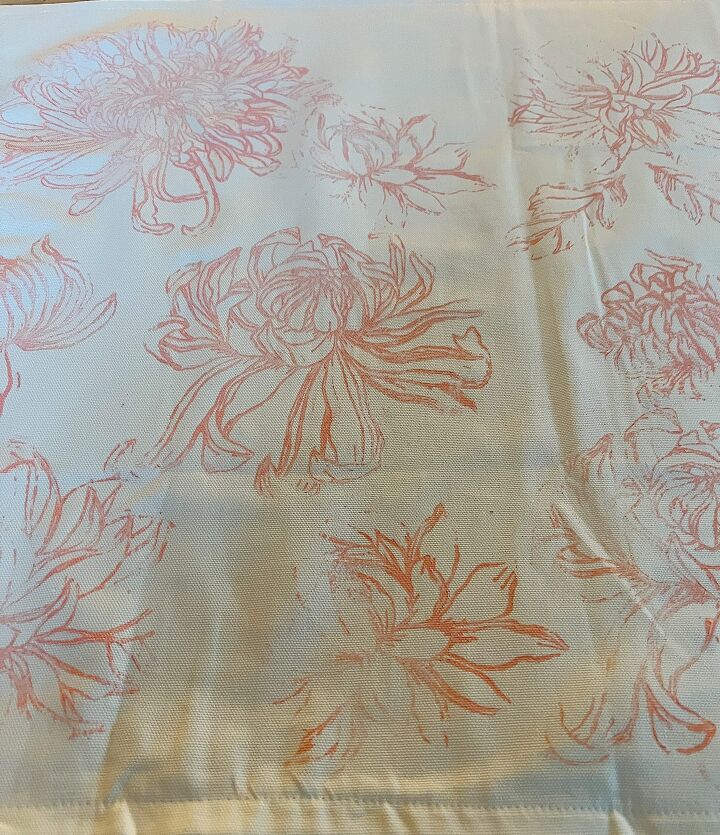
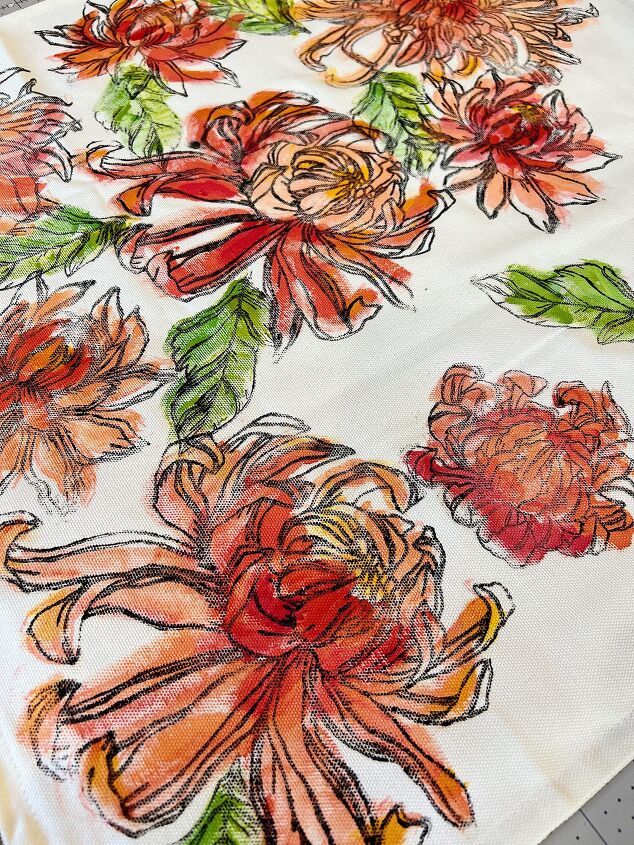
- This is what my pillow looked like after I stamped it but before I stamped on the leaves.
- You are now ready to paint the pillow.
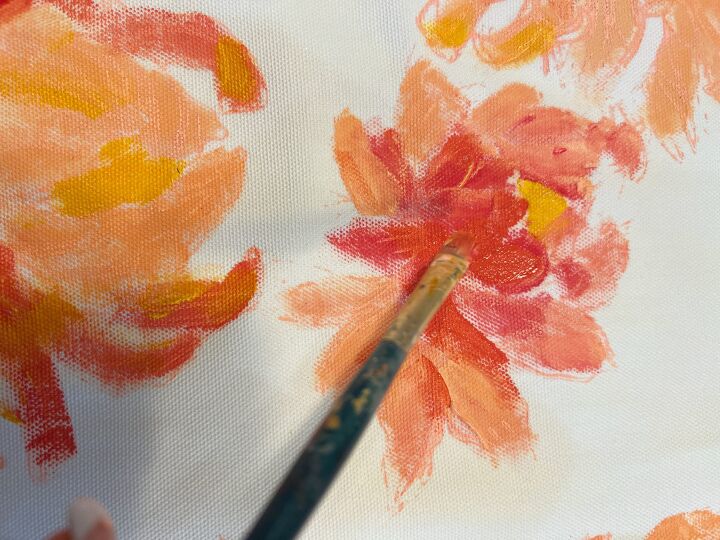
- Mix your paints. I didnt want to paint my flowers all one color so I mixed three different “pinks/oranges” for the flowers. I also used a bright warm yellow for the stamen and two shades of green for the leaves.
- I made the centers of each flower either darker or lighter. I followed the stamp design to see where the petals were but knew my painting did not need to be perfect.
- You can see how loose I painted this. Just know, anyone can paint this!
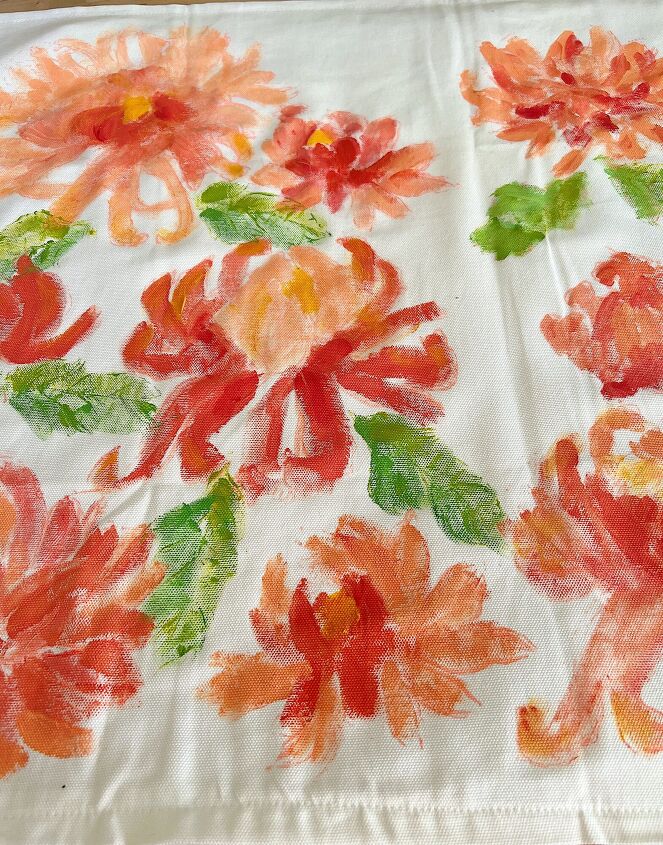
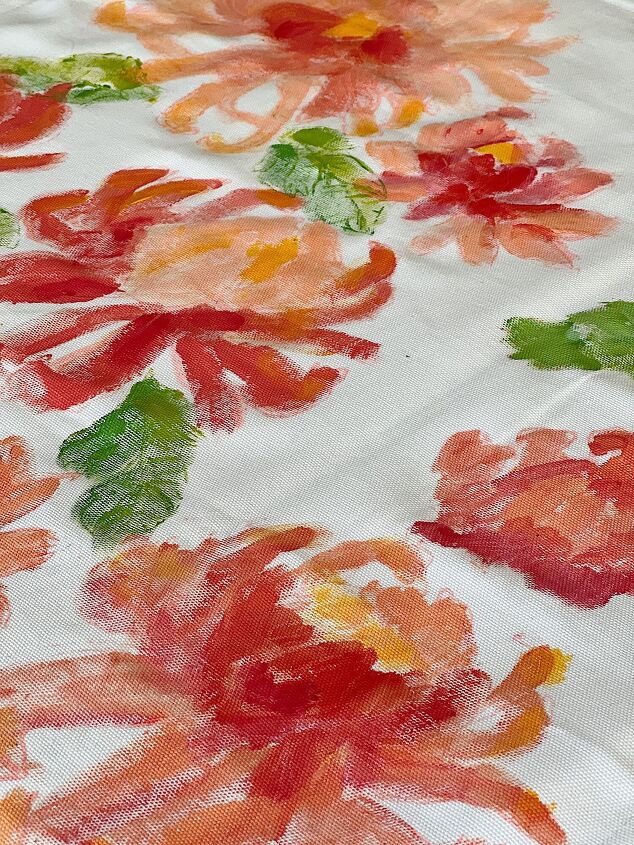
- This is what the painted pillow looked like. Nothing fancy! Hahaha.
- Be sure to let the paint dry completely before completing the next step.
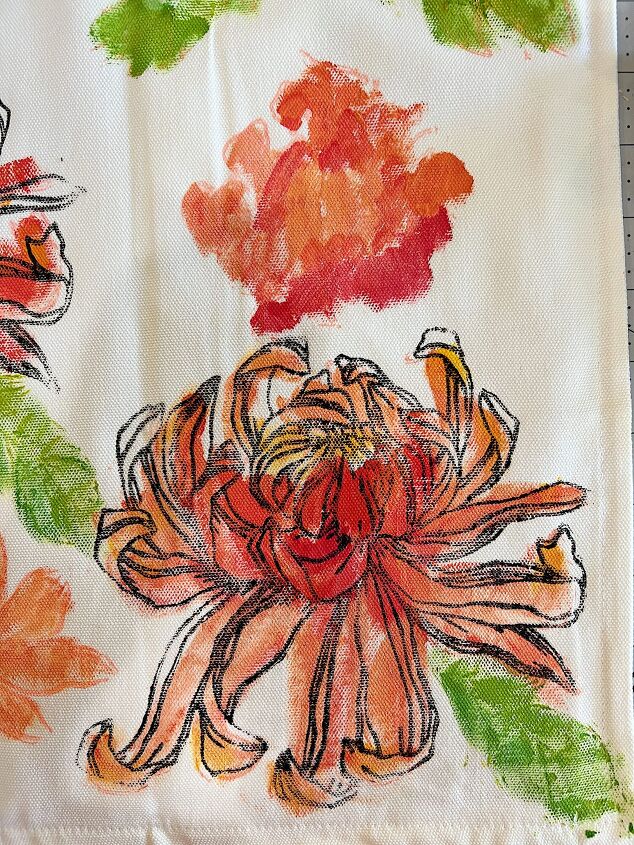
- The next step is to add the stamp design on top of the painted flowers. I used black paint but you could also use gray or brown paint.
- Use the brayer to add a layer of paint on the stamp. Be sure to get enough paint on the stamp, but not too much.

- See the leaf stamp above? I placed it on the green paint, then used a second clean brayer to gently add pressure to the stamp to transfer the paint on to the pillow.
- Let the pillow dry and then iron it to set the paint.

Doesn’t the design look great? I can promise you this is so easy to do. It takes about one-tenth the time it takes to add free motion embroidery!
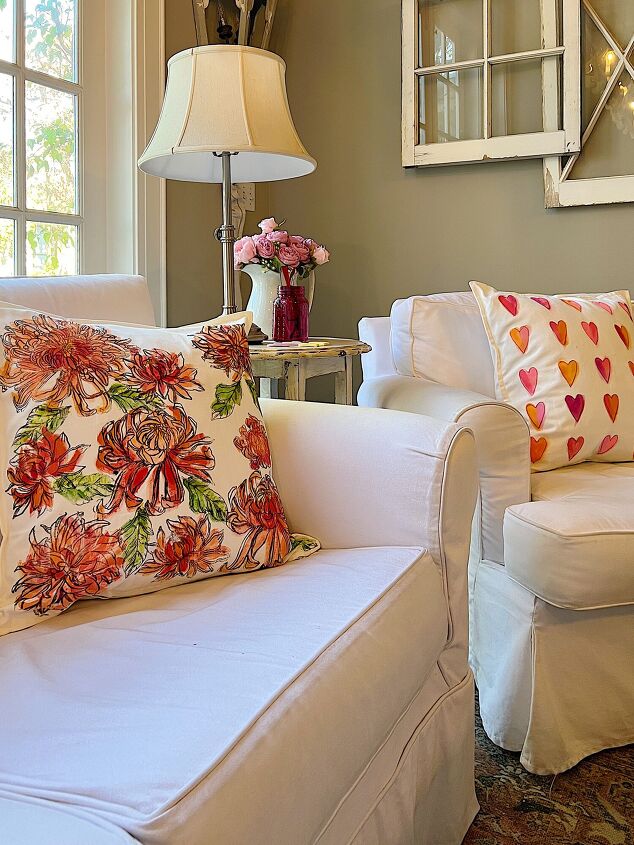
Pink, Valentine’s Day, and Flower Pillows
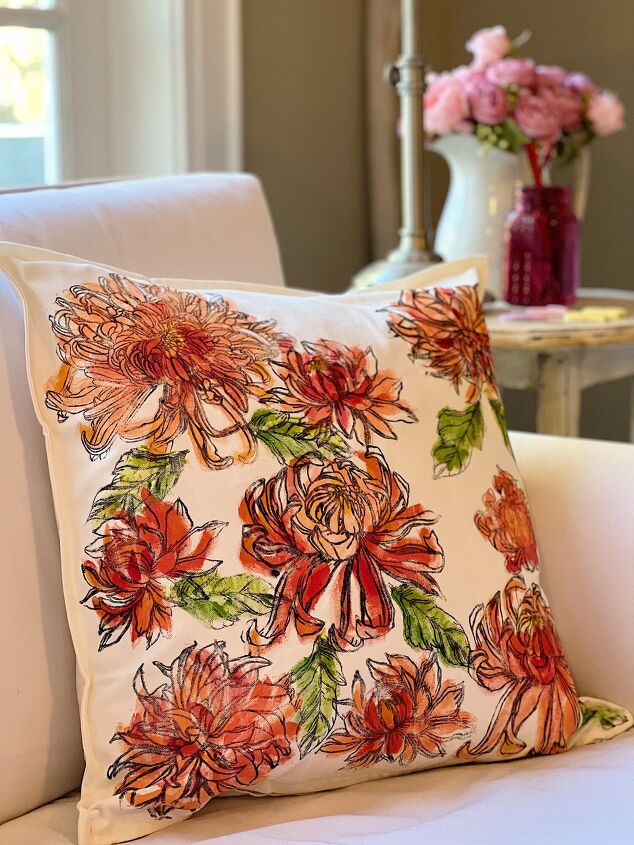
I can’t wait to use this pillow in my Valentine’s Day decor. It is going to look great!
Watch Me Live!
I love having the chance to talk with all of you about all of the things that I love.
I am now sharing a few Amazon Live broadcasts every week and they are so much fun!
I hope you will tap on the links to see what’s new.
Are you curious about the latest tech items you need to know about? Click here.

Want to see the items I use to make my crafts? You don’t need them all but some are essentials. Join me here.
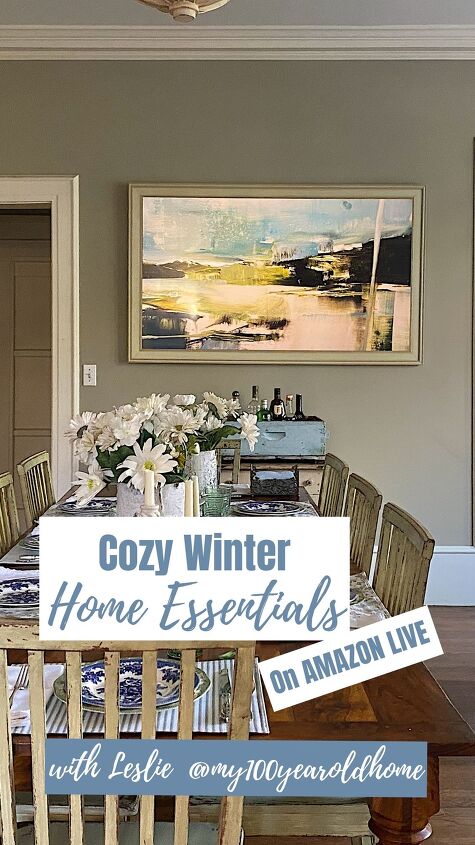
Do you want to make your home cozier for the winter? Here are some wonderful items to do just that! Click here.

Are you looking to get in shape for the New Year? Here are some great items to help you get started. Click here.
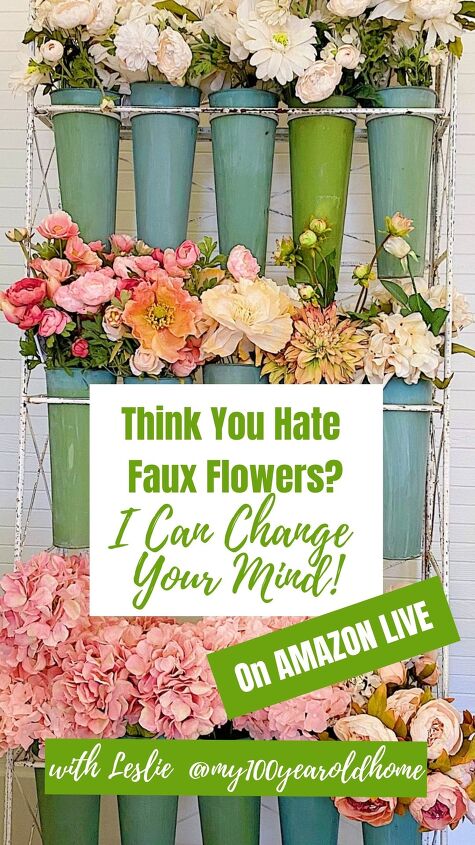
On this broadcast, I shared some of my favorite faux flowers and showed how to arrange them as well! Click here.
I love having the chance to talk with all of you about all of the things that I love.
You Might Also Need…


Pin the image below to your boards on Pinterest (just click the Pin button in the top left corner). You can also follow along with me on Pinterest!
For more real-time updates, follow me on Instagram @My100YearOldHome

ABOUT LESLIE
Welcome to My 100 Year Old Home. I started my blog so I could share my passion for entertaining, décor, cooking, and crafts. You will find all this and more right here. Read more…


Comments
Join the conversation
-
I love the chrysanthemum pillow, just ordered the stamp! The carrots too!
-
My stamps came and I was confused as they are so different then any stamp I've ever used! Had to watch a tutorial then back to your site. Now I get it!


Frequently asked questions
Have a question about this project?