


DIY Whimsical Bird Cage Hanging Lamp
My daughter recently turned 6 and wanted her own desk in her room so I decided to give her a cute little desk nook! Once I decided on a design plan I just knew I had to make a hanging bird cage lamp!
It turned out so cute! Here's the step by step.
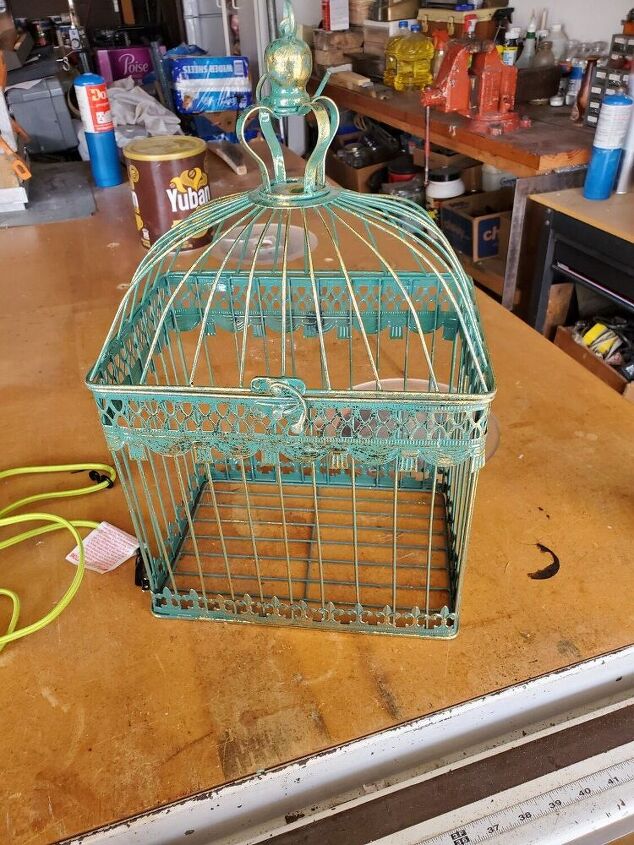
I started with a metal bird cage and a hanging plug in lamp kit. I had both of these on hand already; my favorite way to start a DIY!
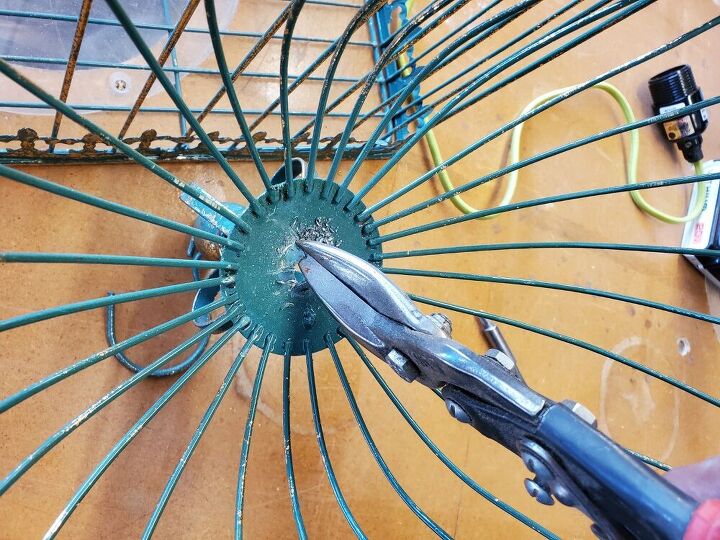
I used tin snips to cut through this center plate. This step was actually a little harder and tedious than I thought it would be. Since there are so many types of bird cages out there, you have to make sure it will have a spot that you can insert a light kit.
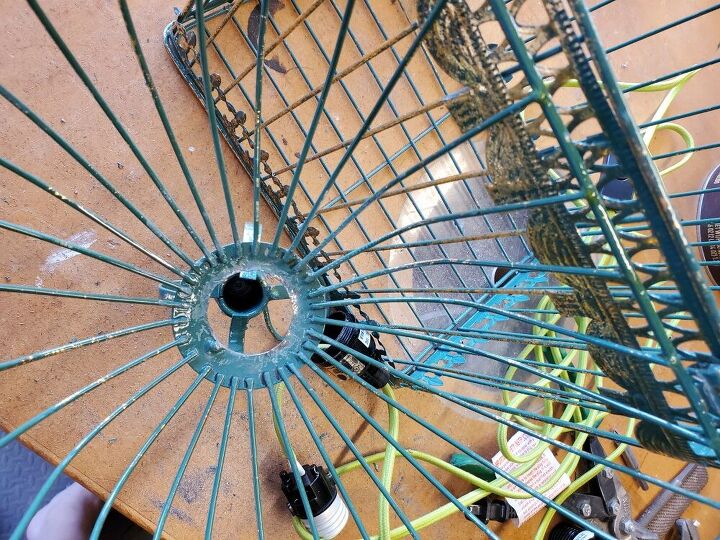
My original plan was to use the little screw on washer type piece to secure the bulb portion into this hole that was cut but it ended up not being big enough. I could have tried to cut more but I was afraid that would cause the top to either cave in or not be structurally sound anymore. So, I decided to leave the bulb hanging lower into the bird cage and secure the cord with a couple of zip ties at the top. This ended up making it much prettier in my opinion!
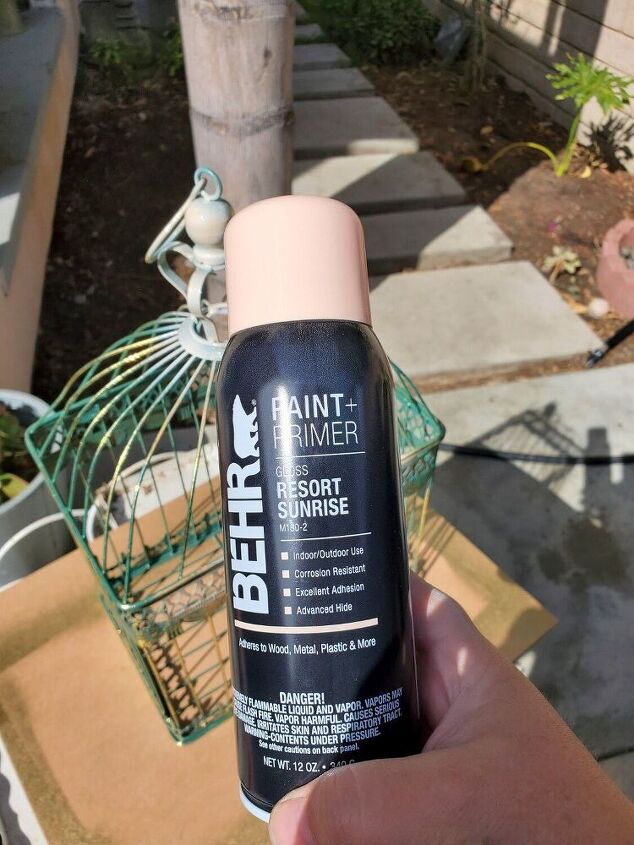
Next up - spray paint! This took several coats in several different positions to get nice coverage.
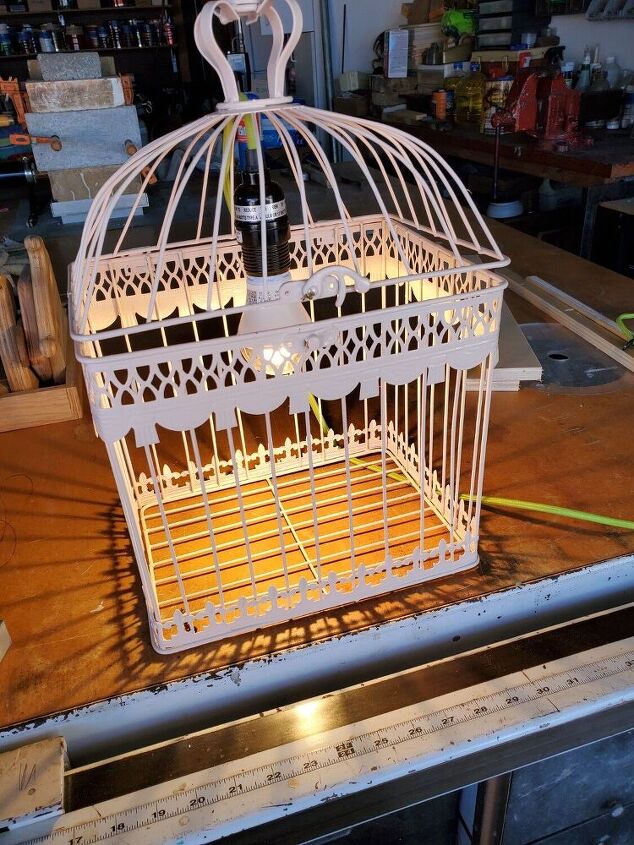
I had to test it out to make sure everything was working out. So far, so good!
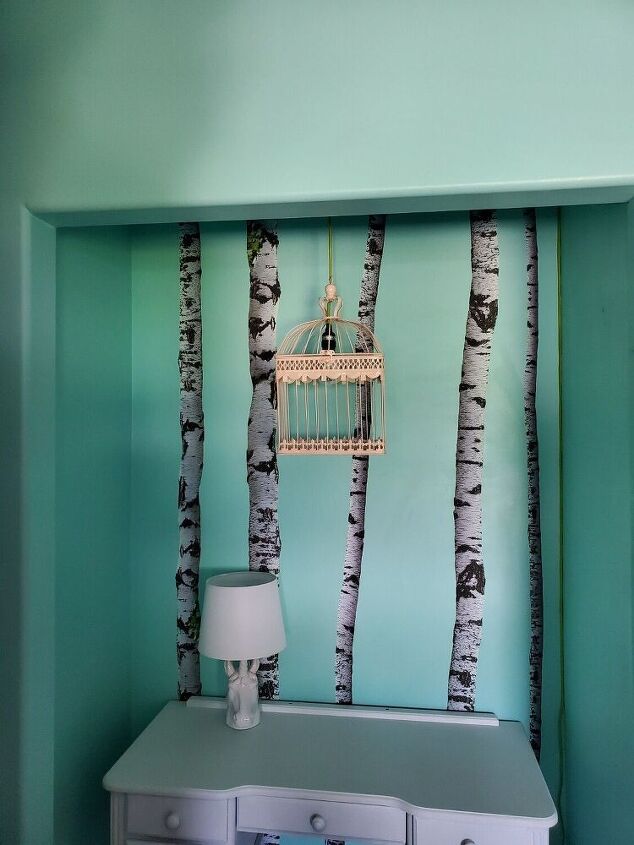
I then took it into the nook and secured it with a hook in the ceiling and upper right corner, and adjusted the height to where I wanted it.
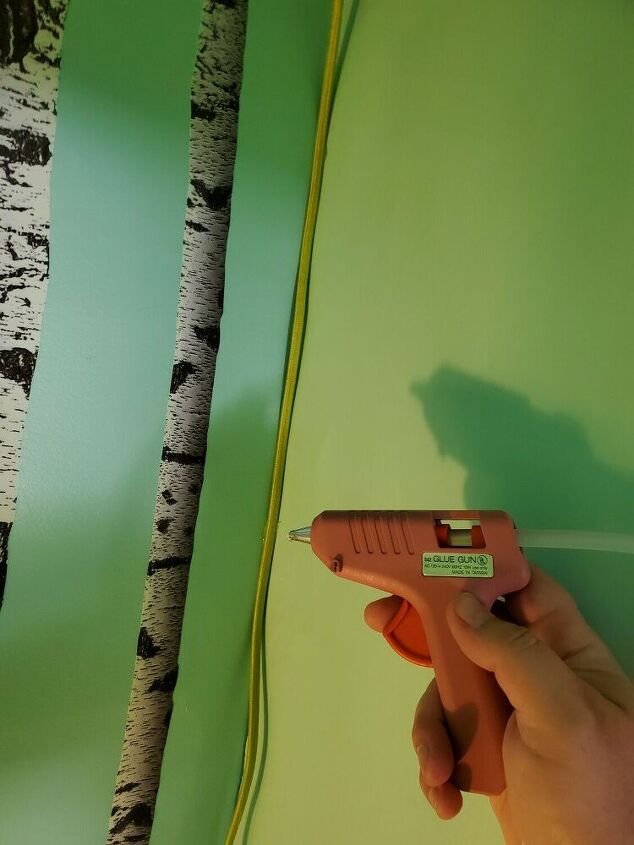
I was thinking about adding some type of quarter round or even staples to hold the cord in the corner. Then my husband had the brilliant idea of using hot glue to secure it! I just used a nice size glob every 6 inches or so. This gave it a nice clean look and will keep it out of the way. It also shouldn't be too hard to remove if we end up changing this space in the future. This particular lamp kit had a cloth covered cord so I felt that it was safe to use the hot glue on it. If using just a regular cord, make sure the hot glue won't melt it or affect the integrity in any way.
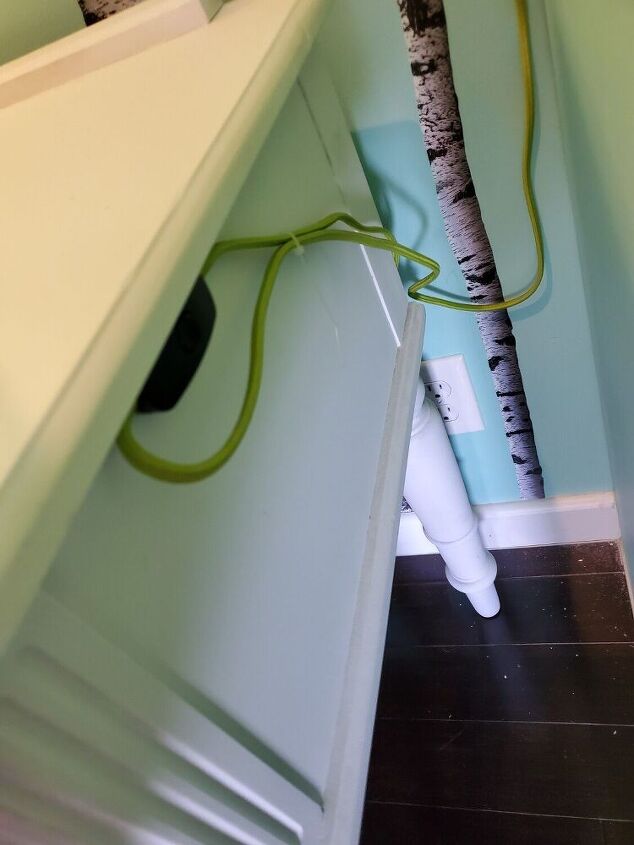
We took it up a notch and also used hot glue to secure the switch to the side of her desk. It's super easy to access and remains hidden from view!
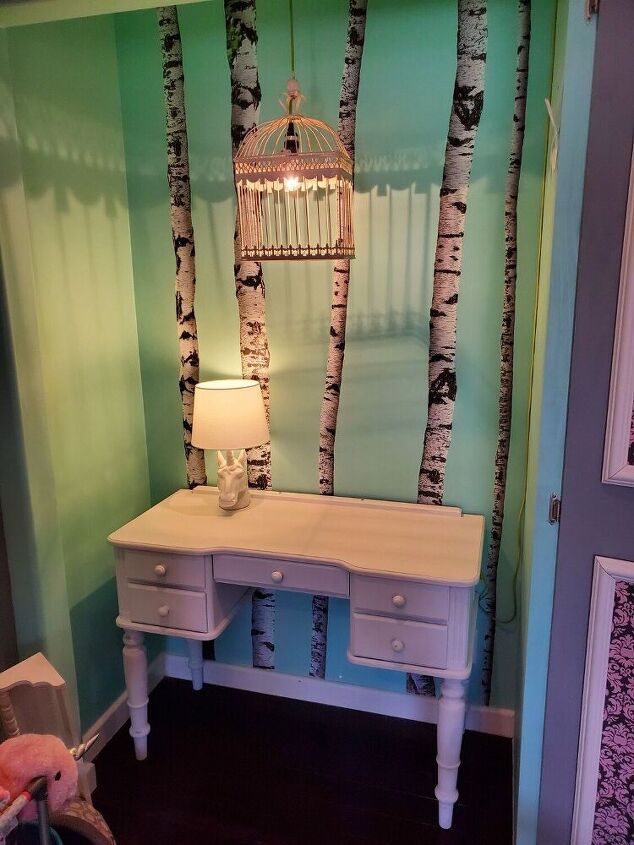
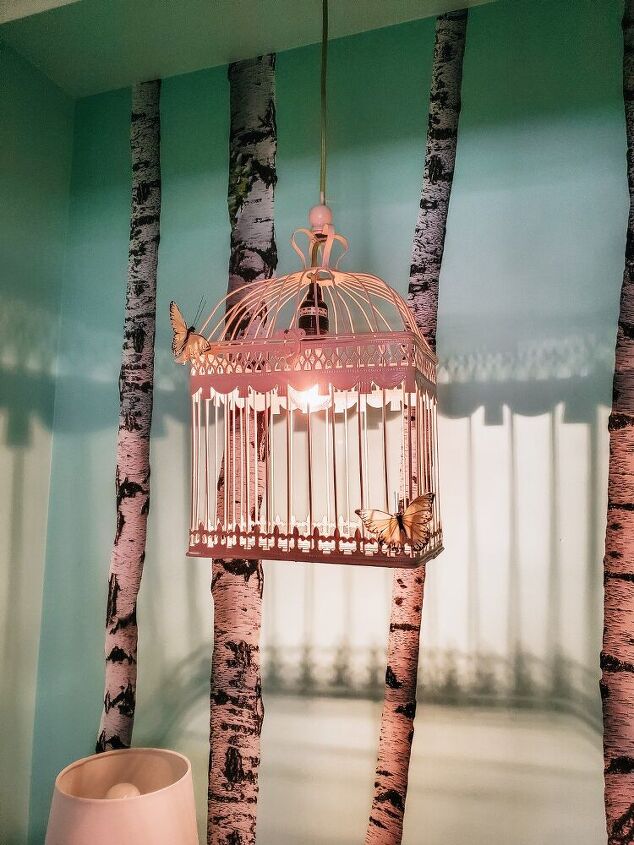
All done! I love the shadow that it casts as well! It's so fun to play around with different types of lighting to make a space feel cozy and whimsical.
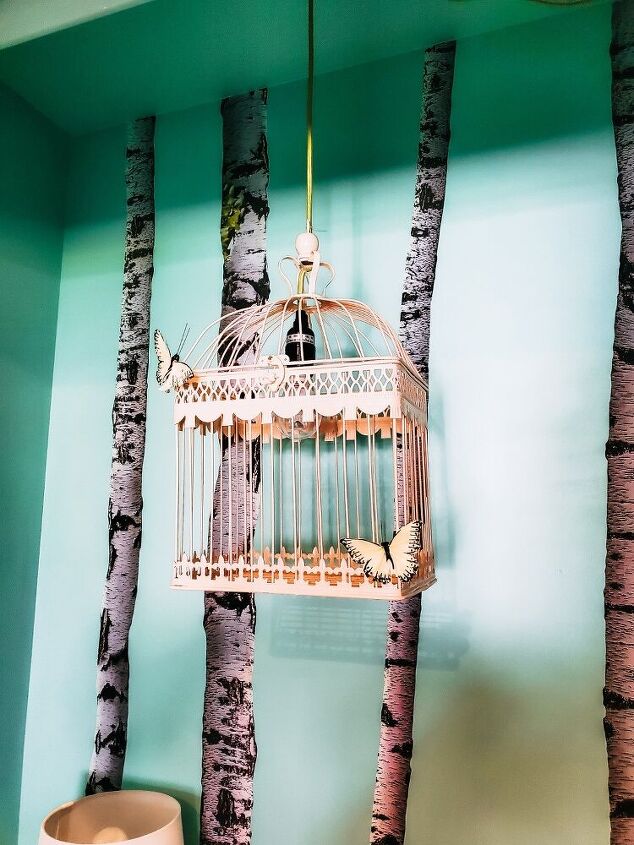
Here's a picture with the light off. I added a couple of butterflies and I might even add some flowers or birds as well! Also, after living with it for a bit, I'm probably going to paint the black part of the bulb housing pink to make it blend in a little better. If you liked this project, stay tuned for my step by step on her entire desk nook!
Resources for this project:
See all materials


Comments
Join the conversation
-
The whole nook is lovely! 👍
-
I have a lot of metal and wooden bird cages.
I think I’ll. Be making some. Thank you!


Frequently asked questions
Have a question about this project?
The trees! OMG! Besides the adorable light, I love the trees! ( and the wall color) I am assuming they are decals but where did you get them? She will love this nook for many years. Beautiful job!