


How to DIY a Professional Finish When Repainting Your Kitchen Cabinets
3 Materials
Painting kitchen cabinets is a big job, and it's tempting to want to take shortcuts. But if you want a paint job that will look great and stand the test of time, it's best to take the time and do it right. Here's how.
You'll need all the standard painting supplies, like drop cloths, paint rollers, brushes, tape and sandpaper. But the real secret is the paint. Use a self-leveling slow drying paint, such as Benjamin Moore's Advance, and a mohair roller for a smooth finish. Here are the steps to the whole process.
You'll need all the standard painting supplies, like drop cloths, paint rollers, brushes, tape and sandpaper. But the real secret is the paint. Use a self-leveling slow drying paint, such as Benjamin Moore's Advance, and a mohair roller for a smooth finish. Here are the steps to the whole process.
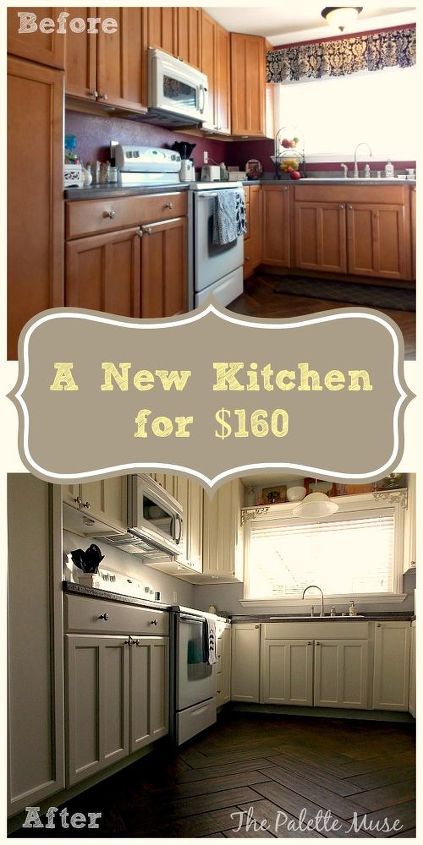
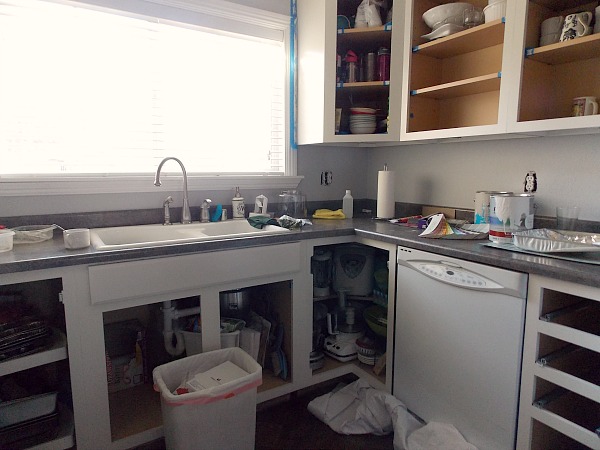
To turn your dingy old dark cabinets into a light, clean, and bright kitchen only requires a little elbow grease, some patience, and the right tools!
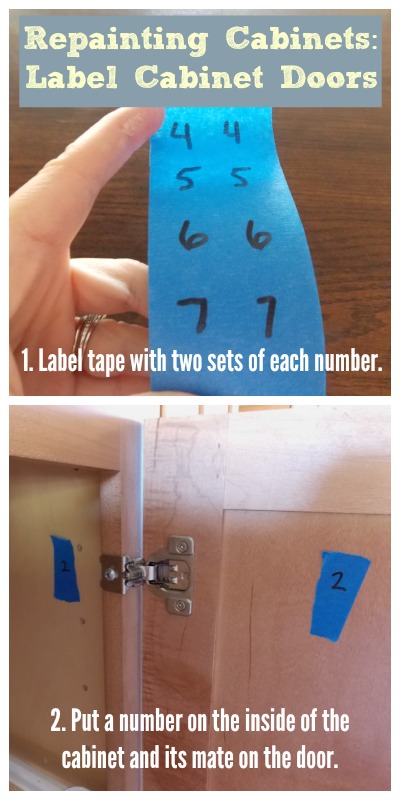
First, label all your doors and drawers. I use a raffle ticket system, as in this photo. DO NOT SKIP THIS STEP! Then remove all the drawers and cabinet doors. You can save a lot of money reusing the hardware if it's still in good shape. Just collect the knobs and hinges for reattaching later. Set the drawers and doors aside, and work on the boxes first, so you can get your kitchen functioning as soon as possible. Remove dishes and food items from the cabinets, so they don't get all dusty.
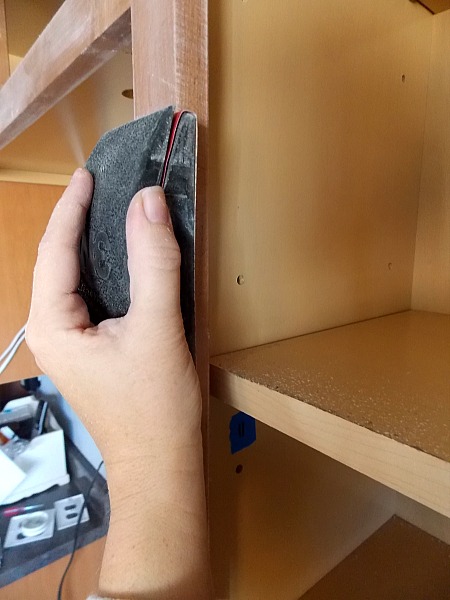
Using a hand sanding block of 150 grit, sand down the frames (outsides) of the cabinets. You need to sand off the top coat of whatever is sealing the original finish, but you don't need to take off every bit of color from the wood. Use a short nap or mohair roller to paint the boxes with primer. I like Benjamin Moore Advance. Use a primer that is close to your finish color.
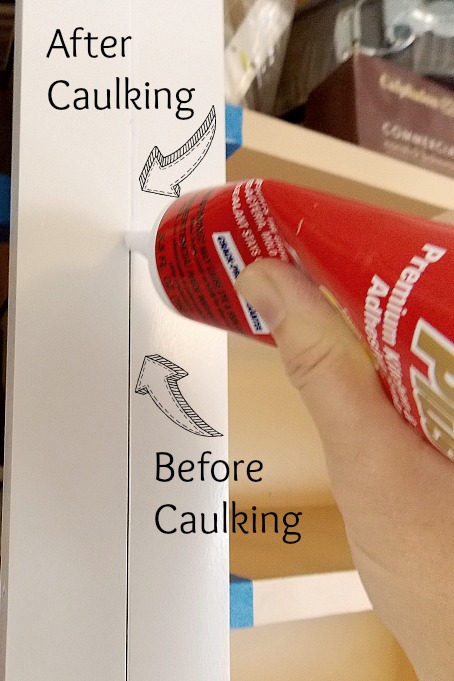
Once the primer is dry, use caulk to fill any seems and caps. Let that dry for at least an hour. Sand lightly with 200 grit sandpaper. Clean all the sanding dust and apply the paint with a mohair roller (and synthetic brush for crevices and corners). Follow manufacturer's instructions for drying times.
In between coats of paint, sand very gently with 320 grit sandpaper. When you paint on the final coat, be careful not to overwork the paint. This will give you a gorgeous, super smooth finish.
Once your cabinet boxes are done, you can replace all your dishes and kitchen items and use your kitchen normally, while you're working on your doors elsewhere. You'll follow the same steps for painting the doors, but with extra attention to detail because they will take the greatest wear and tear, and will be the first thing people will notice.

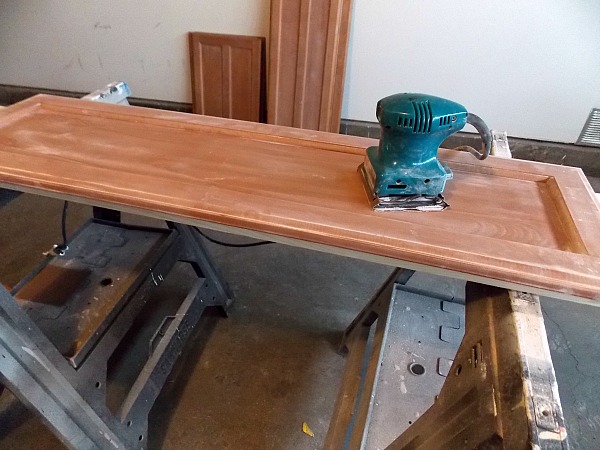
To save yourself lots of time and exertion, use an electric palm sander for the flat surfaces of the doors, and just use your sanding block to get in all the nooks and crannies. It really is worth the time to sand well, so that the paint and primer can properly adhere to the wood. This is how you keep the nicks and scratches at bay.
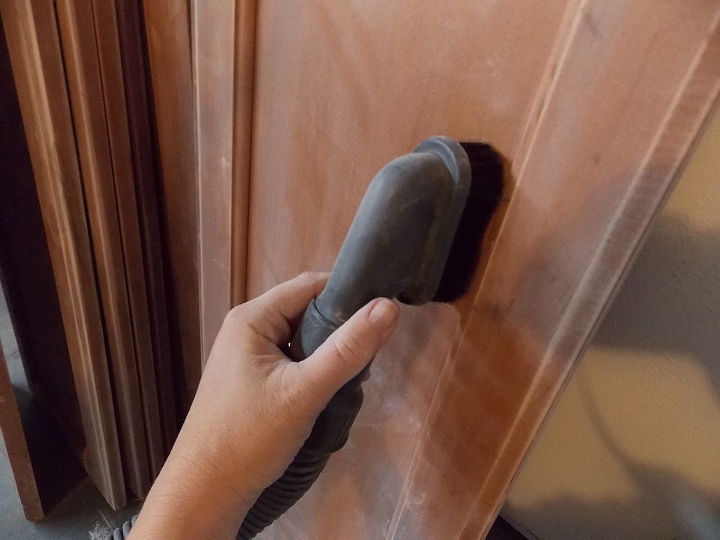
Carefully remove any sanding dust from the doors, first with a vacuum, and then with a microfiber cloth dampened with rubbing alcohol. Do not use water, as it will raise the grain of the wood and interfere with a smooth finish.
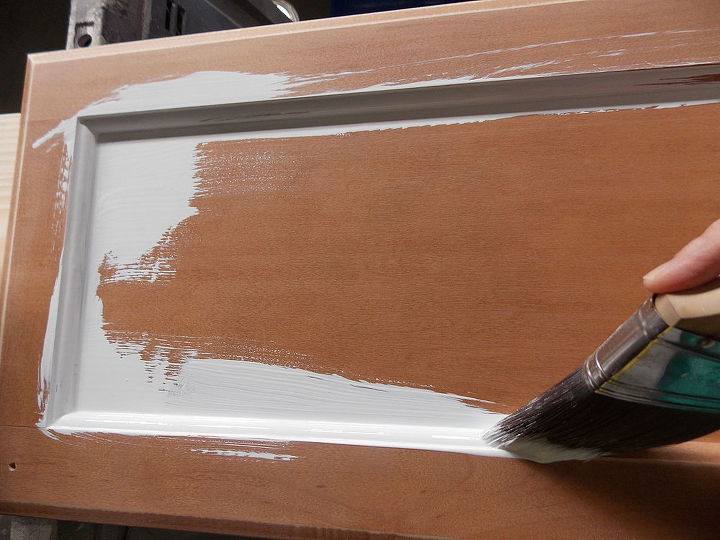
Brush primer in the corners of the door panels. Then use the roller to apply primer to the flat surfaces.
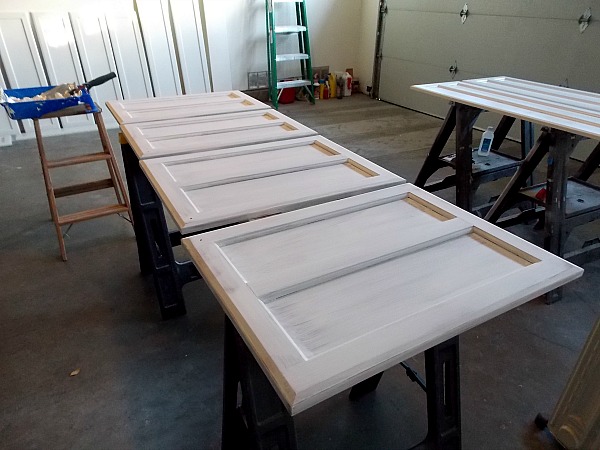
Try to lay the doors flat for as long as possible to minimize drips. Once they are mostly dry, you can lean them up against the wall (not touching each other!) to finish drying. Use your caulk to fill in any gaps between the molding the flat surfaces of the doors. Sand lightly with 200 grit sandpaper and clean well.
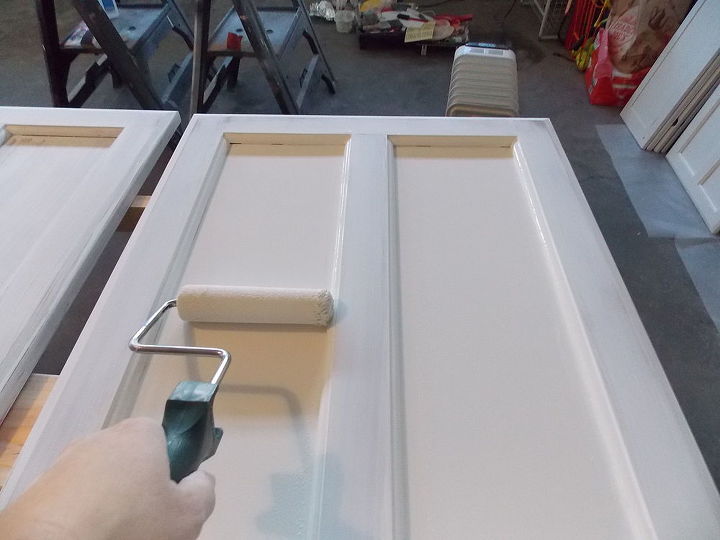
Using your mohair roller, start painting from the lowest surface on the door, the inside panels.
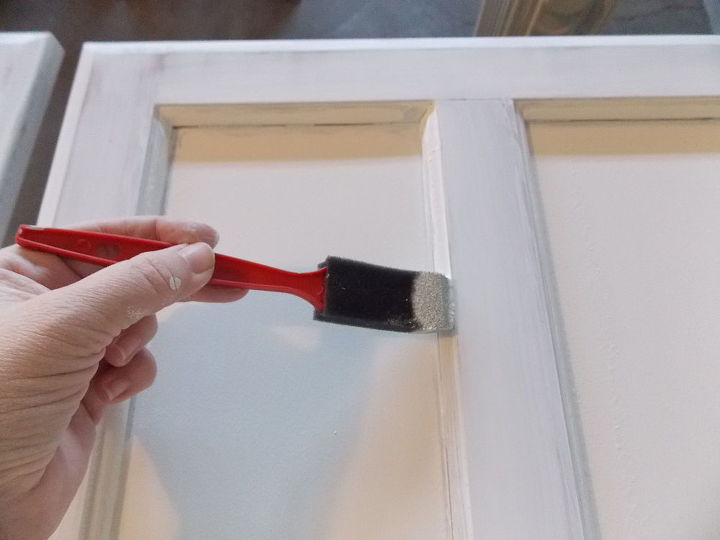
Then use a synthetic brush to fill in the corner layers of molding. This is where you want to be careful not to overload your brush with paint, or you'll end up with drips. Finally use the roller to paint the outside flat surfaces. You can also roll lightly over the already-painted edges to even out any drips or excess paint. Taking the time to do this right will really make a difference in the finished product.
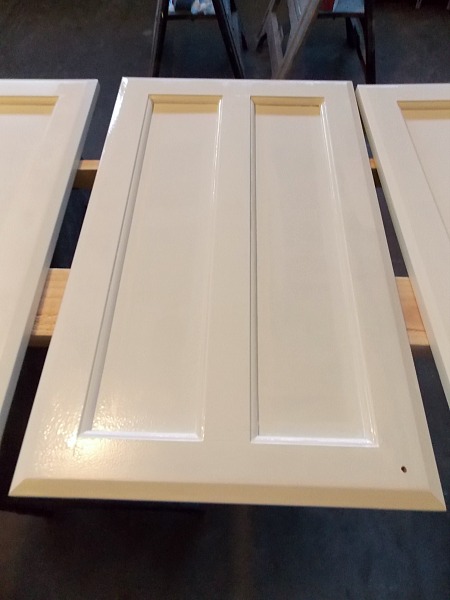
Again, try to lay each cabinet door flat for as long as possible. Since this paint is self leveling and slow drying, having the door flat helps the paint do its job properly. Repeat the sanding (with 320 grit), cleaning and painting process one more time.

Want more details about this and other DIY projects? Check out my blog post!
Comments
Join the conversation
2 of 335 comments
-
I did my bathroom vanity and I do not think I would ever attempt the kitchen. It is so much work. I think when the time comes I will just lightly sand and stain.
-
Thanks for the very thorough tutorial. I haven't gotten my nerve up just yet because I painted the bathroom vanity and learned truly how much work it is to do the job correctly. It really does take a lot of patience and persistence to work through all the details for a great look and finish. The professional cabinet painters earn their money.


Frequently asked questions
Have a question about this project?
I'm seriously considering redoing my kitchen cabinet and wall colors. I just want something that will kind of stand the test of time and appeal to potential buys as we'll likely want to sell within 4-5 years. Any suggestions on colors? currently, they are a medium golden brown stain/finish.
Just a further suggestion; put your hardware in a cheapie zip lock bag (I used the Dollar Tree snack/portion bags) and number those as well. Put the tape with the number in the groove so it doesnt have to be removed for painting.
I also had plain builder grade cabinets in my laundry room that i added 1/4 inch mdf strips to make shaker cabinets. Caulk and good primer created a perfect look.
Would a sponge roller work as well? Shouldn't s coat of polyeurothane be applied after painting is dried and cured