Furniture Hustlers Kitchen Cabinet Refresh

For the last part of January and the first week of February, I joined in on a little challenge over on Instagram - for under $100, build or transform a piece of furniture within the two week time frame. Luckily for me, cabinets were up next on my kitchen transformation!
Hometalk Recommends!
Want to save?
Get your 30-day free trial of Amazon Prime today before the biggest sales of the year start July 16th-17th!
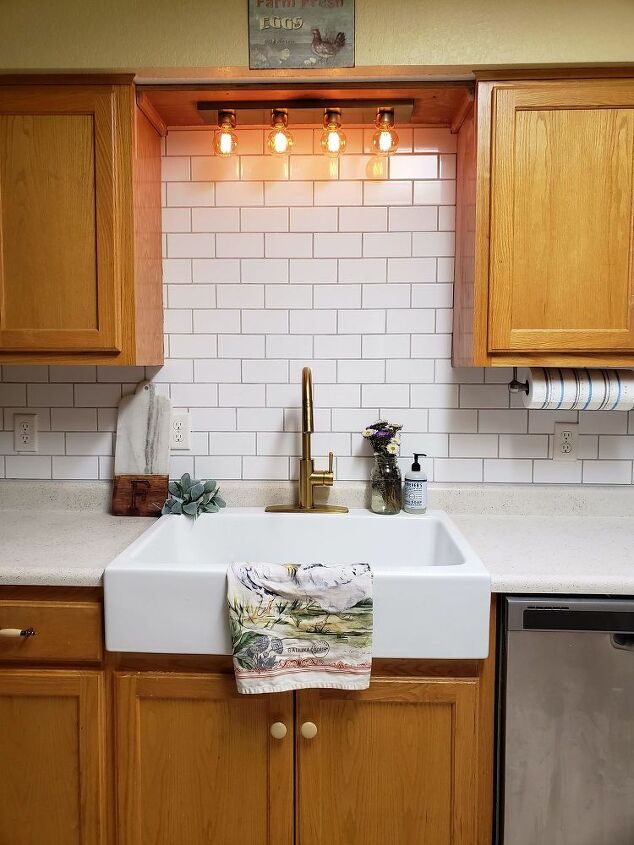
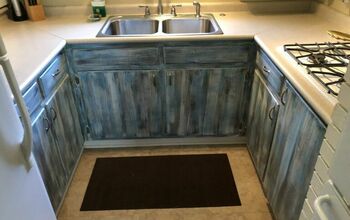
For even MORE reference, let's start with where the kitchen was when I started this refresh project.
It was pretty dark and dated, so I went to work - swapping out the sink, refinishing the counter tops (for $125!) and tiling a back splash. The cabinets have been on my radar for years, but I was always intimidated by how much prep work everyone was talking to me about. If you follow me at all, you know I despise prep work! I know it makes all the difference, so I still try to put in as much as I can. But, when I find life hacks that can help me avoid it - even just a little bit - you know I am all about it.
So, when I discovered Valspar Cabinet Enamel, I was pretty excited. Slightly skeptical, but excited either way. Why, you might ask? Because it doesn't require priming and (in some cases) not even sanding prior to application! 
Of course, my skepticism kicked in, so I tested it out on a dresser prior to tackling the entire kitchen worth of cabinetry. I was extremely satisfied. I didn't prime and I didn't sand on that piece and, almost a year later, it is still looking as beautiful as day one.
With that said, I decided to still put in a little prep work since these cabinets get so much abuse (dogs, kids, husband, me). So, let's dig in to my step by step!
Step 1: Remove your doors and drawers.
Since it was my first time tackling cabinets, I had no idea those doors can just pop off! It was an exciting new discovery for me. I have that little hack stored away in my Instagram highlight about these cabinets if you, like me, didn't know about this trick.
Step 2: Remove all hardware.
I would recommend a power drill here, because there are A LOT of screws. I stored the hinges, child safety locks, etc. in a plastic container as I tackled one side of the kitchen at a time. The door and drawer pulls I pitched because I was replacing them with different hardware.
Step 3: De-grease and clean your cabinets.
Go ahead and clean your cabinets and doors thoroughly. I used a de-greaser to help break up the build up of cooking oils that have probably built up over the years of cooking, children and animals that have paraded past my kitchen cabinets.
Step 4: (Optional) Prepare for your new hardware.
If you are leaving on your existing hardware, you can skip this step. If you are updating them, however, you might need to prep for your new pulls. I was moving away from a single knob on my cabinet doors to a bar-like handle, so I needed to fill in the existing hole with wood filler. From there, I measured 1.5" down from the middle of the old hole, marking that spot with a pen.
I marked a guide dot on my speed square to help me with the spacing from the outer edge of the door. That way, when I marked the new holes, they would be exactly the same distance in from the edge.
I drilled the first hole with a drill bit that was the same size or slightly larger than the screw that came with the hardware. I usually went with the one on the bottom first. Then, I used the actual hardware to mark for the second hole.
This method seemed to really work well!
Step 5: Sand
While this particular paint claims you don't have to sand, I still did just to get a more porous surface for the paint to grab onto. Plus, I wanted smooth edges around the new holes that I had drilled and a smooth surface where I had filled in the previous hardware hole.
Once you have sanded, wipe all of the dust off with a wet cloth and clean up your area well.
Step 6: Paint!
You are going to be painting a lot. I started with the backs of the cabinet doors first. That way, if I accidentally was too impatient and turned them over too soon, it would be hidden inside.
I first went over the uneven edges with a paint brush. Then, I followed it up with a small Mohair roller.
While the doors were drying, I took on the bulk of the cabinet frames.
All of my dogs were kicked out of the house during this process. But, I soon discovered that they don't even need to be around to cause dog hair to just magically show up in my paint.
So, part of my painting quality control was to make sure no hair floated into my paint! 
After your first coat is dry, paint on your second coat.
Looking back - I would have found something to prop the cabinet doors on to paint them, so that you could get to the edges at the same time you are working on the front. But, lesson learned. Even without propping the doors up, I am really happy with the way the paint came out.
With Valspar Cabinet Enamel, you don't have to worry about brush strokes either. Little to no prep work, no brush strokes and it hardens with time, leaving a slightly glossy finish that is easy to wipe down. It is perfect for high traffic cabinets!
Step 7: Re-attach your hardware and hang your doors and drawers.
Attach your cabinet door and drawer hardware - hinges, pulls, etc. - with the screws that were associated with them. Then, attach the hinges that go on the frame to prepare for hanging your cabinet doors.
This part was a little tricky, but I did discover something that really helped me out. I would loosely attach the portion of the hinge that the doors snapped onto first (the ones that attach to the frames). Then, I would snap the cabinet doors on. While lifting it up to where it needed to be, I would tighten only maybe two (of four) screws. I would repeat the process on the other side. Close the doors and you can tell which door needs to go up or down in order to match up with the other. Adjust by loosening the screws (not removing them) and adjusting your door height. Then, when both are in line with each other, tighten completely.
As you can tell, I chose to not paint the inside of the cabinets - wasn't worth it to me! Plus, I thought the contrast looks nice.
Once everything is in place, you can touch up any areas that have gotten scratched (mistakes happen) and step back to admire your brand new kitchen. It really does feel like a whole new space!
Then, you can welcome your furry friends back into the kitchen. 
Thank you all who showed up for this on Instagram - this was such a fun reveal! And because of how it went on Instagram and the post about my counter top refinishing kit, I already know your top question.
What color is this??
I couldn't decide.. at all. So, I narrowed it down to a few and my four year old daughter actually nailed down the final winner - Valspar's Coastal Dusk.
Now get your cabinet painting on - this paint makes it a lot easier!
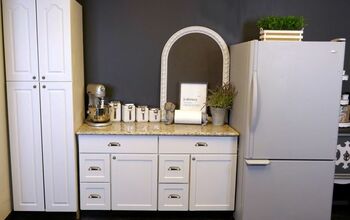
For those who are asking about the FINALLY completed project (including that scroll piece/light fixture area) - this is it! I was forced to leave the 95% club when we sold our home, so I finally wrapped up the project and I miss my kitchen!
At least the house we moved to has a ton of project potential. I don't even know where to start!
Affordable Ways to Update Your Home
Enjoyed the project?
Resources for this project:
See all materialsComments
Join the conversation
-
-
 Kar111420076
on Jul 10, 2024
I bought a handy guide used for installing the knobs or handles!! Cheap and very accurate.
-









Frequently asked questions
Have a question about this project?
I love the wood grain on my cabinets now. Can I paint with something and still see the wood grain?
If there is paint on the cabinets now; how do you remove it?
I know this is a DIY, BUT I just don’t want to fool with it!😩 HOWEVER, I would LOVE to update my cabinets!! How do you find/select a person/company to give you the very best, professional upgrade?