


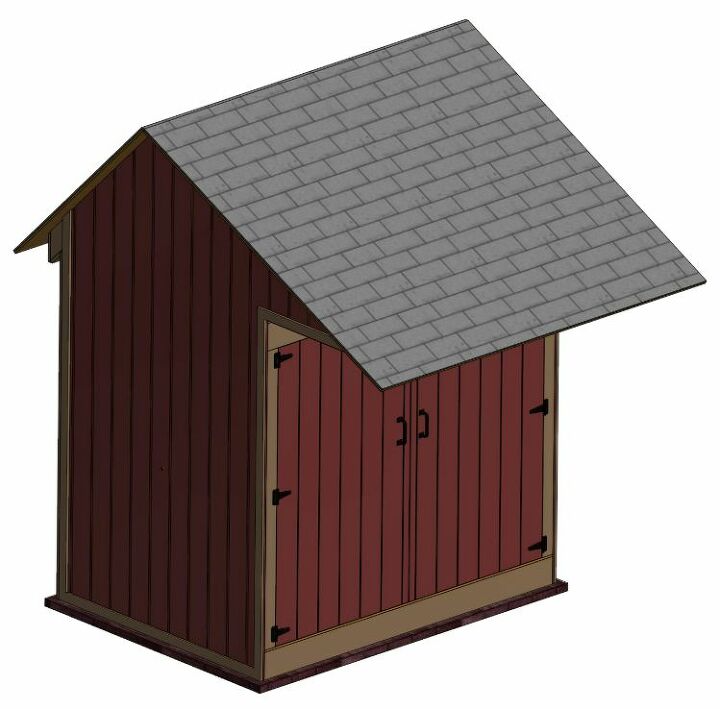
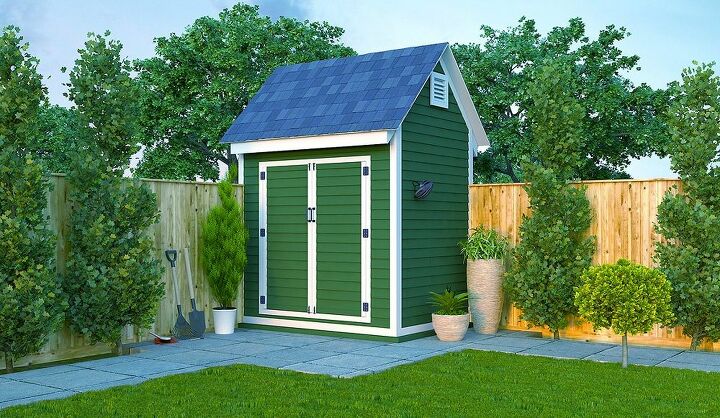
How to Build a 6'x8' Bike Shed
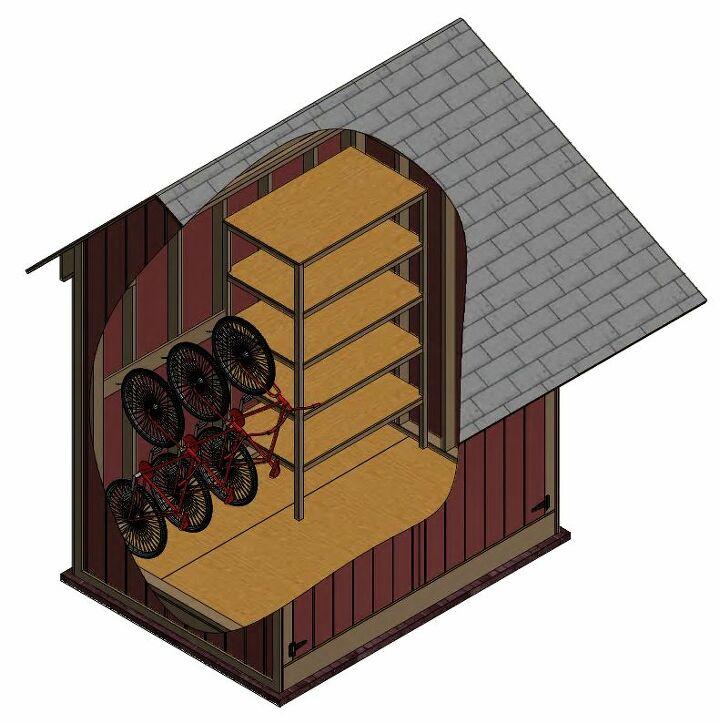
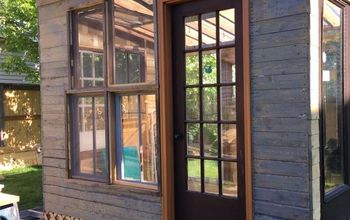
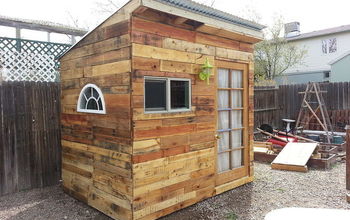
If you have a large family with a lot of bicycles, bicycle collector or just crazy about different bikes? This shed is the ultimate storage solution that keeps them protected from the elements and secure. The 4-foot overhang is perfect for working on your bikes on days when it’s raining or you want some shade from the hot sun. The double barn-style doors open to the entire width of the shed to provide amazing accessibility. The interior of the shed can provide a wide variety of bike hangers off the rafters to different wall mount applications and hangers. It can easily accommodate 4-6 bicycles with room for a small workbench against the back wall. Your work area can be extended with the doors wide open and the under cover of the 4-foot overhang, making this the ultimate bike shed.
Before we begin
If you’ve looked at other shed plans for bikes and found them to be intimidating? There’s no need to worry about that with this shed plan. The plan is designed for the first-time builder as well as someone who has a little bit of experience under their belt. It explains the construction process in simple terms that are easy to follow and understand. The plan will show you how to build the bike shed with step-by-step instructions that are broken down into smaller steps. It also utilizes beautifully designed 3-D illustrations that show you what each section should look like when it’s completed. Precise measurements for cut lumber and overall dimensions are included with the illustrations that provide the builder with a very good visual for each phase of the construction.
Step 1
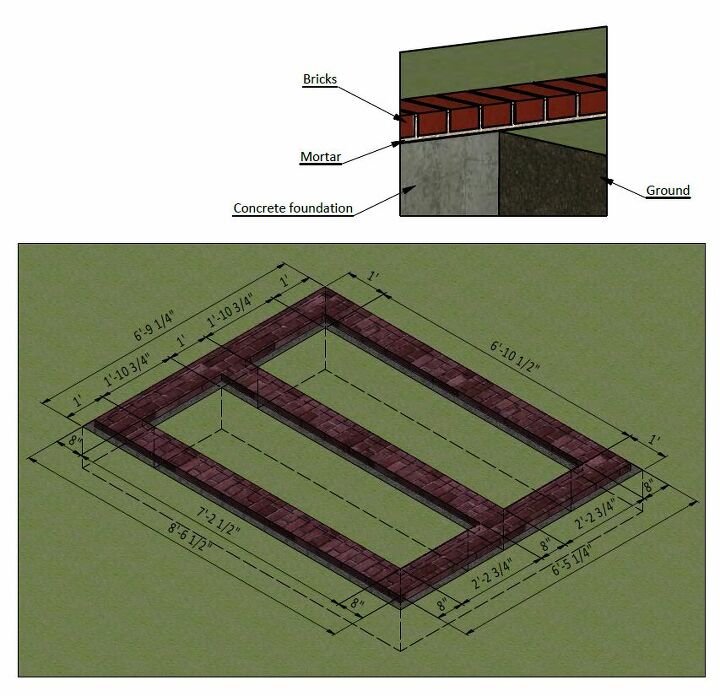
Foundation Preparation
1.1 Clear the area where you want to build the shed and layout for the foundation.
1.2 For the foundation, dig the trenches at least 1’ wide and 1’ deep.
1.3 Fill the trenches to ground level with concrete and let cure, or harden. Since
curing times vary between brands, read the packaging for recommended curing times.
1.4 Once the concrete has cured, use standard-sized bricks and lay them across the
foundation. You will need roughly 100 bricks for this step.
Step 2
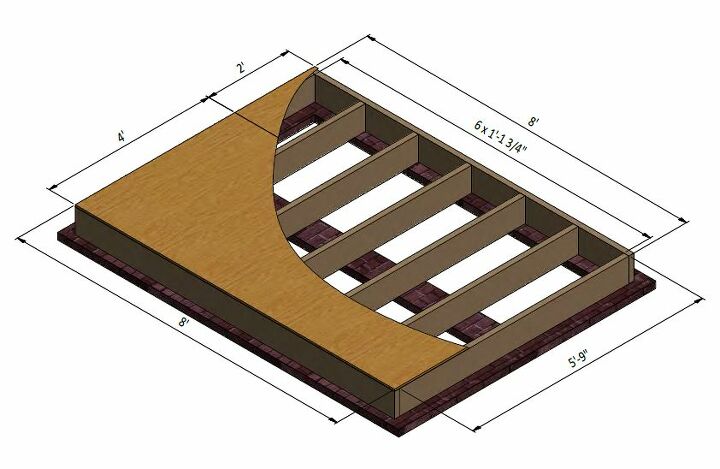
Floor Framing
2.1 Assemble the frame using 1 1/2" x 7 1/4" pressure-treated lumber.
2.2 Secure the beams with 8x5" wood screws.
2.3 Using a speed square or carpenter's square, check the corners to make sure they are 90°.
2.4 Prepare the 9/16" plywood for the floor sheathing according to the drawing.
2.5 Secure the plywood with 2" wood screws.
Step 3
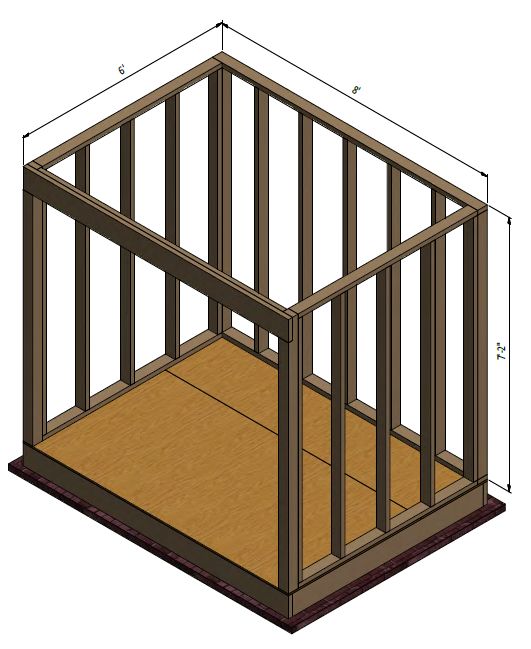
Assemble the Wall Frames
3.1 Using 1 1/2" x 3 1/2", 3 1/2" x 3 1/2" and 7 1/2" x 3/4" pressure-treated lumber, construct wall
frames using the drawing below as a reference. Prepare studs, bottom and top beams in necessary
quantity and connect them with 2x3" and 2x5"wood screws.
3.2 Using a speed square or carpenter's square, check the corners to make sure they are 90°.
Step 4
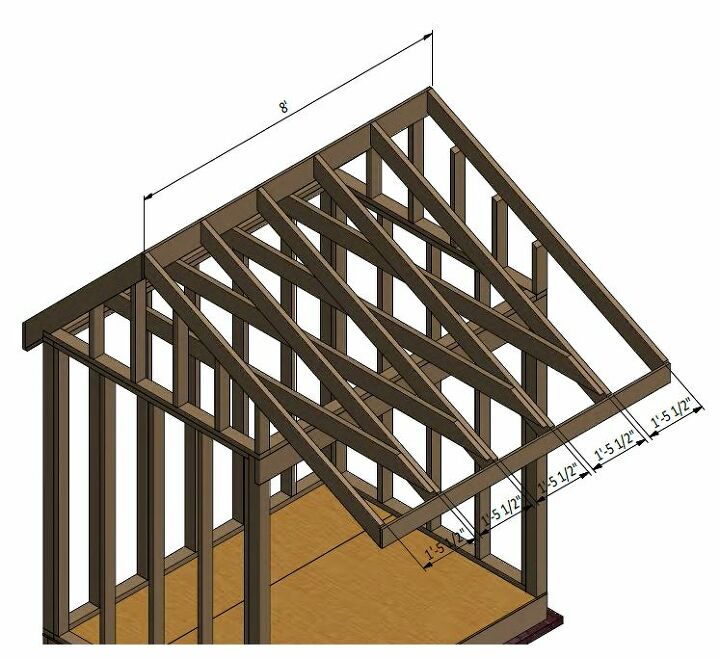
Assemble the Roof Frame
4.1 Assemble the top frame using 1 1/2" x 3 1/2" pressure-treated lumber to fix all four frames
altogether. You will need two board 6' long and two boards 8' long.
4.2 Using 1 1/2" x 5 1/2" pressure-treated lumber, cut six rafters 5 3/4" long and six rafters 7'-6 3/4"
long according to the dimensions in drawing below. Cut the recesses in short rafters for splicing
connection with wall frames.
4.3 Using 3/4 “ x 7 1/4 “ pressure-treated board, cut the ridge board 8' long according the illustration
below.
4.4 Using 1 1/2 “ x 3 1/2 “ pressure-treated lumber, cut four collar ties 9'-3 1/2" long and assemble the
roof frame.
4.5 Using 1 1/2" x 3 1/2" pressure-treated lumber, cut four left walls and four right wall gable studs as
shown in the illustration below.
4.6 Connect the beams with a top frame with the help of 3" wood screws.
Step 5
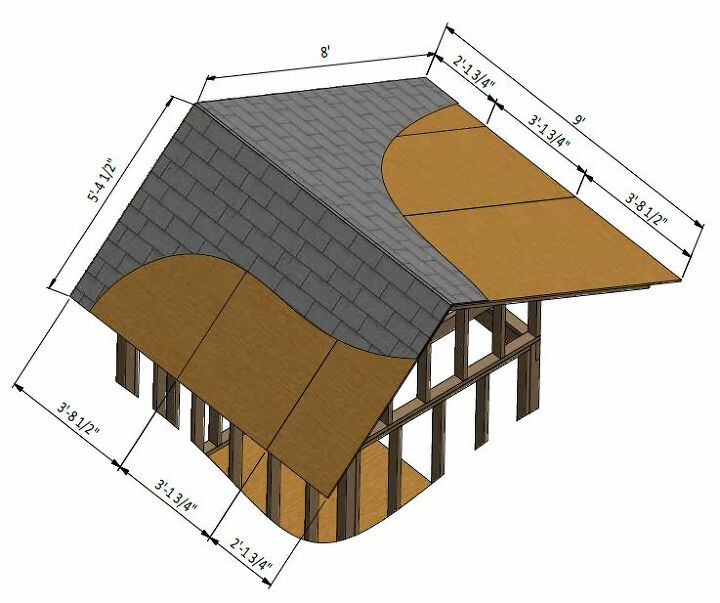
Roof Installation
5.1 Cut sheets of 9/16" plywood for the roof sheathing using the drawing below as a guide.
Secure the plywood with 2" wood screws.
5.2 Cover the plywood with building paper. Install 120 Sq Ft asphalt shingle roofing using an
industrial stapler. Add the metal drip edge to the fascias.
Step 6
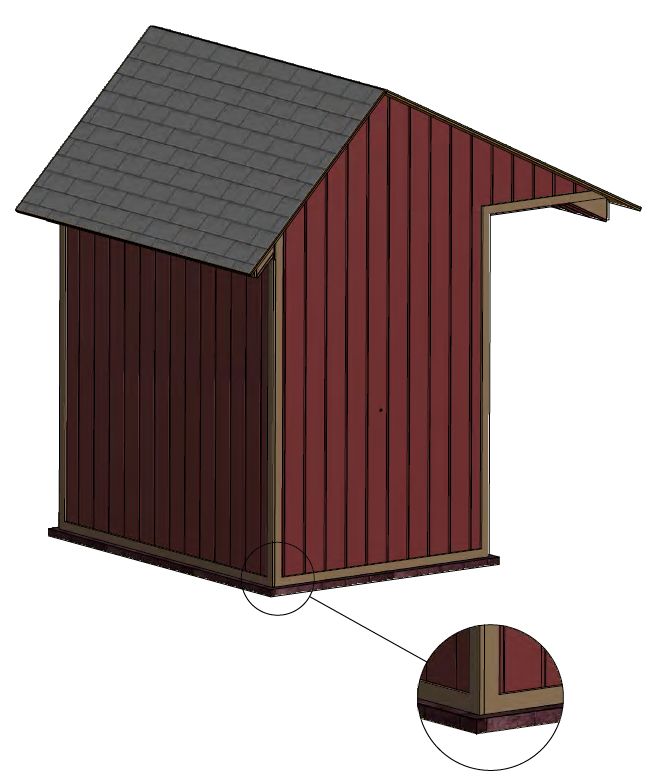
Installing the exterior siding
6.1 Use 1/2" texture plywood siding to cut the wall planes according to the drawings.
6.2 Planes for the side walls must be mirrored.
6.3 Secure the plywood with 2" galvanized nails.
Step 7
Install Wall Trims
7.1 Use 2 1/2" x 3/4" pressure-treated lumber for the walls and door trim and fasten with 2" galvanized nails.

Step 8
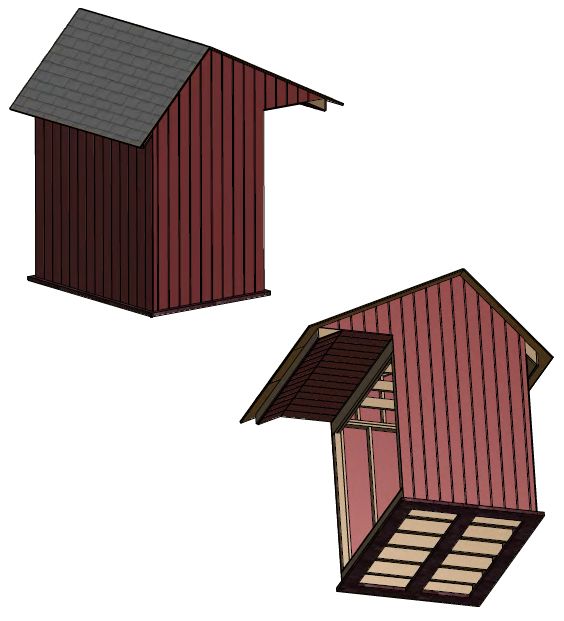
Assemble and Install Shed Doors
8.1 Build the door frames for using 1 1/2" x 3 1/2" pressure-treated lumber and secure with 5" wood screws.
8.2 Prepare the 1/2" texture plywood siding for the doors according to the drawing.
8.3 Install three 3" door hinges using 6x1" wood screws. Finish the doors installation by attaching 6" door pulls (see nodes J, K).
Step 9
Assemble and Install Bicycle Storage Area
9.1 Assemble bicycle storage area on the back wall studs.
You will need three 25 lb. Screw-in Bicycle Hook with Vinyl Coating. Install them on 3/4" x 5 1/2"
pressure-treated lumber according to the length of your bike.
9.2 Using 1 1/2 “ x 1 1/2 “ pressure-treated lumber cut four boards to 6'-6" that will be the studs,
ten boards cut to 2' that will be the sides girts, fifteen boards cut to 3'-6 1/4" that will be the
inner girts.
9.3 Connect the beams with 2x3" wood screws.
9.4 Cut sheets of 9/16” plywood for the shelf sheathing. Cut the corners in the sheets to connect them with studs.
9.5 Secure the plywood with 2" wood screws.
Step 10
Shed Decoration
Now that your shed is all done, you are ready to decorate it any way you want using your favorite
paint, stain, or preservative.


Frequently asked questions
Have a question about this project?