DIY Fence Picket Garden Shed

by
The Garden Frog with C Renee
(IC: blogger)
Have you seen the prices of sheds lately?
I needed a shed and I was not impressed with the ones at the home stores and I certainly did not like price tag for the 'rent to own' ones you see along the road.
So I built one for around $325!
My husband was not on board so it took me a few months to convince him.
See it is not that easy to hide a shed in your backyard in a HOA community where the shed it supposed to look like your home and be placed where the HOA says you can in your back yard. Then they want you to have professional plans, go in front of the 'architectural board to approve said plans, and highly prefer a contractor build it. They do not like DIY projects...
Not in my lifetime will I pay $1500 for a shed that just cost me around $300 and 2 weekends to construct. It really was a weekend project, but life got in the way so it is safe to say it takes 2 weekends to get it built- if you are not a contractor. (disclaimer I am not a contractor, I am a DIY gal!)
$325 and I made it with fence pickets!
Now I had the clear corrugated roof panels from a garage sale already so my budget was for $300 for materials. I knew I wanted to use fence pickets because I wanted a barn/ rustic look and I found the 6' & 8' fence pickets at my local Home Depot! Boy was my husband frowning, but some bribing and some love he gave in and helped me build my shed.
If you visit my blog I will have instructions to build your own shed with fence pickets. It was not hard and at times but with my directions you should be able to put it together fairly easy with your DIY skills and a buddy to help!
I do have to add that a roof may cost you about $200 depending upon the roofing material. Using the plastic corrugated roofing is very simple to use. I may not have attached it according to 'the rules' but it is on and I think it looks cute.
Creating. Inspiring. Gardening without the rules!
[I have to confess that I did not wait for the pickets to completely dry which after a week shrank even more on the shed. So I highly suggest buying them one week and laying them flat in the sun to dry. Plus pickets are not exact and some may not be straight. There are gaps but they do not bother me because I was going for the rustic look.]
I still have to finish the inside and organize so I will post pics later
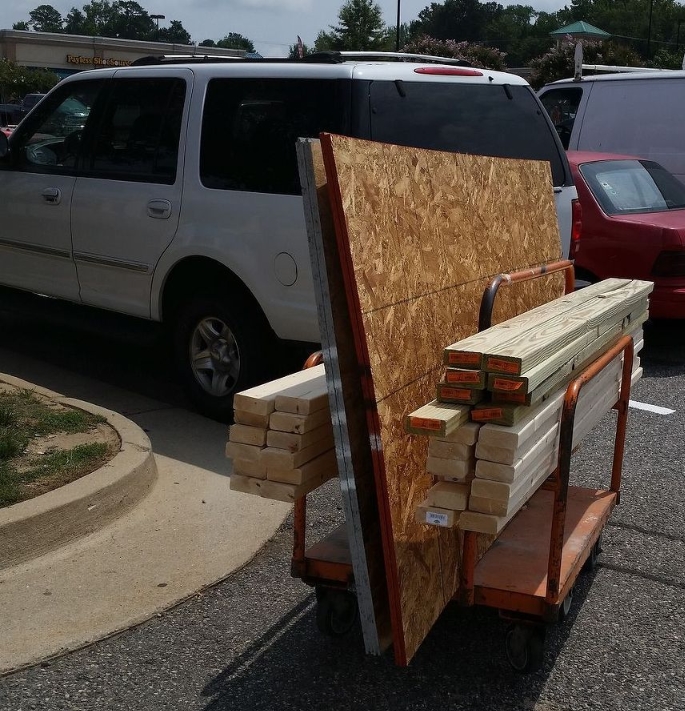
The first load for the base and walls
My space where my small Rubbermaid tool shed sat hidden from spying eyes
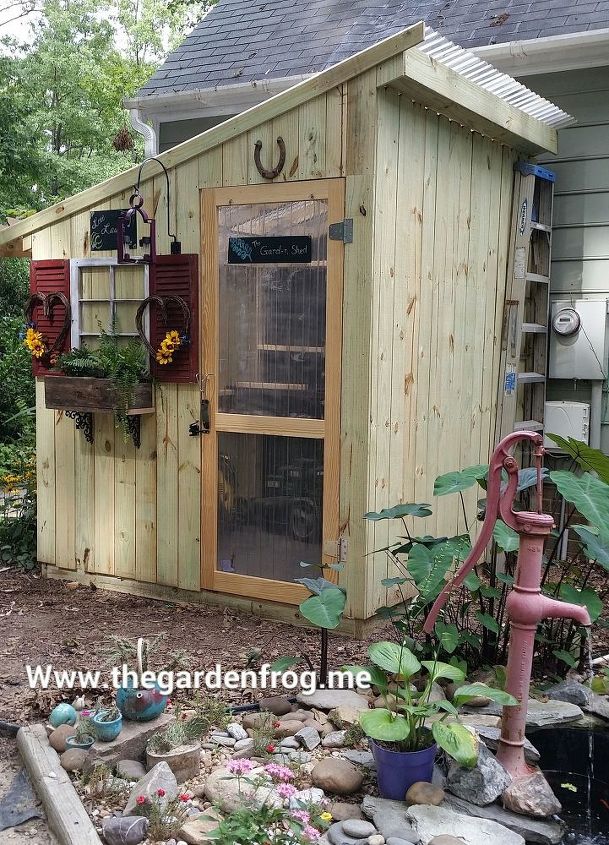
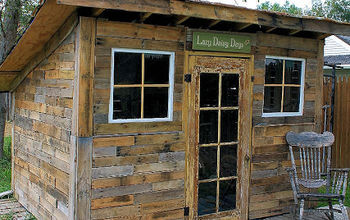
as you walk into my back yard you will see this. Still have some more 'decorating' but for now the lawn mower and all other garden 'stuff' is out of the way.
I did have to buy the screen door on the markdown rack since it had some 'issues' and I put the extra corrugated roofing panel on the inside. the planter box made from 100 yr old oak boards from a barn in the middle of Kentucky, upcycled a shutter from the neighbor's garbage, and a window I had under the deck. And of course the old, old horseshoe for luck!
Enjoyed the project?

Want more details about this and other DIY projects? Check out my blog post!
Published August 17th, 2014 10:47 PM
Comments
Join the conversation
2 of 162 comments
-
 Jayne Cambra
on May 20, 2021
I love your shed! I tried to get to your blog but the link is now working.
-
-
 Lynn
on Jun 30, 2021
Cute shed! How my snow load will your corrugated roof take? Also does the screen door let moisture into the shed? With gaps in the siding are you concerned about vermin getting in? I think I would overlap the siding and truss the roof. After all $300 every 2-3 years gets expensive.
-












Frequently asked questions
Have a question about this project?
Just exactly what I was looking for to add to the side of my existing shed. However; I can't get the the plans from your site. Can you help me?