


90's Lamp Makeover to Make It Look Like It Belongs on 90210

Turn an outdated thrift store lamp using layer paint techniques to make it want to be in the spot light!
Best all in one chalk paint!
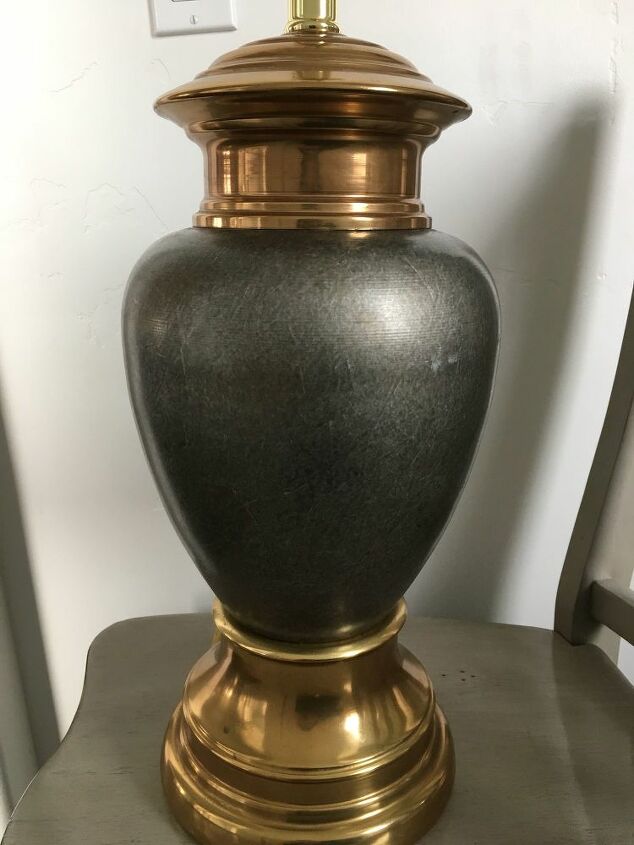
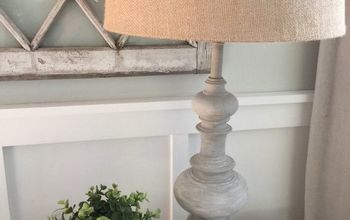
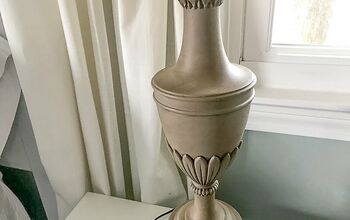
I have never done a lamp makeover before and when I came across two lamps for only $4 at my favorite thrift store, I couldn't pass them up. I was in need of some lamps in my guest room because of the way I rearranged the furniture, the bed now sat in front of the window blocking some light but it makes the room flow so much better.I used two different paints for this lamp and a black glaze. Here is my list of materials:Folk Art Chalk Paint - Castle (base coat)Chalky Chicks Chalk Paint - Blue Steel (dry brushed)Black Antiquing Glaze - wiped on as last techniqueChalk Paint BrushRag
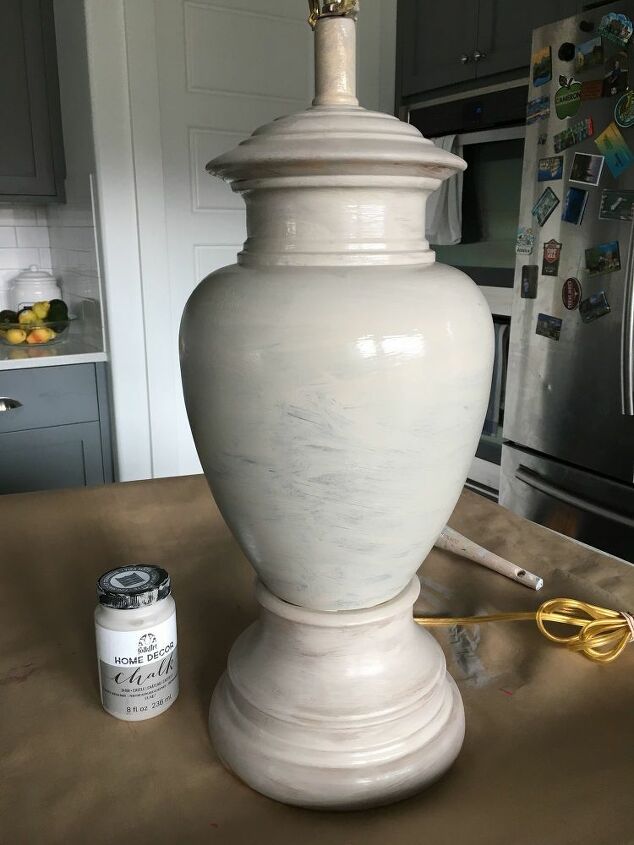
When you use Chalk Paint, you can paint over any surface without having to prime first. I essentially used this Folk Art Home Decor chalk paint as my base coat. The gray part of this lamp was some kind of plastic material but was meant to look like a stone, I guess...I really liked the shape of the lamp so if you can find something you like the shape of and can overlook the mix of materials it is made of you can easily transform it.
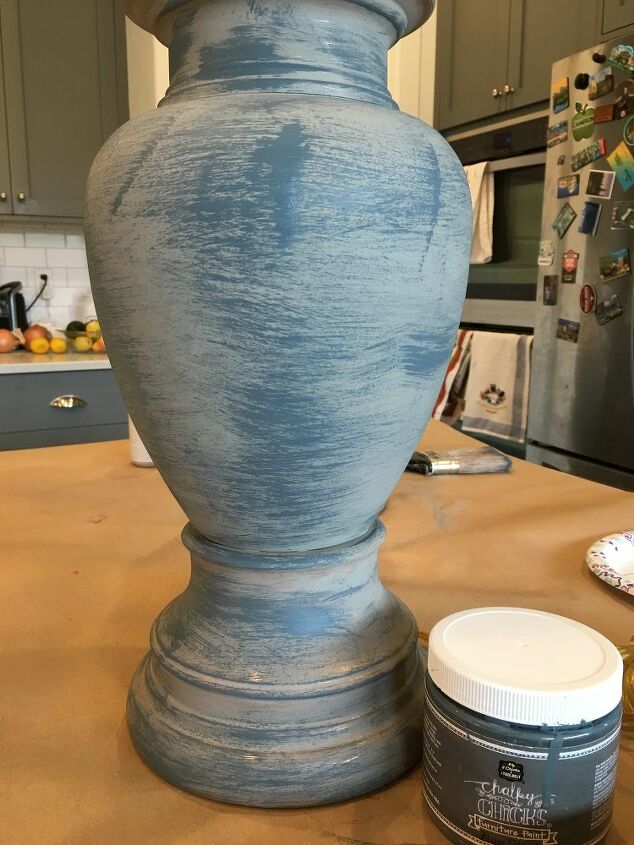
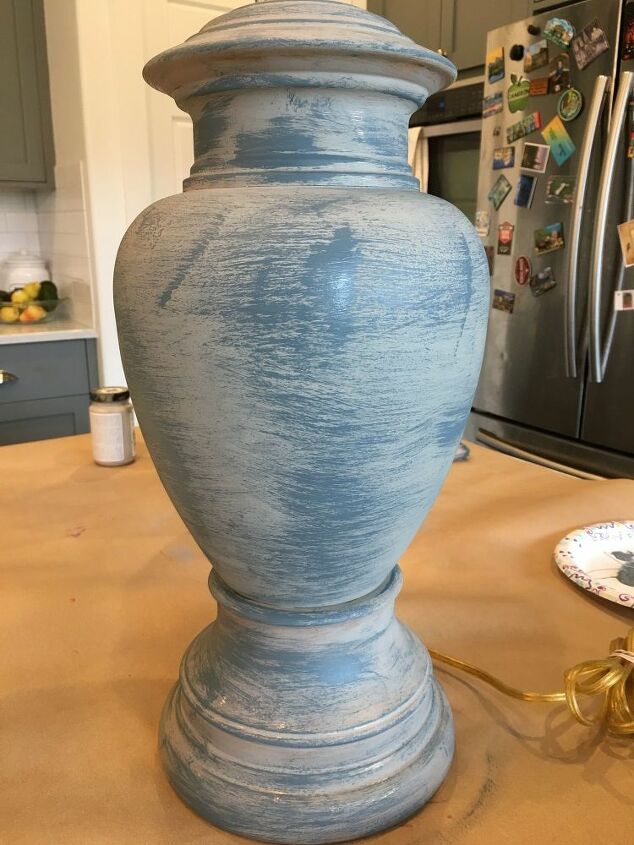
After I applied my "base coat" of the Castle color, I used my chalky chicks paint in Blue Steel and dry brushed it on. To dry brush something - you add a little bit of paint on your brush and blot off most of the paint onto a rag and then you can add a little bit of color by dry brushing it on. It gives it the worn brush marks and it also gives it variation. I was trying to go for the weathered oak look that is popular right now but wanted to give it some color so it wasn't so washed out with the bedding so I added the blue.
Once you have the dry brush color on how you want then I went through and dipped a rag into my antique black glaze and lightly wiped it on and quickly wiped it off. It gave just a hint of variation and dimension and unfortunately, since I had to work quickly wiping it on and off I didn't stop and take any photos!
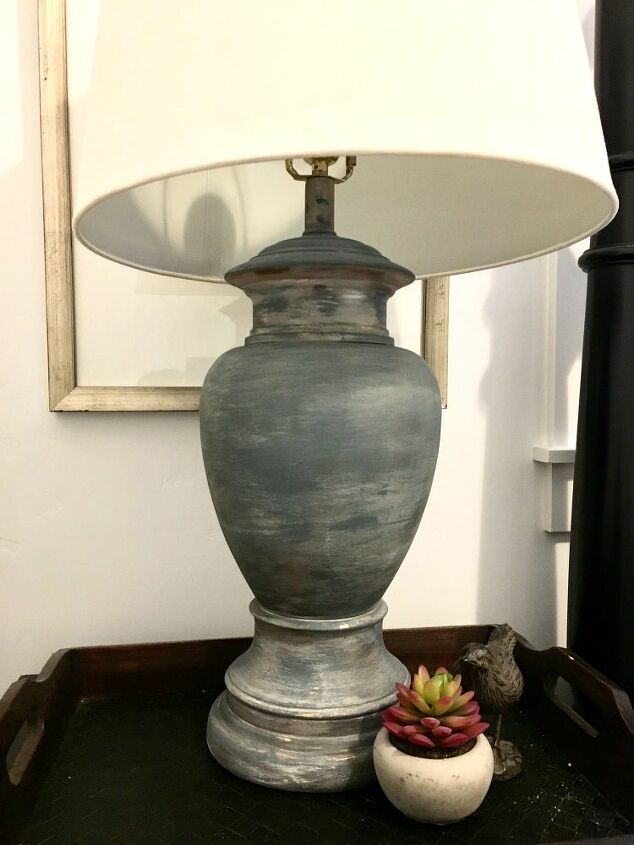
Here is the end result. When I was wiping off the glaze it look off some of the paint so some of the gold on the base and the top shine through in a few areas, which I love it gives it a little of the gold foil look. These vases look perfect with the bedding. I also got the shades at the same thrift store for only $5 so with all the materials I had I got brand new lamps for only $9! You can easily pay over $100+ per lamp if you were to buy from Pottery Barn and I think these look like I paid about that much for them.
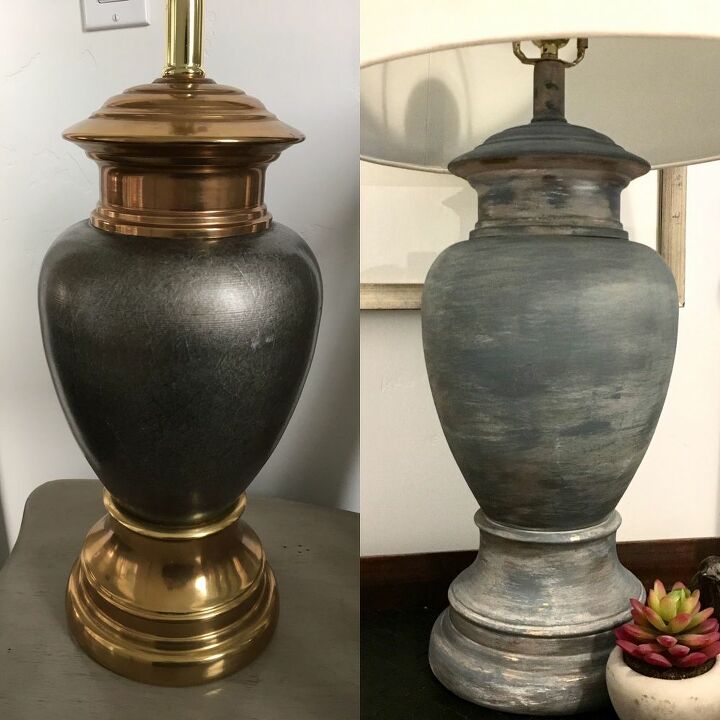
Here is before and after. So easy and thrifty but look like a million bucks! You can save so much money if you are willing to do a little of the work yourself and you really do not need any skill to pull this project off.
Resources for this project:


Comments
Join the conversation
-
TY 4 sharing. love the shape of the lamp. Great job
-
Absolutely loved how the colors came out, &. the fact that it didn’t turn out as planned makes it even more of a lovely surprise!!! Thanks for sharing


Frequently asked questions
Have a question about this project?
For some reason I thought you had two lamps. I thought the first one was the white one and the second one was the gold and Ebony lamp. So this is just one lamp? It looks fantastic by the way!
What is the best way to clean silver plate or pewter