20 DIY Wall Hanging Decor to Spruce Up Your Space
Hanging decor is a great way to spice up a lackluster, boring wall. Our community of creatives has proven time and again that you can achieve the look you want for a price you can afford. In fact, when you scroll through our 20 top wall hanging projects, you’ll find materials and designs to suit, regardless of your skill level. So, if you’re ready to transform your walls, take a look at some of the best wall hanging features around.

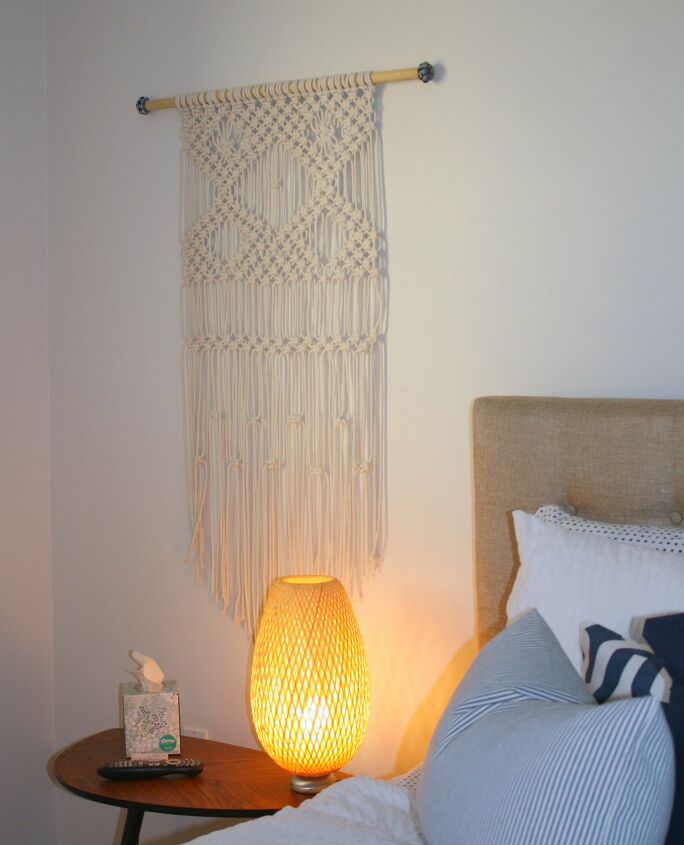
Macrame Wall Hanging for Beginners
To help you create your first macrame wall hanger, Wendy has a few tips.After cutting the rope into 28 pieces, she tied them to a piece of dowel using lark’s head knots. Taking two knots, she then worked with four strands to make the weave. Pulling the right outside rope across the two central strands, she held it in place while bringing the left outside rope over and through the middle. The knot was then pulled taught and the process repeated. Simple. Get tutorial here
Modern Macrame Wall Hanging
Macrame may not be in vogue, but this hanging wall tapestry really does have a modern look. The key to getting a modern macrame is to choose your colors and materials wisely. For this piece, the weave is a fairly standard combination of square knots and half-hitches. However, where it stands out is the copper heart and dip-dye finish. To make the hearts, copper strips were cut and bent into tubes. By combining this with a blue dye ombre effect, this piece makes a '70s icon look fresh. Get tutorial here

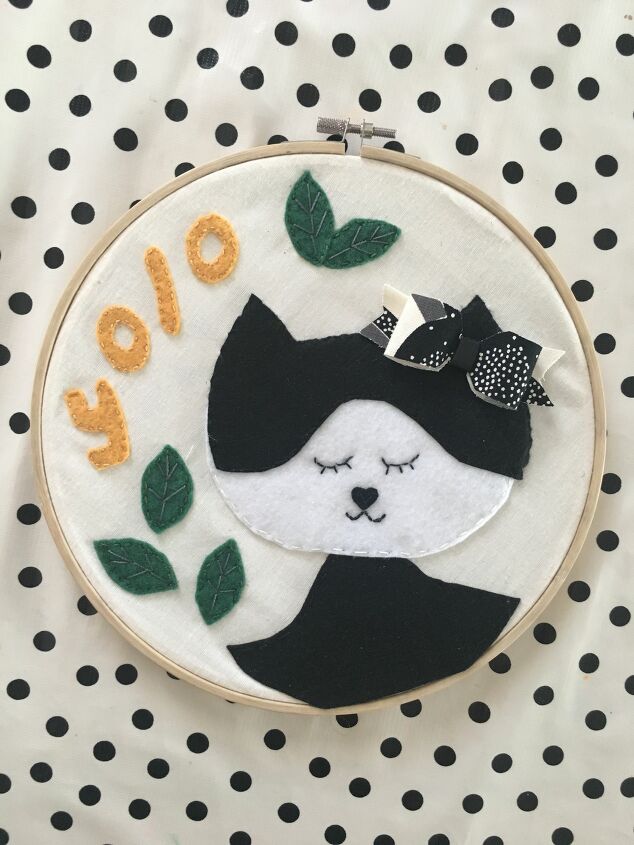
Smooth Felt Tapestry Wall Hangings
If you want your tapestry wall hangings to have a smooth look, this YOLO design from Naomille is perfect. The base for this hanger is an embroidery loop and some cotton fabric. After cutting and stretching to size, Naomille traced her design on to four pieces of colored felt. Using scissors to cut, she moved the sections around to find the perfect position before stitching it to the base. The trick to achieving the same seamless look is to use cotton the same color as the felt. Get tutorial here
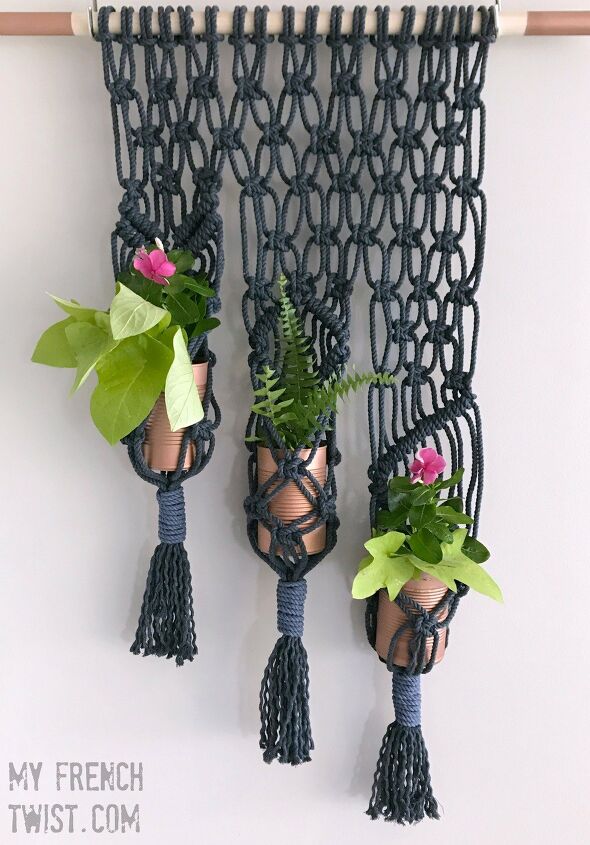
Macrame Wall Hanging Planters
Weaving your favorite plants into a wicked wall hanger can give you a seriously eye-catching look. For this fabulous wall hanging planter, Wendy tied 18 pieces of 5mm rope to a copper pipe using lark’s head knots. From there, she measured down 1.5” and tied nine square knots. This processed was repeated three times before the rope was split into sections. At this point, half-hitch knots created a basket which was closed at the end using a wrap knot. Get tutorial here
Modern Wall Hanging Simplicity
Simple solutions are often the best when it comes to wall hangings.Taking cork roll, paper letters and yarn, Naomille put this wall hanger together in less than an hour. Cutting out her letters first, she then marked out a base on the back of the cork board roll. Cutting the same shape twice, she stuck the shapes together before gluing on her letters. Finally, a strip of dowel was glued to the top and t-shirt yarn was tied to each end. Get tutorial here
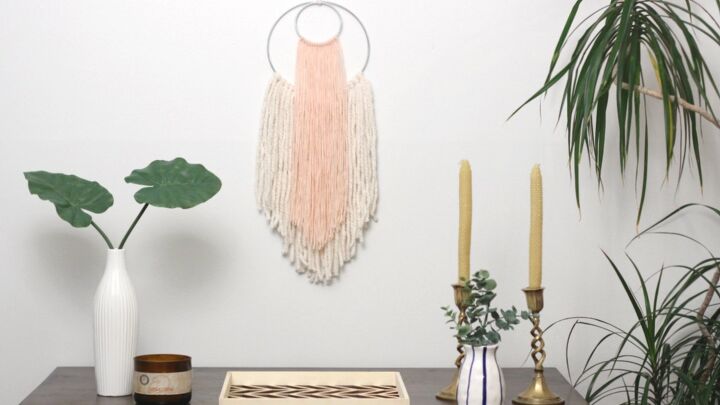
Brilliant Boho Tapestry Wall Hangings
Want to weave a brilliant Bohemian wall hanger? If so, here’s how… After wrapping yarn around an object 1.5 feet long, Katie cut her yarn and folded two pieces into a loop. She then slid the loop under a wire ring and pulled the ends through the middle. With the yarn threaded, she repeated the process until the bottom of the ring was covered. The same technique was used on a smaller wire ring before the two were strung together. Simple! Get tutorial here
Wonderful Woven Wall Hanging Without Any Weaving
If you can’t weave but love the woven wall hanging decor, Anna has the answer. Taking two carpet samples, created this wonderful wall hanger without weaving her own patterns. By carefully selecting the most rustic samples she could, all Anna needed to do was thread some twine through the top of one sample and hang from a twig. The second sample was then added between the two for a simple yet impressive look. Get tutorial here

Picture-Perfect Pallet Wall Hanging Art
A pallet and some paint can completely transform a boring wall with a fantastic piece of artwork. Taking four pallet lengths and cutting to size, Mona glued supports to the back before securing with screws. With the canvass in place, she embraced the rustic look applied a thin coat of grey/white paint. With the wood’s natural texture coming through, she finished with a skull stencil to give her unique piece some eerie charm. Get tutorial here

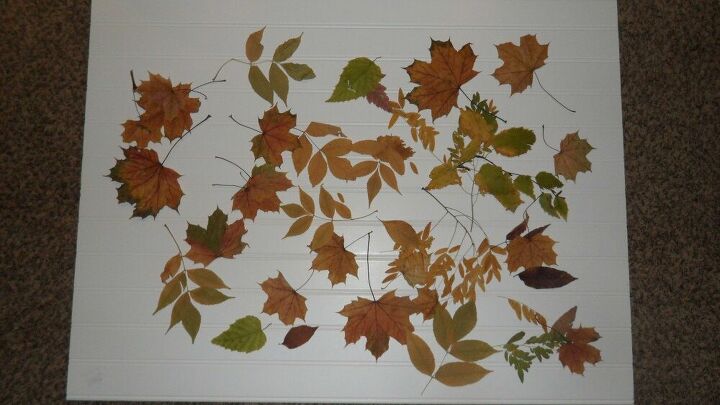
Fantastic Fall Wall Hanging
Bring the outside inside with this fantastic fall wall hanging by Michelle.After collecting fallen leaves from outside her house, Michelle pressed them between some heavy books and newspaper for three weeks. After suitably dry, she gathered and trimmed branches and sprayed them with a clear sealer. As well as preserving the branch, the sealer added the perfect shine. Finally, Michelle looped the leaves in fishing line and tied to the branch to create this hanging homage to nature. Get tutorial here
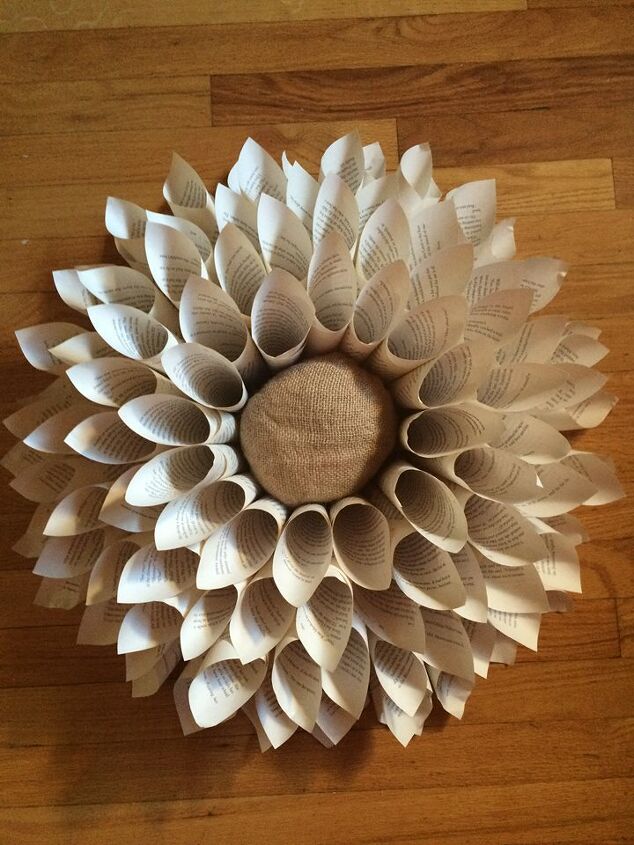
From Book to Beautiful Wall Hanging
Let the words of an old book live on with this ingenious idea from Borei Design. Starting with a piece of cardboard cut into the shape of a plate, Borei stapled a section of woven grocery bag to the front. A hole and a piece of jute created the hanger. To decorate, pages were rolled into cones and glued around the edge of the base. Working towards the center, she finished with a burlap bag to create the fabulous flower you see above. Get tutorial here
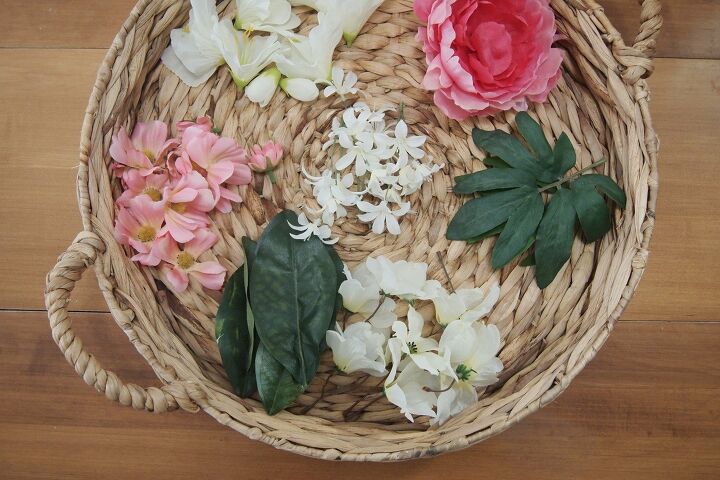
A Fine Flower Wall Hanging
If you enjoyed our fall wall hanging, this flower hanger should pique your interest. Taking some faux flowers, Thalita removed the blooms and separated each individual flower. Once they were deconstructed, she took a needle and threaded each flower onto a length of cotton. After evenly spacing out the flowers across multiple threads, she finished the look by tying each one to a piece of driftwood and hung it from a simple wall hook. Get tutorial here
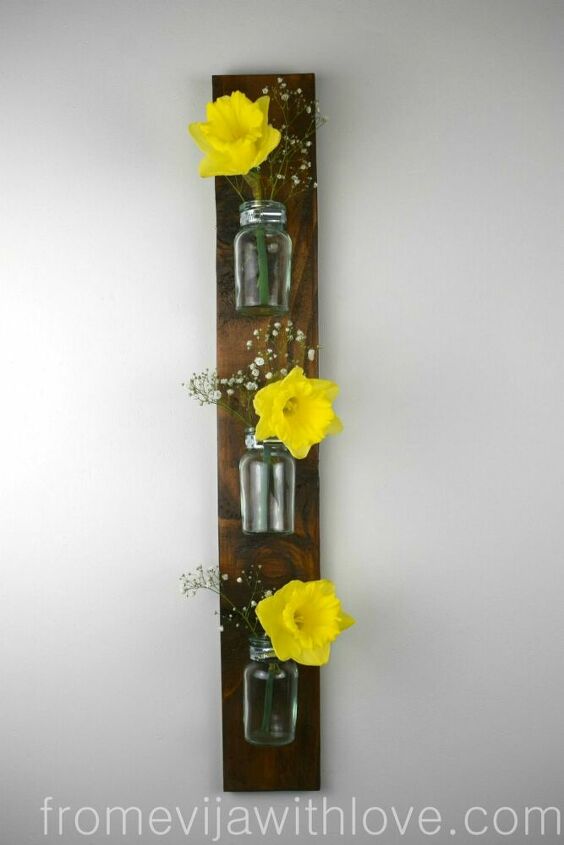
The Perfect Pallet Planter
If you don’t want to use an old pallet as a base for painting, how about this wall planter idea? Once she’d dismantled a pallet, Evija found the most attractive piece and cut it to size. She sanded and stained it before screwing a picture hook into the back. To finish, she drilled holes into three hose clips and screwed in place. Mini bottles were added before flowers gave this clever wall planter a fresh look. Get tutorial here
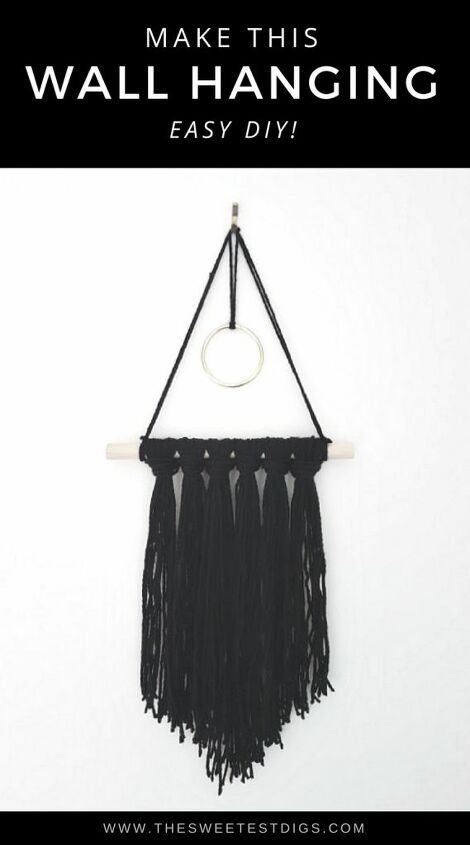
Simple DIY Yarn Wall Hanging
Even without any knitting skills, you can add some fabulous fabric to your walls. For this wall hanger, The Sweetest Digs took some chunky yarn (the thicker the better) and held the loose end. After looping it around her arm ten times, she cut the string in her hand to create ten pieces lengths of yarn. Finally, the yarn was bunched together, folded over a piece of dowel and the loose ends pulled through to create a knot for this simple DIY hanger. Get tutorial here
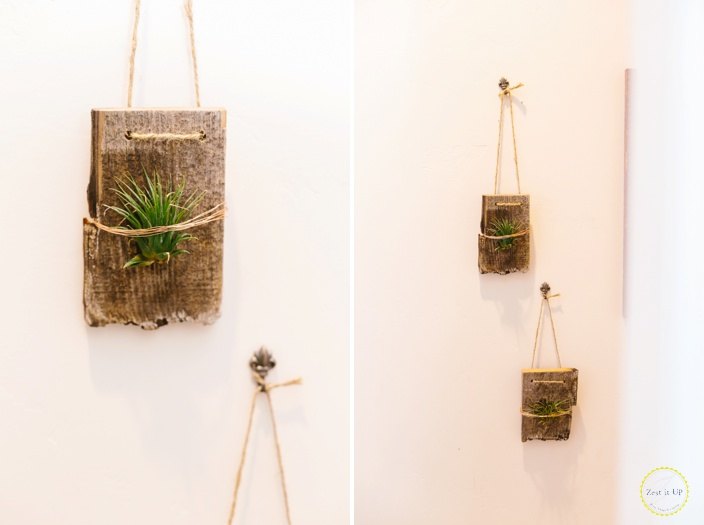
Wicked Wall Mounted Air Planters
Give your wall planters some serious air time with this neat idea from Zest it Up. Before wrapping the wire around sections of wood, this Hometalker drilled two holes into the top of her hangers. Twine was then threaded through each section and tied at the back to ensure this wall planter stayed in place. To complete the look, plants are threaded in between the wire wrap to get the perfect natural look. Get tutorial here
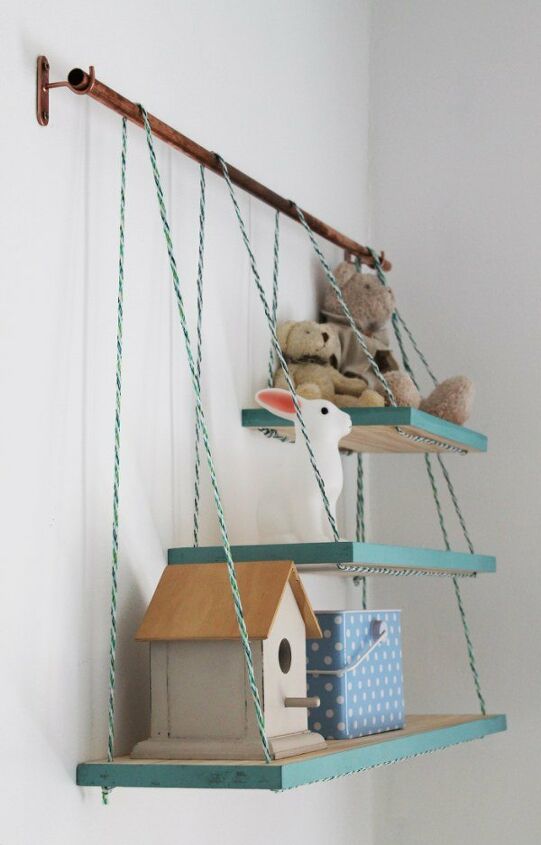
Combine Copper and Pine for the Perfect Wall Display
Hanging shelves are the perfect way to display your favorite household items. Measuring 25mm from the edge of each shelf, this Hometalker used a 4.5mm wood drill to make the holes through which twine would be threaded. Once the edges were painted, multicolored twine was put through each hole and looped around a length of copper pipe. To finish, copper brackets were screwed into the wall, onto which this fantastic set of shelves were hung. Get tutorial here
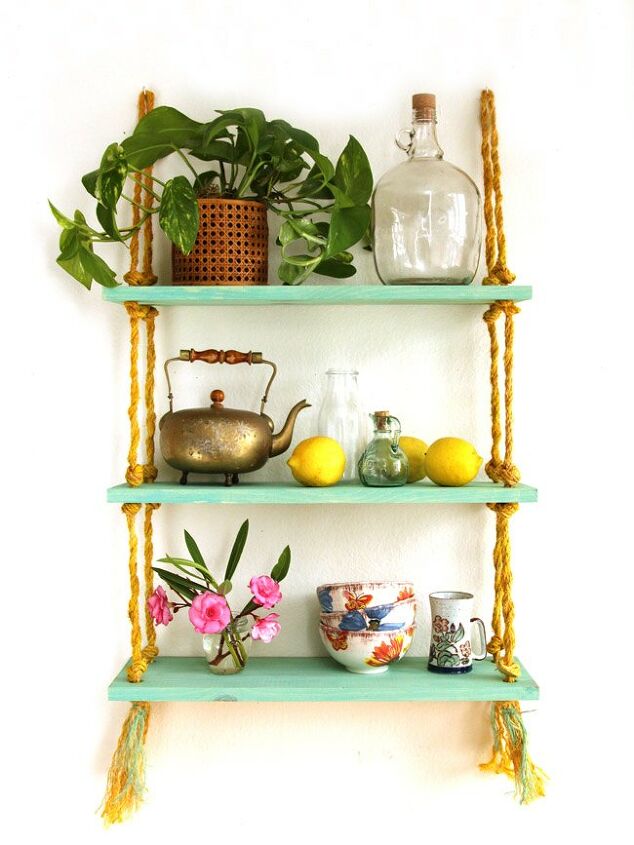
Really Rustic Rope Shelving
For a really rustic looking wall hanger, try this idea from APieceofRainbow.
Get tutorial here
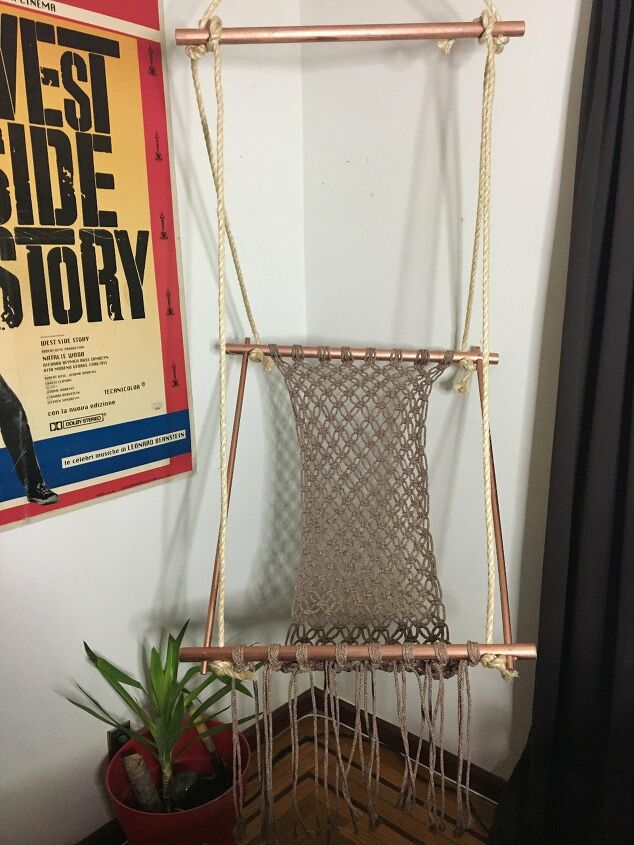
Magical Macrame Hanging Chair
With some dowel and ¼" macrame cord, Amanda was able to make this impressive hanging chair. Starting with dowel cut to length, Amanda drilled holes into the ends, through which the thinner pieces were slotted into the thicker ones. Once she’d made a frame, she secured it with screws and looped 32 strands of macrame around the top and bottom. With the macrame weave secure, a thicker rope was used to hang this eye-catching feature. Get tutorial here
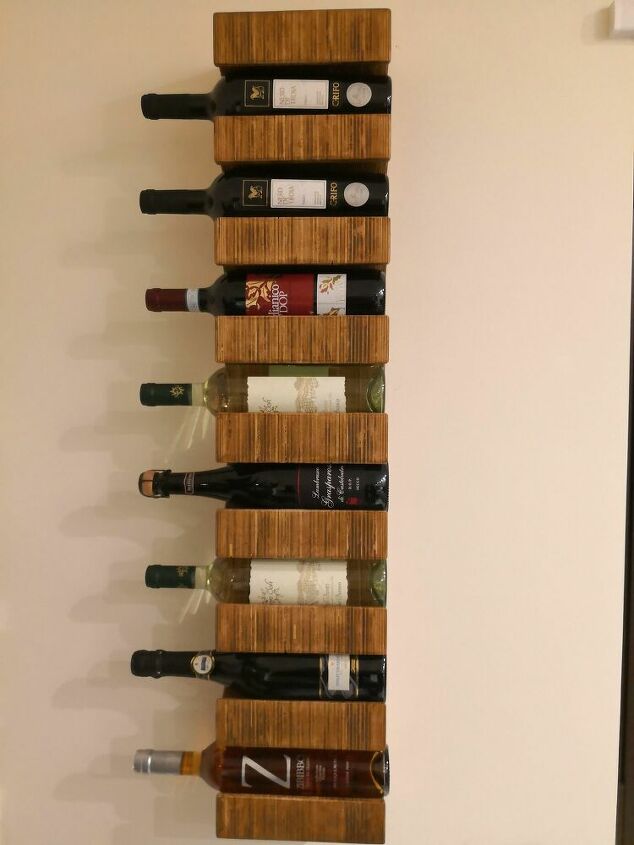
Tasty Wine Rack Wall Hanging
A wine rack can be a tasty addition to your wall if you know how to hang it. In this project, pieces of 18mm and 12mm plywood were used to build a fantastic hanger. Marking out circles in a length of ply, this Hometalker cut out the sections, leaving a gap at the front for each bottle. Once the first length was cut, it was used as a template. More lengths were cut before it was all glued together to make this impressive wine rack. Get tutorial here
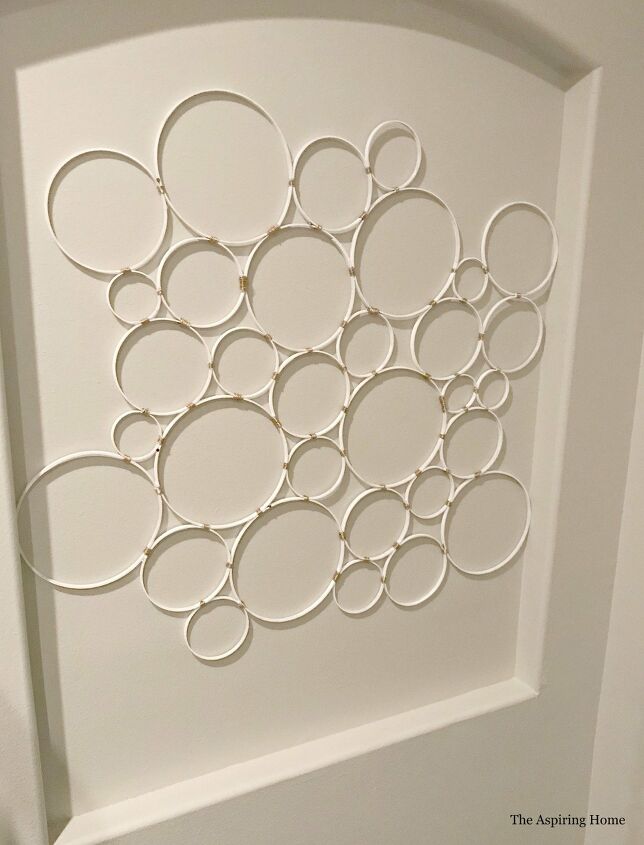
Elegant Embroidery Hoop Wall Hanging
Wall hanging tapestry is a great way to give a blank canvass some pop. To recreate this elegant wall hanger, start with the hoops. After taking apart embroidery hoops and removing the metal connectors, Joy bent and glued them back into shape. From there, the largest hoop was used as a starting point, onto which smaller ones were attached with floral wire. The key to getting this look is to avoid large negative spaces between each loop. Get tutorial here
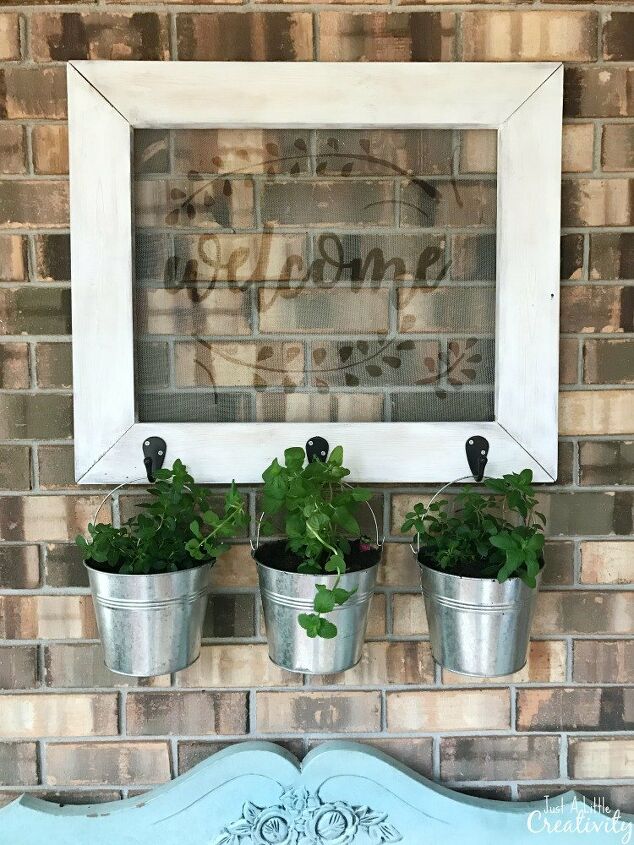
Frame Your Planter in the Perfect Wall
Nature is just as appealing as any piece of art, which is why we love these farmhouse wall hanging planters. After cutting pine slats into four, Molly secured the picture frame using angle braces. A combination of paint and stain were used to give the frame a rustic look before weather screen was cut and stapled in place. To finish, Molly used a sharpie to write a message on the mesh before screwing in hooks and hanging her galvanized buckets. Get tutorial here