


Deconstructed Canvases

Have you ever thought that canvases are great but just a bit boring....no? Just me then  Well anyway, here’s my answer to that thought in case anyone else is like me!
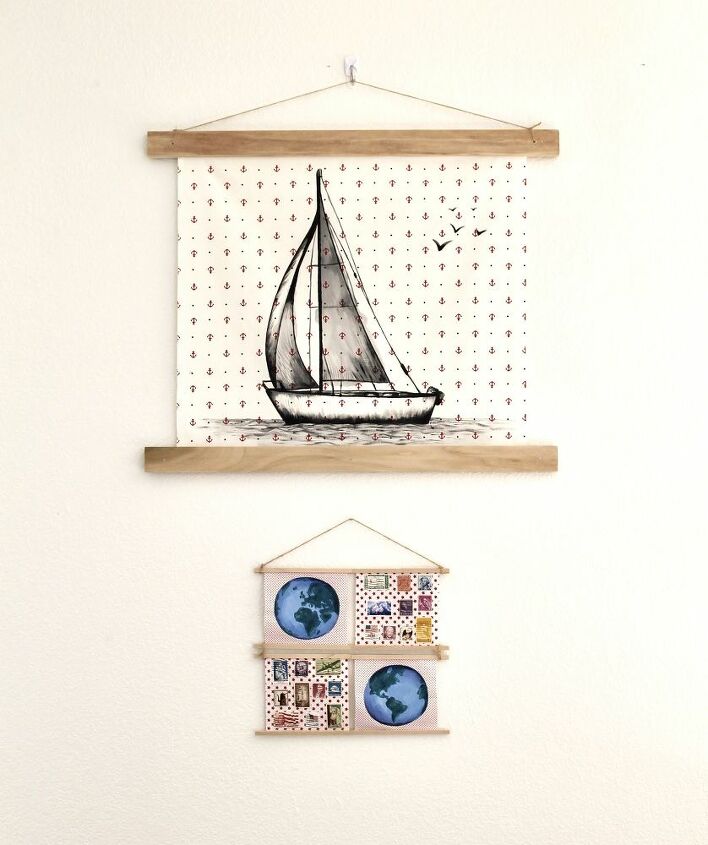
I made both a large and small version of the concept to give different ideas about how you can construct this at home. These projects are so quick and easy to make and the possibilities are endless.
The supplies you will need to make your own will vary depending on how you want yours to look, but if you want to make something similar to mine then first, this is what I used for my boat design:
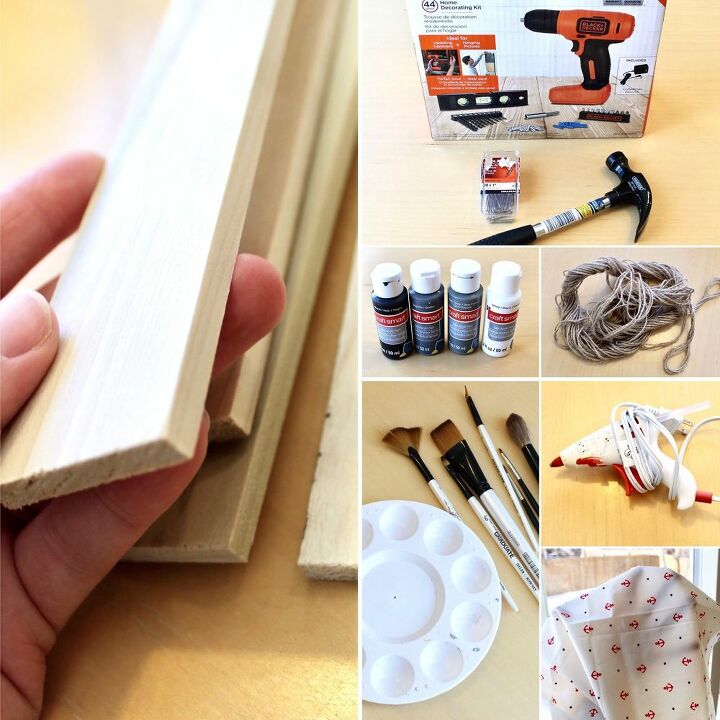
- 4 long thin strips of wood (I got mine from Lowe’s and I believe it was poplar wood)
- Paint and paintbrushes
- A drill (optional)
- A hammer and nails
- Twine/wool/string
- A glue gun (or any strong glue)
- Fabric (I chose cotton)
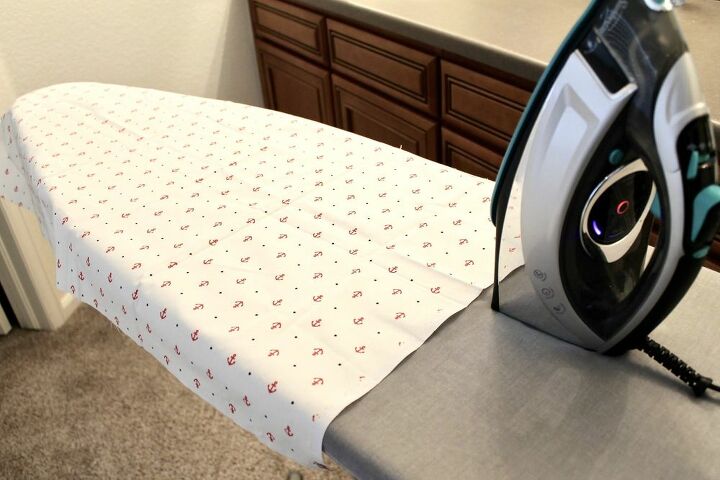
The first thing I did was iron my fabric. You want as fewer creases as possible for a couple of reasons, for it to look lovely and smooth on your wall but also so it’s easier to paint on.
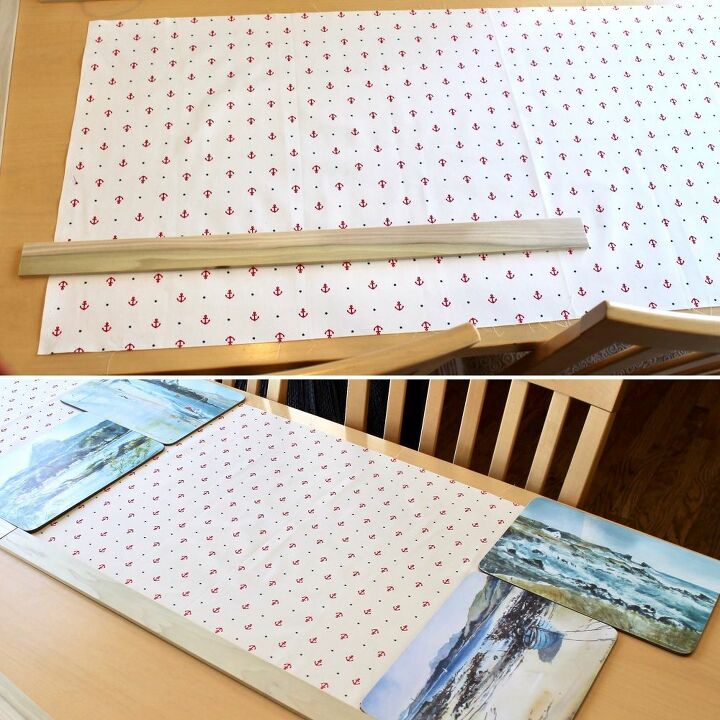
Once you’re all ‘de-creased’, you want to lay your fabric out on a smooth surface where you’ll be painting and work out how much of the fabric area you want to paint on. I did this by placing one of my strips of wood on the fabric for an idea of it’s length. I knew I wanted my wood to over-hang slightly on either side of my fabric so I sectioned off my painting area with this in mind.
To section off my painting area, I placed weighted dinner-matts all around to make a frame so that my fabric wouldn’t slip whilst I painted. I could have cut my fabric to size at this point before painting but I preferred the excess material for grip purposes.
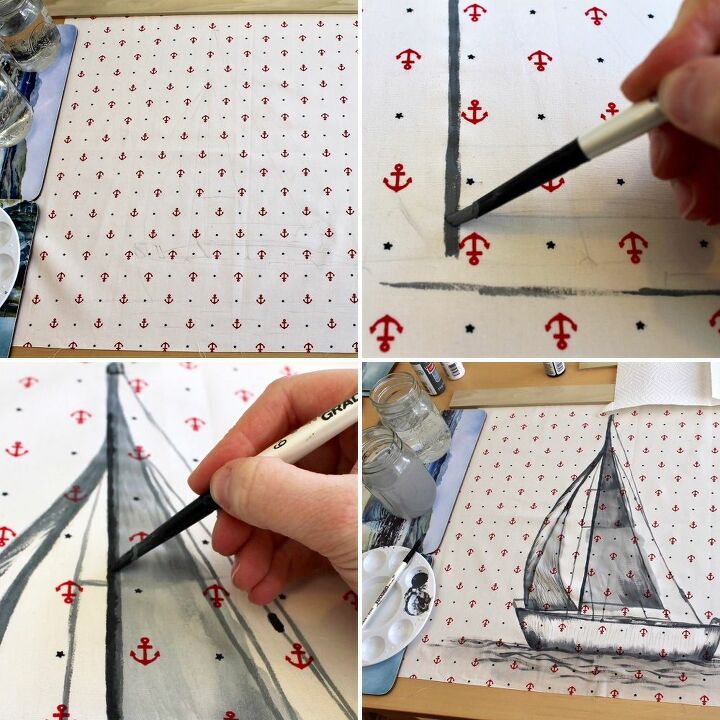
Now for the fun part! I sketched out my design very lightly as I didn’t want to leave pencil marks behind. I then went in with my paint. I chose to use monochromatic colors as I wanted a strong contrast with the lovely red anchors.
If you’re thinking, “well I can’t make this project because I can’t paint”, please don’t think that! Of course you can! You could try so many different options if your drawing/painting skills need work. You could pick a really busy patterned fabric and just highlight elements of the design with golds or silvers or metallic paint. You could pick a plain fabric and do potato prints all over to create a pattern of your own, or even finger-paint a pattern on. There are many different things you can do besides painting an actual picture onto fabric so just try to think of something that you really like and simplify it.
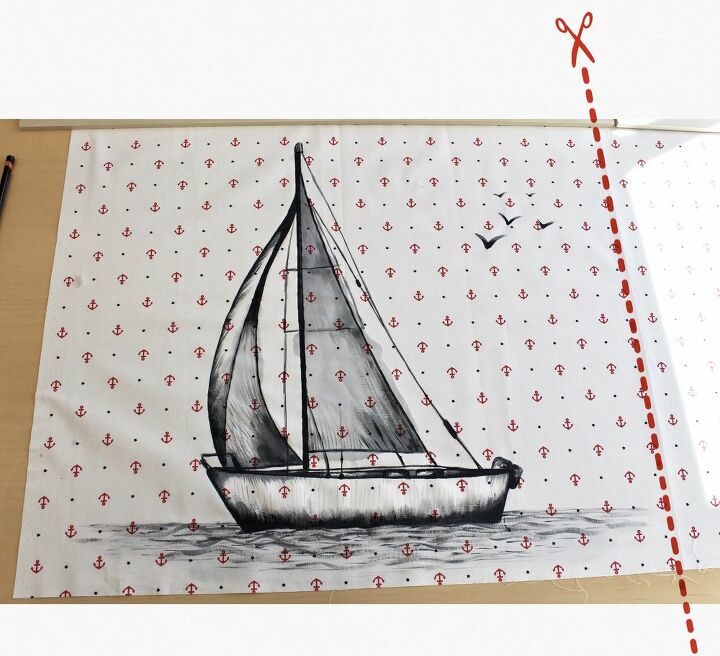
Once you’re happy with your picture/design, you’ll now want to cut it to size. I got my strip of wood again just to double check how much I wanted to cut off.
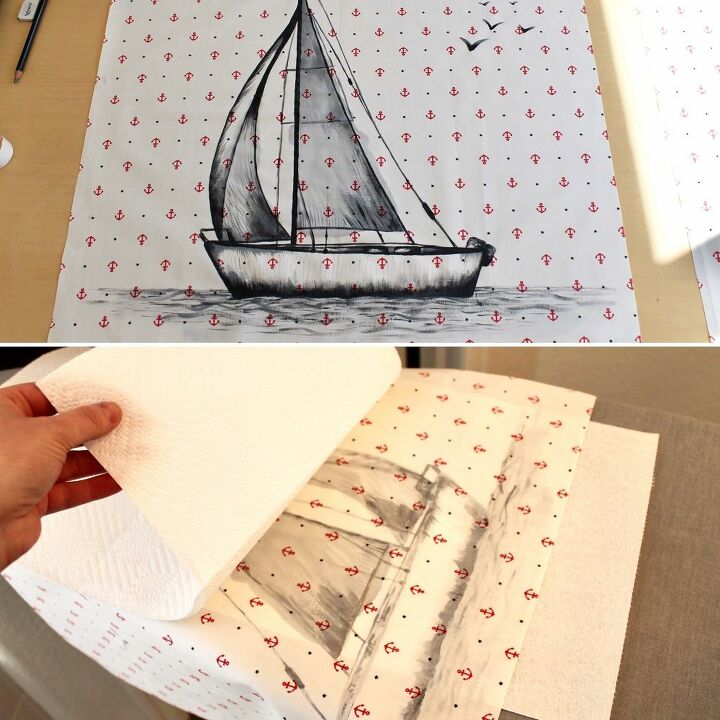
You may notice that your fabric has gone a bit bumpy from applying liquid to it and pulling on it with a paintbrush. If this has happened then just give it another go under the iron. I placed kitchen roll between my fabric and the ironing board and then again between my fabric and the iron.
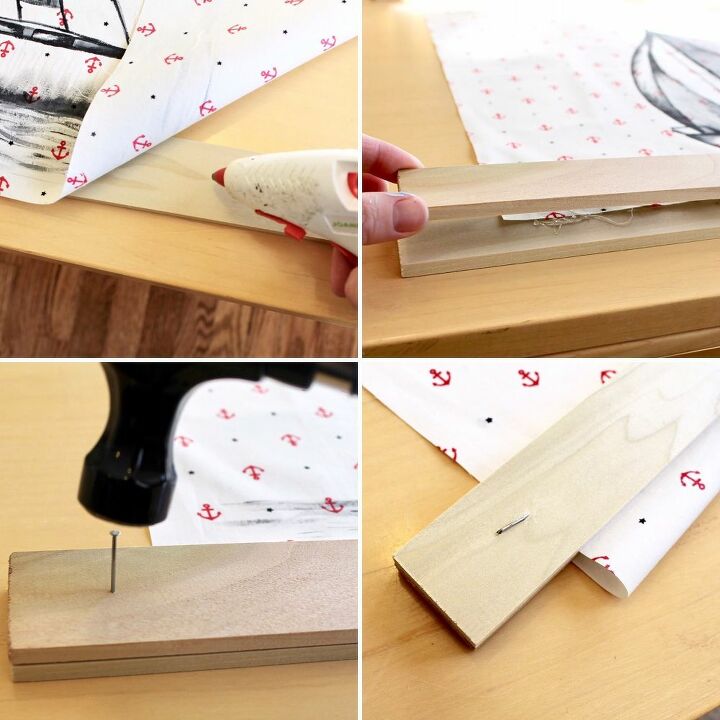
Next, I lined up the top of my fabric between 2 strips of my wood. I glued along the edge of the fabric and sandwiched it between the 2 strips of wood, making sure my 2 wood pieces lined up neatly with one another. I then repeated the same steps for the bottom edge of fabric. Once the glue was dry on both the top and bottom wood sandwiches, I hammered in my nails, one in each corner and one in the middle, 6 in total. You can use more, less or no nails if you prefer but I found my wood bowed slightly in the middle despite using glue.
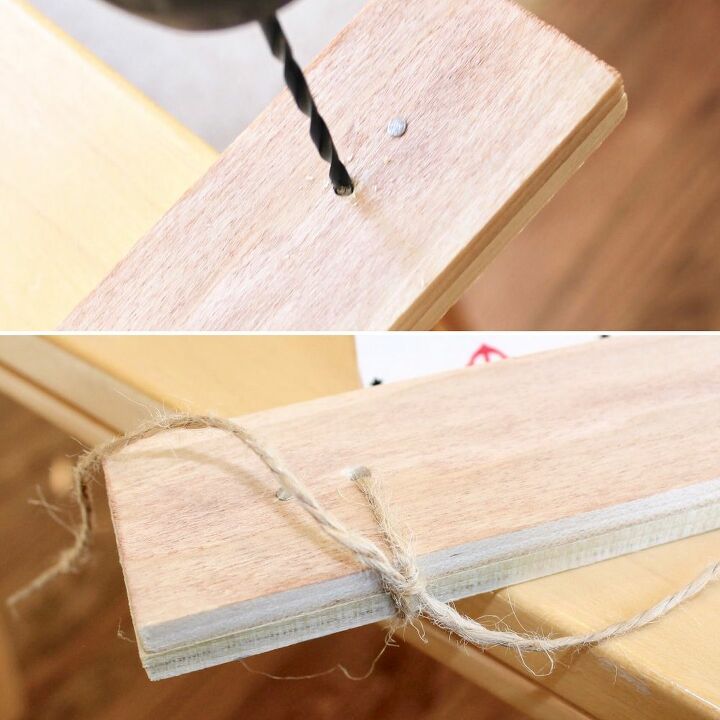
I then got my new drill - only $30 from Lowe’s which came with loads of attachments - and made 2 small holes next to the 2 corner nails on the top wood sandwich. I then threaded through and tied my twine on either side to make a hook for going on the wall.
You absolutely do NOT need a drill for this step though, you could simply tie your twine around the corners of the wood and secure with a bit of glue so that the 2 tied loops don’t slide into your fabric and crinkle it.
And there you have it! A deconstructed canvas!
A smaller version of this is can also be made. You will need small craft sticks, I got mine from Walmart, and obviously smaller fabric, I used quarters that I got in a bundle from eBay.
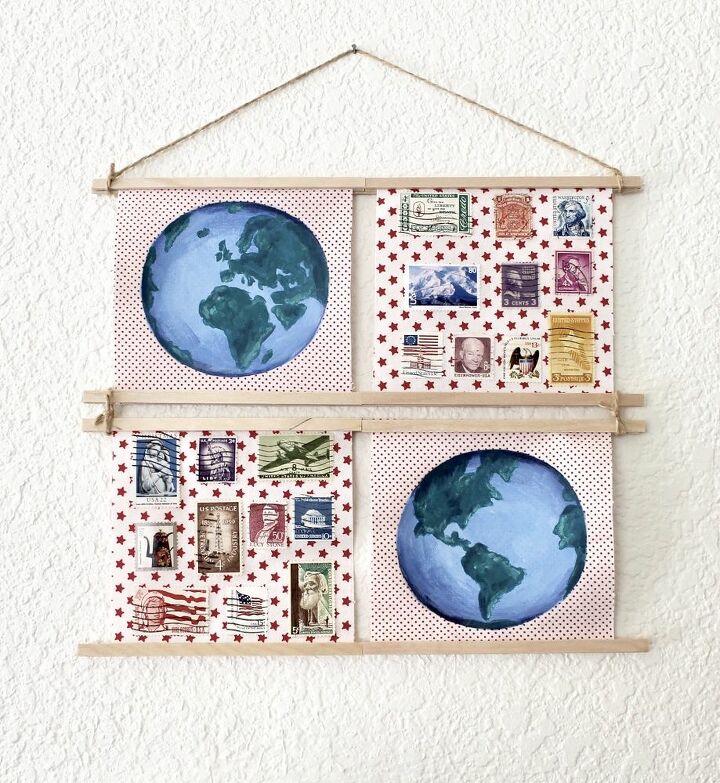
I thought the star fabric looked very American so I went with a theme of adventure and travel to reflect my recent move to America.
The benefit of this smaller design is that you can apply much simpler painting techniques to your fabric or simply stick items onto the fabric like I did with these USA stamps. It could also be a way of displaying some old ticket stubs that you want to show off.

Just like before, you’ll want to give your fabric an iron if it needs it before you start painting. I painted the world from 2 different angles for my polka dot fabric. For my star fabric I stuck lots of different USA stamps on to give the illusion of distance and travel. I bought a pack of used stamps off eBay years ago for hardly anything and these particular stamps all came in that pack.
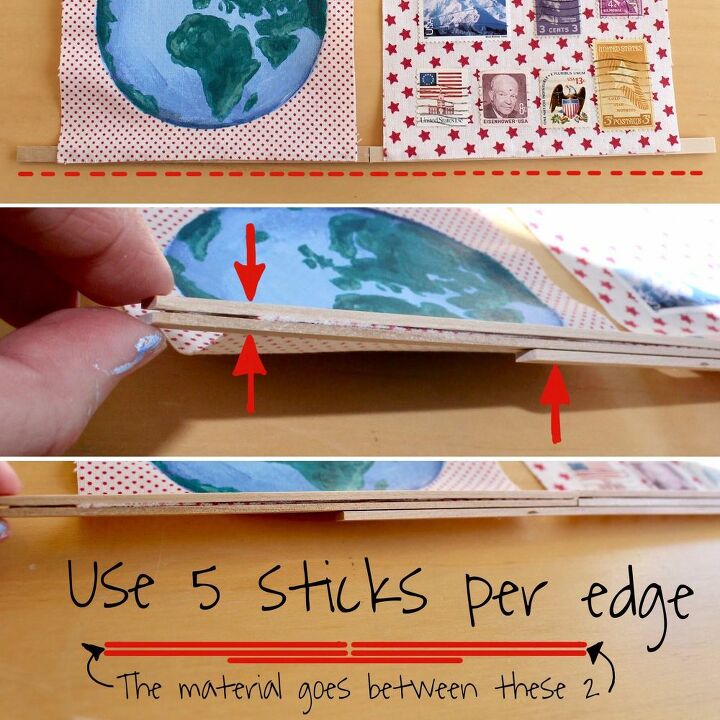
Similar to before but on a much teenier scale, you want to sandwich your fabric between your craft sticks using glue. I could have done this in a way that I ended up with 4 small deconstructed canvases before tying them together, but I wanted the rows to be linked. I used an extra craft stick to do this. It looks a little messy at this stage but when it’s on the wall, you can’t see that extra craft stick at the back.
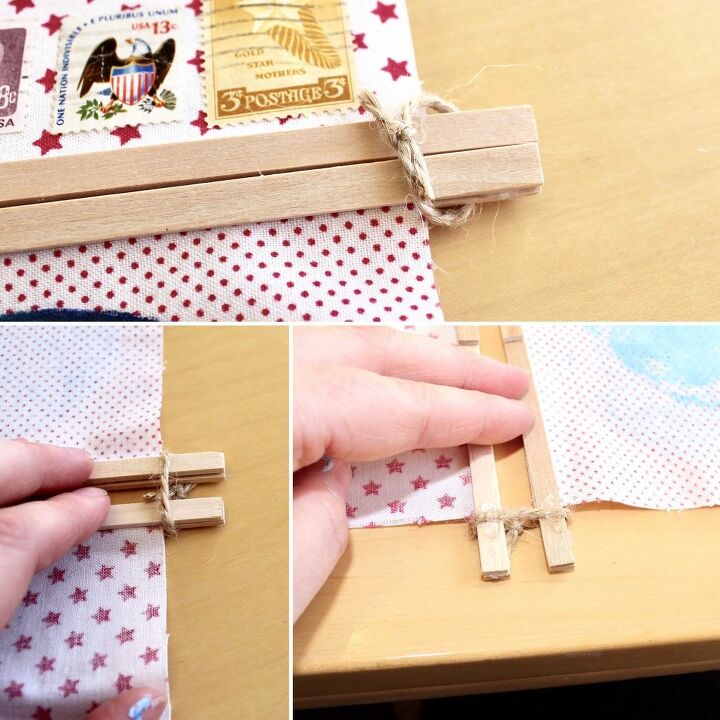
So, if you’ve chosen to follow my guidelines exactly, you’ll have 2 separate decontructed canvases, each containing 2 pieces of teeny square material. To join these 2 together, I used twine and simply tied it around the craft sticks at each end. I wanted a little gap between the 2 though so I left slack when tying the twine. This meant that the twine could fall off easily so I secured the twine to the back of the sticks with glue.
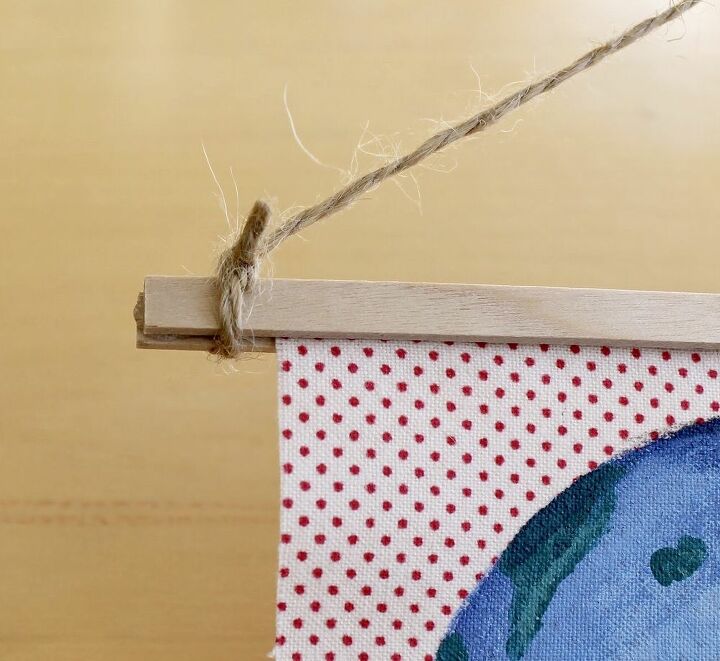
Lastly, tie some twine around the top sticks to create a hook for the wall.
So, I hope you like the idea of my deconstructed canvases and feel inspired to give this a go. Let me know what you think or if you have any questions at all.
Thank you.


Comments
Join the conversation
-
I love this idea. I'm pretty crafty and I have a friend who would love the boat theme. Thank you for sharing your story!!
-
Great idea and as well as providing lots of detail you are so encouraging—thanks!


Frequently asked questions
Have a question about this project?