WOOD SHUTTERS BECOME A WORK OF ART (even If You Can't Paint)
by
Carmen
(IC: homeowner)
7 Materials
$15
5 Hours
Medium
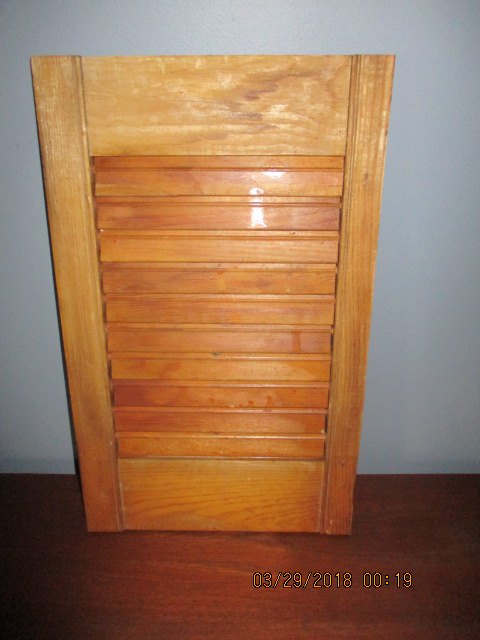
I love old wood shutters. I found one at a Thrift store for $ 3.00. It was old but in really nice shape. The size is 9.75" x 16" and has 10 slats. I am not an artist -
I can't paint a picture but I love a beautiful piece of fabric. So why not merry the two together !
This is a really rewarding project - from an old shutter to something quite
unique to hang on your wall. Even more rewarding is when your guests ask you where you got it - "I made it".
So, let's get started.
Lightly sand and clean your shutter. Paint frame with your choice of colour - I've found white to be the best. I used chalk paint.
Do NOT paint the slats - only the frame and side edges.
Let paint dry - chalk paint does not take long. Give it a light sanding.
While the paint is drying, we can start working on the fabric placement and cutting.
Choose your fabric panel. I chose a pelican. It measures 11.5" x 13".
As long as the panel covers the slats - you will be fine.
Count the number of slats in your shutter. Mine has 10 slats. Measure the width and length of a slat. Mine was 7 1/4" x 1 1/8". Now cut a
template of that size - see photo - green template. Place your cut
template on a slat to make sure it fits nicely.
Now onto the fabric. Determine the centre of the IMAGE on the fabric - not the whole fabric - but what your focal point is. My pelican is the
focal point. You will be making your cutting marks on the WRONG side
of the fabric. When you determine the centre point - fold fabric and hand crease the fold. Lightly draw a pencil mark down the centre. Lay the centre of the template on the centre line and mark both ends. Make 3
marks along on the side (top, middle and bottom). Draw a line. Now
you have 3 vertical lines on your fabric - left, centre and right.
Now we will trace the template onto the fabric.
Photo shows your vertical lines.
Now we will trace the template onto the fabric. I wanted to make sure that my Pelicans' eye was not cut - so my first template is centred on the eye. Then I proceeded to cut the remaining slat pieces.
After you trace the first template - place the template immediately under
the traced line and so on. Do NOT leave any spacing - this will distort your finished image. I only had enough fabric for 9 slats - so number 10 was cut from the side - it was not part of the image so nothing was distorted.
Cut all your strips CAREFULLY AND ACCURATELY.
KEEP YOUR STRIPS IN ORDER.
Fabric strips are now cut and ready to modge podge them to the shutter slats. Important - make sure your slats are facing down.
Brush the podge onto your first slat - NOT ONTO THE FABRIC.
Make sure you use modge podge "outdoor" - it is thicker and waterproof.
Lay your first fabric piece down on the slat - "PAT" THE FABRIC IN PLACE - DO NOT RUB - FABRIC STRETCHES - BE GENTLE.
I use a plastic knife to make sure the fabric is under the slat above it.
As you are placing your fabric on the slats, it is really important that all the lines match in your image. If not, it will look distorted.
Once your slats are done - step back and look closely to make sure everything aligns. Let it dry for about an hour. Then, brush a light coat
of podge on each shutter. Attach a hanger on the back.
YOU ARE DONE - GOOD JOB !
Here is another example of a larger shutter that I did .
Enjoyed the project?
Resources for this project:

Old Glory Patriotic Fabric Panel Stonehenge Stars & Stripes IV Eagle & US Flags 39338-49
Any price and availability information displayed on [relevant Amazon Site(s), as applicable] at the time of purchase will apply to the purchase of this product.
Hometalk may collect a small share of sales from the links on this page.More info
Published March 29th, 2018 6:55 PM
Comments
Join the conversation
2 of 123 comments
-
 Diana Deiley
on Sep 06, 2019
You had me at wood shutter AND Pelican. OMG this is awesome. I collect wooden pelicans, so your shutter would fit right in. Of course you know I AM going to do this as soon as I locate a shutter. Thank you for sharing your great project and all the tips with us. Genius! Love it, love it, love it!

-
-
 Paula Papp-Martini
on Jul 30, 2021
omg I love this- going to try this weekend if I can find a nice picture/pattern
-









Frequently asked questions
Have a question about this project?
I ha A door and thinking of putting a cloth scarf 🧣 will that work or do I need a shutter
How to fold a fitted sheet?
Love this,have shutters but we don’t have very good material stores in my area. Is there an online source for material with this large a print? Becky