


Save Money on a Detail and Learn How to Clean Your Car's Interior

By Marilyn Syarto
Car interiors take a beating, whether you’re the only one in your car or it’s always packed with your family or friends. Cleaning car interiors takes a lot of time and elbow grease. The worst interiors can take a professional car detailer five to six hours to detail, which is why many people pay to have car interiors detailed by professionals. But, professional detailing can cost a pretty penny, and you’re mostly paying for labor you can do yourself, which is why we made a step-by-step guide to cleaning your car interior.
With a few brushes, high-quality microfiber cloths, and a variety of household and specially-formulated auto cleaners (you may have to take a trip to the auto supply store for some extra-useful items), you can get your car almost back to brand new. But, remember, even professional detailers don’t expect perfection when it comes to grimy car interiors.
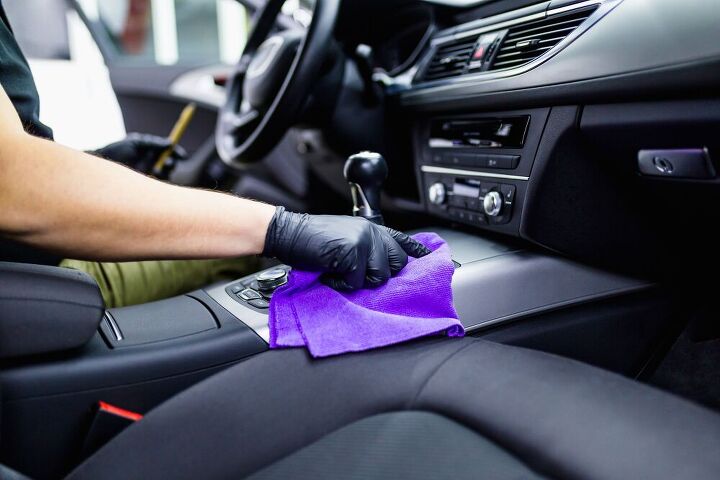
Photo via Shutterstock
How Often to Clean Your Car Interior
Caring for your car’s interior is just as important as the exterior. To avoid years of dirt build-up, old gum, dried-up liquids, gunk in the edges of pushbuttons, and cracked and faded materials from exposure to UV rays, you should consider deep cleaning your car’s interior two to three times a year.
Why You Should Clean Your Car Interior
There are plenty of benefits to cleaning your car’s interior, other than keeping it looking great. Cleaning the interior offers many major benefits:
- Prevents dirt, grime, and sun damage from wearing and tearing down the materials inside the car
- Improves the air quality of your car to help you avoid allergies or other serious health issues
- Kills viruses that may be deposited on car interiors
- Increases your safety by giving you a clear view forward and out the back for driving
- Retains your car’s value so you can sell it for a better price when that time comes
- Eliminates bad odors that can make driving your car a chore and cause problems when selling the car
How to Disinfect a Car Interior
If you want to disinfect outside germs and bacteria from your car’s interior, use a soft-bristled brush or a microfiber cloth with a mix of water and a tiny bit of liquid dish soap or laundry detergent on surfaces. And beware of a few don’ts:
- Do not use bleach or hydrogen peroxide to clean the interior of your car because they can damage surfaces and fabrics.
- Do not use ammonia-based cleaners on screens because they will damage the coatings.
- Do not overuse rubbing alcohol or other sanitizer gels on plastic surfaces because they can dry out and crack the material (using it just a few times should be fine).
Car Cleaning Safety Tip
How to Clean Car Interior Fabric and Seats
If you’re wondering what to use to clean your car interior, it’s simple: Clean the interior of a car with household products, just as you would in your home. Start off by tossing all loose garbage and debris into a garbage bag before getting started on your deep clean, and remember to wear protective rubber gloves while detailing your car’s interior.
Here's how to clean car interior fabric and seats.
Tools and Materials Needed
- Steamer
- Water
- Liquid dish detergent
- Paint stirrers
- Microfiber cloth
- Rubber band
- Spray cleaner
Step 1: Steam Seats
Use your handheld or small steamer on fabric upholstery to break apart the embedded dirt and stains on seats. Don’t use too much water or the entire cushion will be soaked and can turn musty and moldy. Steamed water can do the job on its own
Step 2: Add Soap if Needed
If you want to add a little soap for extra lift, just add a drop of liquid dish detergent—too much soap will leave a permanent sudsing stain on your cushions.
Step 3: Get Into Crevices
Get into the crevices by wrapping a paint stirrer (cheap or free at paint and hardware stores) with a microfiber cloth. Secure the cloth with a rubber band on the handle of the stirrer. Spray an all-purpose cleaner on the cloth. Stick the stirrer into tough-to-reach areas in seat cushions and around the center console to grab and loosen up the dirt.
How to Clean Car Leather Seats
The key to cleaning leather is to gently use a good leather cleaner and conditioner without scrubbing the material raw. If you scrub the material too hard, you might remove some of the leather’s surface color. Follow the manufacturer’s directions on the package of whatever leather cleaning solution or conditioner you use for best results.
Tools and Materials Needed
- Leather cleaner
- Leather conditioner
- Microfiber cloth or cleaning cloth suggested by cleaner/conditioner manufacturer
The key to cleaning leather is to gently use a good leather cleaner and conditioner without scrubbing the material raw. If you scrub the material too hard, you might remove some of the leather’s surface color. Follow the manufacturer’s directions on the package of whatever leather cleaning solution or conditioner you use for best results.
How to Clean a Car’s Interior Roof
The roof of your car’s interior is called the headliner. Although the headliner isn’t necessarily something you’ll inspect often, it’s where all the stains go from splashed coffee, food, soda, and greasy, slimy hands. And if you smoke in your car, tar and nicotine may have built-up stains, as well.
The headliner is there for a reason: It insulates the interior from noise and the sun’s heat and hides wiring and hardware that goes into making the rest of the car functional. The headliner is not an easy area to clean. They can be replaced, but cleaning them the right way can help.
Depending on how dirty your car’s headliner is, we’ve got tips for a light surface cleaning, like if you’re looking to spot-treat a stain or two, and tips for a heavy-duty cleaning, when the headliner has absorbed odor or a majority of the surface needs a refresh.
Note: Avoid using a steamer on the headliner; a hot steamer can compromise the layers of materials, glues, and adhesives behind the headliner fabric, especially with older cars, according to Dallas Paint Correction and Auto Detailing.
Tools and Materials Needed
- All-purpose upholstery-safe cleaner
- Clean microfiber towel (microfiber is a must to grab the dirt)
- Orbital polisher with a soft microfiber finishing pad
- Blow dryer
For light cleaning on a headliner...
Step 1: Pretreat Stains
Pretreat stains with a spray of all-purpose cleaner, let sit for a few minutes.
Step 2: Fold Towel
Take a large microfiber towel and fold it into fours.
Step 3: Spray Cleaner
Generously spray cleaner on the face of the cloth.
Step 4: Scrub Headliner
Roll the cloth so you are holding one end tight, but roll it over your knuckles for a better grip while you are scrubbing the headliner as hard as you can go in all directions of the affected area. Your knuckles are doing the scrubbing work, and you’ll feel it in your arms! Do this cleaning in short sprints because it can be tough on your back and knuckles.
For heavy-duty cleaning on a headliner...
Step 1: Spray Cleaner
Spray a small amount of all-purpose cleaner on your headliner—do a section at a time.
Step 2: Use Orbital Polisher
Spray a small amount of cleaner on the soft microfiber finisher pad of your orbital polisher.
Use your orbital polisher and pad with minimal pressure on the roof of the car and move the polisher slowly around the headliner. (The pad will become dirty.)
Step 3: Towel Up Dirt
Take a clean, dry microfiber towel and mop up lingering dirt and moisture.
Step 4: Dry
Use a blow dryer on a cool setting to quicken the drying process. The entire headliner will dry in under an hour and any lines that the moisture may have left will disappear.
How to Clean Car’s Interior Windows
Not only do your windows need cleaning, so do your windshields (inside and out), which is why you need a curved cleaning tool to help you reach those tough corners. Avoid using paper towels because they can potentially leave behind lint. Use a simple glass cleaner, or try this DIY recipe:
Tools and Materials Needed
- Spray bottle
- 1 cup water
- 1 cup rubbing alcohol
- 2 tablespoons distilled white vinegar
- Microfiber towels
- Curved cleaning tool with microfiber head
Step 1: Mix Cleaning Solution
In a spray bottle, mix 1 cup of water, 1 cup of rubbing alcohol, and 2 tablespoons of vinegar. (Or, here’s another DIY recipe, or, use a regular commercial window cleaner.)
Step 2: Spray Cleaner
Spray cleaner onto the glass.
Step 3: Buff
Use microfiber cloths to buff the windows.
Step 4: Clean Interior Windshield
Spray cleaner on the head of the curved cleaning tool and clean the inside bottoms of your windshields.
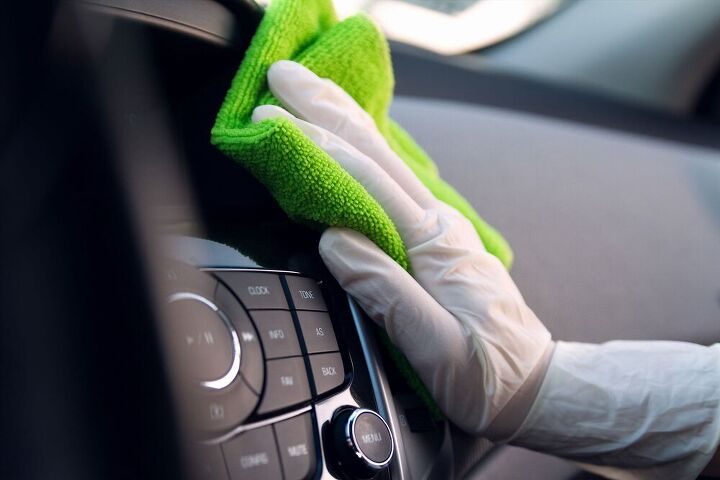
Photo via Shutterstock
How to Clean Car Touch Screens
For touch screens, you need to treat them just as gently as you would your cell phone or other devices. That means opting for specific cleaners formulated for screens.
Warning: Never use paper towels or even old rags to clean your touch screens, as the materials may scratch the screens. Do not use any ammonia, alcohol, or glass-cleaning products or they could damage the screen’s protective coatings.
Tools and Materials Needed
- Microfiber cloths
- Screen cleaning solution (non-abrasive, ammonia-free, and alcohol-free)
For dusty screens, gently wipe the screen using circular motions with a microfiber cloth. For dirty or grimy screens, spray a small amount of cleaning solution on the cloth and buff. Go slowly so you do not get any moisture in the ports or corners of the screens. Buff dry with a clean microfiber cloth.
How to Clean Car Vents
Remember to clean out your air conditioning/heating vents on the dashboard because dust and dirt become embedded in the AC vents. A good clean-out will also make your vents more efficient, blowing out clean air rather than pollutants and irritants that can be harmful to the lungs. This is an especially essential step if you have respiratory problems. There are a few ways to clean your vents, or you can use all of the methods for a nice deep cleaning.
Tools and Materials Needed
- Vacuum
- Vent cleaner brush
- Can of compressed air
- Detailing horsehair brush (or a brush with long, dense bristles)
- Spray cleaner formulated for car vents
- Crevice cleaner gel (optional)
Step 1: Vacuum
First, vacuum up loose dirt and dust around the vent with a vacuum cleaner by using the brush or crevice attachment.
Step 2: Dust
Wipe the vents with a microfiber vent cleaner brush (it looks like a miniature version of what you would use to clean horizontal window blinds).
Step 3: Run Air
Run the car’s AC system first for a minute, then turn off the car. Aim a can of compressed air into the vents to lift stuck dirt and dust.
How to Clean Car’s Hard Plastic Surfaces
The plastic parts of your car’s interior, such as cupholders, the dashboard, and the floor, take a beating—especially a floor area where your feet push dirt into the micro-grooves of the plastic and cake it onto the material. To clean up these plastic areas:
Tools and Materials Needed
- Hard bristled brush
- All-purpose degreasing cleaner (such as Fantastik)
- Microfiber cloths
Step 1: Spray Cleaner
Spray with a general all-purpose degreasing cleaner.
Step 2: Brush Dirt
Use a brush to scrub off caked dirt.
Step 3: Wipe Away Dirt
Wipe the area with a microfiber cloth to extract more dirt.
Step 4: Brush Dry
Buff dry with a clean microfiber cloth.
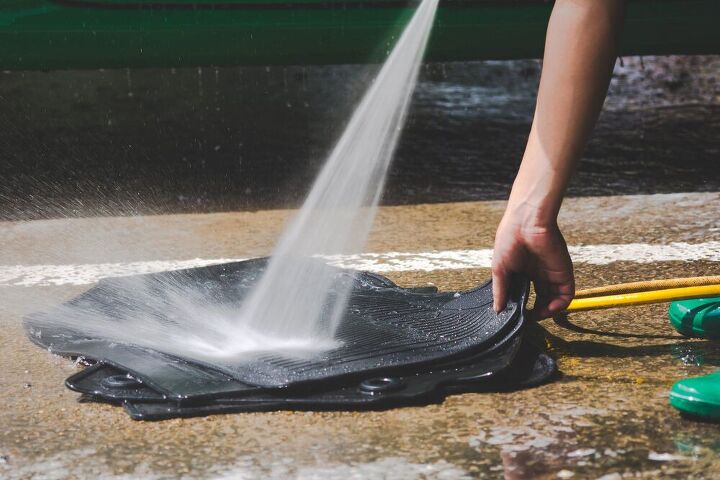
Photo via Shutterstock
How to Clean Car Plastic Floor Mats
Car floor mats see the bottom of your shoes every day, meaning they're a catch-all for dirt, mud, and snow salt. Here's how to clean them.
This easy method works for rubber and plastic floor mats that are caked with dirt, mud, and road salt, plus any other grime that your feet drag in from the street. Typically, you’ll only need to clean the top of the mats.
Tools Materials Needed
- Garden hose
- Hard-bristled brush
- All-purpose degreasing cleaner (such as Fantastik)
- Microfiber towel
Step 1: Remove Mats
Remove the mats from the car and shake out the loose debris.
Step 2: Spray Mats
Spray down the mats using a garden hose. Spray a generous amount of cleaner all over the mat.
Step 3: Scrub
Scrub with a brush to remove all the dirt.
Step 4: Rinse and Dry
Rinse clean with the garden hose. Dry with a microfiber towel.
How to Clean Carpet Floor Mats
Carpet floor mats are a little trickier because dirt gets more easily embedded into carpet fibers than it does plastic. Note that if you do not have access to a garden hose, you can also use just vinegar to clean the mats.
Tools Materials Needed
- Protective rubber gloves
- White distilled vinegar in a spray bottle
- Hard-bristled brush
- Bucket
- Water
- Liquid dish detergent
- Garden hose
- Blow dryer
Step 1: Remove Mats
Put on protective rubber gloves. Remove mats from the car, vigorously shake them out to remove loose debris, and lay them on the ground.
Step 2: Spray Vinegar
Spray vinegar on mats.
Step 3: Brush and Shake Mats
Use the brush to loosen up and remove surface dirt, salt, grime. Shake out the mats again.
Step 4: Scrub Mats
Add water and a few drops of liquid dish detergent to a bucket. Dip the brush into the bucket, then scrub the mats until clean and fresh.
Step 5: Rinse Clean and Dry
Rinse clean with the garden hose. Let air dry or use a blow dryer to quicken the process.
DIY Carpet Freshener
How to Keep Your Car Interior Clean
Now that you’ve deep cleaned your car’s interior, how do you get it to stay that way? The trick is to organize your car’s interior to keep it as clean as possible. Following these tricks will immediately make a difference in how your car’s interior functions, looks, and smells.
- Put cleanable silicone cupcake liners in your car cup holders to catch spills.
- Keep dry microfiber floor-sweeping cloths handy in the car to quickly grab the dust that accumulates on top of your dashboard.
- Organize your glove compartment and all the important documents in a mini-file or small binder.
- Turn a slim plastic cereal container into a trash container lined with a small plastic trash bag—it will fit perfectly in your car.
- Shake out your car mats every week or so.
- Find a small plastic container with a secure top to hold spare change.
- Indulge in a trunk organizer to securely hold everything from groceries to plants so nothing falls and spills.
- Keep a small plastic craft box in your car (under the seat or in the trunk) to hold small things like wipes, scissors, tape, bandaids, hair ties, etc.
Tips and Hacks for Difficult Cases
If you’ve cleaned the front of your AC vents but you still smell something rancid when you turn on the car or run air, you may have the following issues that need to be fixed by a professional detailer or auto repair shop, according to professional automotive news source Cars Direct:
- Mold and bacteria are growing in the vents.
- There’s a gas leak and the smell is being sucked into the system.
- Your air filters need deep cleaning or replacement. A professional will steam clean your intake air vents and/or your air filter for maximum effectiveness.
- A sweet smell from your vents means there’s a toxic antifreeze leak that needs immediate attention.
Cleaning a car takes a lot of work. If you’re cleaning the interior, you might as well clean the exterior, too, which is double the work. Besides the sheer amount of time it takes to clean the interior, there are a few other signs it’s time to take your car to a professional detailer:
- There’s a general lingering odor inside your car that you can’t eliminate.
- You’re selling your car and want to clean it up.
- You want to shine up your interior with professional sealants.
When's the last time you deep cleaned your car's interior? Do you have any tips to share below?
Comments
Join the conversation
-
This information perfectly describes how you should take care of your car.


Frequently asked questions
Have a question about this project?