


Pottery Barn Coffee Table Copycat - 804 Sycamore
We haven’t had a coffee table for years! I love them, love styling them, love the function they add, but having one doesn’t always work out. Our daughters are eight and a half years apart, so we’ve had littles rolling around the ground and jumping off sofas for a while – it just didn’t make sense for the way we used our family room. Then there was the challenge of finding one I loved and was willing to pay for. For years I’ve been searching for vintage pieces to create my own coffee table, checking Facebook Marketplace for a unique piece to restore, but no luck. When I finally found one that I really liked and felt would coordinate with my coordinated living room pieces, it was way out of my budget. So, I decided to build a Pottery Barn coffee table copycat, but not from scratch. Instead, I built a simple cover that slides onto an existing tabletop that I didn’t love so much!
Pottery Barn Coffee Table Copycat – Video
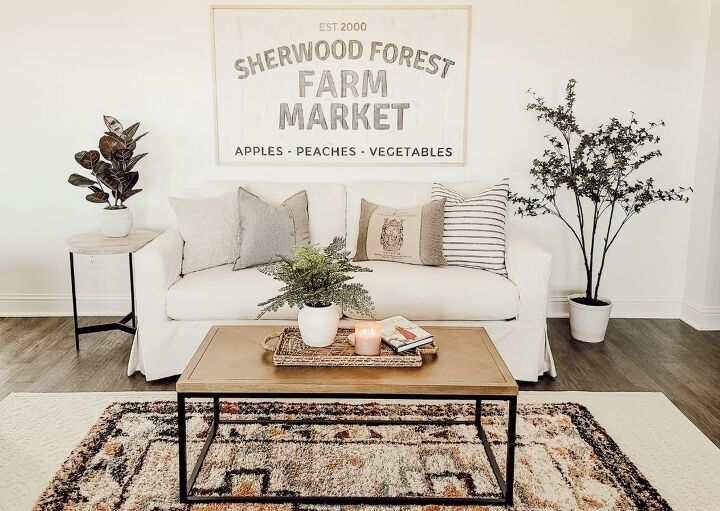
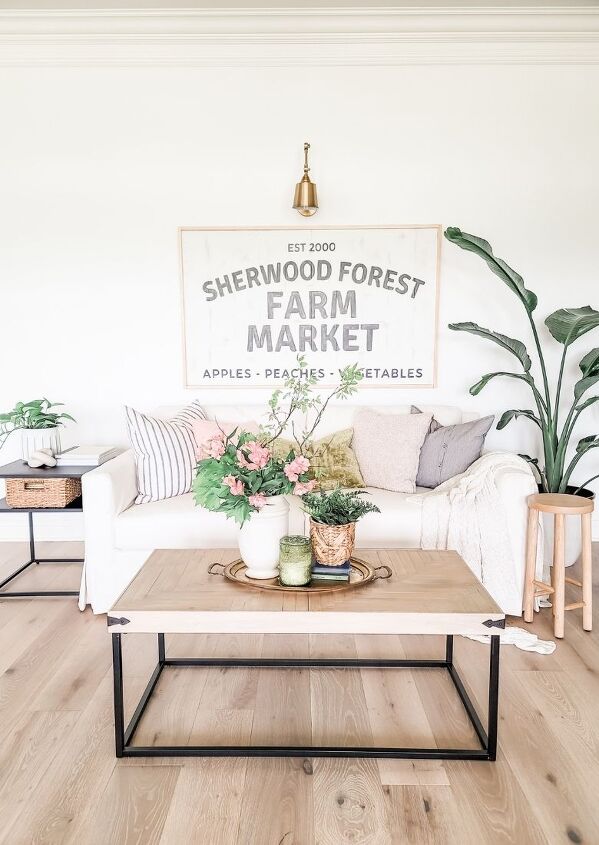
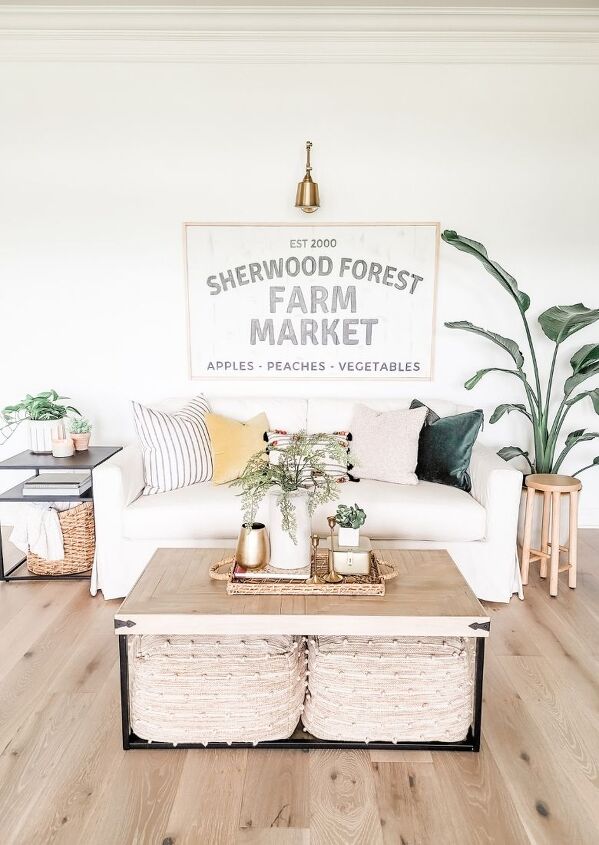
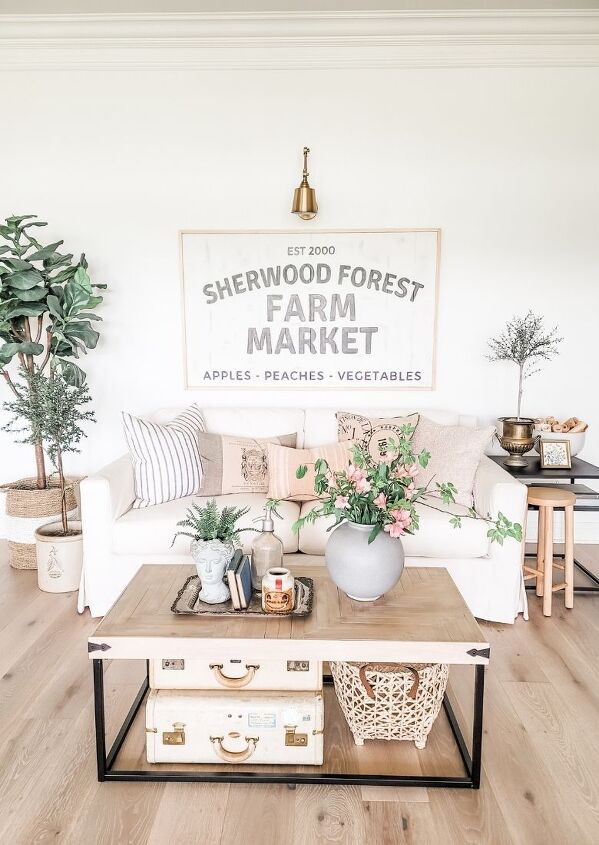
My Pottery Barn coffee table copycat looks great downstairs as well as upstairs – it’s nice being able to move things around when I want to. Now that I have a coffee table in front of my sofa, I’ve been enjoying the opportunity to style it. Little changes to tabletops are a great way to reuse your decor and refresh a room. I love using a tray to contain and display the decor – check out some of my favorite coffee table decor.

In
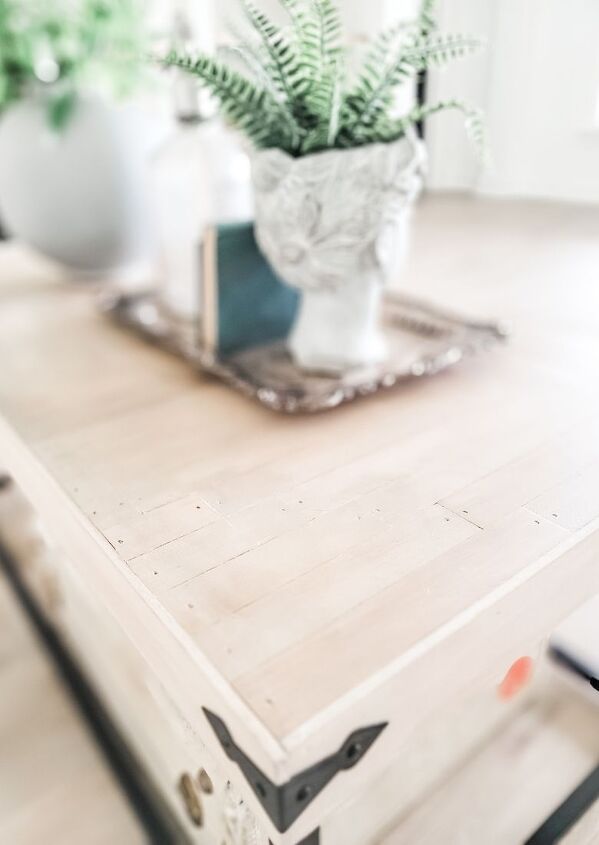
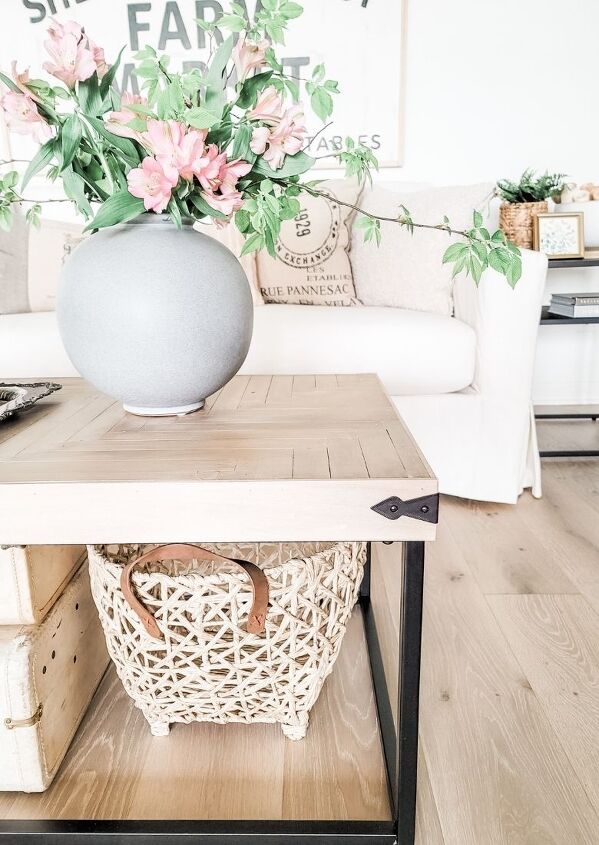
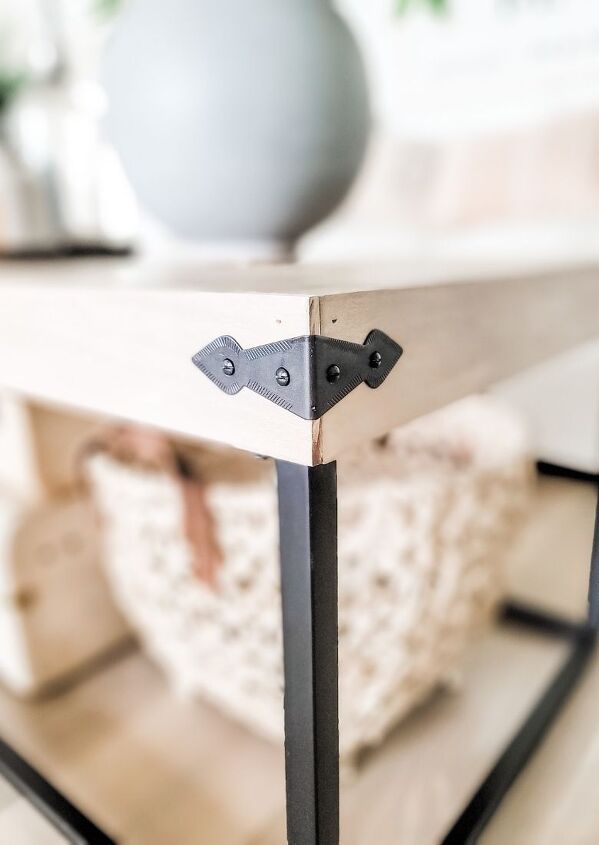
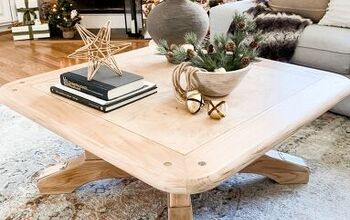
Building the Pottery Barn coffee table copycat was so much fun! I wasn’t too concerned if it didn’t work out because I used the most inexpensive spacer wood I could (aka lattice boards). I knew going in that the boards weren’t exactly the same size, they were rough, and uneven, but I liked those qualities about them because that meant I could easily create a unique piece that looked a little old and rustic with a modern frame. I added the decorative corners at the last minute because I think they add a little more stability to the thin wooden corners, and they add a nice finishing touch too. The best part about this Pottery Barn coffee table copycat is that it lends itself to any design you can think of, and it’s simple enough for anyone to take on.
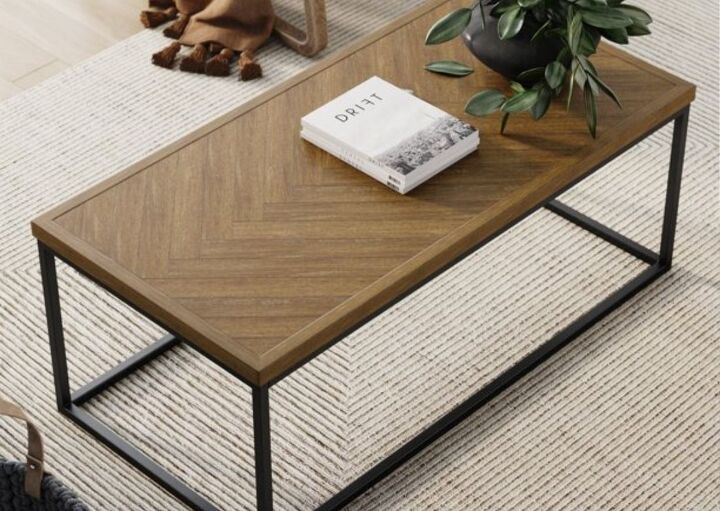
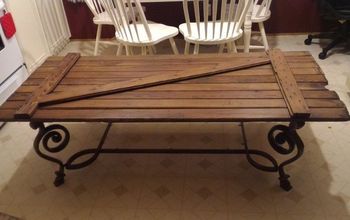
This DIY project started with this inexpensive coffee table from Walmart. I was really only after the black metal frame and the size. It was actually less expensive for me to buy an entire coffee table over just a black frame to add my own top to. Go figure! It turned out to be better this way though, if my coffee table cover didn’t turn out, I still had a useable table, and the existing top added strength to my cover. Below I’ve included some additional coffee tables that I considered.
Pottery Barn Coffee Table Copycat
You may look at the affordable Walmart coffee table and think the chevron pattern looks pretty nice and the color is OK, but I was after a thicker looking top without adding a lot of weight. I also wanted to apply my custom stain color to the wood and bring in the herringbone pattern. This Pottery Barn coffee table copycat isn’t an exact match, but it’s definitely inspired and more affordable than the original. The cool part is that both of my daughters have expressed how much they like the new table – which is pretty great to me. Here’s a photo of the original coffee table in our living room before I created a simple cover for it.
Pottery Barn Coffee Table Copycat
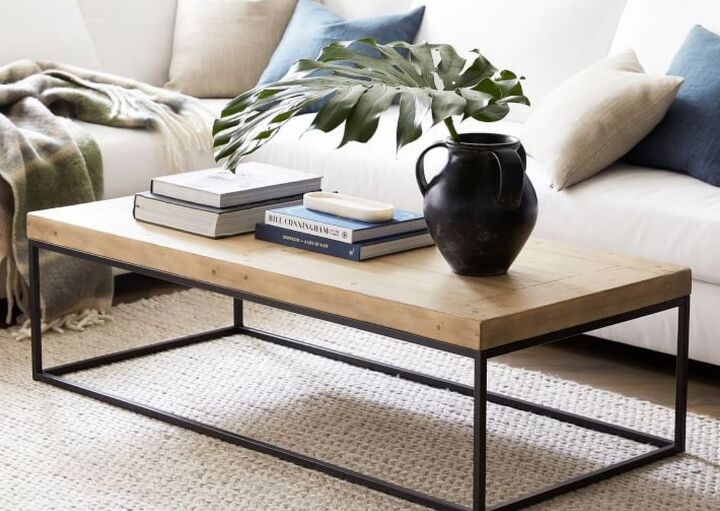
Anytime someone says copycat, I feel like it’s normal to expect a duplicate. Well, I’ll be the first to tell you that I didn’t create a duplicate, it’s not perfect or exact, but the Malcolm Pottery Barn coffee table is so beautiful and timeless to me that it inspired my own similar design. I love the mix of modern black metal with the rustic worn top – it feels cozy, a little vintage, but sturdy and fresh in a way. The Malcolm coffee table is longer than mine, uses solid wood, has the designer look and details I love, but when something is outside my budget I always consider if I can make it myself. And this time I decided I would attempt something similar for a fraction of the price. Below you can see the Pottery Barn coffee table that inspired this project.
Pottery Barn Coffee Table Copycat – Tutorial
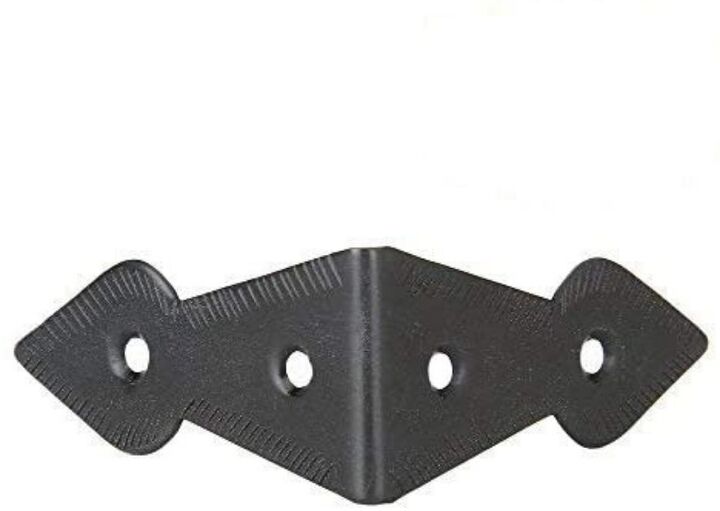
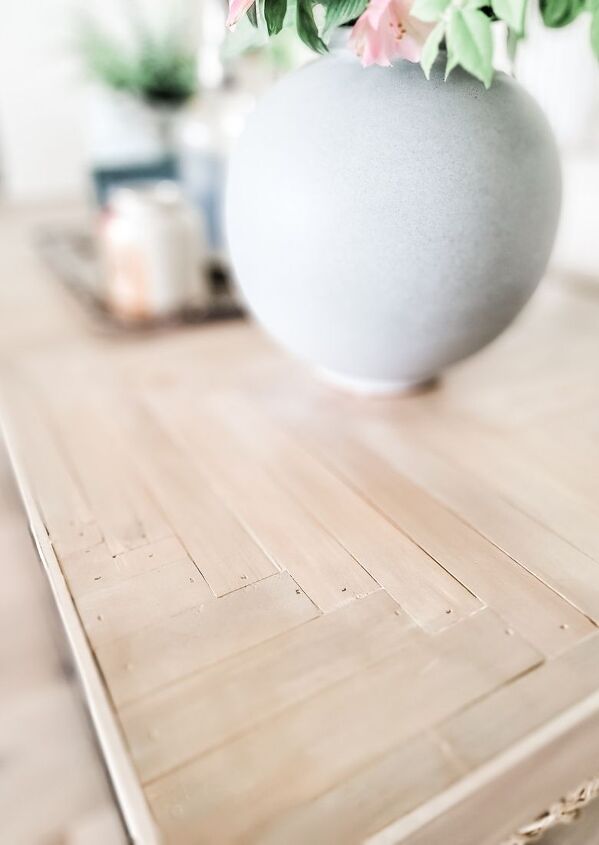
The cover that I built started with a piece of scrap plywood I had on hand. I used 1/2-inch plywood so that it was thick enough to nail into, but not too heavy. To get the plywood to fit the top of the coffee table, I just flipped the coffee table upside down and traced around it onto the plywood. Just cut your traced lines. Then I cut a bunch of 12-inch-long lattice pieces. I used about 14 spacer (lattice) boards for the top, and then I was able to use the trimmed off pieces to fill in the rest of the spaces. The video I made showing the process is the best way to demonstrate how the top pattern came together. I was able to use 2″ wide boards to create the border – and these boards were the same thickness as the lattice boards along the top so it doesn’t bulge over the edges at all. You can use any boards you want to wrap and frame the new cover, but I wanted to make sure the cover didn’t overlap with too much thickness away from the frame. My goal wasn’t to create something that looked made, but to create something that looked like it always was. I also found these decorative corner pieces to add a nice detail and some added security for the corners of the coffee table cover.
Once the boards were glued and nailed down (3/8″ brad nails), there were some small spaces in between some boards. The lattice boards aren’t perfectly uniform, so I used wood filler to fill some of the wider spaces. The wood filler claims it can be stained, but there are some places that didn’t stain well. Again, I wasn’t looking for perfection and this outcome didn’t ruin the overall look but be aware of my experience before you begin a similar project. I sanded the entire cover with 180 grit and then 220 grit sandpaper. Once cleaned off, I added Rove + Dwell’s Farmhouse stain. Four hours later, gently sand with a 220-grit sanding sponge, and clean off. Then, I lightly applied Varathane’s whitewash stain and immediately wiped it off. These are the two main steps to achieve my white oak looking stain color. I love the warm and worn look of it, and it’s not too dark for my taste. A matte polyurethane finish was brushed on to protect the surface.
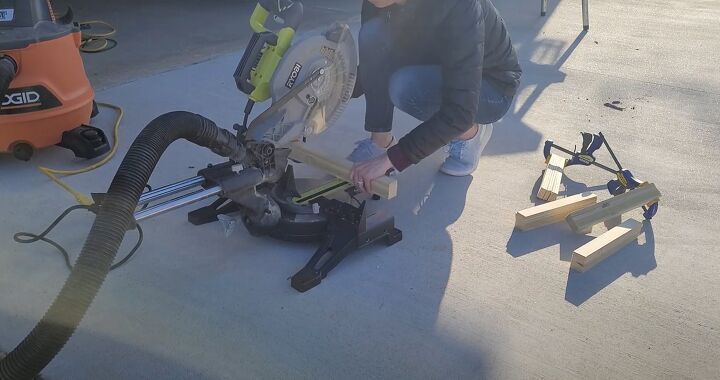
I cut spacer boards into 12" long pieces. They are not perfectly uniform, but they were cheap and thin.
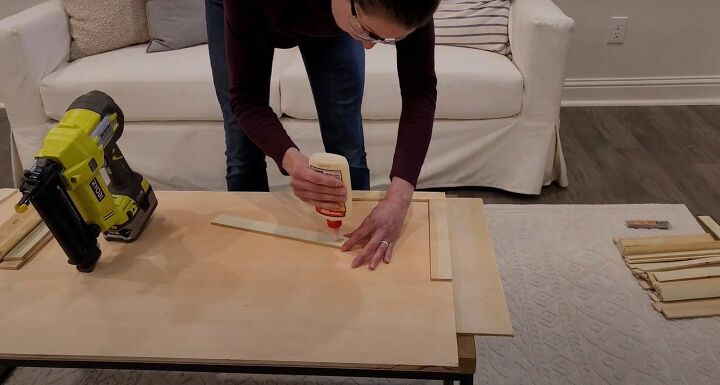
After I cut a 1/2" piece of plywood to perfectly fit on top of my existing coffee table, I began adding wood glue to my spacer boards and then used a brad nail to further secure them.
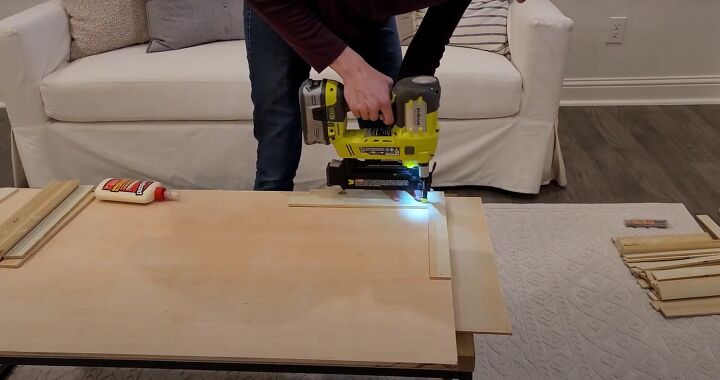
Make sure to use the correct length of brad nails so that they don't go through the plywood.
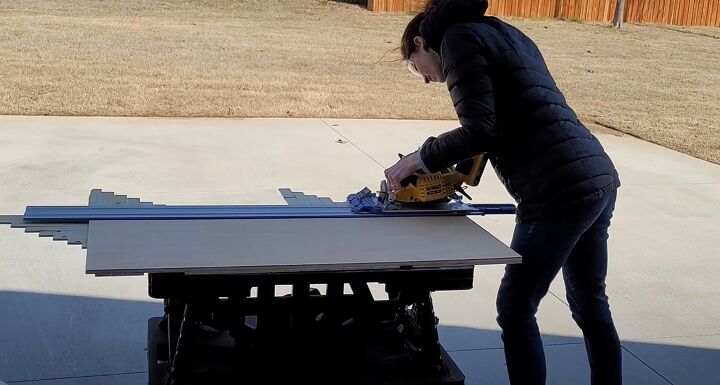
Once I used up all my spacer boards to create a herringbone pattern, I waited for the glue to be dry and then I used a circular saw and Kreg straight edge jig to cut off the overhanging boards.
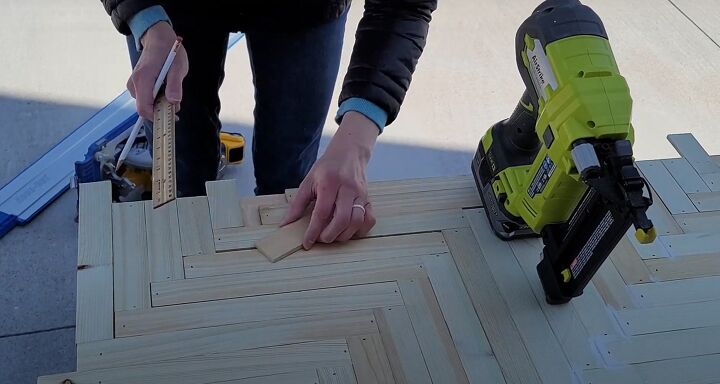
I used the small pieces that I just cut off of the edge to fill in the remailing small spaces. This caused me to have to make one more cut around the perimeter where little pieces were hanging over. The jig kept my edge perfectly straight.
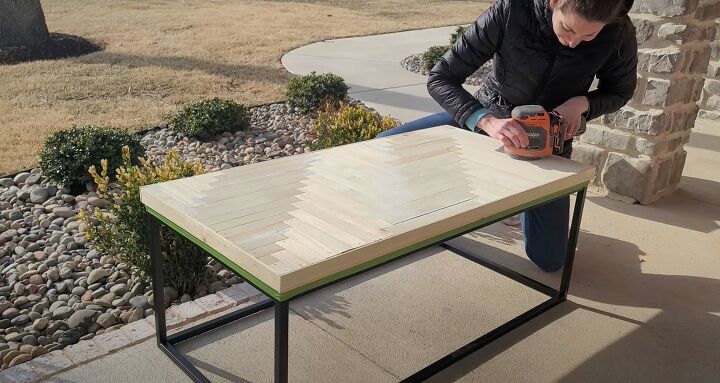
Then I added a 2" wide spacer board around the outer edge. Once the cover was constructed, I sanded all the boards with 180 grit and then 220 grit and it really smoothed out the surface nicely. Clean the dust off so it's ready for staining or painting.
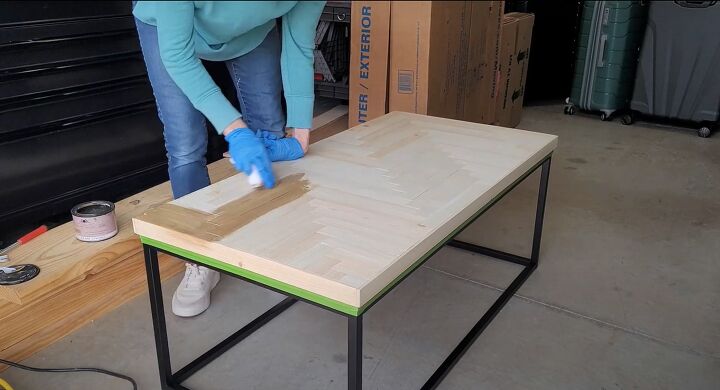
I used painter's tape to protect the frame of my coffee table and then I applied a farmhouse stain and then four hours later a white wash stain. Once it's dry, I added a coat of matte polyurethane to give more protection and wear to the coffee table cover.

Comments
Join the conversation
-
Hi there! Your work is absolutely beautiful! May I ask where you got the frame underneath your coffee table top? Thanks so much!❤️
-
You put lots of work into this coffee table. It's stunning. I love your taste. Thank you so much.


Frequently asked questions
Have a question about this project?