


DIY Lighthouse Bird Feeder
DIY Lighthouse Bird Feeder
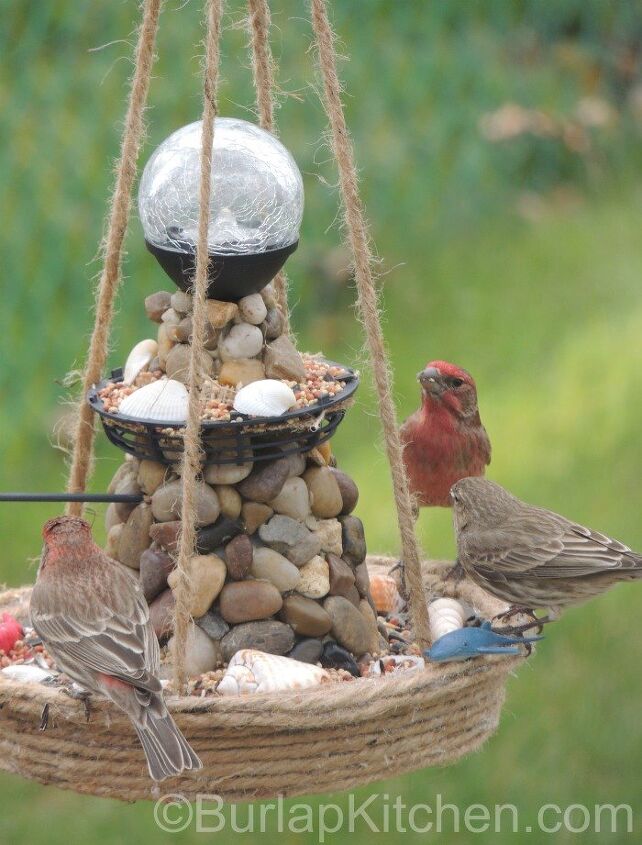
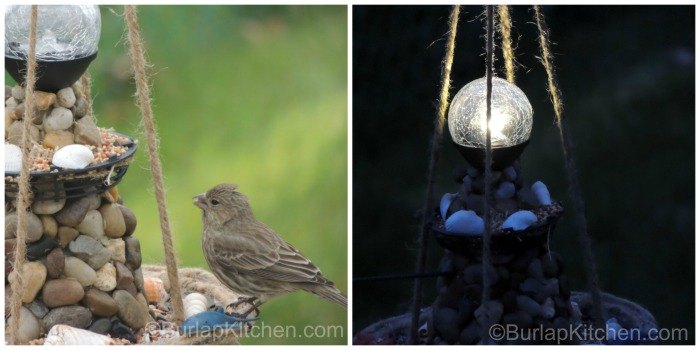
You can make this super cute DIY Lighthouse Bird Feeder using just a few supplies from the dollar tree. I will warn you, gluing the stones on takes some patience. Because of this I left all the supplies out in my craft room and glued a little each night while watching TV. It took a little time but the birds seem to LOVE it!
Supplies:
- Small traffic cones ( I got these at the dollar tree in with the school supplies)
- Small fan or something to work as a balcony ( I also got mine at the dollar tree)
- 4 packs of stone ( from dollar tree)
- 9 inch pie pan ( from dollar tree. Set your cone in it to make sure it fits!)
- Solar light ( you can buy this at dollar tree but I found one I liked better at Walmart)
- Thick twine
- Drill
- Hot Glue Gun & Glue Sticks
- Loctite
- caulking gun
- popsicle sticks
- paper plate
- Laytex gloves
- Sea Shells ( maybe you have some from a previous trip to the beach?)
- Small sea critters ( found mine at dollar tree)
- Small piece of Burlap
- Grey or tan spray paint (try to get a paint that will blend in well with the rocks)
- small dowl rod painted black (optional)
How to:
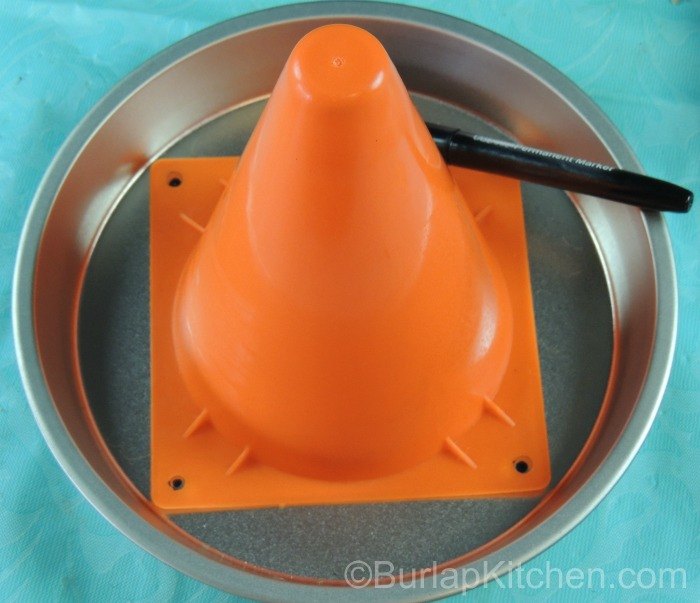
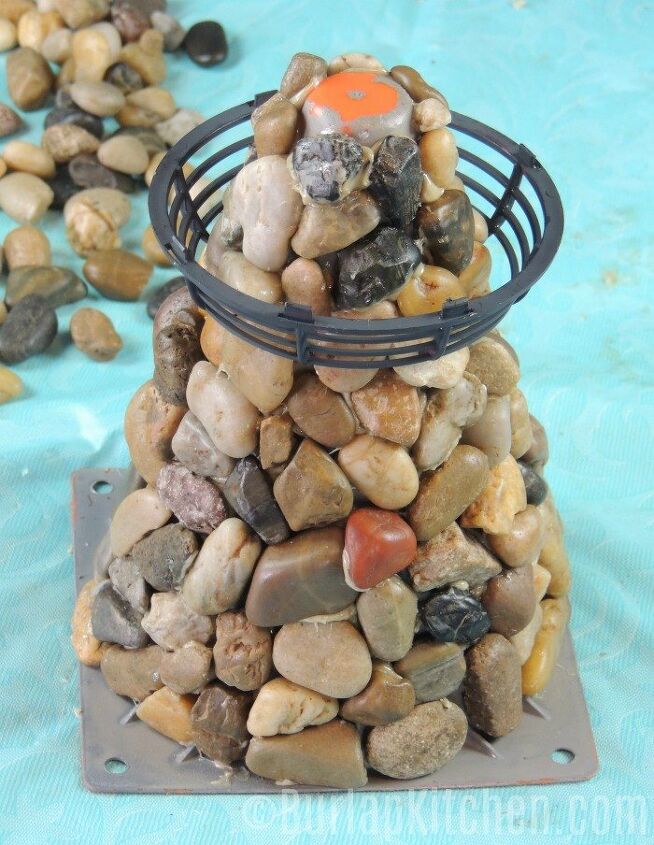
Step 1: The first thing I did was put my cone in my pie pan and marked the holes. This helped me to know where to drill.
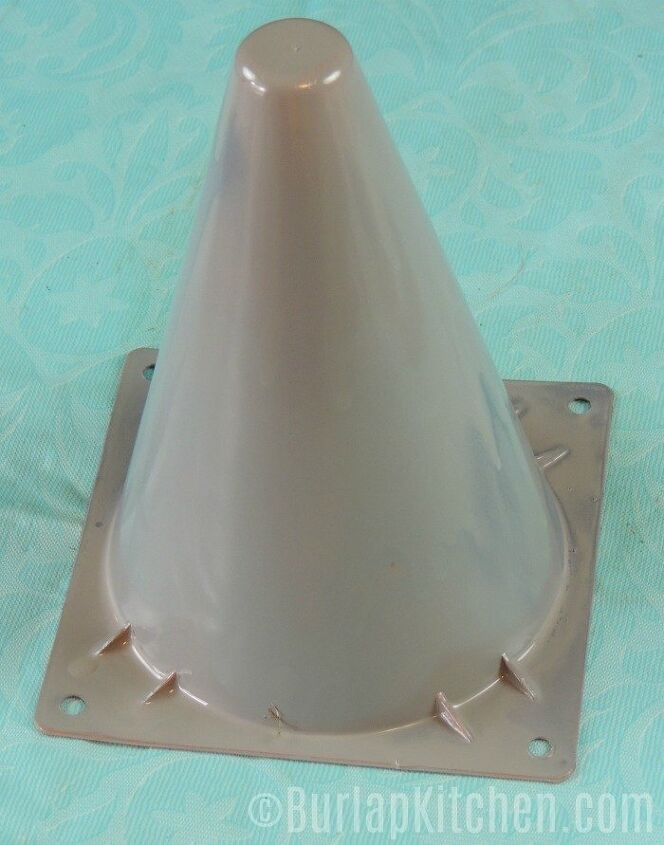
Step 2: Next I spray painted my traffic cone grey and left it dry overnight.
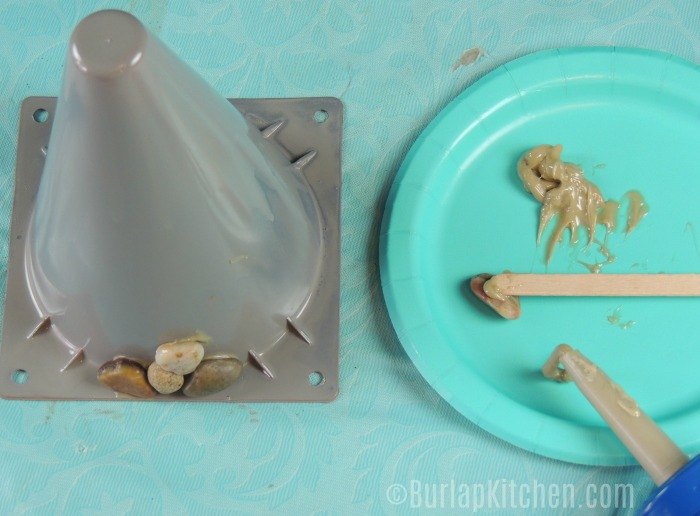
Step 3: I then started gluing my rocks. I found the easiest way to do this was to squeeze some Loctite on a paper plate and use a popsicle stick to apply the glue to the rocks. Because this gets a little messy, I suggest wearing latex gloves. I didn’t wear gloves and had Loctite on my hands for a week!
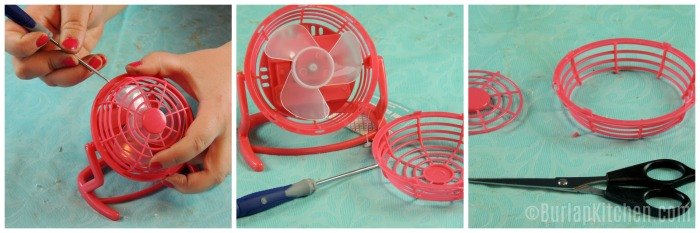
Step 4: I wanted to add a balcony but couldn’t find ANYTHING that would work. While I was at the dollar tree I came across this fan, it worked perfectly! I just used a screwdriver to pop it apart and then spray painted it black. My scissors were used to cut the middle section of the fan out so it fits around my lighthouse.
It should look something like this when you’re finished.
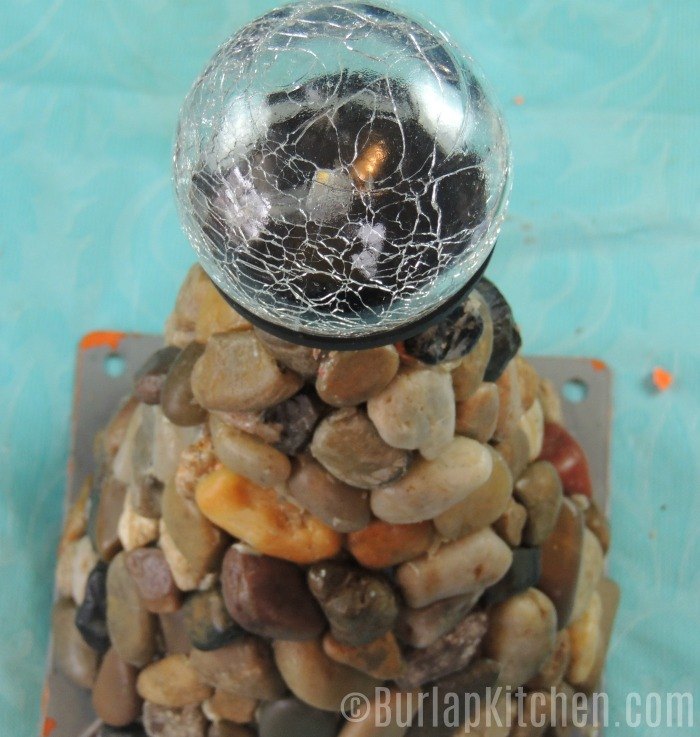
Step 5: To fit the solar light in I had to figure out a way to cut a hole in the top. I found that drilling a bunch of holes around the rim then cutting it with scissors worked for me. If you have a better way of doing this, go for it!
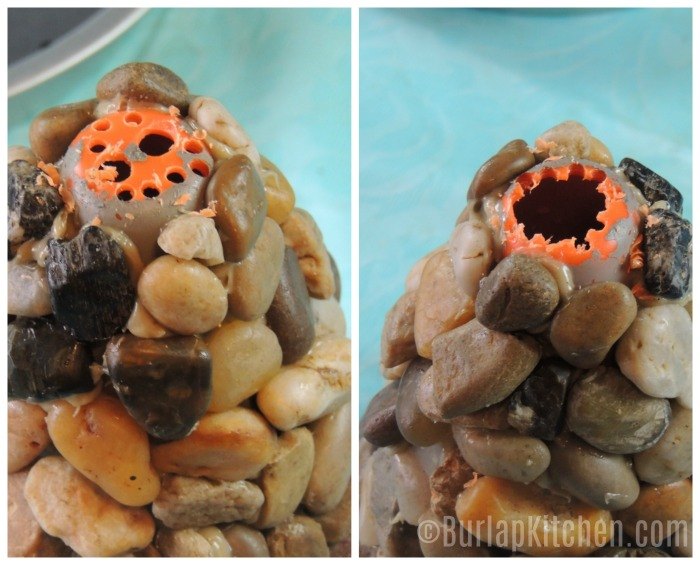
Step 6: I then took the stake part of the solar light off and shoved it in the hole. Perfect fit!
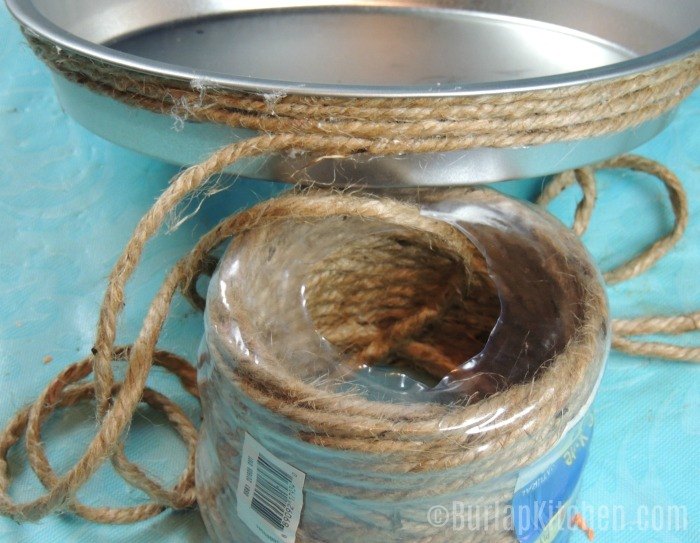
Step 7: Next I used my hot glue gun to glue twine around my pie pan. I think it gives more of a nautical look.
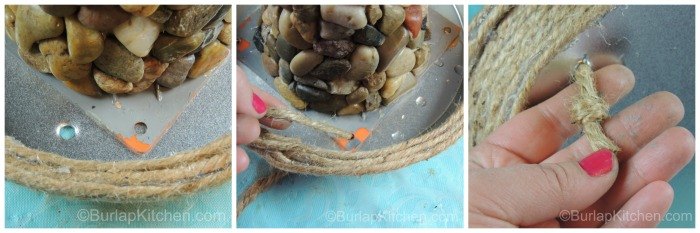
Step 8: Next I Put my lighthouse back in the pie pan to make sure the holes I marked earlier were still accurate. I then drilled my holes. Make sure when you drill your holes you drill down. Doing it this way leaves the sharp edge on the bottom rather than the top, this way the birds don’t step on anything sharp!
After drilling the holes I stuck a piece of twine through each hole and tied a double knot at the base of the pan. You will need 4 long pieces of twine for this. I pulled the twine up in the air to about the length I wanted and gave myself a few extra inches of wiggle room (we will tie the top knot in Step 11).I found that dipping my twin in water helped it to go through the holes much easier. See the photo below for help with this step.
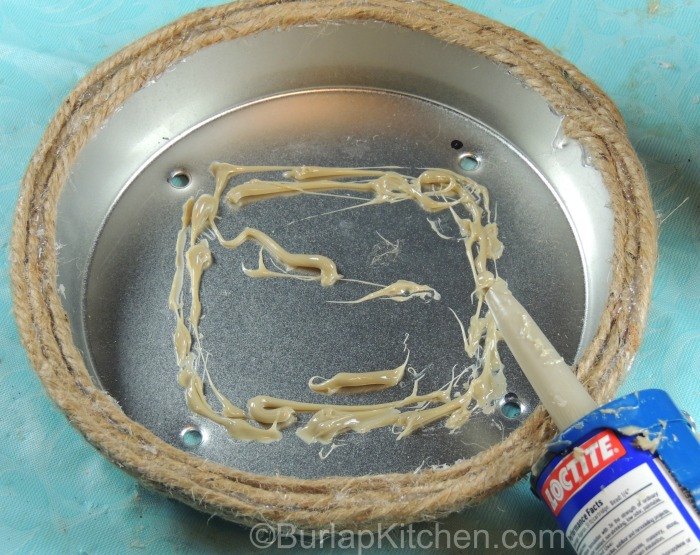
Step 9: Use Loctite to glue your lighthouse to the pie pan & let it dry overnight.
*I goofed a little here, I tried to glue my lighthouse down before putting the twine in. This didn’t work very good so I had to re-glue the lighthouse.
Step 11: Once everything is dried bring all four strings up and tie in a double knot. I also hot glued a few mini sea creatures around the rim of the pie pan. It should look something like this when you’re all finished.
*I also decided to drill a hole in the side of my lighthouse and used Loctite to secure a little perch for the birds. I used a small dowel rod and painted it
black.
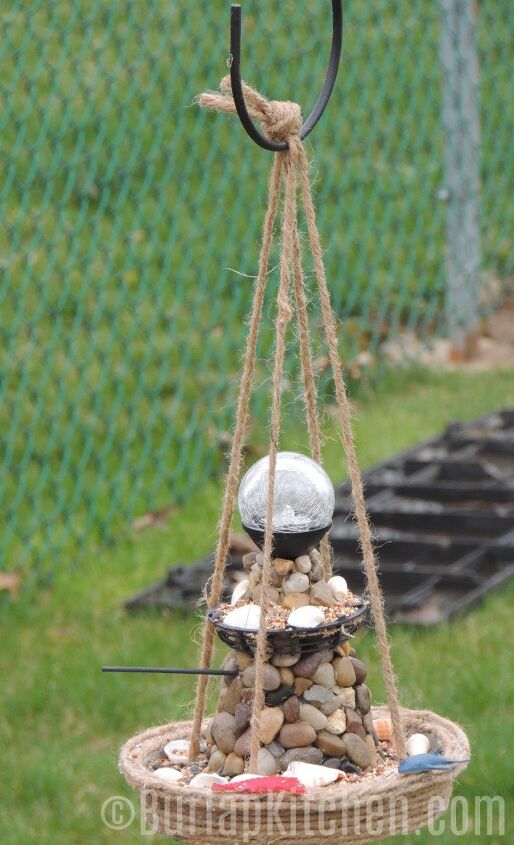
Step 12: Time for the fun part! Fill your Lighthouse bird feeder with birdseed and scatter a few seashells around. I put a little piece of burlap around the balcony so the birdseed didn’t fall through.
I’m not sure who enjoys this lighthouse bird feeder more, me or the birds?
Resources for this project:


Comments
Join the conversation
-
I just love it and I love lighthouses!!! Great job!!!
-
This is the cutest little thing, really great job, thanks for sharing.
DAISY🌼


Frequently asked questions
Have a question about this project?
This is awesome - so creative and natural for the area! Kudos to you. You have to love birds to have taken the time to create this for them. Question: the solar light is not glued down - correct? I think you have it made so you could pull it up to replace batteries or the whole light if necessary but I want to make sure.
This is adorable but I have one question for you. If you live in an area that is not arid for most of the year you should think of getting a pan larger than the feeding pan to place over it so that when it rains the seeds will not mold and rot. Large enough holes in the feeding pan might work but you will have to cover the bottom with a plastic mesh so that the seed does not fall out. Thank you for the idea it really is a good one :)
Just wondering about the glue you use. Is it safe for wildlife?
Thanks