


Organize Your Nut-eating Passion With a Handy Acorn Serving Tray!
Raise your hand if you too adore eating fresh nuts as a healthy snack!
I have nut bowls of every kind all over the house , especially when local farms are offering up their recent fall harvests. YUM.
However after making a big nut-cracking mess around my computer work station lately, I decided to create an easy project that would not only help organize my nut-eating passion, but to also add a festive fall touch at the same time.
Gathering up a couple of reclaimed wood planks and some rustic nut bowls, here's the helpful fall cutie that transpired...
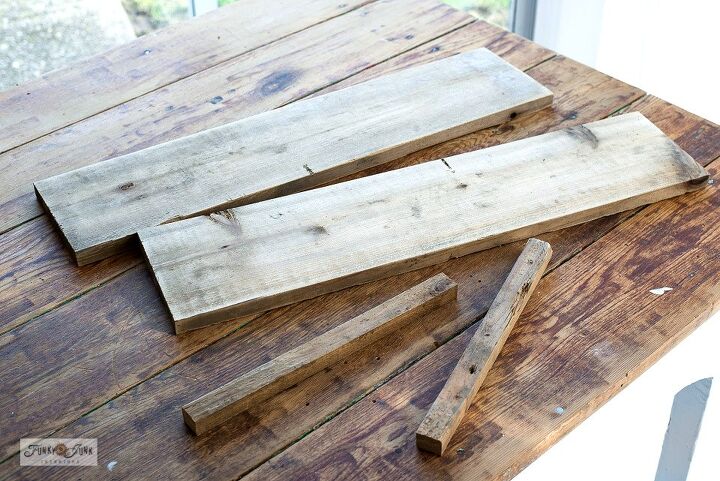
Two fence planks I had in my stash were lightly sanded, then cut to the desired length.
2 smaller trim boards were added for decorative detailing or can be used as support boards to hold the tray together.
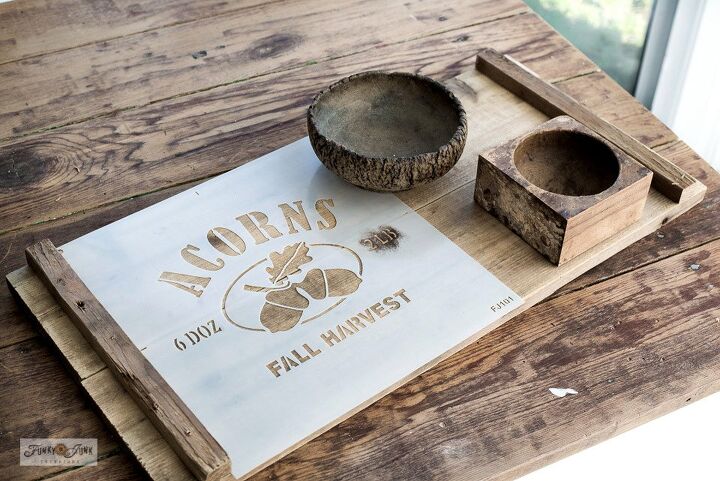
After a quick dry-fit of positioning an Acorns stencil along with a couple of rustic nut bowls, it was time to assemble the tray.
Note that I am going to stencil the Acorns graphic off to the side, so the nut bowls don't cover the cute graphics!
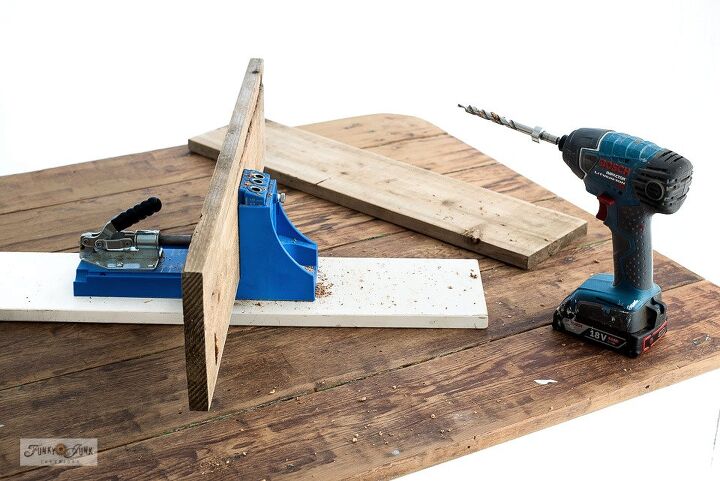
Assembling with a jig
The tray was assembled with pocket holes using a Kreg Jig. It's a really handy tool that is easy to use, and helps make super strong wood joints that look totally professional!
Holes are drilled in at a sharp angle. Then the boards are positioned next to each other, and attached with screws through the pocket holes.
Learn more about how to use a Kreg Jig from THIS POST. Includes a helpful video too!
How to assemble with no jig
If you don't have a jig, no worries! You can use two thicker side boards as your tray supports with the method below...
Adding trim (or support) boards
Position trim boards into place, flip the tray good-side-down, and attaching from the bottom with screws.
Next up is stenciling!
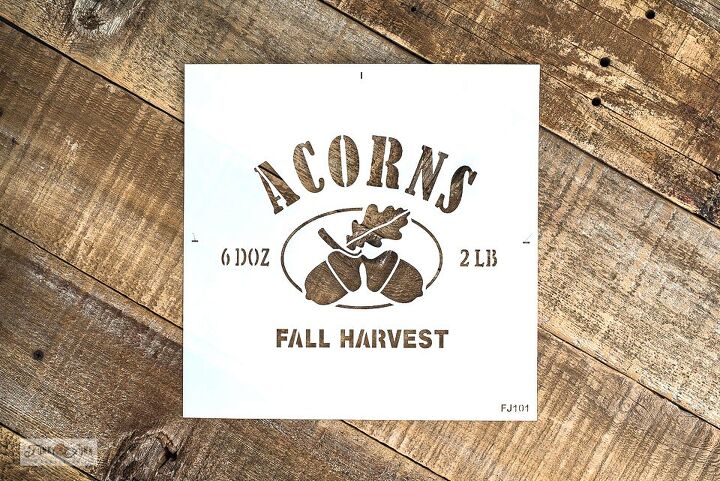
I selected this ACORNS stencil from HERE (among other fall designs), that fit this little mini nut tray perfectly!

How to stencil:
- position stencil with masking tape
- load a stencil brush with paint
- off-load most paint onto a rag until brush feels dry
- tap or swirl paint through stencil for desired effect
I used various tones of paint to add detail and shading to the Acorns stencil.
And here's how this cutie turned out...
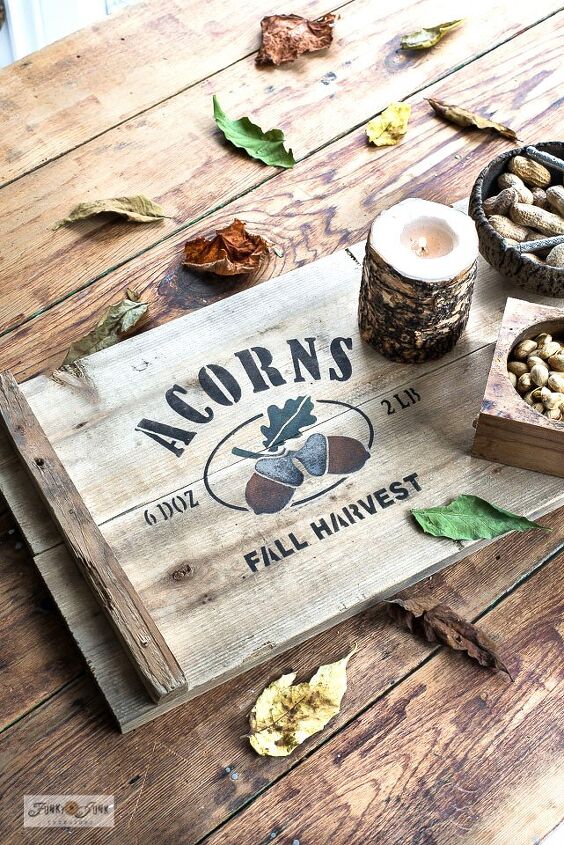
Welcome to the cutest and most helpful nut snacking station in the land!
Love the stenciled neutral paint tones that offer such a warm fall-vibe, don't you think?
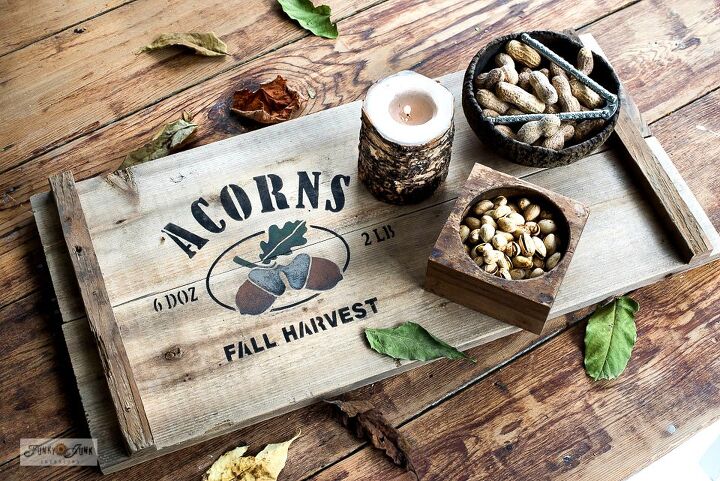
And of course, adding a few rustic bowls to the mix is a must! Fill them to the brim with your favorite nuts and carry your tray around to snack wherever desired!
Makes an adorable fall decorating centerpiece and is super handy placed on the ottoman for my coffee too.
Think you'll put a little nut snacking tray together yourself?
Resources for this project:
See all materials


Frequently asked questions
Have a question about this project?