


Easy Rub ’n Buff Hacks for a High-End Look on a Small Budget

You can use Rub ’n Buff to completely change the look of your home without spending much money. This article walks through simple, budget-friendly upgrades using $8 Rub ’n Buff to elevate everyday fixtures and finishes.
This post was transcribed by a member of the Hometalk editorial team from the original HometalkTV episode.
Tools and materials:
- Silver leaf Rub ’n Buff
- Gold leaf Rub ’n Buff
- Plastic palette
- Painter’s tape
- Cardboard scraps
- Assorted makeup brushes
Disclosure: Hometalk may receive a small affiliate commission from purchases made via links in this article but at no cost to you.

AMACO Rub n Buff Wax Metallic Finish
1. Creating custom Rub ’n Buff colors
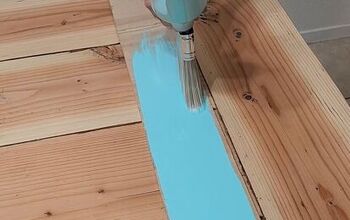
I started with silver leaf and gold leaf Rub ’n Buff and mixed them together to create custom colors. Toning down the gold resulted in a softer finish that landed somewhere between gold and silver, which worked perfectly for a more elevated look.

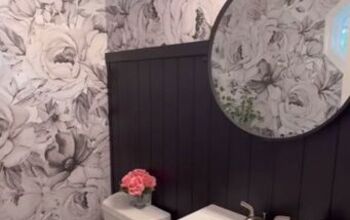
2. Protecting surfaces before you start
Before applying anything, I used green painter’s tape to fully protect the porcelain of the toilet. Taking the time to tape everything off made it easy to focus on the finish without worrying about damaging surrounding surfaces.

3. Upgrading builder-grade plumbing
Using a fluffy blush brush, I applied the toned-down gold Rub ’n Buff to the plumbing. The brush was perfect for this application and helped create an even finish.

Once I removed the tape, the reveal showed how much more elevated the builder-grade plumbing looked.

4. Warming up cheap silver finishes
The original silver finish from Walmart looked very basic, so it needed an upgrade. I switched to an old eyeshadow brush and applied the same champagne-toned Rub ’n Buff. Right away, the finish looked warmer and more refined compared to the old grommet.

5. Repeating the process for a cohesive look
I repeated this same process on all the grommets as well as the curtain rod. Using the same Rub ’n Buff color throughout helped tie everything together and warmed up the entire space.

6. Achieving a frame TV look for less
I wasn’t about to spend a thousand dollars on a frame TV, so I used gold leaf Rub ’n Buff instead.

It delivered the same high-end look for just a few bucks, making it one of the most satisfying upgrades.

7. Fixing messy door hinges
I accidentally got paint on the door hinges while painting, but the gold leaf Rub ’n Buff came to the rescue. Applying it over the hinges gave them a classic brass look and turned a mistake into a design detail.

8. Giving light switches new life
The light switches were far too plain on their own.

That slightly warm silver Rub ’n Buff was just right for giving them new life and helping them blend better with the upgraded finishes around them.

These simple Rub ’n Buff upgrades show how a small, affordable product can make a big impact across an entire home. If you loved these home hacks, check out how to make an antique mirror clock with only $20.
Comments
Join the conversation
-
I use Rub and Buff all the time and did the door hinges. ^They have lasted forever. Love the shower curtain rod.
-
Wonderful idea! Beautiful work!


Frequently asked questions
Have a question about this project?
Does it wash off?
Will it wear off?