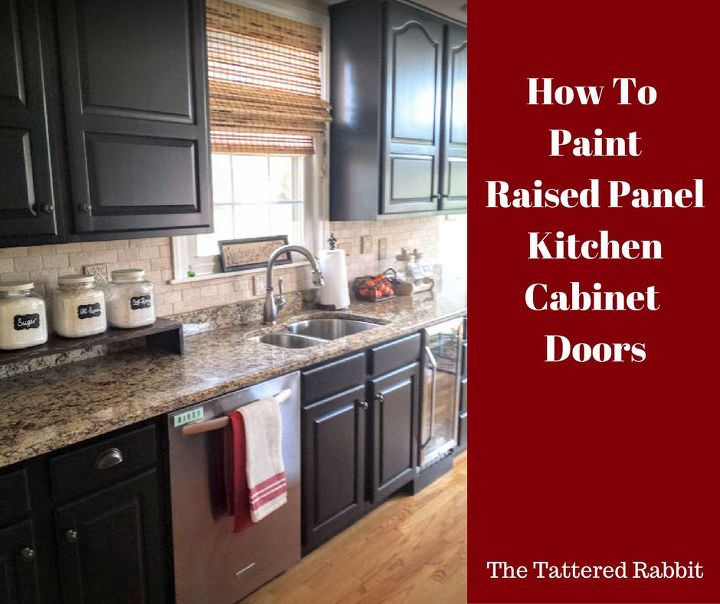
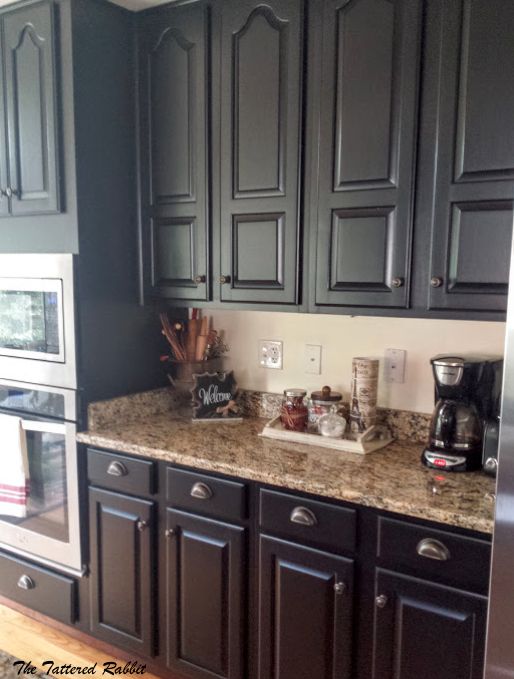
How To Paint Raised Panel Kitchen Cabinet Doors

Dear friends, let me tell you about the wonderfully awesome, yet extremely long journey of painting my kitchen cabinets. About this time last year I decided I wanted to paint my kitchen cabinets, but it took me almost a year to get up the nerve (and energy) to tackle this bad boy. You see I've got a lot of experience painting furniture. I've painted, stained, and stenciled. I've distressed the heck out of things and I've painted the cleanest, neatest lines imaginable, and I knew (I mean I really KNEW) how much work this was going to be. And just so you know, I wasn't wrong, BUT it has been so worth it! I'm totally in love with the new look and feel of my kitchen and if you're thinking about redoing your cabinets then I'm going to say go for it! A little paint can do a world of good. I'm going to share my tips, tricks, and tools I put to use while painting 42 doors and drawers which has become known as the never ending kitchen makeover.
I have a very detailed blog post with lots and lots of pictures to help explain things, so if you feel like you need more information than what I'm providing below, then please hop over to the blog to read more. If you still have questions after that then I'll be happy to answer them.
Tools: Getting the right size of brush for each part is extremely important to save on time and to get the cleanest lines possible. According to the type of paint you use, you may be able to use a small roller on the larger areas. I didn't like how the paint dried when I used a roller so I stuck with the foam brushes. You can read more about that issue in my blog post. FYI: black paint is the hardest to paint with because lines/brush strokes are easily seen. If you're using a lighter color then a roller may work well for you.
Tips: A brush that is too big will come into contact with other raised panels which will create a mess.
Tips: A brush which is too small will create more work. And if you're using a brush instead of a roller, you want to be able to do one long final sweep down the raised panel (or door, drawer, dresser top--this applies to everything you paint) so that you don't have stop and go brush marks. Your brush should be the same width as your raised panel.
Tricks: I bought a set of small foam brushes and a set of larger foam brushes. The small brushes are used on the recessed areas of the doors and to catch any drips or runs, especially around the outer edges of the doors. The larger brushes are used for the bigger panels. I also cut a larger brush down to fit the smaller raised panels as was shown in one of the previous pictures.
Paint Order: I always start with the back side of the door and I do 3 coats of paint with appropriate dry times in between coats before moving onto the front side. 1. On the back side, I start with the recessed areas first (the middle panels). 2. I then do the horizontal sections. 3. The long vertical sections are last. Always paint in the direction of the wood grain and be vigilant about runs and drips.
Paint Order: Front side: The paint order is the same. 1. Always start with the recessed areas first. 2. Do the raised middle raised panels and the horizontal raised panels. 3. The long vertical sections are last.
The kitchen isn't quite done yet, but here's a sneak peek. We have a little more painting to do plus a couple of fun projects with lots of creative storage solutions coming up. Please hop over to the blog for more info and pics on paint order, products I used and loved, and other tips and tricks.
Frequently asked questions
Have a question about this project?
  1 question
  • Celeste Berube Wyatt Celeste Berube Wyatt on Jan 04, 2019

    I am trying to “hop over to your blog post” for more detailed information but it is taking me to this godaddy site. What am I doing wrong?

Comments
Join the conversation
2 of 6 comments
  • Katherine DePallo Katherine DePallo on Aug 21, 2017

    Thank you for giving me the hoot-spa to start this project. My cabinets are from the 80's, they are in great shape but do need to be in the present. I do have a couple of questions:


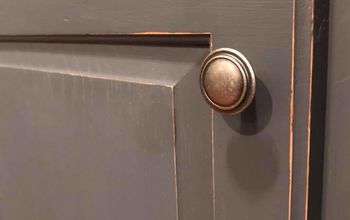
    * The polyurethane is peeling off - I'm assuming that I have to sand to prep before applying the paint, and filling in the cabinet knob holes?


    * Do you put a seal on the cabinets afterwards, or is the seal in the paint?


    *When the cabinet doors are off, do you do the front of the interior cabinet that shows when you open the cabinet doors?


    * How long do you wait to rehang the cabinet doors?


    Thank you again for sharing. I'm so inspired!

  • Hey Katherine! I'm just getting over a migraine so I'm going to keep this short and refer you to the series of posts I did on the makeover. I gave very detailed instructions for each process from taking down the doors to prepping (most important), tools used, # of coats, etc. If you have any questions after reading the posts then I'll be happy to answer them. I don't always check for comments on HomeTalk so you will get a quicker answer if you leave a comment on the blog. Just an FYI, I did our kid's bathroom about 4-6 months before starting the kitchen and used GF paint but used a different sealer and that paint has chipped. The GF sealer formed a really hard coat unlike the sealer I used for the bathroom. I really think the GF products are superior and would highly recommend sticking with them.

Next