


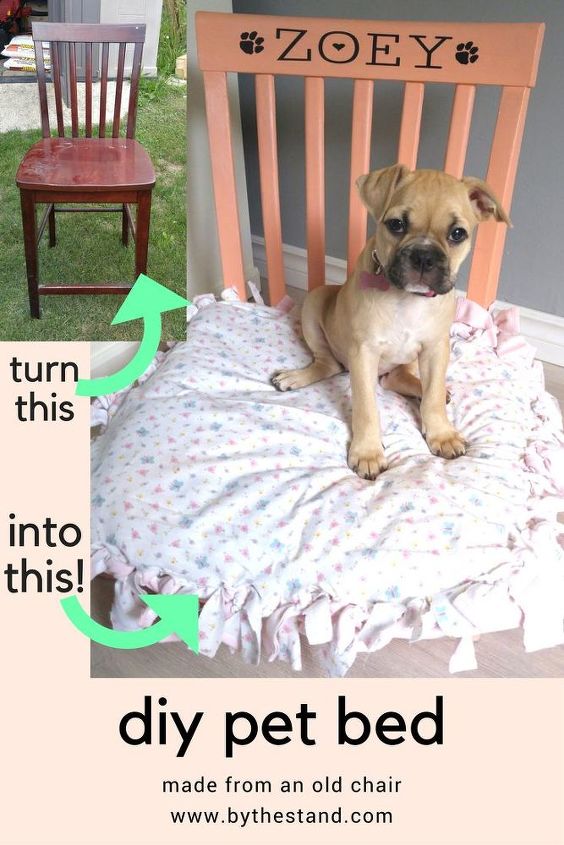
DIY Pet Bed From An Old Chair

by
Holly Grace
2 Materials
$15
4 Hours
Medium
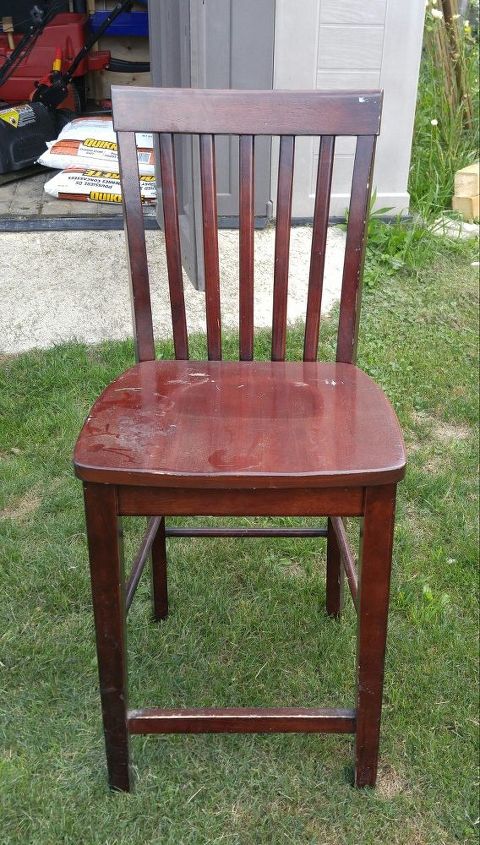
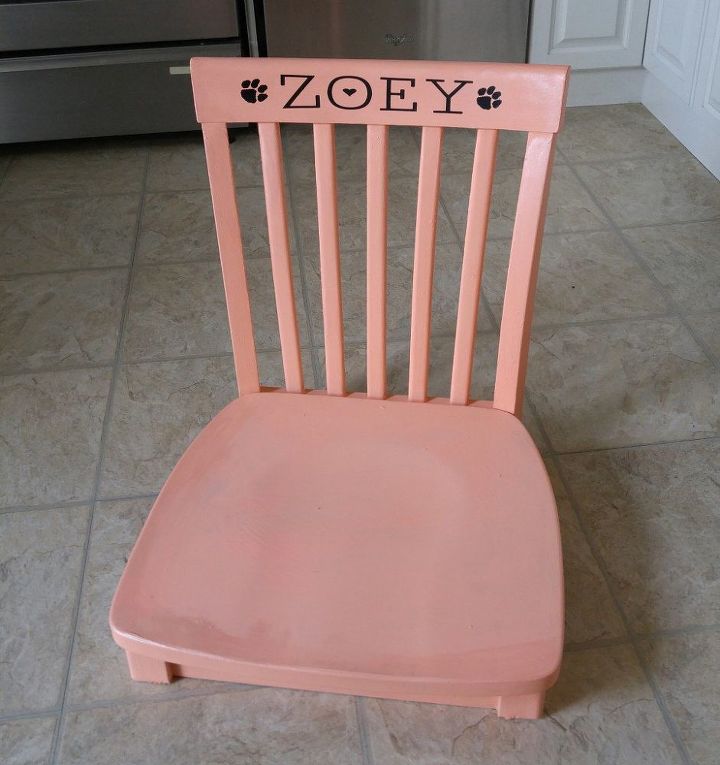
We recently expanded our family and added a four legged member!! A new puppy who we call Zoey! We are so happy to have this little fur ball join our family. In preparation for her arrival, I decided to make her own bed.
I used an old chair that I had kicking around. I actually picked it up from the side of the road. Take and look and see what I did to make this gorgeous pet bed!
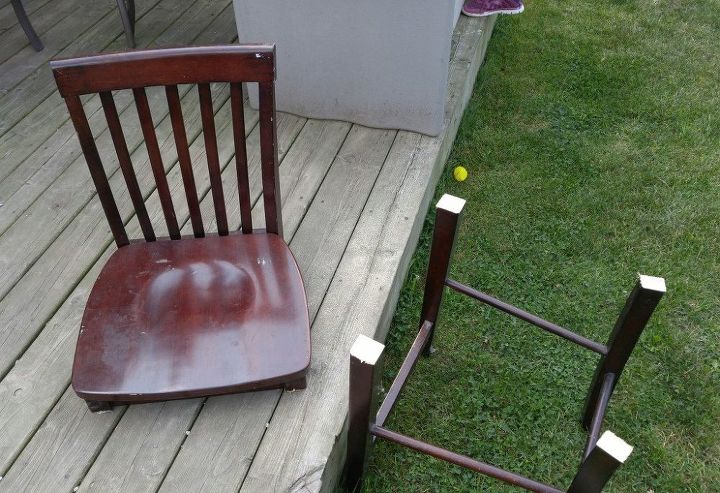
I only needed two tools to do this, too.
My Ryobi Jigsaw and my Ryobi Palm Sander. I began by using my jigsaw to cut of the legs of the chair. This was so easy to do and this handy little (but mighty) jigsaw cut right through without hesitation.

Once I had the legs gone it looked like this
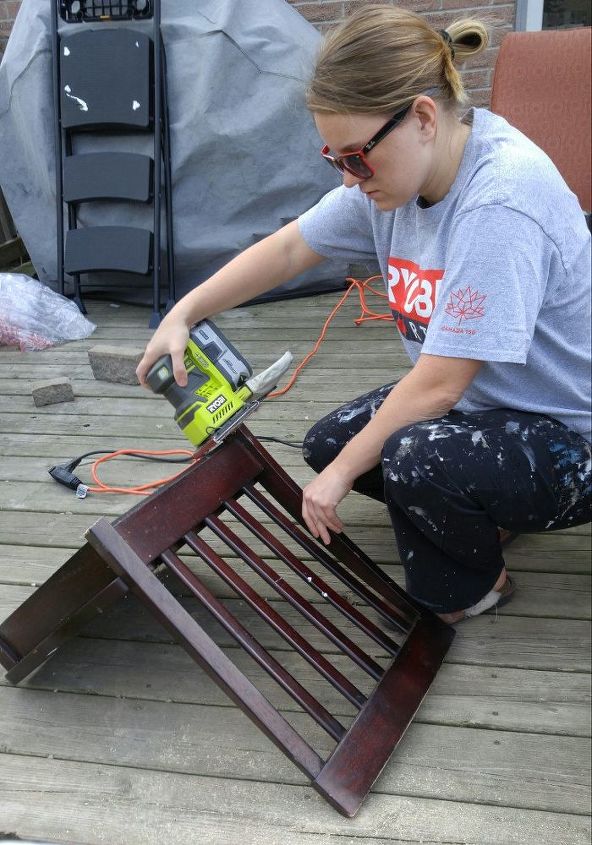
Next, I used my palm sander to sand down the edges where I cut. This sander is the best! It’s quick and easy , plus it operates off the RYOBI ONE+ batteries. Getting these batteries was the best thing I ever did! I am slowly building my tool collection so that I have all the RYOBI ONE+. No power cords required!
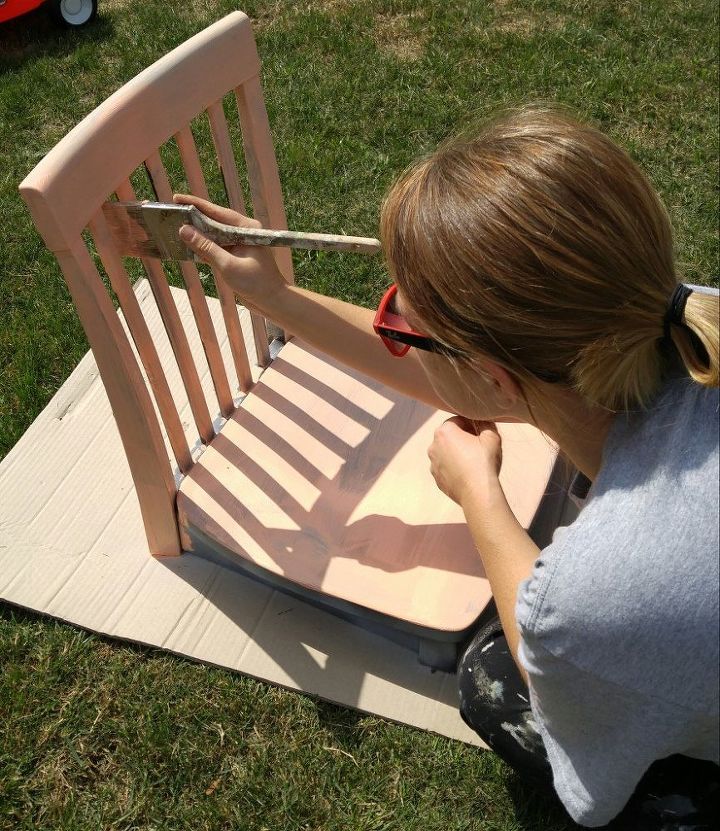
Time to paint!!!
I used Americana Decor Chalky Finish paint in Smitten mixed with just a tiny bit of Timeless.
I added the Timeless shade just to dull the smitten just a bit. I didn’t want it to be too bright.
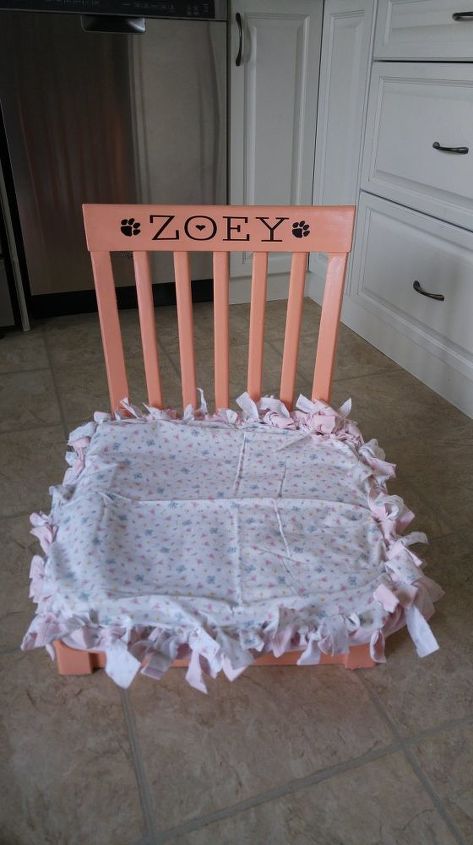
After the paint dried, I used my Cricut to put Zoey’s name on her gift!
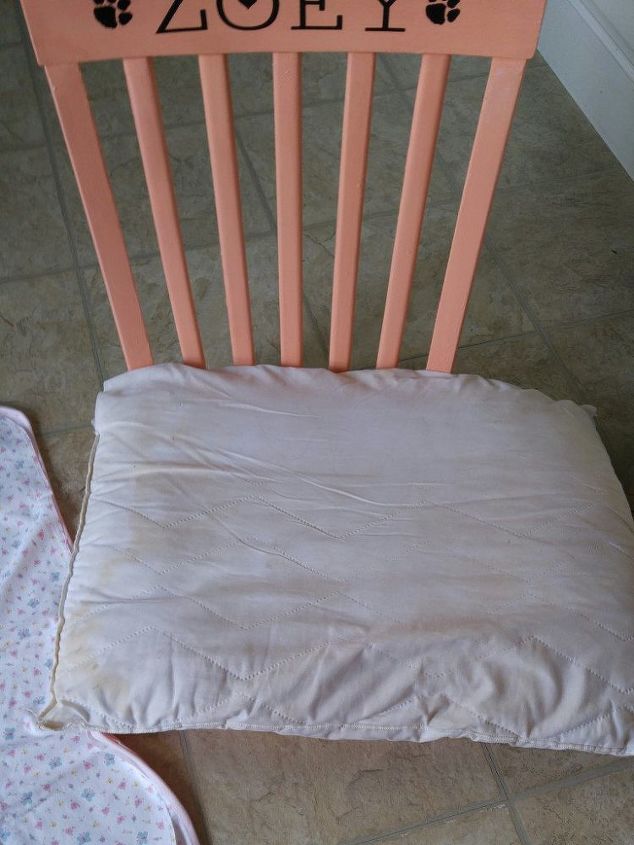
Kind of looks like a hard bed, though right? Don’t worry, I can fix that!
Here is the no-sew pillow bed that I made to sit on top of the chair — I mean, bed.
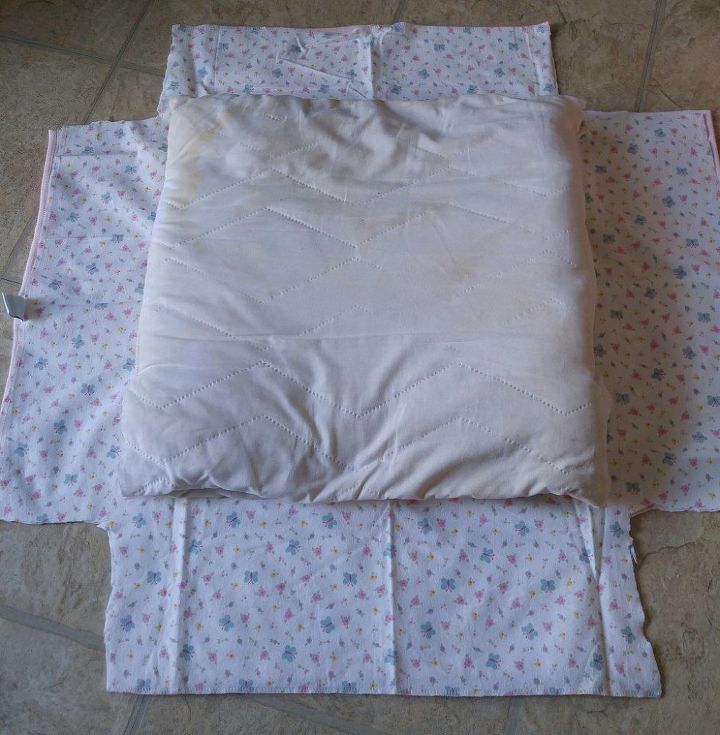
I started with an old pillow and two old receiving blankets that used to be my daughter’s. The pillow was just a little bit too long for the chair seat. I used a pair of scissors and I cut the pillow to fit the size of the seat.
I laid the pillow on top of the two receiving blankets. It doesn’t matter at this point if they are right side up or down.
Next, I cut off the corners, like pictured below.
Then I cut little slits in both receiving blankets, making my way all around.

Separating the two receiving blankets, I then laid one down, then the pillow and then the other receiving blanket on top.
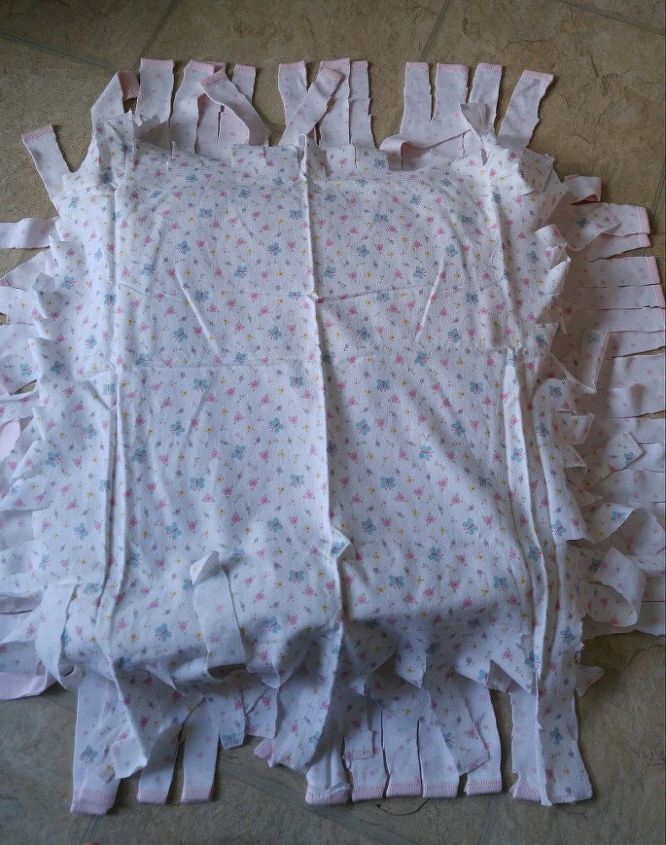
Now all that’s left to do is to tie the frayed pieces together. Just a simple knot will do.
For extra strength at the corners, I crossed the frays and tied them with the fray diagonal to it.
Once the frays were all tied, I had a cute little pillow for Zoey’s new bed.
Now all we need is a Zoey!
There she is!!
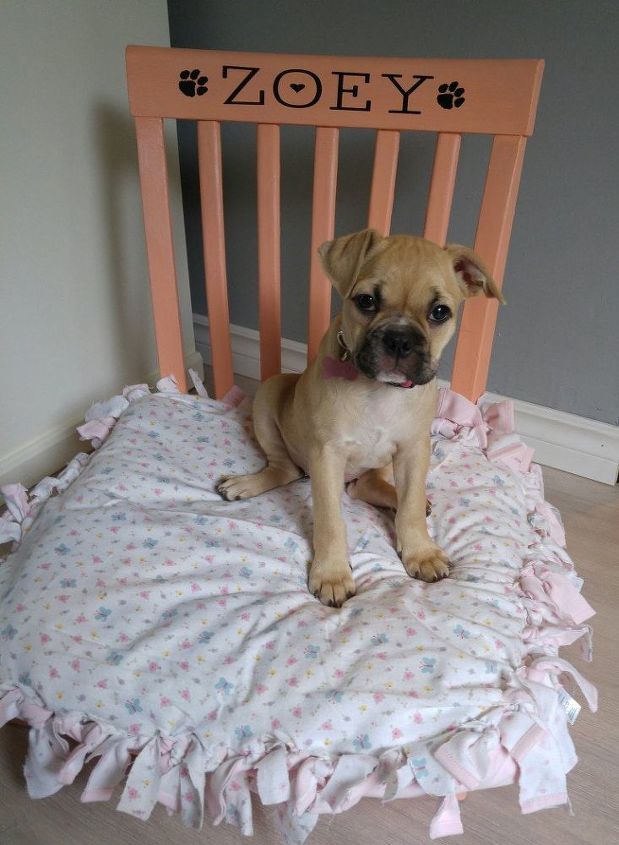
We love our new little pup!  She has become quite the loving addition to our family!!
She has become quite the loving addition to our family!!If you have a pet that would love a little bed like this make sure you pin this idea to your DIY board!
If you know someone with a dog that would love this, make sure you share it with them, too!!
For more pics and to ooo over our sweet little pup, visit my blog! :)
Want more details about this and other DIY projects? Check out my blog post!
Comments
Join the conversation
2 of 41 comments
-
When I first looked at your bed and Zoey I thought to myself that's a lot of work for a couple of months. :) I didn't even know there was a breed called an UG, talk about a perfect match. Thanks for sharing Holly, both the bed and
Zoey.
I just thought of another way to make it easier to wash, make one side like the back of a pillow sham where one end overlaps the other. I have actually made a dog bed cover that way and it works great for on and off. 🐾🐾
-
The only thing I will do differently is leave some leg on it for draft. Puppy get real cold right on the floor.


Frequently asked questions
Have a question about this project?
how do you wash the bed?
Where do you buy your sander and jigsaw?
She is so cute. a ug is my favorite breed and I have always wanted a frenchie so you have the best of both worlds. What are you going to do with the chair legs? You could make a canopy bed with them if you have no other plans. attach a board to the bottom. remove one of the braces and add strips of wood to the top make a point or leave flat and surround with fabric. one bed for the main living area one for the bedroom