


From Drawer to Shelf Unit - Upcycling Project

by
Clint
4 Materials
$5
10 Hours
Medium
I had a drawer left over from a previous build and I was looking for somewhere to store it in my little shed until I figured out what I wanted to do with it. I leaned it up against a wall and thought to myself "hmm, that actually wouldn't look too bad mounted to the wall as a shelf" ..... so I made a shelf from it.
Not the most exciting story but its true! I have a two part video series up on YouTube showing the process and more detailed steps below, here's how I did it....
{
"id": "4613747",
"alt": "",
"title": "",
"video_link": "https://www.youtube.com/embed/PDKFujoOQK4",
"youtube_video_id": "PDKFujoOQK4"
}
{
"width": 634,
"height": 357,
"showRelated": true
}
I got this drawer from a unit that I received for free as well as all the wood used in its build, its a free shelf! If you look around or if you're a member of trading/selling groups I'm sure you could find a suitable drawer no problem.
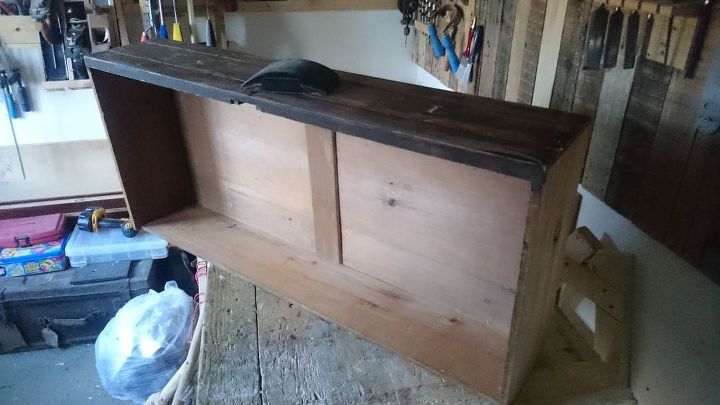
I turned the drawer the other way up (than in this photo) so that the front acted as the bottom of the shelf, this was because its the more solid side of the shelf and at the bottom it would need to take the most weight.
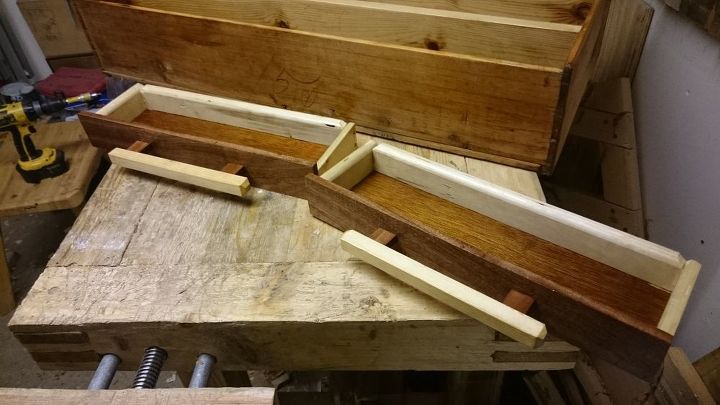
I had a couple of bits of pine from an old shelf that were perfect for this build. I measured the inside lengths of the drawer where I wanted the shelves to go. Its important to measure the length where each shelf will go rather than just assuming both lengths are the same because its a square drawer. One shelf had to be around 5mm longer than the other in this case.
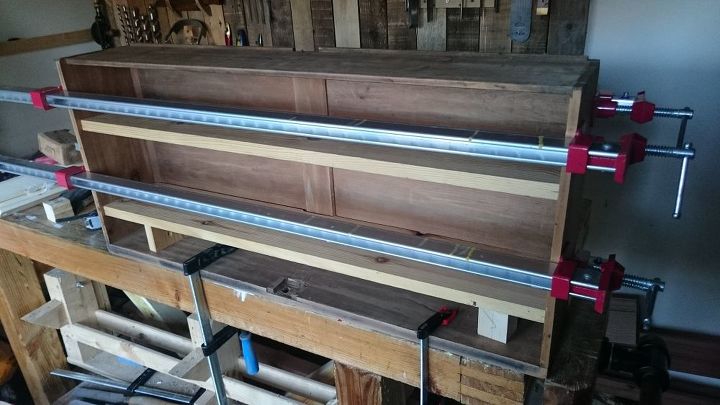
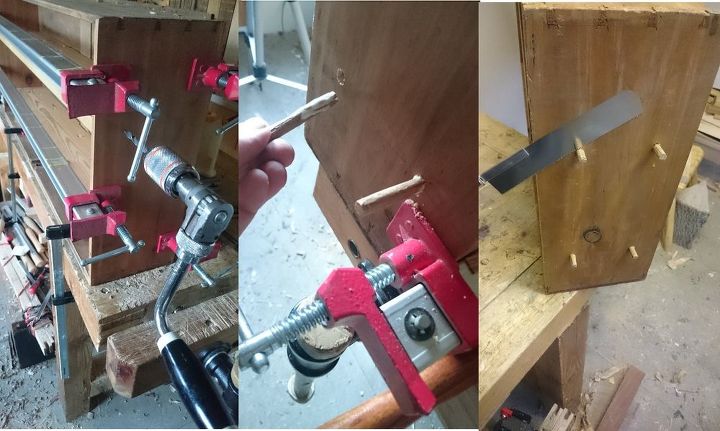
When I had the shelves in place and square with the drawer I clamped from either side to bend the sides in a little and hold the shelves firmly while I fixed them in place. You could do this with screws if you like but I decided to drill through the sides and glue and tap some dowels in so it was more in keeping with the previous woodwork.
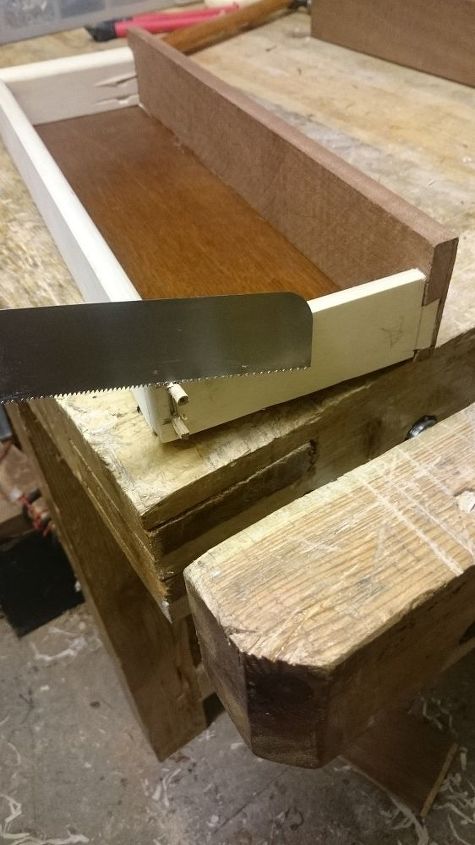
I left the glue for a day to dry and then cut the ends off with a flush cut saw. I then put about 4 screws into the back of each shelf from the back of the unit (where they wouldn't be seen) for more rigidity. You could sand it down and finish it right here, it'd be a perfectly fine shelf unit.
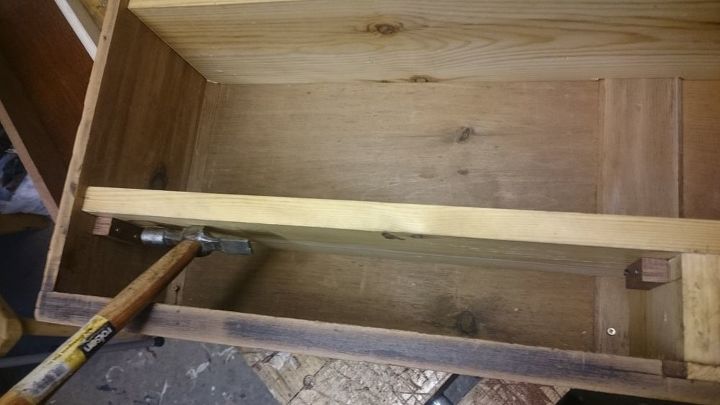
I decided however to add a couple of little drawers as there's lots of little bits in my shed that need a home, namely drill bits. The first step in doing that is to add a small divider underneath the lower shelf.
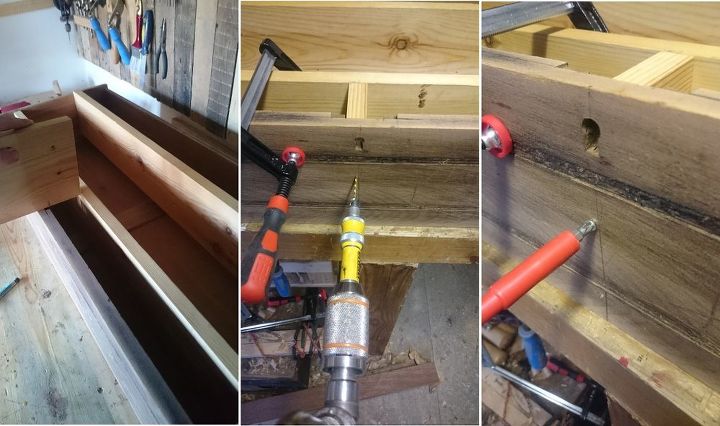
To measure for the divider I just held the piece of wood up against the bottom shelf and cut it to size. After that I just screwed a couple of screws through the bottom. I also decided to add a dowel from the top of the shelf into the divider.
In hindsight I should have figured this out before securing the shelves to the drawer as it made doweling through the shelf into the divider difficult. I you weren't worried about screws being seen or if you plugged over the top of them with wood then you could easily do it this way and add a screw through the top instead.
I made the drawers with some not so beginner woodworking techniques which I wont detail here as they would probably need a separate article. A drawer is basically a box with a bottom though, so there's no reason you couldn't just make the front of the drawer to fit into the gaps under the shelf and then just make a box around it.
The drawers here are made from sapele that was an offcut from a doorframe, some plywood slats for the sides from an old cot and a thin piece of plywood for the bottom from an old cabinet that was being thrown away.

I cut off some pieces of the leftover shelf material and some small scraps and made them into the handles. You could of course buy some handles or just use some from your collection if you're a bit of a parts hoarder like me!
After drilling two small pilot holes through the front of each drawer I put some screws in from the inside of to drawer to the outside. Once the screws were half way I placed the small blocks over them to add as gap creators for when I screwed the handles on.
This made it easy for my fingers to get behind the handles to open the drawers.
I cut up 4 small blocks and nailed them to the side of the shelf unit just under the bottom shelf. This was to hold the drawers straight as they're pulled out so they don't keep angling downwards and potentially falling out.
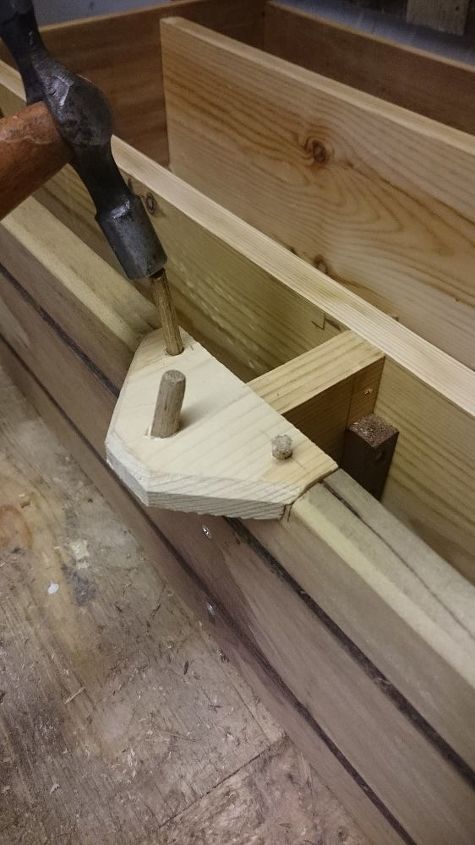
There was a rather ugly and exposed piece of the shelf under the drawer divider left there by a lock mechanism that was previously on the drawer. I decided to cover it up by making a kind of hanger and attaching it with glue and dowels.
This is probably a fairly isolated problem so the chances you'll encounter this with a drawer you might use is fairly slim.
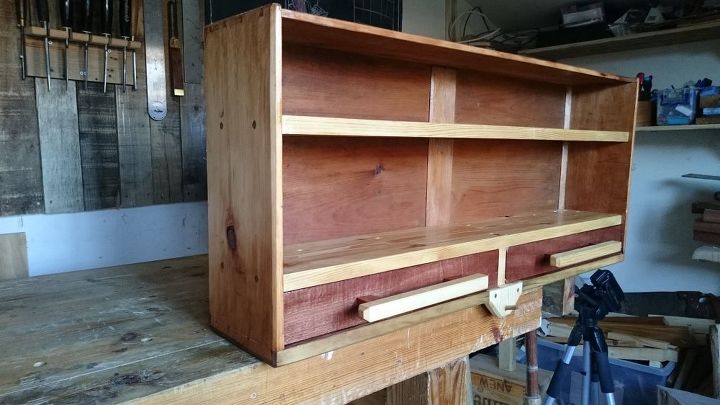
After planing and sanding down the sides to expose the dovetails as well as sanding the rest of the unit down, I finished it with indoor varnish. Its not my usual finish of choice but since I know its going to have a lot of use and a lot of wear and tear I went with a hard wearing finish.
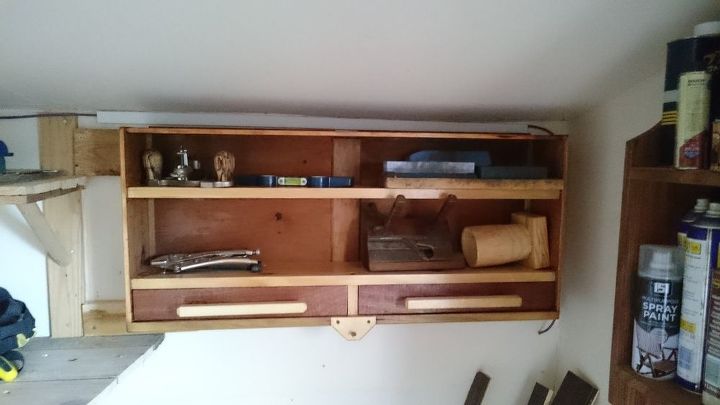
Since this is just for storage in my shed I'm fairly pleased with it, I can store a ton of stuff on it and even more things inside the drawers.
The great thing about this project is that you can make it as difficult as you want; you could also paint the draw, draw on the sides, add some glass fronts, add a whole row of hangers on the front or the sides, the possibilities are really endless.
The second part of the build is below.
Thank you so much for taking the time to read this and check out my project. Feel free to subscribe to my YouTube channel and like my Facebook page to keep up to date with my builds, see behind the scenes and be alerted when I go live on Twitch.
All comments and criticisms welcome!
{
"id": "4613750",
"alt": "",
"title": "",
"video_link": "https://www.youtube.com/embed/c7ovNpLxGpA",
"youtube_video_id": "c7ovNpLxGpA"
}
{
"width": 634,
"height": 357,
"showRelated": true
}
The second and final part of the build .
Want more details about this and other DIY projects? Check out my blog post!
Comments
Join the conversation
1 comment
-
I love how it turned out...very nice.


Frequently asked questions
Have a question about this project?