


Build Two Raised Herb Gardens for Less Than $50

6 Materials
$48
4 Hours
Easy
Our goal was to build two raised bed herb gardens for less than $50, and we were able to do it using this simple design.
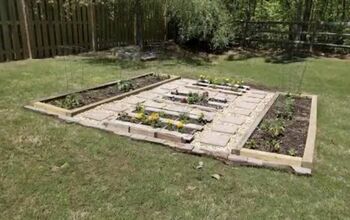
Raised Bed Herb Gardens
To build these garden beds, we purchased 4 pieces of lumber at our local Lowes store. They were 2x10x8. We cut 2' off the end of each piece, leaving us with 4 pieces of lumber that were 6' long and 4 pieces of lumber that were 2' long. We then painted one side of each board. We used untreated lumber, so we chose to paint it to help it last a bit longer. I used leftover paint from another project, so this part cost us nothing.
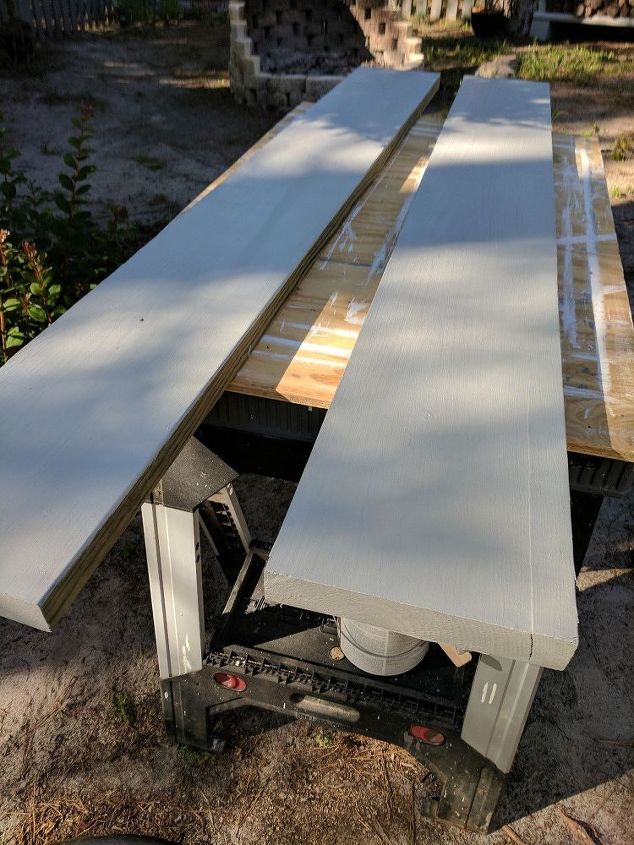
Painting the boards
Next, we used wood screws to attach the short end pieces to the long side pieces. We used three screws on each end to secure the boards. Then we set them in place in our yard. Next, we used cheap plastic drop cloths from the local Dollar store to "line" the insides of the boards. I just folded the cloths into long strips and stapled them onto the inner sides of the boards. I did this to help keep moisture and soil from contacting the surface of the boards, and to help preserve the boards a little better.
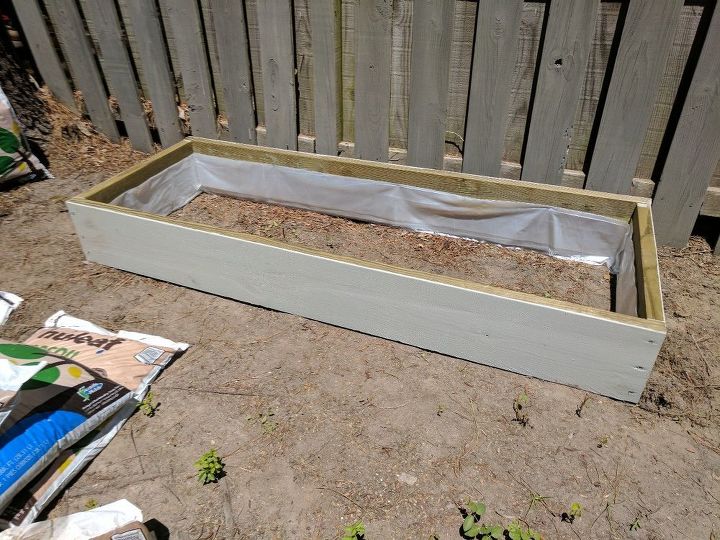
Staple plastic to inner sides of boards
Next, I used large pieces of cardboard to completely line the bottom and sides of the beds. I have been using cardboard instead of plastic as a weed barrier for several years and I love it. It works wonderfully, and you can just use old boxes, etc so it is free as well.

Line the beds with cardboard
Next, I filled each of the beds with topsoil that I purchased at Lowes. I used standard topsoil, and just poured it right into the beds. It took about 6 bags of topsoil for each bed.
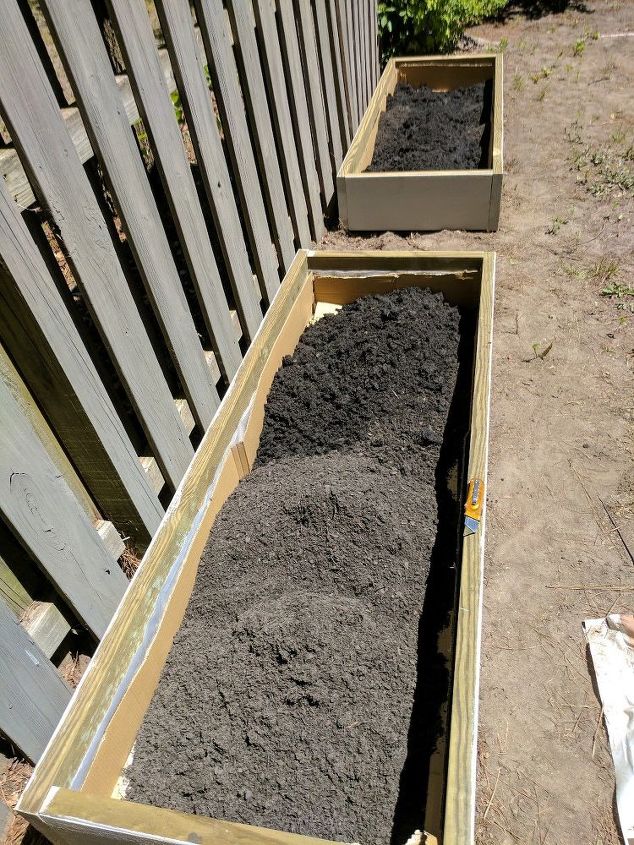
Filling the beds with topsoil
Continue filling the beds until they are almost completely full. I planned to cover mine with mulch, so I left a couple of inches of space at the top.
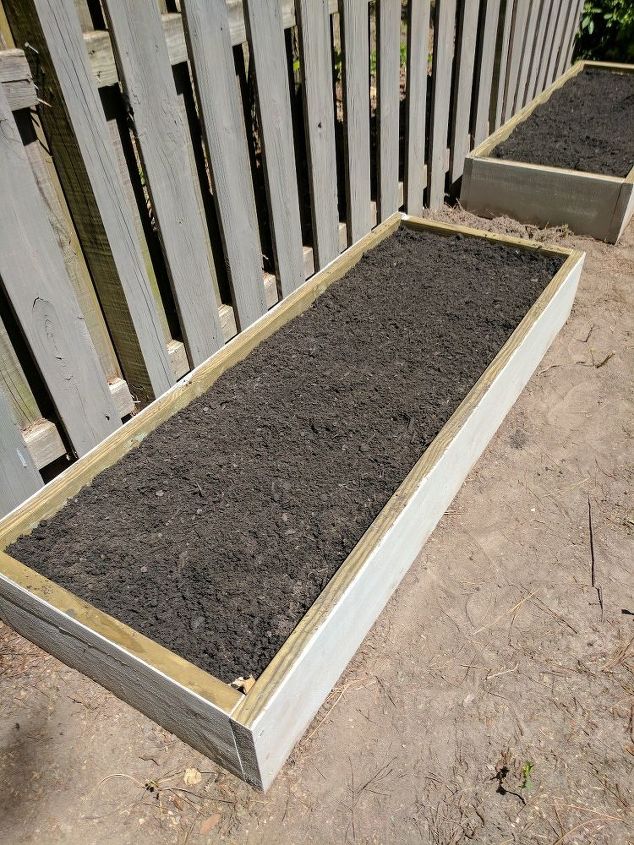
Beds completely filled with soil
Next, I planted my various herb plants with lots of help from Boudreaux...my little garden helper.

The final step was to cover the surface of the beds with mulch. I just spread it evenly across the top of the beds. It didn't take much...about one full bag for both beds.
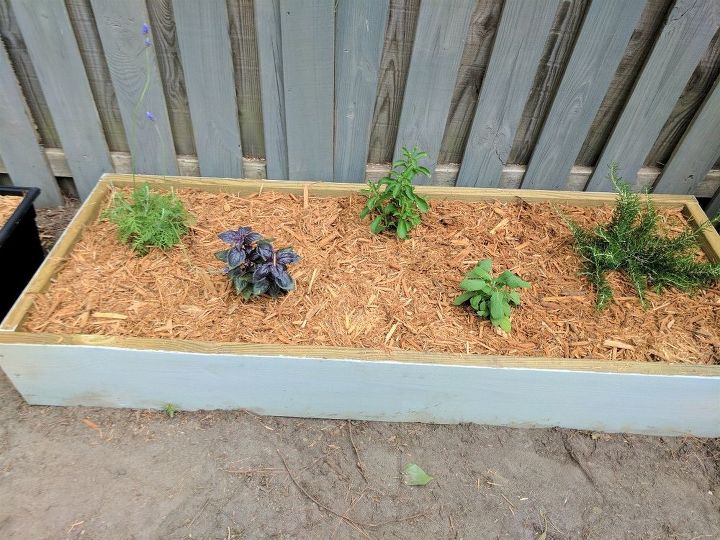
One of the newly mulched beds
Finally, I just watered the plants as needed. Luckily, there was almost no weeding needed at all over the growing season due to the use of the cardboard.

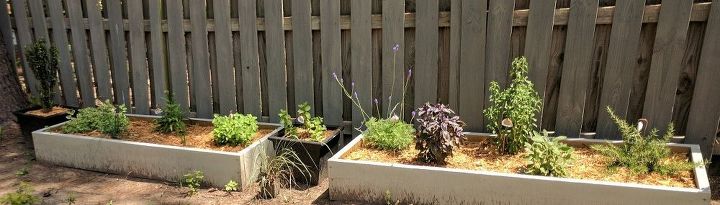
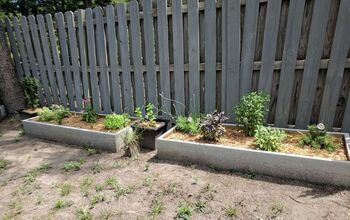
Later in the season
This is a picture of the beds later in the season. As you can see, the plants are all doing well and flourishing nicely. I have been able to take cuttings from all of the plants several times already, and look forward to having fresh herbs for a long time to come. This project was very reasonable to build...The lumber, dropcloths, topsoil and mulch came to about $48 all together....and the project took about 4 hours...not counting the time it took for the paint to dry.
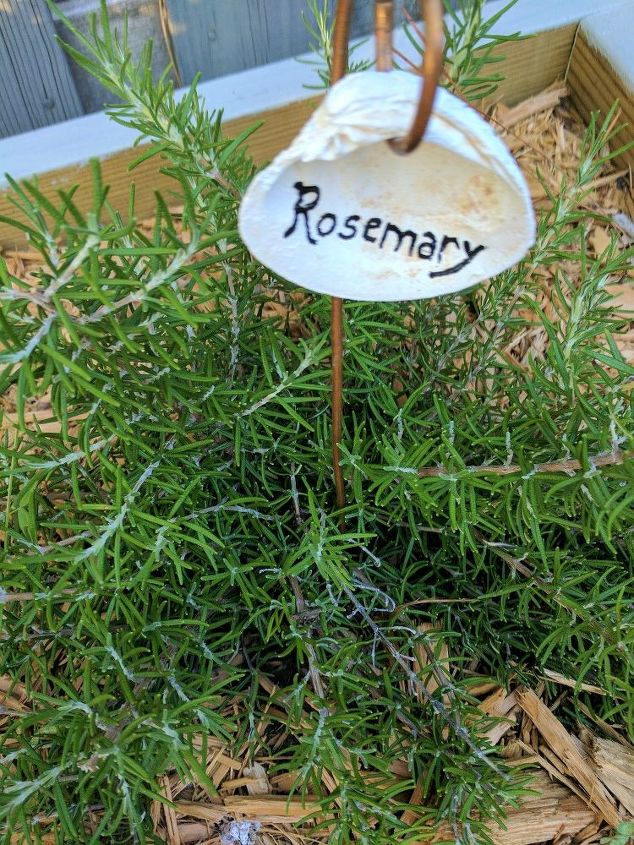
Rosemary with Plant Marker
This last picture shows a close up of my rosemary plant with the plant marker I made using seashells and copper wire. Check my other projects for instructions on how to make these very easily!
Resources for this project:
See all materials


Any price and availability information displayed on [relevant Amazon Site(s), as applicable] at the time of purchase will apply to the purchase of this product.
Hometalk may collect a small share of sales from the links on this page.More info
Comments
Join the conversation
4 of 60 comments
-
Nice looking garden. I have used cardboard in this way. It helps but I think it also depends on what weeds and grasses you're dealing with. And how neat a gardener you are (and I'm not). I live with Bermuda grass which has a spreading underground root so it manages to defeat cardboard. I also have nutgrass --same thing.
Hope you might post your garden in 2021.
-
Doing well, Michele. Right now, the only thing surviving in my herb garden is a 3 year old rosemary, and thyme. Need to revamp the whole thing next year. Right now I'm pulling weeds and piling on the bare areas, When they die down and turn brown they sort of look like mulch. Hope your garden continues to do well.


Frequently asked questions
Have a question about this project?
what type of wood? Many planks will rot out in a few years...Redwood or the new wood composites work best, cost more but endure..
I'm doing a raised vegetable bed like this. Your garden seems shallow, good enough for herbs but not veggies. How deep did you dig? I would think at least 2 -3 feet for a veg root system.
Did you have to punch holes in the bottom of the plastic for drainage?